springcloud-Eureka搭建服務註冊中心
阿新 • • 發佈:2018-11-21
目錄:
1、搭建服務註冊的服務端;
2、將Spring boot的一個專案做為服務註冊進去;
一、搭建服務註冊的服務端
1、首先通過IntelliJ IDEA或其它IDE建立一個spring boot 專案;
2、在pom.xml檔案中新增spring cloud的版本依賴和Eureka的服務端依賴,具體程式碼如下:
<?xml version="1.0" encoding="UTF-8"?>
<project xmlns="http://maven.apache.org/POM/4.0.0" xmlns:xsi="http://www.w3.org/2001/XMLSchema-instance"
	xsi:schemaLocation="http://maven.apache.org/POM/4.0.0 http://maven.apache.org/xsd/maven-4.0.0.xsd">
	<modelVersion>4.0.0</modelVersion>

	<groupId>com.lyq.demo</groupId>
	<artifactId>eureka-server</artifactId>
	<version>0.0.1-SNAPSHOT</version>
	<packaging>jar</packaging>

	<name>eureka-server</name>
	<description>eureka-server project for Spring Boot</description>

	<parent>
		<groupId>org.springframework.boot</groupId>
		<artifactId>spring-boot-starter-parent</artifactId>
		<version>1.5.9.RELEASE</version>
		<relativePath/> <!-- lookup parent from repository -->
	</parent>

	<properties>
		<project.build.sourceEncoding>UTF-8</project.build.sourceEncoding>
		<project.reporting.outputEncoding>UTF-8</project.reporting.outputEncoding>
		<java.version>1.8</java.version>
	</properties>

	<dependencies>
		<dependency>
			<groupId>org.springframework.boot</groupId>
			<artifactId>spring-boot-starter-web</artifactId>
		</dependency>

		<dependency>
			<groupId>org.springframework.boot</groupId>
			<artifactId>spring-boot-starter-test</artifactId>
			<scope>test</scope>
		</dependency>

		<!-- 新增springcloud-erueka服務端依賴 -->
		<dependency>
			<groupId>org.springframework.cloud</groupId>
			<artifactId>spring-cloud-starter-eureka-server</artifactId>
		</dependency>
	</dependencies>

	<!-- spring-cloud版本依賴 -->
	<dependencyManagement>
		<dependencies>
			<dependency>
				<groupId>org.springframework.cloud</groupId>
				<artifactId>spring-cloud-dependencies</artifactId>
				<version>Dalston.SR1</version>
				<type>pom</type>
				<scope>import</scope>
			</dependency>
		</dependencies>
	</dependencyManagement>

	<build>
		<plugins>
			<plugin>
				<groupId>org.springframework.boot</groupId>
				<artifactId>spring-boot-maven-plugin</artifactId>
			</plugin>
		</plugins>
	</build>


</project>
3、通過註解@EnableEurekaServer啟動此為一個服務註冊中心提供給其它應用進行對話,具體程式碼如下:
package com.lyq.demo;

import org.springframework.boot.SpringApplication;
import org.springframework.boot.autoconfigure.SpringBootApplication;
import org.springframework.boot.builder.SpringApplicationBuilder;
import org.springframework.cloud.netflix.eureka.server.EnableEurekaServer;

/**
 * 通過@EnableEurekaServer開啟此端為服務註冊中心
 */
@SpringBootApplication
@EnableEurekaServer
public class EurekaServerApplication {

	public static void main(String[] args) {
		SpringApplication.run(EurekaServerApplication.class, args);
	}
}
4、在application.yml或者application.properties(格式自己去做對應的改變)檔案中進行註冊服務端的引數配置:
#配置埠
server:
  port: 1111

#配置為Eureka的服務端-服務註冊中心
eureka:
  instance:
    hostname: localhost
  client:
    #因為自己是註冊中心,設定為false,表示不向註冊中心註冊自己
    register-with-eureka: false
    #因為自己是註冊中心,設定為false,表示不需要去檢索服務
    fetch-registry: false
    #Eureka客戶端將要註冊的註冊中心的地址
    serviceUrl:
      defaultZone: http://${eureka.instance.hostname}:${server.port}/eureka/
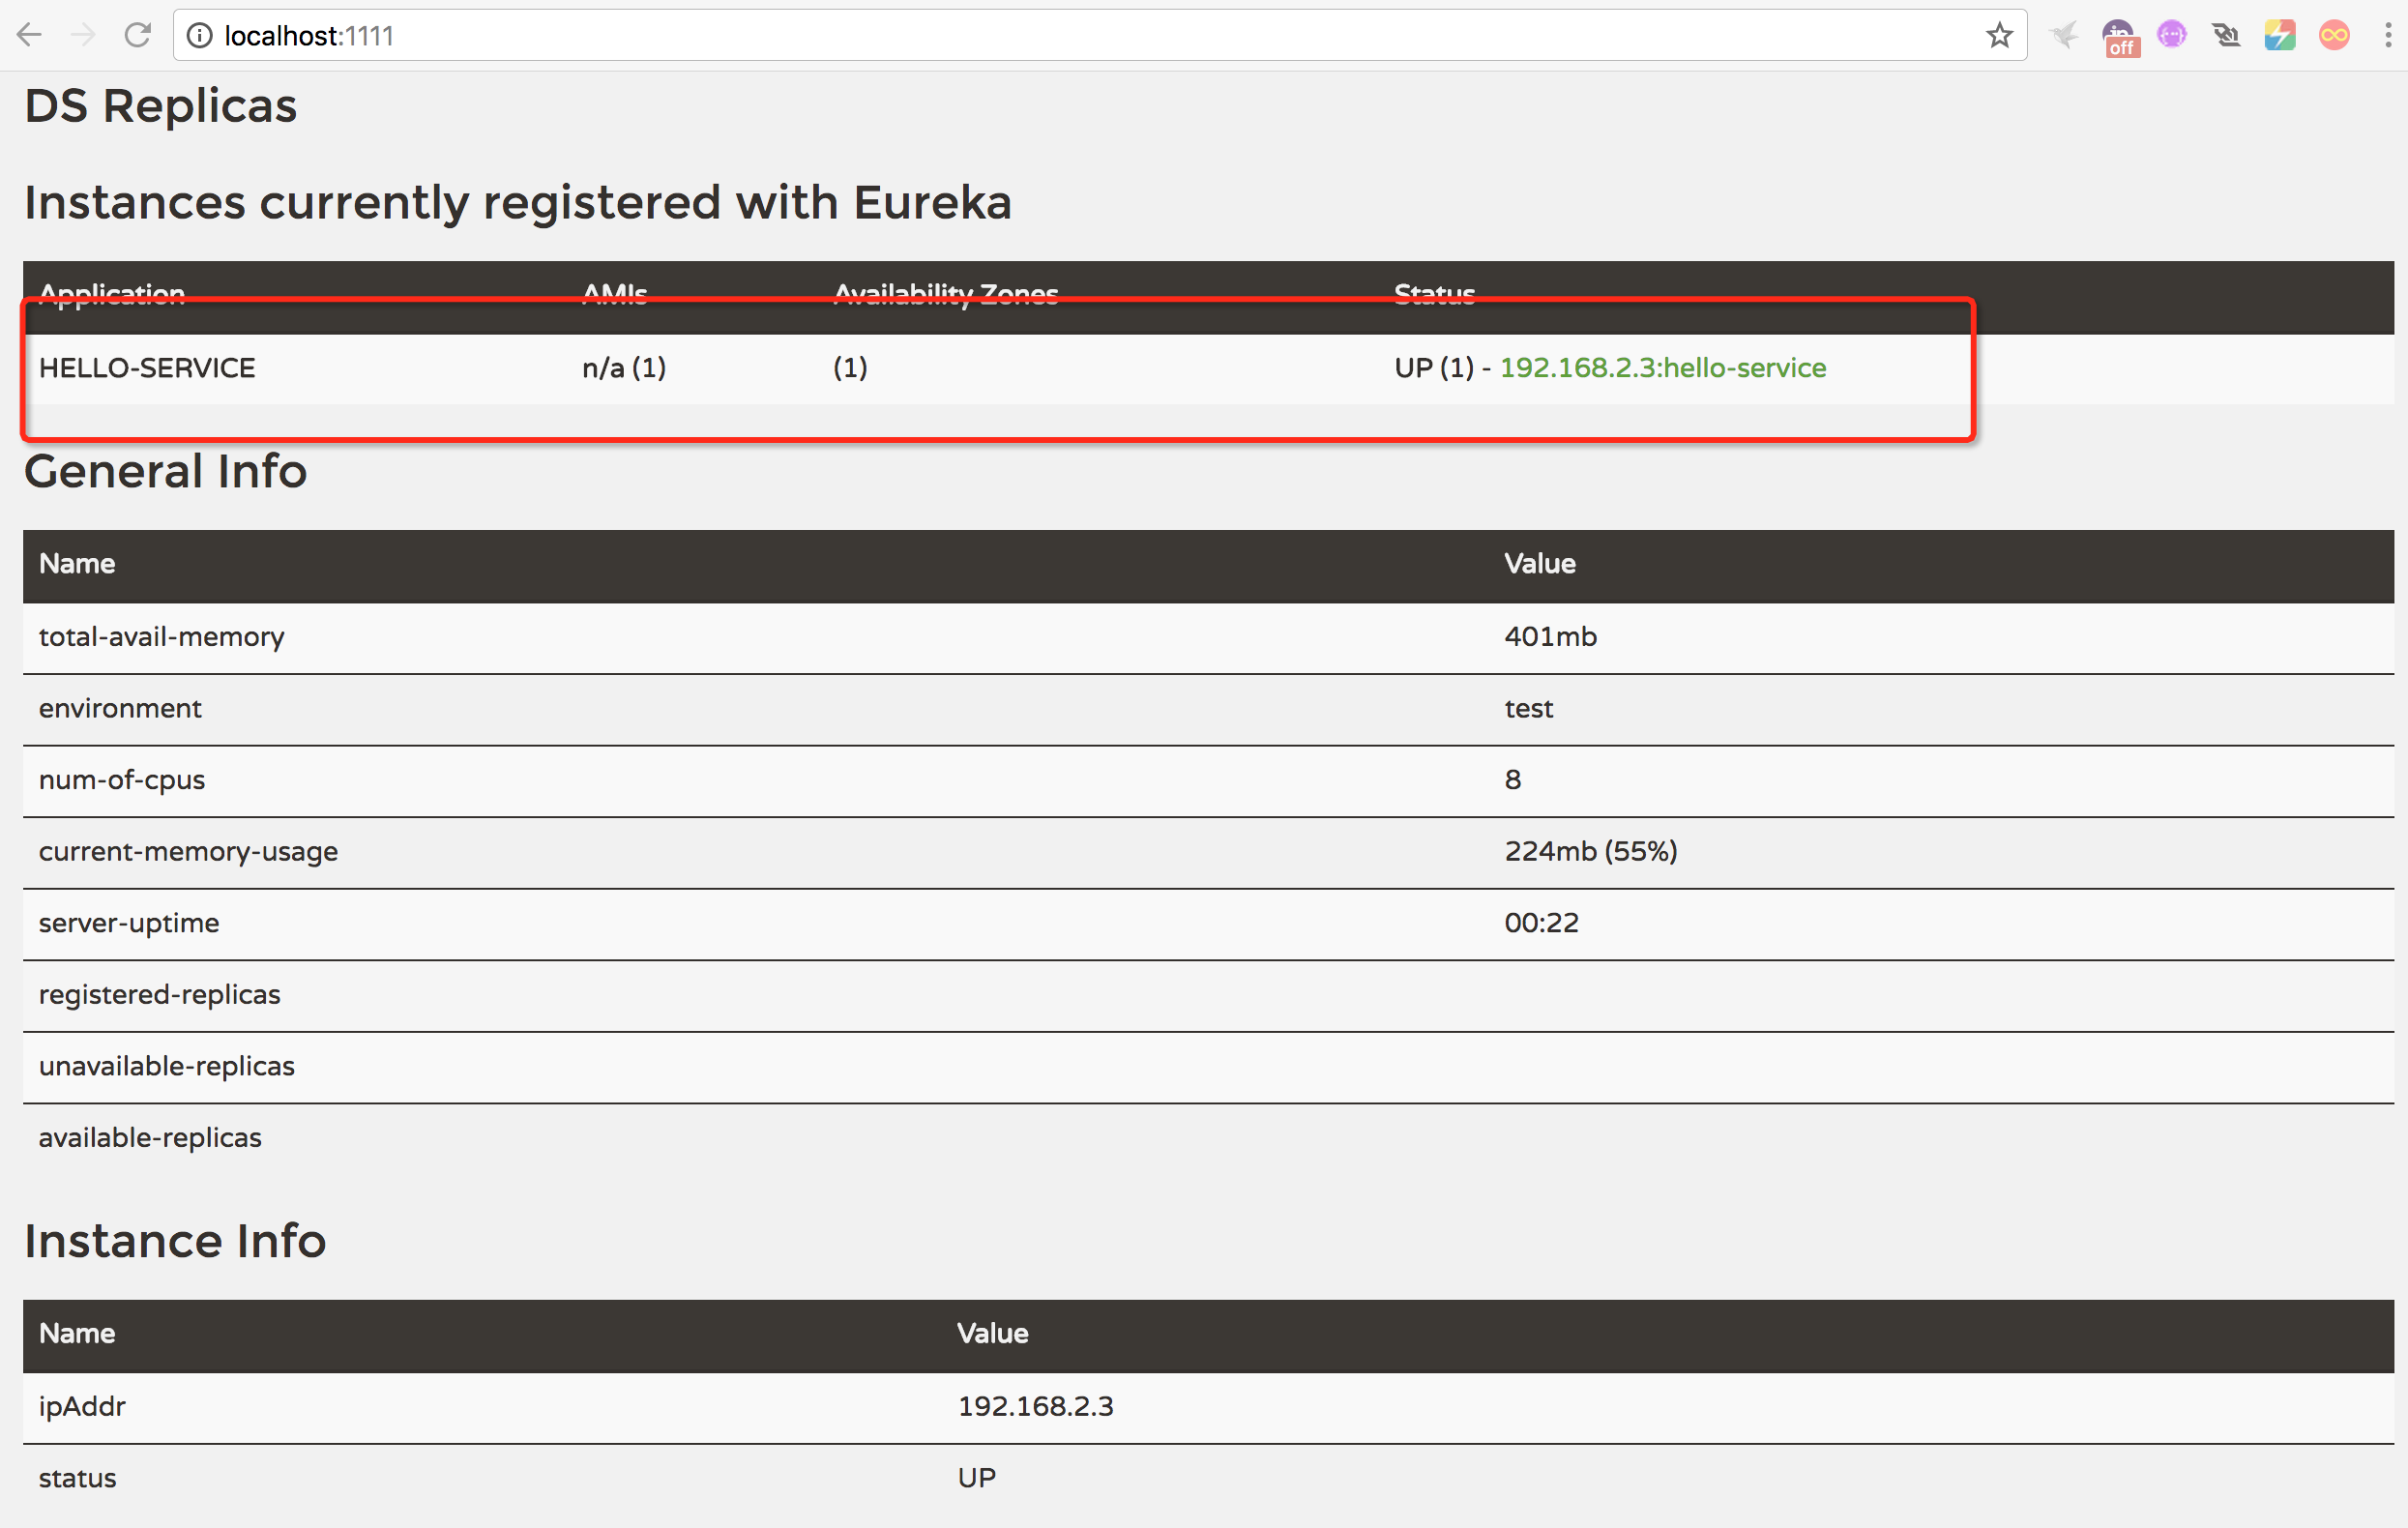
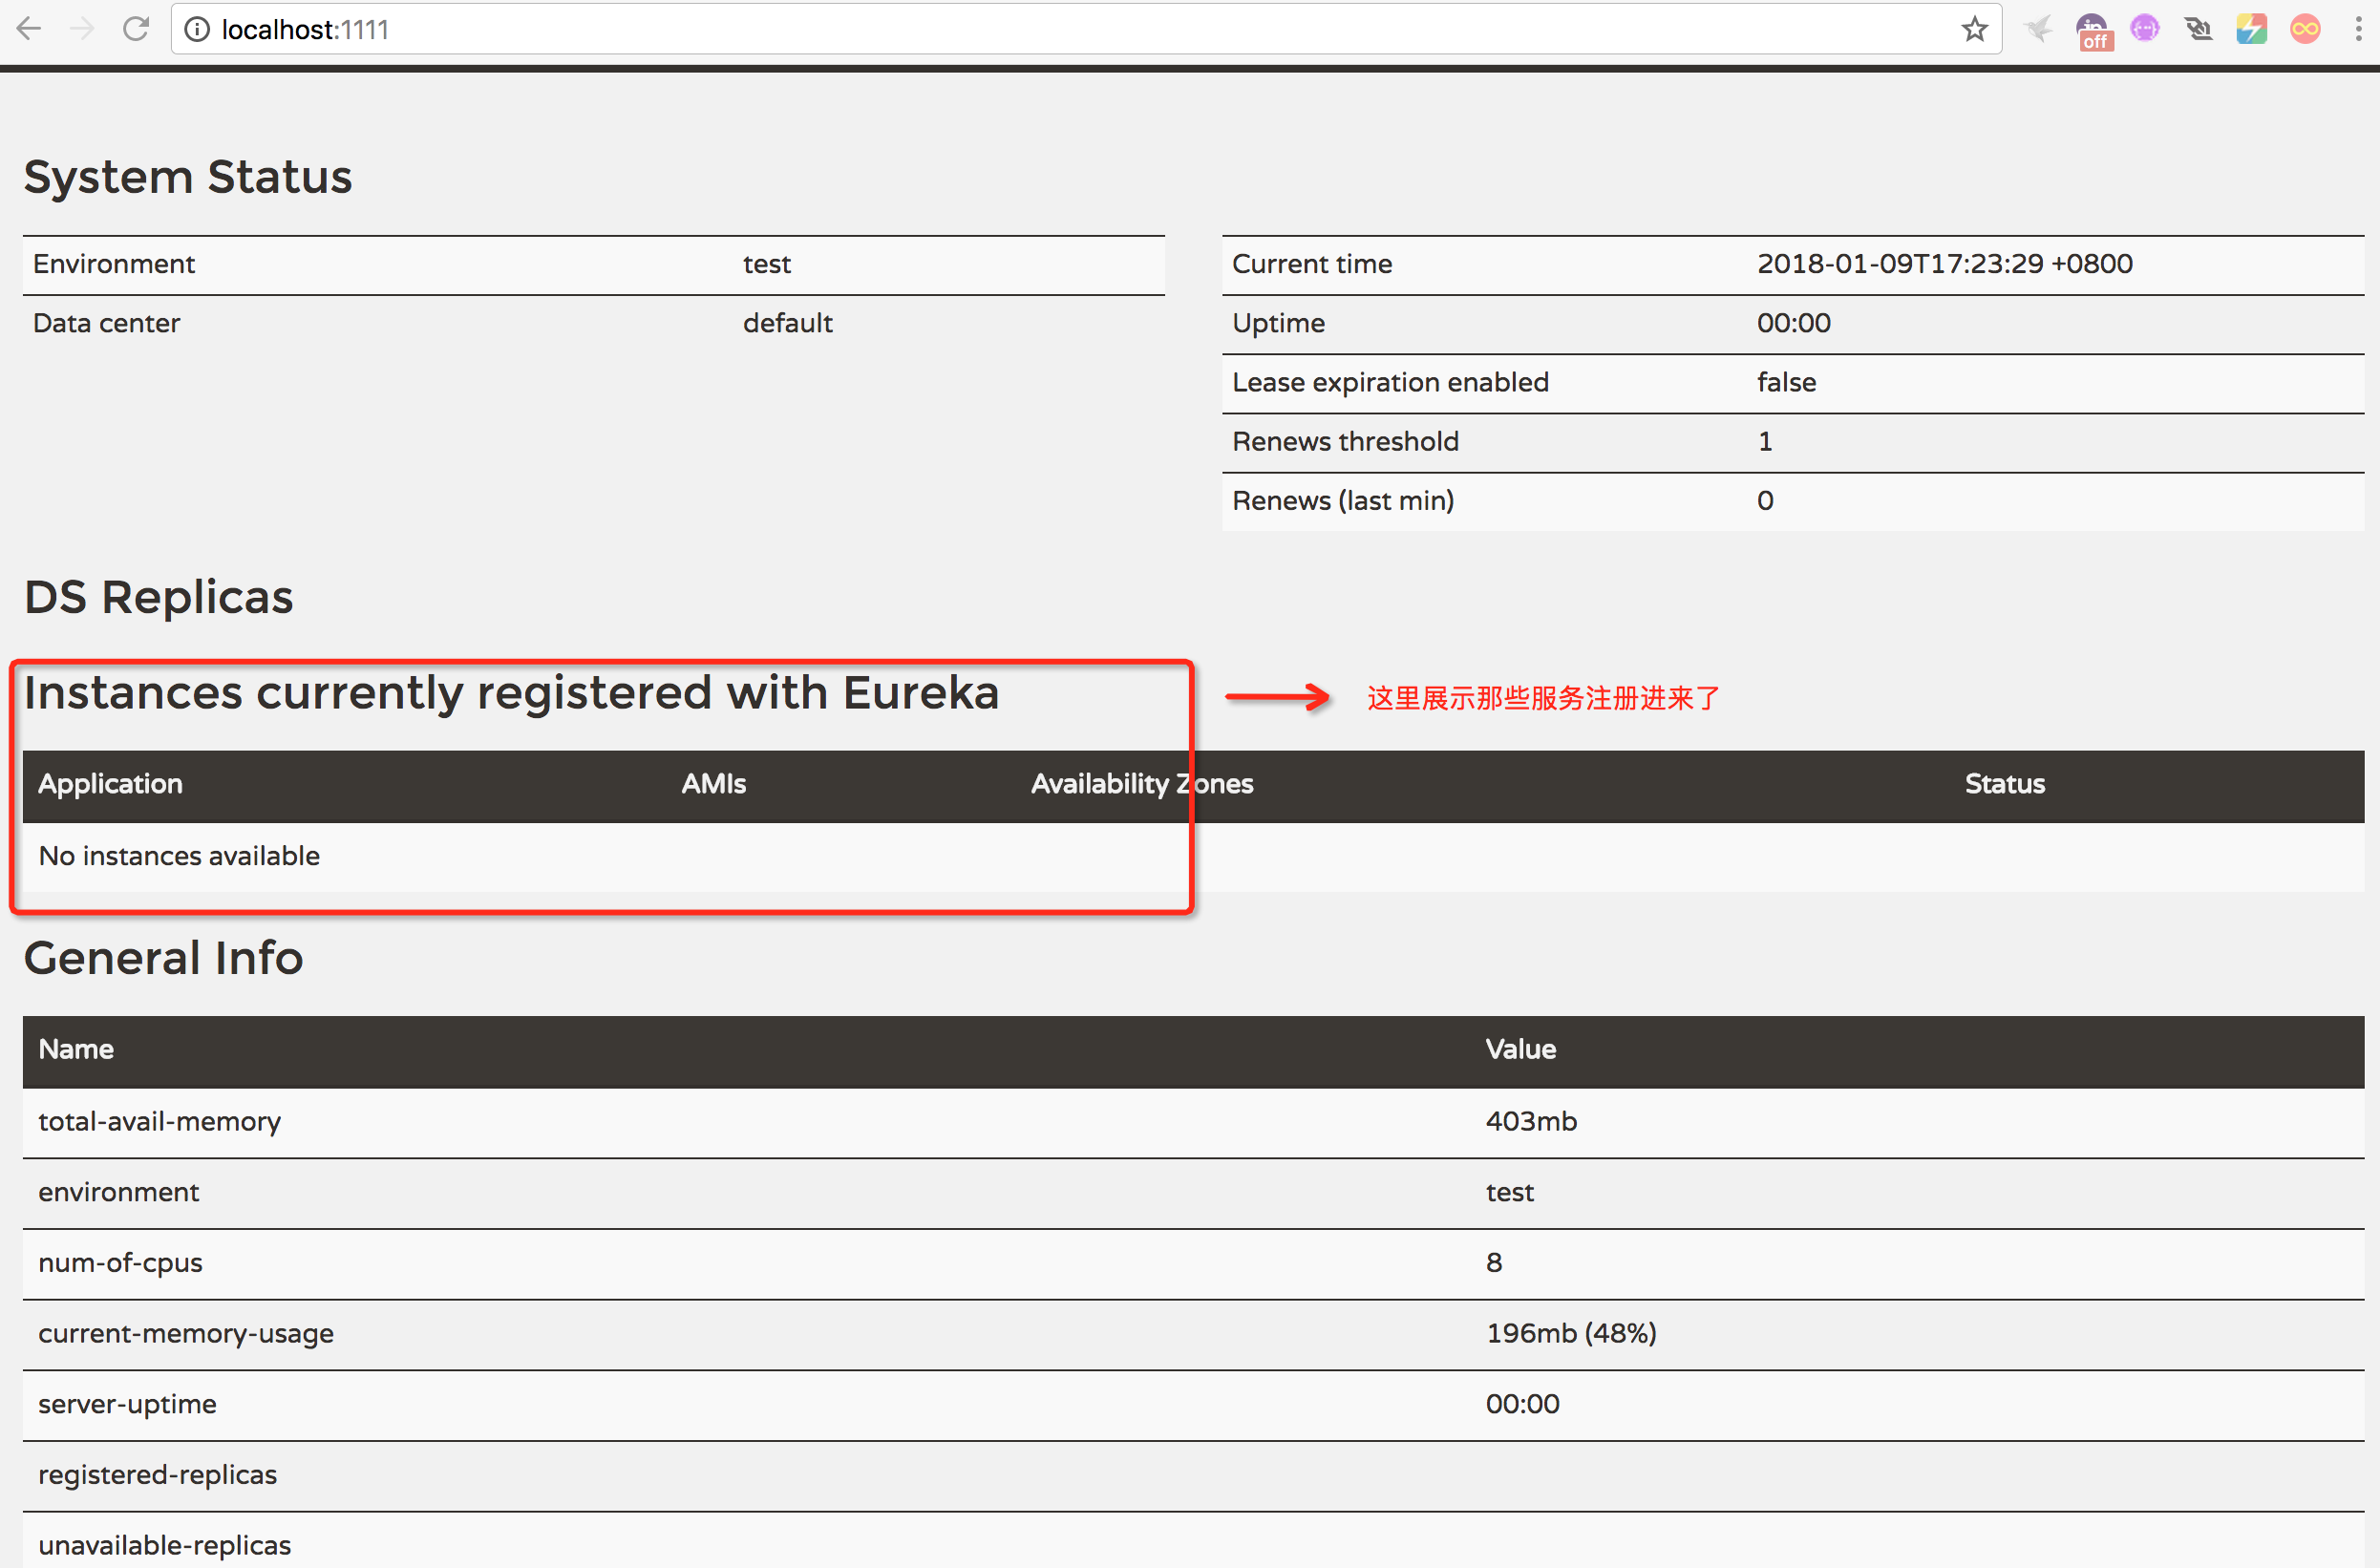
5、編譯執行專案即可,在瀏覽器輸入: http://localhost:1111出現Eureka資訊面板
二、將Spring boot的一個專案做為服務註冊進去
1、建立一個springboot專案eureka-clientone;
2、在pom.xml引入springcloud的依賴還有eureka-client的依賴,具體如下:
<?xml version="1.0" encoding="UTF-8"?>
<project xmlns="http://maven.apache.org/POM/4.0.0" xmlns:xsi="http://www.w3.org/2001/XMLSchema-instance"
	xsi:schemaLocation="http://maven.apache.org/POM/4.0.0 http://maven.apache.org/xsd/maven-4.0.0.xsd">
	<modelVersion>4.0.0</modelVersion>

	<groupId>com.lyq.demo</groupId>
	<artifactId>eureka-clientone</artifactId>
	<version>0.0.1-SNAPSHOT</version>
	<packaging>jar</packaging>

	<name>eureka-clientone</name>
	<description>eureka-clientone project for Spring Boot</description>

	<parent>
		<groupId>org.springframework.boot</groupId>
		<artifactId>spring-boot-starter-parent</artifactId>
		<version>1.5.9.RELEASE</version>
		<relativePath/> <!-- lookup parent from repository -->
	</parent>

	<properties>
		<project.build.sourceEncoding>UTF-8</project.build.sourceEncoding>
		<project.reporting.outputEncoding>UTF-8</project.reporting.outputEncoding>
		<java.version>1.8</java.version>
	</properties>

	<dependencies>
		<dependency>
			<groupId>org.springframework.boot</groupId>
			<artifactId>spring-boot-starter-web</artifactId>
		</dependency>

		<dependency>
			<groupId>org.springframework.boot</groupId>
			<artifactId>spring-boot-starter-test</artifactId>
			<scope>test</scope>
		</dependency>

		<!-- springcloud-eureka-client依賴 -->
		<dependency>
			<groupId>org.springframework.cloud</groupId>
			<artifactId>spring-cloud-starter-eureka</artifactId>
		</dependency>

	</dependencies>

	<!-- spring-cloud版本依賴 -->
	<dependencyManagement>
		<dependencies>
			<dependency>
				<groupId>org.springframework.cloud</groupId>
				<artifactId>spring-cloud-dependencies</artifactId>
				<version>Dalston.SR1</version>
				<type>pom</type>
				<scope>import</scope>
			</dependency>
		</dependencies>
	</dependencyManagement>

	<build>
		<plugins>
			<plugin>
				<groupId>org.springframework.boot</groupId>
				<artifactId>spring-boot-maven-plugin</artifactId>
			</plugin>
		</plugins>
	</build>


</project>
3、通過註解@EnableEurekaClient開啟註冊功能,啟用Eureka的DiscoveryClient實現,具體程式碼如下:
package com.lyq.demo;

import org.springframework.boot.SpringApplication;
import org.springframework.boot.autoconfigure.SpringBootApplication;
import org.springframework.cloud.netflix.eureka.EnableEurekaClient;

/**
 * 使用註解@EnableEurekaClient開啟註冊功能,啟用Eureka的DiscoveryClient實現
 * @author : lyq
 * @date   : 2018/1/9
 */
@SpringBootApplication
@EnableEurekaClient
public class EurekaClientoneApplication {

	public static void main(String[] args) {
		SpringApplication.run(EurekaClientoneApplication.class, args);
	}
}
4、在application.yml或者application.properties(格式自己去做對應的改變)檔案中進行註冊服務端的引數配置:
# 配置註冊到註冊中心的服務名稱
spring:
  application:
    name: hello-service

# 配置服務註冊中心的地址
eureka:
  client:
    serviceUrl:
      defaultZone: http://localhost:1111/eureka/
5、如果需要列印請求的日誌,在HelloController裡面註解DiscoveryClient物件來獲取資訊列印,具體如下:
package com.lyq.demo.controller;


import org.apache.log4j.Logger;
import org.omg.PortableInterceptor.SYSTEM_EXCEPTION;
import org.springframework.beans.factory.annotation.Autowired;
import org.springframework.cloud.client.ServiceInstance;
import org.springframework.cloud.client.discovery.DiscoveryClient;
import org.springframework.web.bind.annotation.GetMapping;
import org.springframework.web.bind.annotation.RestController;

/**
 * @author : lyq
 * @date   : 2018/1/9
 */
@RestController
public class HelloController {

    private final Logger logger = Logger.getLogger(HelloController.class);

    @Autowired
    private DiscoveryClient discoveryClient;

    @GetMapping("hello")
    public String hello() {
        ServiceInstance instance = discoveryClient.getLocalServiceInstance();
        System.out.println("********************************************");
        System.out.println("* request path: "+instance.getUri() + " host: "+instance.getHost()+" serviceid: "+instance.getServiceId());
        System.out.println("********************************************");
        return "Eureka-clientone";
    }

}
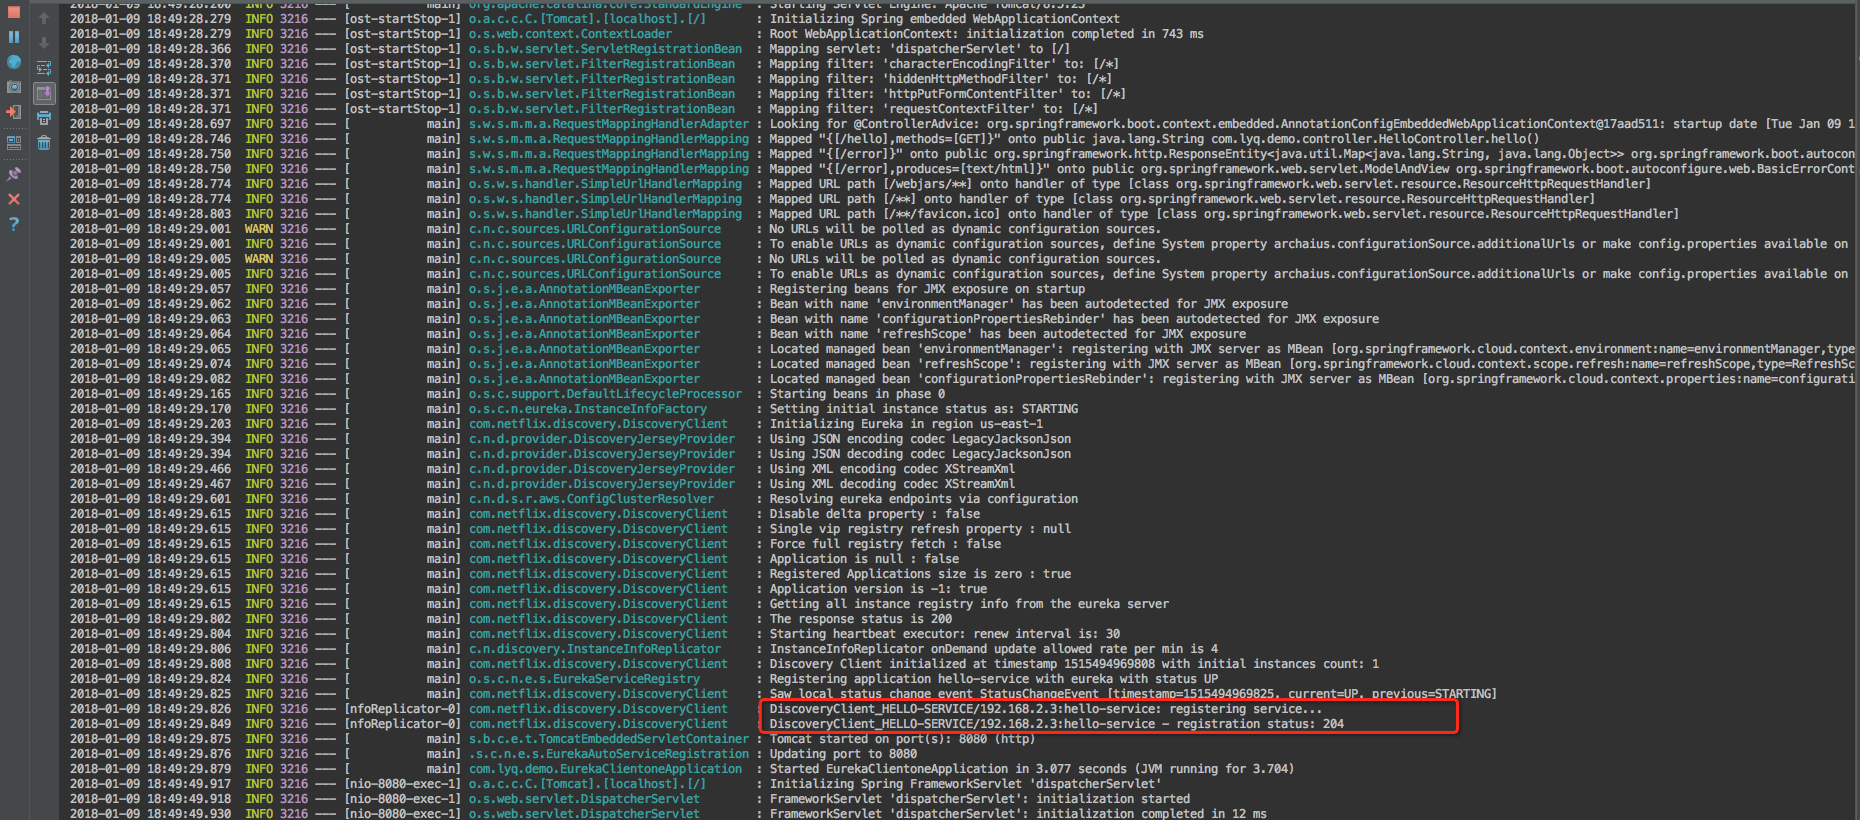
6、先執行服務端,然後在執行此需要註冊的客戶端在控制檯可以見到如下注冊資訊:
7、或者在瀏覽器輸入:http://localhost:1111也可以看到註冊資訊