
暴力解說之首次部署NGINX
前言
本章基於Centos 7.x系統講解
本章講解下在專案上線部署的時候對NGINX的操作。有些童鞋在網上百度類似LNMP安裝就跟著命令一條一條執行了,如果沒報錯還好,一旦報錯就懵逼狀態了。這是對自己、對程式碼的不負責任的表現。本章帶大家"正經"的安裝一次NGINX。
下載
下載NGINX的原始碼包切勿隨意查詢,好好的NGINX官網在那擺著,何必盲目搜尋呢?
原始碼包下載地址 : http://nginx.org/en/download....
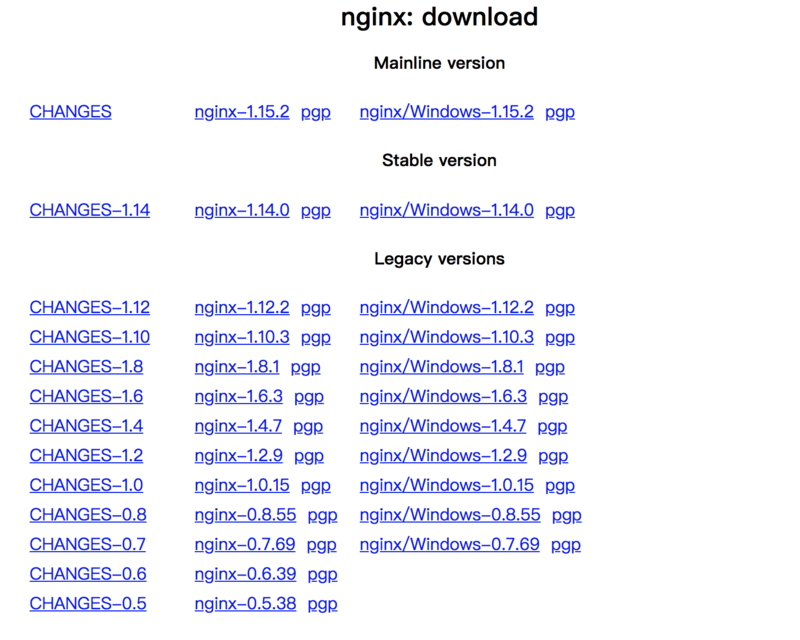
- Mainline Version 主線版本,也是開發版本測試版本,跟自己沒仇的最好別下載
- Stable version 穩定版本,一般下載就在穩定版本內找就可以了
- Legacy versions 以往的版本
實際對版本沒有太多要求的,下載穩定版本的就可以,每個版本都分.gz的原始碼包和.exe的windows安裝包,會下載遊戲還不會下載個壓縮包了嗎?
很多人糾結安裝包放哪比較好,現在告訴你
/usr/srcusr 歷史上全稱是user(使用者目錄),只不過現在不是這個意思了,。總之放這地死不了人。
wget http://nginx.org/download/nginx-1.14.0.tar.gzwget 比吃飯還簡單的命令瞭解一下?

然後就開始下載了,下載懂不懂?沒下載過遊戲嗎?
安裝
下載完之後 /usr/src 目錄下就有個 nginx-1.14.0.tar.gz 的壓縮包,然後就是刷刷刷的命令,擼起袖子就是幹
解壓縮
tar 解壓縮命令
| 引數 | 說明 |
|---|---|
| -z | 專門解壓gzip壓縮的,沒看到壓縮包最後是.gz嘛 |
| -x | 解壓 |
| -v | 解壓過程,就是解出來啥檔案 |
| -f | 指向檔案,一定得放最後 |
tar -zxvf nginx-1.14.0.tar.gz隨後就是咔咔咔的解壓,然後出來一些看不懂的檔案
nginx-1.14.0/
nginx-1.14.0/auto/
nginx-1.14.0/conf/
nginx-1.14.0/contrib/
nginx-1.14.0/src/
nginx-1.14.0/configure
nginx-1.14.0/LICENSE
nginx-1.14.0/README
nginx-1.14.0/html/
nginx-1.14.0/man/
nginx-1.14.0/CHANGES.ru
nginx-1.14.0/CHANGES
nginx-1.14.0/man/nginx.8
nginx-1.14.0/html/50x.html
nginx-1.14.0/html/index.html
nginx-1.14.0/src/core/
nginx-1.14.0/src/event/
nginx-1.14.0/src/http/
nginx-1.14.0/src/mail/
nginx-1.14.0/src/misc/
nginx-1.14.0/src/os/
nginx-1.14.0/src/stream/
nginx-1.14.0/src/stream/ngx_stream_geo_module.c
nginx-1.14.0/src/stream/ngx_stream.c
nginx-1.14.0/src/stream/ngx_stream.h
nginx-1.14.0/src/stream/ngx_stream_limit_conn_module.c
nginx-1.14.0/src/stream/ngx_stream_access_module.c
......
這個時候你所在的 /usr/src 目錄下就有了一個 nginx-1.14.0 資料夾
nginx-1.14.0 nginx-1.14.0.tar.gz./configure
目錄有了現在就是安裝了,不要百度不要谷歌,官網文件寫的那麼清楚幹那多餘的活有什麼用。小學英語就能看懂。http://nginx.org/en/docs/conf... , 滑動到最下面,官網給出了一個demo
./configure
    --sbin-path=/usr/local/nginx/nginx
    --conf-path=/usr/local/nginx/nginx.conf
    --pid-path=/usr/local/nginx/nginx.pid
    --with-http_ssl_module
    --with-pcre=../pcre-8.41
    --with-zlib=../zlib-1.2.11
對頭就是這樣安裝,如果你不願瞭解這些配置,完全就可以
./configure對沒錯,啥都不用加,9個字母結束戰鬥,為什麼不需要加引數?是因為nginx很多引數都有預設值。
| 引數 | 預設 | 註釋 |
|---|---|---|
| --prefix=path | /usr/local/nginx | nginx安裝路徑 |
| --sbin-path=path | prefix/sbin/nginx | nginx命令路徑 |
| --modules-path=path | prefix/modules | nginx模組路徑 |
| --conf-path=path | prefix/conf/nginx.conf | nginx配置檔案路徑 |
| --error-log-path=path | prefix/logs/error.log | nginx預設日誌目錄 |
執行./configure
checking for OS
 + Linux 3.10.0-514.26.2.el7.x86_64 x86_64
checking for C compiler ... found
 + using GNU C compiler
 + gcc version: 4.8.5 20150623 (Red Hat 4.8.5-16) (GCC)
checking for gcc -pipe switch ... found
checking for -Wl,-E switch ... found
checking for gcc builtin atomic operations ... found
checking for C99 variadic macros ... found
checking for gcc variadic macros ... found
checking for gcc builtin 64 bit byteswap ... found
checking for unistd.h ... found
checking for inttypes.h ... found
checking for limits.h ... found
checking for sys/filio.h ... not found
checking for sys/param.h ... found
checking for sys/mount.h ... found
checking for sys/statvfs.h ... found
checking for crypt.h ... found
checking for Linux specific features
checking for epoll ... found
checking for EPOLLRDHUP ... found
checking for EPOLLEXCLUSIVE ... not found
checking for O_PATH ... found
checking for sendfile() ... found
checking for sendfile64() ... found
....
configure是個檢查工具,上面的直接結果很清楚了,各種的checking,檢測下環境支援不?依賴都裝了嗎?檢測成功後你才可以進入下一步,否則你進入下一步也依舊會提示xxx不存在,xxx不支援等等
make && make installmake是一個編譯工具,你就記住是個編譯工具就行了,編譯的過程輸出
cc -c -pipe  -O -W -Wall -Wpointer-arith -Wno-unused-parameter -Werror -g  -I src/core -I src/event -I src/event/modules -I src/os/unix -I objs \
    -o objs/src/core/nginx.o \
    src/core/nginx.c
cc -c -pipe  -O -W -Wall -Wpointer-arith -Wno-unused-parameter -Werror -g  -I src/core -I src/event -I src/event/modules -I src/os/unix -I objs \
    -o objs/src/core/ngx_log.o \
    src/core/ngx_log.c
cc -c -pipe  -O -W -Wall -Wpointer-arith -Wno-unused-parameter -Werror -g  -I src/core -I src/event -I src/event/modules -I src/os/unix -I objs \
    -o objs/src/core/ngx_palloc.o \
    src/core/ngx_palloc.c
cc -c -pipe  -O -W -Wall -Wpointer-arith -Wno-unused-parameter -Werror -g  -I src/core -I src/event -I src/event/modules -I src/os/unix -I objs \
    -o objs/src/core/ngx_array.o \
    src/core/ngx_array.c
....
cp conf/nginx.conf '/usr/local/nginx/conf/nginx.conf.default'
test -d '/usr/local/nginx/logs' \
    || mkdir -p '/usr/local/nginx/logs'
test -d '/usr/local/nginx/logs' \
    || mkdir -p '/usr/local/nginx/logs'
test -d '/usr/local/nginx/html' \
    || cp -R html '/usr/local/nginx'
test -d '/usr/local/nginx/logs' \
    || mkdir -p '/usr/local/nginx/logs'
make[1]: 離開目錄“/usr/src/nginx-1.14.0”
最後他copy了一些必須檔案到指定目錄裡,這個時候nginx的安裝就基本完成了。
配置
如果是僅僅執行了這條命令
./configure那nginx的目錄就是
/usr/local/nginx
-----------
cert client_body_temp conf fastcgi_temp html logs proxy_temp sbin scgi_temp uwsgi_temp以下講解的所有配置都在nginx.conf內進行
修改預設指向目錄
取消預設指向的解析目錄 html 直接註釋掉就行了。一般我會把專案目錄指向 /var/www 一般都在虛擬主機檔案中指向
避免泛解析
總有些人會把域名解析錯地址或者是惡意解析到你的伺服器上。對於這種人必須嚴懲
server {
    listen       80  default_server;
    server_name  _;
    return       403;
}
分分鐘遮蔽他
新增虛擬主機
虛擬主機的配置檔案可千萬別都寫到nginx.conf中
一般我會在nginx.conf同級建立一個server目錄存放
include /usr/local/nginx/conf/server/*.conf;配置Gzip壓縮
http://nginx.org/en/docs/http...
新增SSL支援
https://segmentfault.com/a/11...
開啟日誌記錄
https://segmentfault.com/a/11...
開啟負載均衡
https://segmentfault.com/a/11...
開啟反向代理
https://segmentfault.com/a/11...
設定許可權
最好設定nginx命令之允許root使用者或者你們公司的運營執行,無緣無故的nginx -s stop可受不了。
官網文件
nginx官網是我感覺文件寫的最簡介最詳細的文件。以下列出各部分詳細地址
- 編譯配置引數 http://nginx.org/en/docs/conf...
- 虛擬主機配置 http://nginx.org/en/docs/http...
- 配置檔案中的計量單位 http://nginx.org/en/docs/synt...
- nginx命令引數 http://nginx.org/en/docs/swit...
- nginx負載均衡配置 http://nginx.org/en/docs/http...
- nginx官方部落格 https://www.nginx.com/blog/
致謝
感謝你看到這裡,本篇文章我的語言過於偏激了,還希望見諒。希望本篇文章可以幫助到你,有什麼問題可以在評論區留言。謝謝
別害怕英語,小學英語水平就能看懂,一切源於堅持