
hadoop2-elasticsearch的安裝
阿新 • • 發佈:2018-11-21
本文主要講elasticsearch-2.2.1的安裝過程。
準備工作:
1.搭建虛擬機器
你需要先參考
把你的虛擬機器搭建起來-hadoop環境可以先不用搭建(完成步驟1到步驟8)
2.下載elasticsearch包
這裡我搭建的是4臺虛擬機器(node1,node2,node3,node4)
elasticsearch 只允許普通使用者操作,不允許root使用者操作
--1.關閉防火牆 service iptables stop --2.建立使用者elsearchuseradd elsearch --3.給使用者elsearch設定密碼 passwd elsearch --4.在/opt目錄下面建立elsearch/es/目錄 mkdir /opt/elsearch/es/ --5.進入到/opt目錄下面 cd /opt/ --6.把elsearch目錄以及裡面的子目錄的許可權設定為elsearch chown -R elsearch:elsearch elsearch --此時,/elsearch, /elsearch/es的許可權都應該為elsearch --7.切換使用者到elsearch su elsearch
此時,所有節點都應該是elsearch使用者,而不是root使用者。
現在去到node1節點上面進行操作
--此時,在node1上面操作 --1.此時,我們就可以把下載好的elasticsearch-2.2.1.tar.zip檔案上傳到node1下面的/opt/elsearch/es/ --2.解壓/opt/elsearch/es/elasticsearch-2.2.1.tar.zip檔案 cd /opt/elsearch/es/ unzip elasticsearch-2.2.1.tar.zip --3.修改配置檔案 cd /opt/elsearch/es/elasticsearch-2.2.1/conf/ vi elasticsearch.yml # ======================== Elasticsearch Configuration ========================= # # NOTE: Elasticsearch comes with reasonable defaults for most settings. # Before you set out to tweak and tune the configuration, make sure you # understand what are you trying to accomplish and the consequences. # # The primary way of configuring a node is via this file. This template lists # the most important settings you may want to configure for a production cluster. # # Please see the documentation for further information on configuration options: # <http://www.elastic.co/guide/en/elasticsearch/reference/current/setup-configuration.html> # # ---------------------------------- Cluster ----------------------------------- # # Use a descriptive name for your cluster: # cluster.name: elsearch-app # # ------------------------------------ Node ------------------------------------ # # Use a descriptive name for the node: # node.name: node1 # # Add custom attributes to the node: # # node.rack: r1 # # ----------------------------------- Paths ------------------------------------ # # Path to directory where to store the data (separate multiple locations by comma): # # path.data: /path/to/data # # Path to log files: # # ----------------------------------- Memory ----------------------------------- # # Lock the memory on startup: # # bootstrap.mlockall: true # # Make sure that the `ES_HEAP_SIZE` environment variable is set to about half the memory # available on the system and that the owner of the process is allowed to use this limit. # # Elasticsearch performs poorly when the system is swapping the memory. # # ---------------------------------- Network ----------------------------------- # # Set the bind address to a specific IP (IPv4 or IPv6): # network.host: 192.168.79.138 # # Set a custom port for HTTP: # http.port: 9200 # # For more information, see the documentation at: # <http://www.elastic.co/guide/en/elasticsearch/reference/current/modules-network.html> # # # discovery.zen.ping.unicast.hosts: ["host1", "host2"] # # Prevent the "split brain" by configuring the majority of nodes (total number of nodes / 2 + 1): # # discovery.zen.minimum_master_nodes: 3 # # For more information, see the documentation at: # <http://www.elastic.co/guide/en/elasticsearch/reference/current/modules-discovery.html> # # ---------------------------------- Gateway ----------------------------------- # # Block initial recovery after a full cluster restart until N nodes are started: # # gateway.recover_after_nodes: 3 # # For more information, see the documentation at: # <http://www.elastic.co/guide/en/elasticsearch/reference/current/modules-gateway.html> # # ---------------------------------- Various ----------------------------------- # # Disable starting multiple nodes on a single system: # # node.max_local_storage_nodes: 1 # # Require explicit names when deleting indices: # # action.destructive_requires_name: true discovery.zen.ping.multicast.enabled: false discovery.zen.ping.unicast.hosts: ["192.168.79.138","192.168.79.139", "192.168.79.140","192.168.79.141"] discovery.zen.ping_timeout: 120s client.transport.ping_timeout: 60s :wq --4.然後從node1分發到其他節點(node2, node3, node4)的相同目錄 cd /opt/elsearch/es scp -r ./elasticsearch-2.2.1 elsearch@node2:/opt/elsearch/es scp -r ./elasticsearch-2.2.1 elsearch@node3:/opt/elsearch/es scp -r ./elasticsearch-2.2.1 elsearch@node4:/opt/elsearch/es
接下來在node2,node3,node4上面進行操作
--分別修改node2,node3,node4上面的配置檔案
cd /opt/elsearch/es/elasticsearch-2.2.1/conf/

vi elasticsearch.yml

--修改兩個地方
--1.node.name: node1
--2.network.host: 192.168.79.138

--修改為和下面相對應,然後儲存
192.168.79.138 node1
192.168.79.139 node2
192.168.79.140 node3
192.168.79.141 node4
最後,在所有節點(node1,node2,node3,node4)上面進行操作
--啟動elasticsearch
cd /opt/elsearch/es/elasticsearch-2.2.1/bin
./elasticsearch
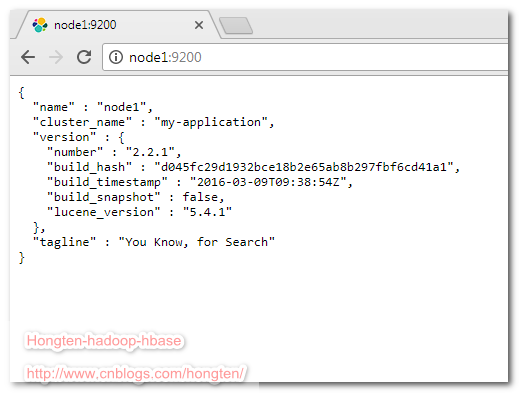
開啟瀏覽器,輸入:node1:9200可以看見一下效果
新增外掛elasticsearch-head
把下載好的外掛重新命名為
head
然後新增到所有節點(node1,node2,node3,node4)的
/opt/elsearch/es/elasticsearch-2.2.1/plugins
目錄。
然後重啟所有節點。
--啟動elasticsearch
cd /opt/elsearch/es/elasticsearch-2.2.1/bin
./elasticsearch
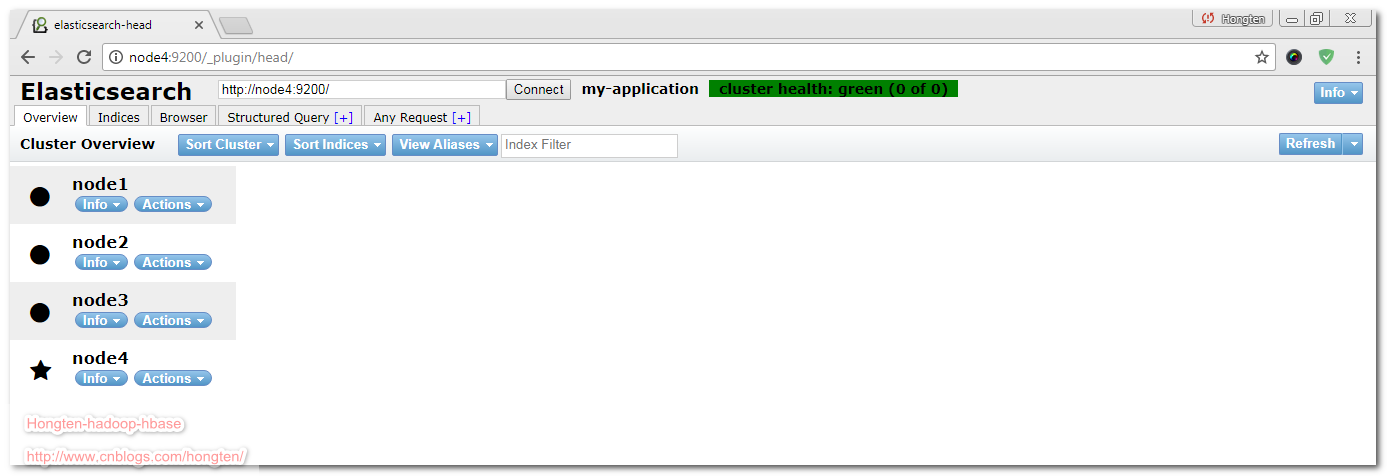
效果如下:
瞭解更多:elasticsearch-head
========================================================
More reading,and english is important.
I'm Hongten

大哥哥大姐姐,覺得有用打賞點哦!你的支援是我最大的動力。謝謝。
Hongten部落格排名在100名以內。粉絲過千。
Hongten出品,必是精品。
E | [email protected] B | http://www.cnblogs.com/hongten
========================================================