基於【SpringBoot】的微服務【Jenkins】自動化部署
基於【SpringBoot】的微服務【Jenkins】自動化部署
一、關於自動化部署
關於自動化部署的優點,我就不在這裡贅述了;只要想想手工打包、上傳、部署、重啟的種種,就會有很多場景歷歷在目,相信經歷過的朋友都能體會其中的酸甜苦辣;
而一旦到了大型專案,比如所微服務化之後的專案,不僅僅功能模組多,而且都不再是單機部署;並且一搞大型活動就是動不動幾十個節點的大叢集部署,想要靠手工再來完成這些操作,那就等著玩死自己吧;
那麼,如果把這一切都交給Jenkins來管理,你要做的就是在頁面輕點滑鼠,接下來就是刷刷手機、喝喝茶。。。哈哈哈哈
二、環境介紹
--centos 7
--Jenkins v.2.121.3
--JDK 1.8
--SpringBoot+Maven+Git
三、專案中要完成的操作
這裡,我們藉助了maven-assembly-plugin來完成打包,操作如下;
1、第一步,在專案的pom.xml檔案中加入如下的配置:
<build>
        <finalName>bm-demo-admin</finalName>
        <plugins>
            <plugin>
                <groupId>org.apache.maven.plugins</groupId>
                <artifactId>maven-jar-plugin</artifactId>
                <configuration>
                    <archive>
                        <manifest>
                            <!--指定main入口-->
                            <mainClass>cn.com.bluemoon.admin.web.WebAdminApplication</mainClass>
                            <addClasspath>true</addClasspath>
                            <classpathPrefix>lib/</classpathPrefix>
                        </manifest>
                    </archive>
                    <excludes>
                        <include>*.xml</include>
                        <include>*.yml</include>
                        <include>*.json</include>
                    </excludes>
                </configuration>
            </plugin>
            <plugin>
                <groupId>org.apache.maven.plugins</groupId>
                <artifactId>maven-assembly-plugin</artifactId>
                <configuration>
                    <!-- not append assembly id in release file name -->
                    <appendAssemblyId>false</appendAssemblyId>
                    <descriptors>
                        <!--打包的詳細描述,需要配置額外檔案-->
                        <descriptor>src/assembly/assembly-descriptor.xml</descriptor>
                    </descriptors>
                </configuration>
                <executions>
                    <execution>
                        <id>make-assembly</id>
                        <phase>package</phase>
                        <goals>
                            <goal>single</goal>
                        </goals>
                    </execution>
                </executions>
            </plugin>
        </plugins>
    </build>
2、在專案的src目錄下,新建assembly目錄,新建assembly-descriptor.xml檔案,內容如下:
<?xml version="1.0" encoding="UTF-8"?>
<assembly>
    <id>bin</id>
    <!-- 最終打包成一個用於釋出的zip檔案 -->
    <formats>
        <format>tar.gz</format>
    </formats>
    <fileSets>
        <!-- 打包jar檔案 -->
        <fileSet>
            <directory>${project.build.directory}</directory>
            <outputDirectory></outputDirectory>
            <includes>
                <include>*.jar</include>
            </includes>
            <fileMode>0755</fileMode>
            <lineEnding>unix</lineEnding>
        </fileSet>
        <!-- 把專案相關的啟動指令碼,打包進zip檔案的bin目錄 -->
        <fileSet>
            <directory>${project.basedir}/src/main/scripts</directory>
            <outputDirectory>/</outputDirectory>
            <includes>
                <include>*</include>
            </includes>
            <fileMode>0755</fileMode>
            <lineEnding>unix</lineEnding>
        </fileSet>

        <!-- 把專案的配置檔案,打包進zip檔案的config目錄 -->
        <fileSet>
            <directory>${project.build.directory}/classes</directory>
            <outputDirectory>conf</outputDirectory>
            <includes>
                <include>*.xml</include>
                <include>*.yml</include>
                <include>*.json</include>
            </includes>
        </fileSet>
    </fileSets>
    <!-- 把專案的依賴的jar打包到lib目錄下 -->
    <dependencySets>
        <dependencySet>
            <outputDirectory>lib</outputDirectory>
            <scope>runtime</scope>
            <excludes>
                <exclude>${groupId}:${artifactId}</exclude>
            </excludes>
        </dependencySet>
    </dependencySets>
</assembly>
3、在src/main目錄下新建scripts檔案下,加入restart.sh、start.sh、stop.sh指令碼,內容分別如下:
restart.sh
#!/bin/sh
./stop.sh
./start.sh
start.sh
#!/bin/sh
export JAVA_HOME=$JAVA_HOME
export PATH=$JAVA_HOME/bin:$PATH
export CLASSPATH=.:$JAVA_HOME/lib/dt.jar:$JAVA_HOME/lib/tools.jar
PIDFILE=service.pid
ROOT_DIR="$(cd $(dirname $0) && pwd)"
CLASSPATH=./*:$ROOT_DIR/lib/*:$ROOT_DIR/conf/
JAVA_OPTS="-Xms256m -Xmx512m -XX:+UseParallelGC"
MAIN_CLASS=cn.com.bluemoon.admin.web.WebAdminApplication
if [ ! -d "logs" ]; then
   mkdir logs
fi
if [ -f "$PIDFILE" ]; then
    echo "Service is already start ..."
else
    echo "Service  start ..."
    nohup java $JAVA_OPTS -cp $CLASSPATH $MAIN_CLASS 1> logs/bm-demo-admin.out 2>&1  &
    printf '%d' $! > $PIDFILE
    echo "Service  start SUCCESS "
fi
stop.sh
#!/bin/sh
PIDFILE=service.pid
if [ -f "$PIDFILE" ]; then
     kill -9 `cat $PIDFILE`
     rm -rf $PIDFILE
     echo "Service is stop SUCCESS!"
else
    echo "Service is already stop ..."
fi
四、新建Jenkins任務
這裡就不在介紹如何安裝Jenkins,以及Jenkins的環境配置,包括git,mave,node.js等,網上有很多的部落格講這一塊,可以自己找一下;
1、選擇新建任務=>構建一個maven專案,輸入任務的名稱

2、新增描述,選擇新增構建引數等等
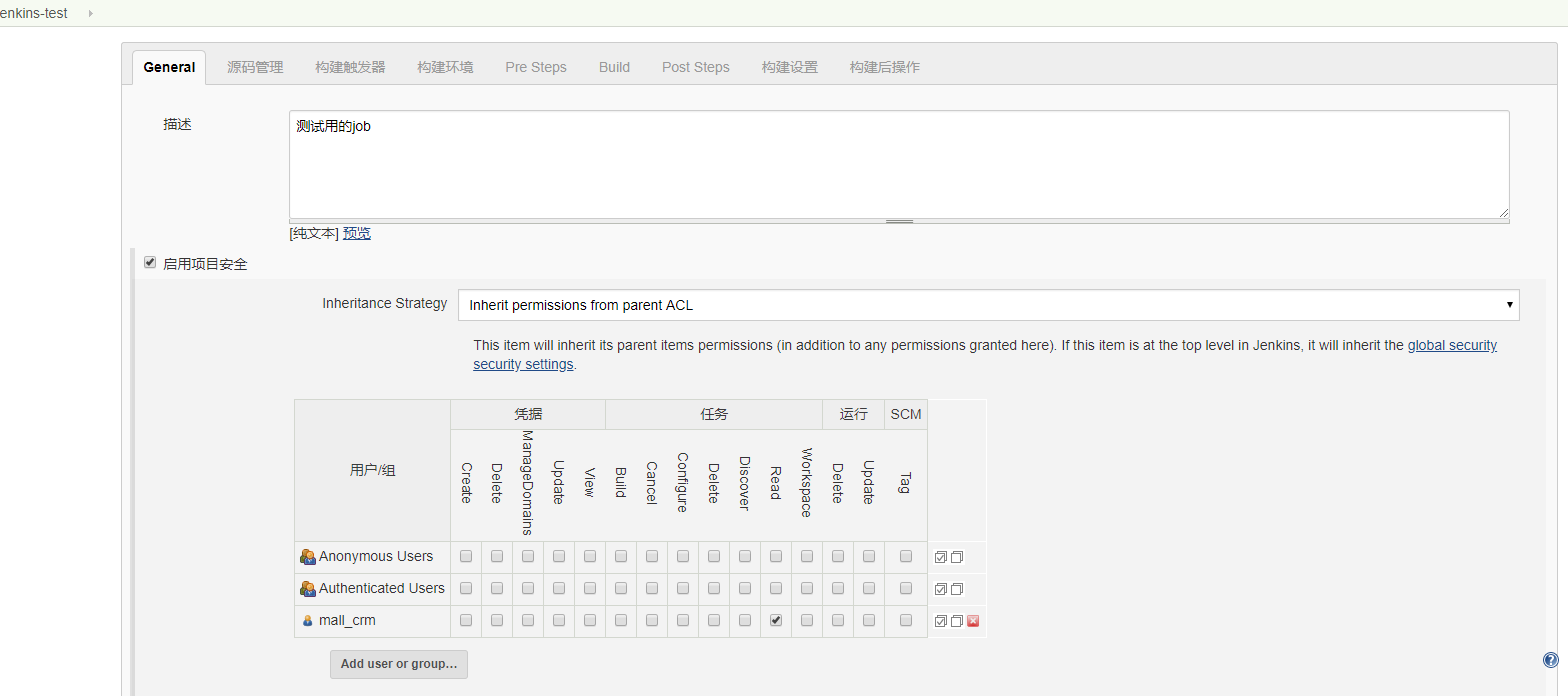
3、勾選丟棄舊的構建,保持構建天數 7天,保持最大構建個數 3個,這裡可以自己選擇,主要是用於回滾

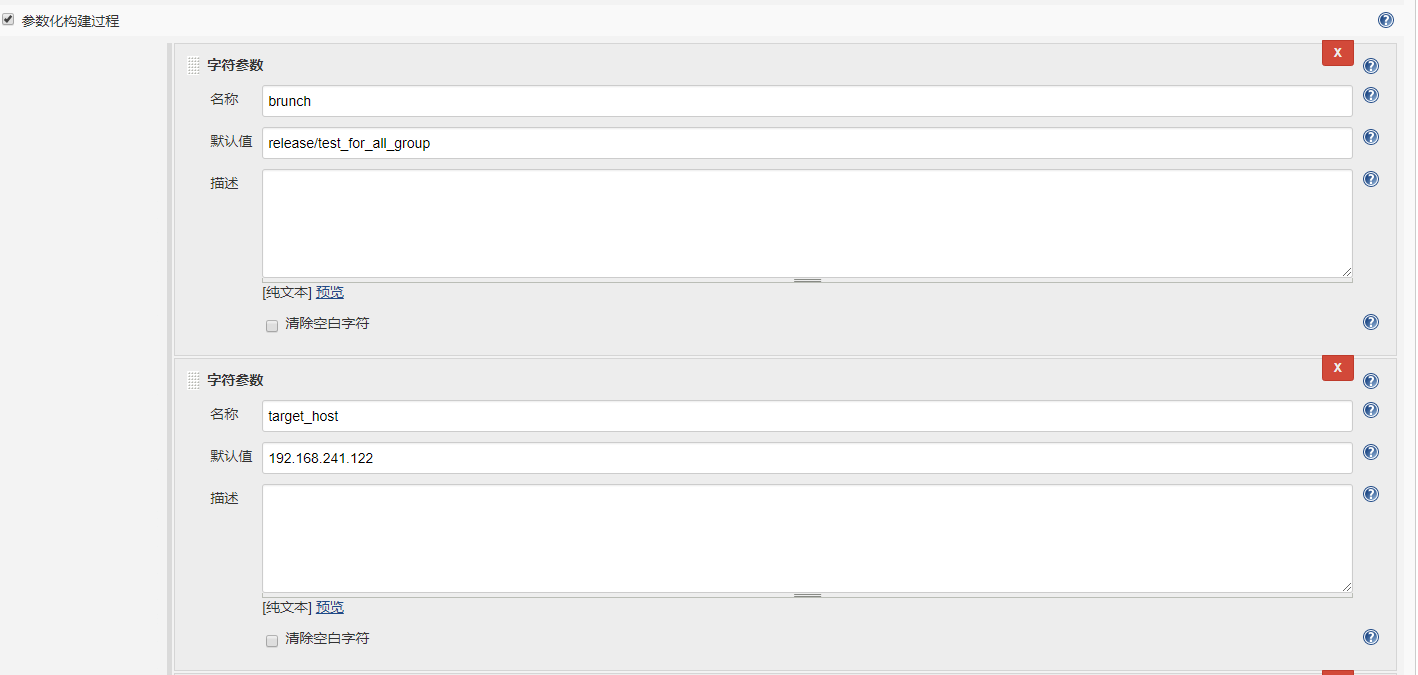
4、勾選引數化構建過程,新增字元引數
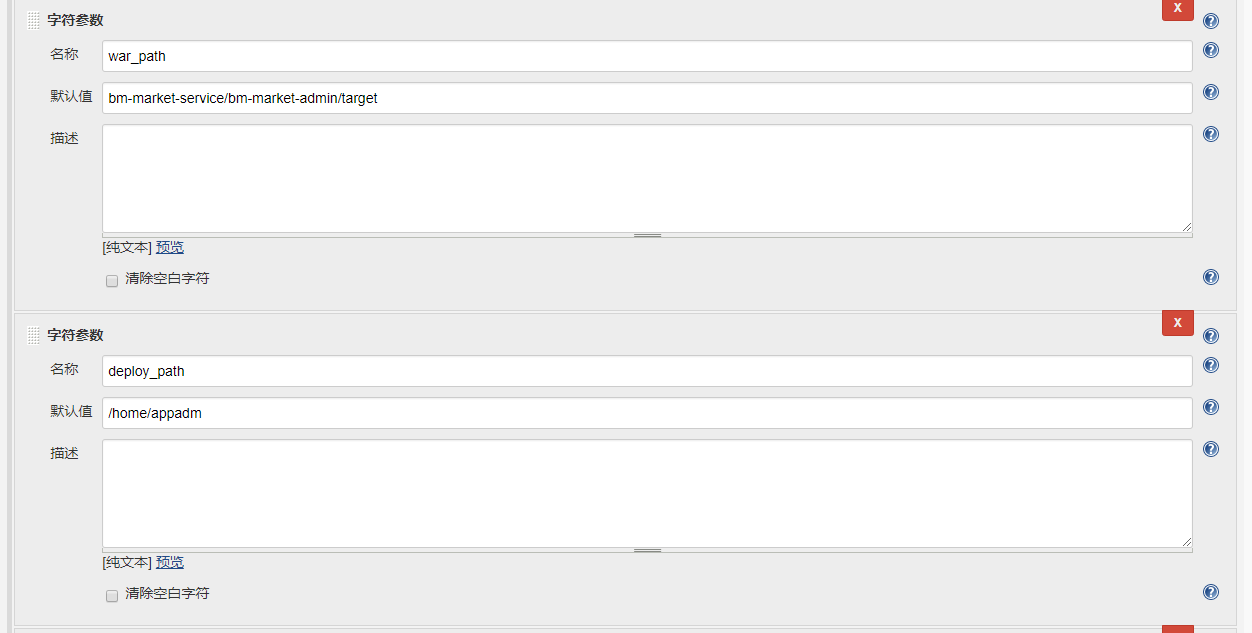
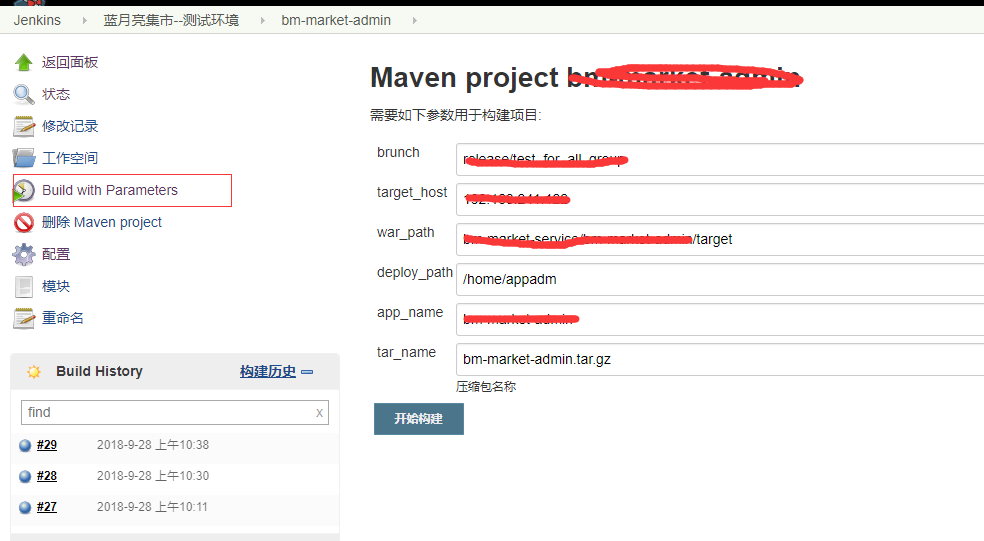
這裡有必要解釋一下新增的引數
brunch git的分支,作為部署時的可修改引數
target_host 部署的目標機器,可以是ip,也可以在hosts裡面新增代理(後面補充)
war_path 專案打包完成之後的包所在路徑
deploy_path 部署在目標伺服器上面的路徑
app_name 部署的應用的名稱
tar_name 打包完成之後的壓縮包的名字(這裡不是達成jar,而是壓縮包)

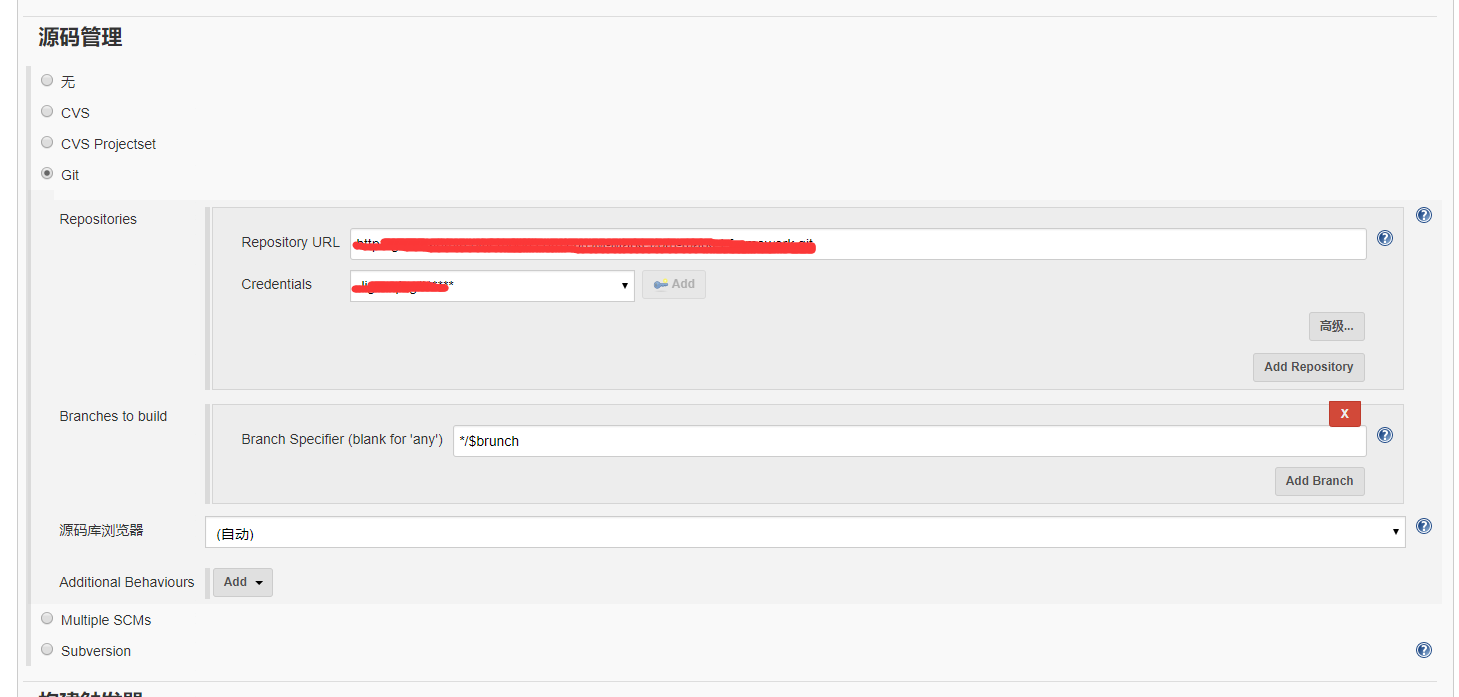
5、在原始碼管理=》勾選git 新增倉庫地址和使用者許可權
6、構建觸發器和構建環境可以根據自己的需要選擇,我這裡沒有選擇
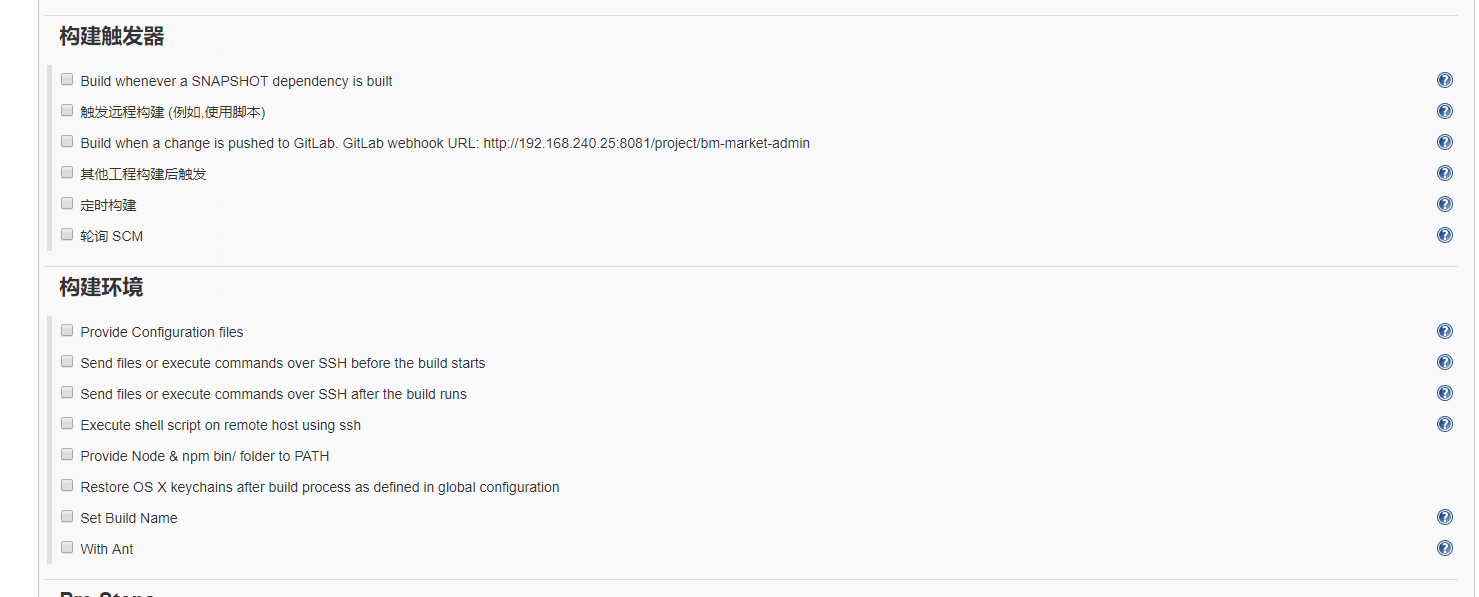
7、Build中新增引數

8、新增shell命令

cd /data/ansible/jenkins-ansible-supervisor-deploy
ansible-playbook -i hosts om-platform.yml --verbose --extra-vars "target_host=$target_host
deploy_path=$deploy_path deploy_war_path=$WORKSPACE/$war_path tar_name=$tar_name app_name=$app_name"
如上是執行的shell命令,這裡解釋兩個檔案,一個是om-platform.yml,內容貼出來看一下:
---
# This playbook deploys a simple standalone Tomcat 7 server.

- hosts: "{{ target_host }}"
  user: appadm

  roles:
    - om-platform-deploy
一個是hosts 也就是host檔案,在上面target_host中配置了別名的話,就需要在此處的hosts檔案中定義:

比如你要部署的節點服務是兩個節點的,那你就可以針對240.62/63新增一個叫bm_mana_11_11_test的別名,那麼部署的時候在target_host引數中新增別名代替就可以一次部署完畢了;
最後儲存,任務就新建完了,當然,如果有其他的需要你可以自己行選擇;
9、在目標伺服器上的部署目錄/home/appadm 下新增init.sh檔案,內容如下:
# init.sh 初始化專案
#!/bin/sh

serverName=$1

if [ ! $serverName ]; then
  echo "請輸入正確的啟動服務包名。。"
else
  #echo "$serverName 正準備啟動,請稍候。。。"
 cd "/home/appadm/$serverName"
 echo "/home/appadm$serverName"
  #./start.sh
   #nohup java -jar  $serverName &
  #echo "the ${serverName} 啟動完成。。。"
fi
一般,我們在部署時,就會操作這個介面來修改引數部署
四、補充說明
這裡要補充說明的是,jenkins的機器和目標伺服器之間是需要做SSH KEY的,關於怎麼完成這一步其實也很簡單,就是生成信任的key,具體操作就由度娘來介紹吧;

