
haproxy實現discuz論壇的動靜分離和負載均衡
阿新 • • 發佈:2018-11-23
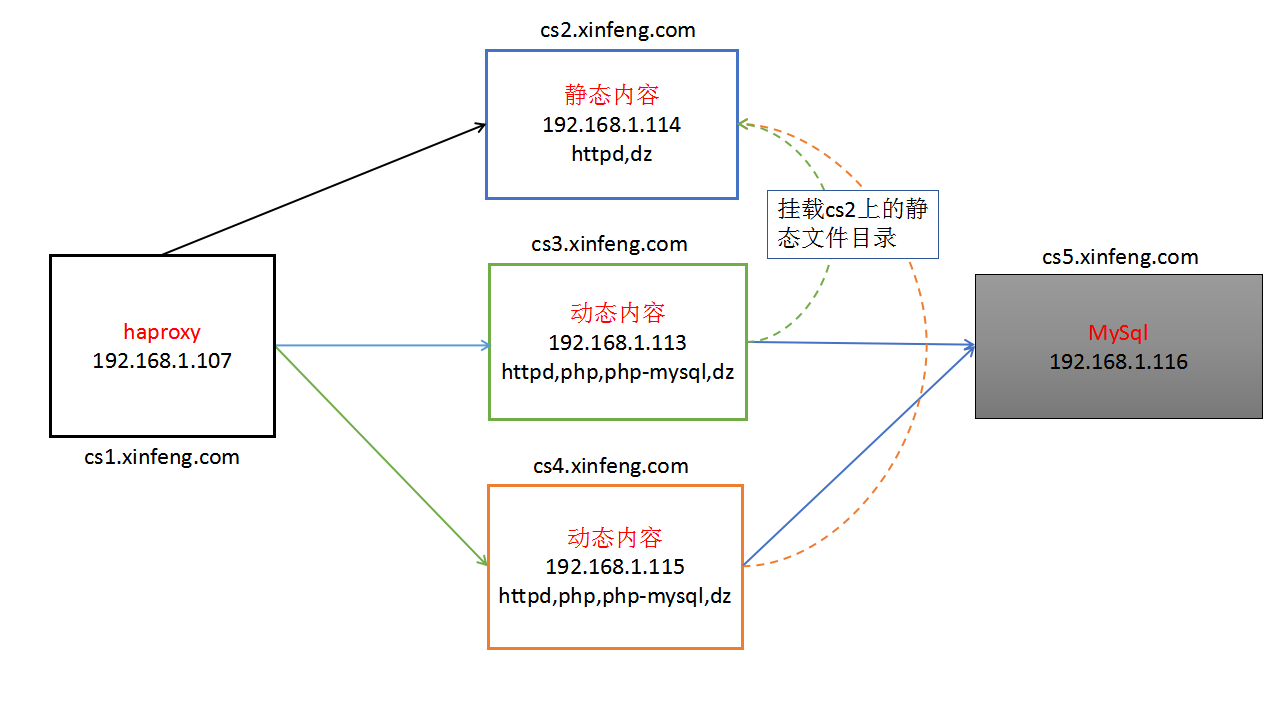
一、在cs2、cs3、cs4上安裝httpd
[[email protected] ~]# yum install httpd

[[email protected] ~]# yum install httpd

[[email protected] ~]# yum install httpd
二、在cs3、cs4上安裝php和php-mysql
[[email protected] ~]# yum install php [[email protected] ~]# yum install php-mysql [[email protected] ~]# yum install php [[email protected] ~]# yum install php-mysql
三、在cs5上安裝mysql
[[email protected] ~]# yum install mariadb-server
四、在cs5上給dz論壇建立資料庫
[[email protected] ~]# systemctl start mariadb [[email protected] ~]# mysql #建立一個discuz用的資料庫,庫名叫dz MariaDB [(none)]> create database dz; #建立並授權賬號dzadmin密碼123321給dz庫,授權範圍為全網 MariaDB [(none)]> grant all privileges on dz.* to[email protected]'%' identified by '123321'; #授權賬號dzadmin密碼123321給dz庫,授權範圍為本地 MariaDB [(none)]> grant all privileges on dz.* to [email protected] identified by '123321'; #重新整理許可權 MariaDB [(none)]> flush privileges;
五、配置cs2、cs3、cs4的httpd
[[email protected] ~]# vim /etc/httpd/conf/httpd.conf
ServerName cs2.xinfeng.com:80    #修改此處
DocumentRoot "/var/×××w/html/upload"    #因為次檔案還不存在,所以會報錯,等裝了dz之後再執行之後的就OK了
[[email protected] ~]# httpd -t
[[email protected] ~]# systemctl start httpd

[[email protected] ~]# vim /etc/httpd/conf/httpd.conf
ServerName cs3.xinfeng.com:80    #修改此處
DocumentRoot "/var/×××w/html/upload"
[[email protected] ~]# httpd -t
[[email protected] ~]# systemctl start httpd

[[email protected] ~]# vim /etc/httpd/conf/httpd.conf
ServerName cs4.xinfeng.com:80    #修改此處
DocumentRoot "/var/×××w/html/upload"
[[email protected] ~]# httpd -t
[[email protected] ~]# systemctl start httpd
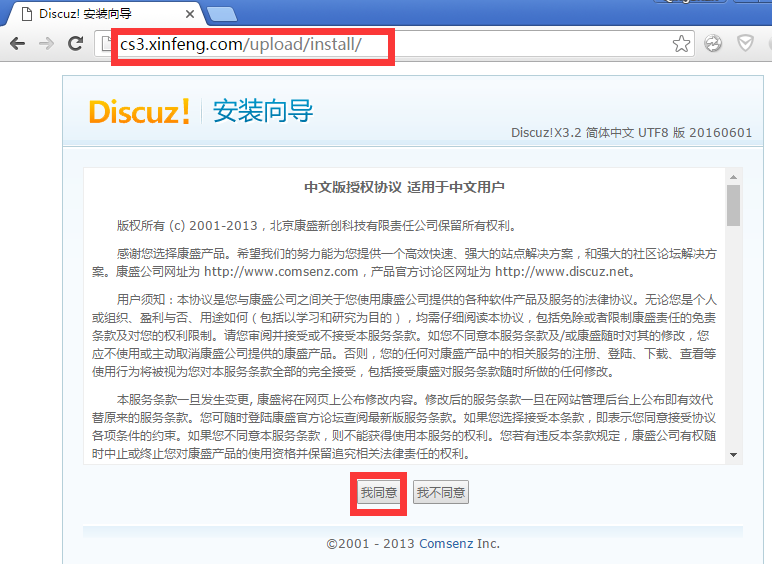
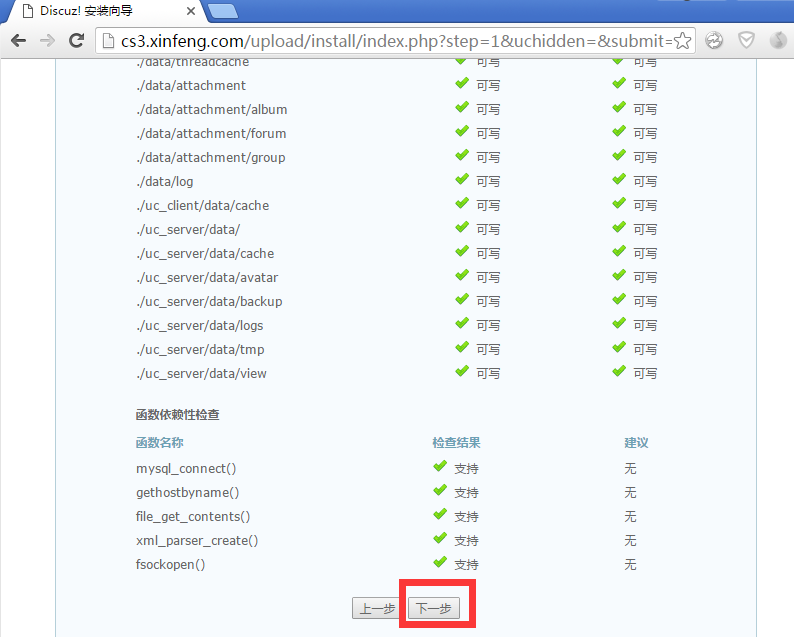
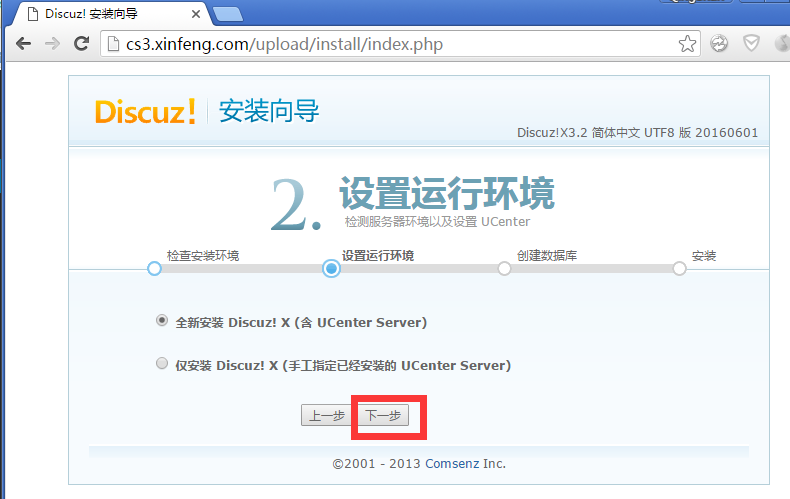
六、在cs3安裝discuz
[[email protected] ~]# wget  http://download.comsenz.com/DiscuzX/3.2/Discuz_X3.2_SC_UTF8.zip
[[email protected] ~]# mkdir Discuz
[[email protected] ~]# unzip -d /root/Discuz Discuz_X3.2_SC_UTF8.zip
[[email protected] ~]# cp -a /root/Discuz/* /var/×××w/html/
[[email protected] ~]# chmod -R 777 /var/×××w/html/upload/*
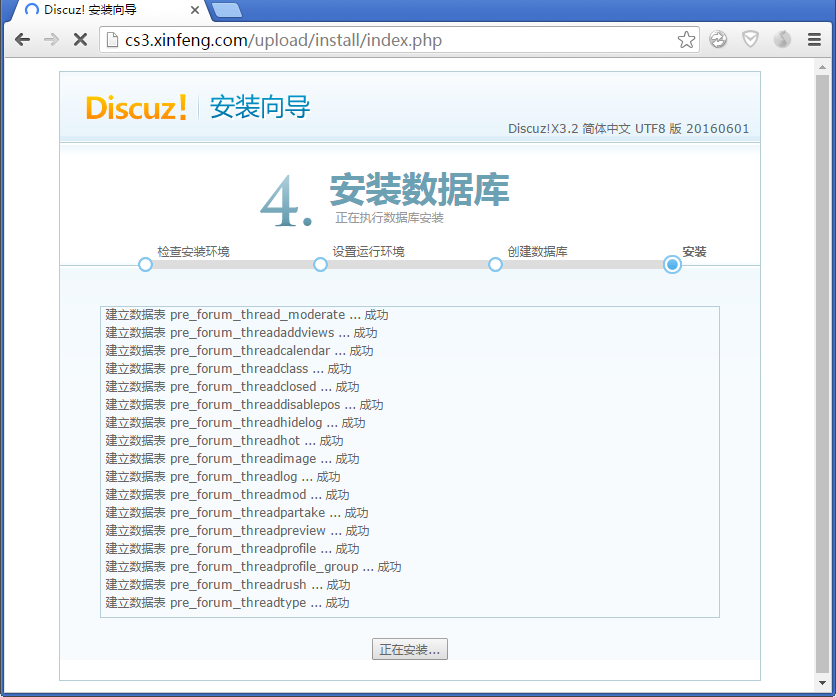
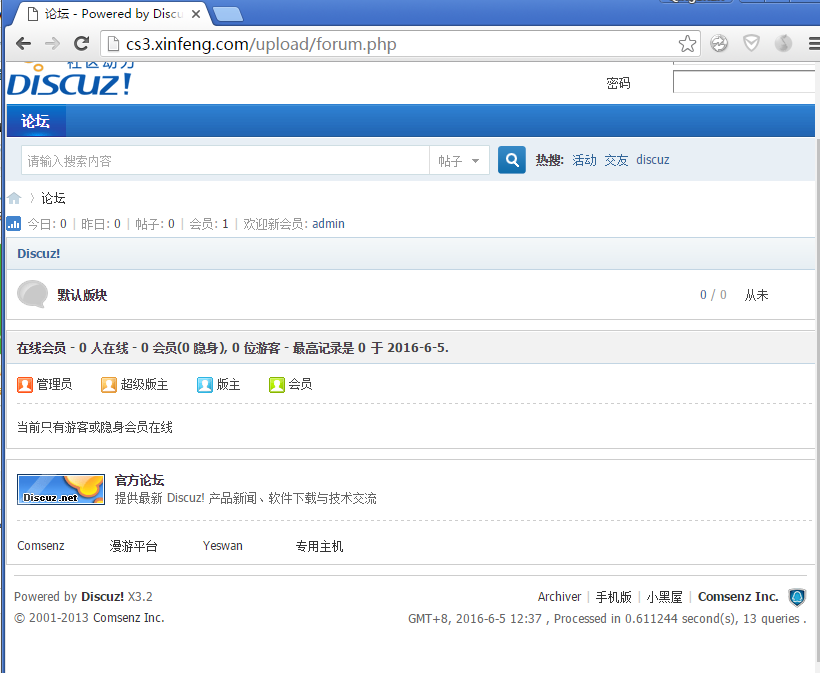
開啟cs3.xinfeng.com安裝
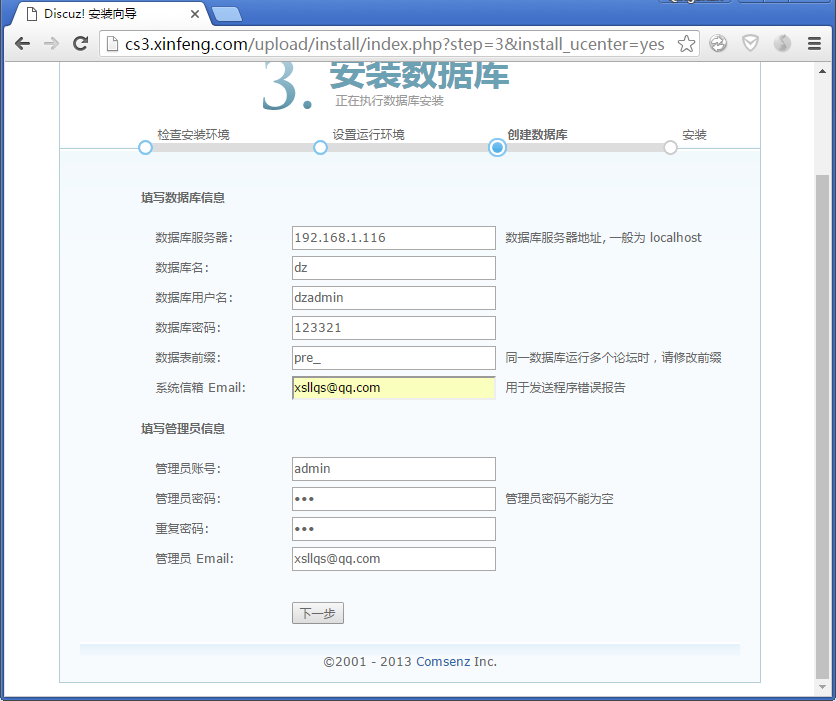
論壇管理員賬號admin,密碼123

七、將cs3上安裝完成後的網站根目錄複製到cs2和cs4上
#複製cs3下的/var/×××w/html所有檔案到cs2/var/×××w/html/下
[[email protected] ~]# scp -r /var/×××w/html/* 192.168.1.114:/var/×××w/html/

#複製cs3下的/var/×××w/html所有檔案到cs4/var/×××w/html/下
[[email protected] ~]# scp -r /var/×××w/html/* 192.168.1.115:/var/×××w/html/
八、將cs3和cs4的靜態檔案存放目錄掛載到cs2下
#/var/×××w/html/upload中需要掛載的目錄如下
data ┄┄┄資料快取及附件
static ┄┄┄靜態檔案
設定cs2為NFS伺服器
[[email protected] ~]# yum install nfs-utils
[[email protected] ~]# yum install rpcbind
[[email protected] ~]# service rpcbind start
[[email protected] ~]# vim /etc/exports
#NFS輸出目錄為data,可以訪問這個目錄的主機為cs3和cs4,許可權為讀寫,訪問uid為0(root),允許超過1024的埠號連線
/var/×××w/html/upload/data/ 192.168.1.113(rw,all_squash,anonuid=0,insecure)
/var/×××w/html/upload/data/ 192.168.1.115(rw,all_squash,anonuid=0,insecure)
#NFS輸出目錄為static,可以訪問這個目錄的主機為cs3和cs4,許可權為讀寫,訪問uid為0(root),允許超過1024的埠號連線
/var/×××w/html/upload/static/ 192.168.1.113(rw,all_squash,anonuid=0,insecure)
/var/×××w/html/upload/static/ 192.168.1.115(rw,all_squash,anonuid=0,insecure)
[[email protected] ~]# service nfs start
#檢視共享狀態
[[email protected] ~]# showmount -e
Export list for cs2.xinfeng.com:
/var/×××w/html/upload/static 192.168.1.115,192.168.1.113
/var/×××w/html/upload/data   192.168.1.115,192.168.1.113
在cs3上掛載
[[email protected] ~]# yum install nfs-utils
[[email protected] ~]# yum install rpcbind
[[email protected] ~]# service rpcbind start
[[email protected] ~]# service nfs start
[[email protected] ~]# mount 192.168.1.114:/var/×××w/html/upload/data/ /var/×××w/html/upload/data/
[[email protected] ~]# mount 192.168.1.114:/var/×××w/html/upload/static/ /var/×××w/html/upload/static/
[[email protected] ~]# showmount -e 192.168.1.114
Export list for 192.168.1.114:
/var/×××w/html/upload/static 192.168.1.115,192.168.1.113
/var/×××w/html/upload/data   192.168.1.115,192.168.1.113
在cs4上掛載
[[email protected] ~]# yum install nfs-utils
[[email protected] ~]# yum install rpcbind
[[email protected] ~]# service rpcbind start
[[email protected] ~]# service nfs start
[[email protected] ~]# mount 192.168.1.114:/var/×××w/html/upload/data/ /var/×××w/html/upload/data/
[[email protected] ~]# mount 192.168.1.114:/var/×××w/html/upload/static/ /var/×××w/html/upload/static/
[[email protected] ~]# showmount -e 192.168.1.114
Export list for 192.168.1.114:
/var/×××w/html/upload/static 192.168.1.115,192.168.1.113
/var/×××w/html/upload/data   192.168.1.115,192.168.1.113
九、在cs1上安裝配置haproxy
開起日誌功能
[[email protected] ~]# vim /etc/rsyslog.conf
#開啟或增加一下幾行,讓udp514埠處於監聽狀態,並將日誌紀錄到指定檔案中
$ModLoad imudp
$UDPServerRun 514
local2.*                                                /var/log/haproxy.log
[[email protected] ~]# systemctl restart rsyslog.service
[[email protected] ~]# ss -unl | grep 514
UNCONN     0      0            *:514                      *:*
UNCONN     0      0           :::514                     :::*
配置haproxy
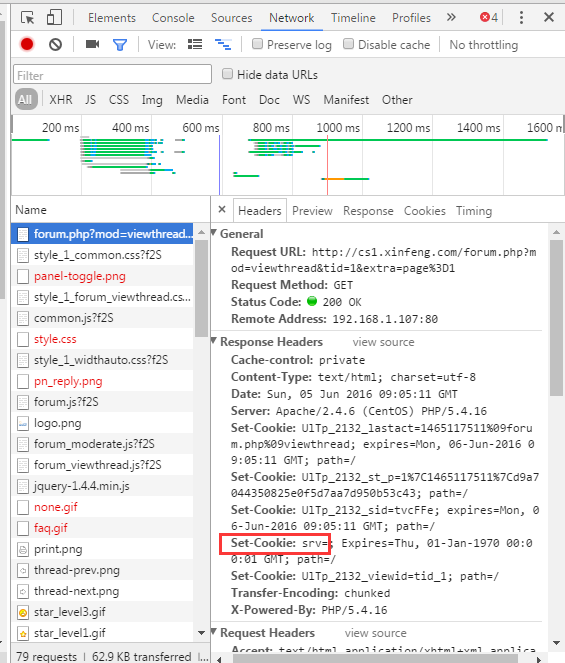
[[email protected] ~]# yum install haproxy
[[email protected] ~]# vim /etc/haproxy/haproxy.cfg
#---------------------------------------------------------------------
global    #全域性配置

    log         127.0.0.1 local2    #日誌紀錄位置

    chroot      /var/lib/haproxy    #haproxy的工作目錄
    pidfile     /var/run/haproxy.pid    #pid檔案位置
    maxconn     4000                    #最大連線數
    user        haproxy                #執行時使用的使用者身份
    group       haproxy                #執行時使用的組身份
    daemon                            #啟動為守護程序,不加此處執行在前臺

    stats socket /var/lib/haproxy/stats    #本地訪問stats統計資訊時以套接字方式通訊

defaults    #預設配置
    mode                    http    #已http模式執行
    log                     global    #預設日誌為全域性配置中日誌的設定
    option                  httplog
    option                  dontlognull
    option http-server-close
    option forwardfor       except 127.0.0.0/8    #除本機外所有發往伺服器的請求首部中加入“X-Forwarded-For”首部
    option                  redispatch
    retries                 3
    timeout http-request    10s
    timeout queue           1m
    timeout connect         10s
    timeout client          1m
    timeout server          1m
    timeout http-keep-alive 10s
    timeout check           10s
    maxconn                 3000    #前端最大併發連線數

listen static    #設定統計報告頁面
    bind *:9000    #監聽在本機9000埠
    stats enable    #開啟
    stats hide-version    #隱藏haproxy版本
    stats uri /hadzadmin?stats    #統計頁面路徑
    stats realm "HAProxy/ Static"    #開啟統計頁面的認證功能
    stats auth hasts:123            #進入統計頁面所使用的賬號hasts和密碼123
    stats admin if TRUE            #條件滿足時進入管理級別

frontend  dz    #前端設定
    bind *:80    #監聽在80埠
    acl url_static path_beg -i /data /static /images /javascript /stylesheets    #url開頭為這些的靜態內容
    acl url_static path_end -i .jpg .gif .png .css .js .html .ico    #url結尾帶為這些的靜態內容
    use_backend staser  if url_static    #如果靜態內容符合url_static的條件,就排程到staser中的伺服器
    default_backend             dyser    #其他預設排程到dyser中的伺服器

backend dyser    #後端動態內容伺服器設定
    cookie srv insert nocache    #在cookie中插入srv字串防止登入資訊丟失
    balance     roundrobin    #排程演算法為輪詢
    server      cs3 192.168.1.113:80 check
    server      cs4 192.168.1.115:80 check

backend staser    #後端靜態內容伺服器設定
    balance     roundrobin
    server  cs1 192.168.1.114:80 check

[[email protected] ~]# systemctl start haproxy
修改cs2、cs3、cs4的http配置檔案,讓他們能收到真實訪問的ip
[[email protected] ~]# vim /etc/httpd/conf/httpd.conf
#修改一下內容
    LogFormat "%{X-Forwarded-For}i %l %u %t \"%r\" %>s %b \"%{Referer}i\" \"%{User-Agent}i\"" combined
[[email protected] ~]# service httpd reload
#cs3和cs4執行同樣的操作
十、測試
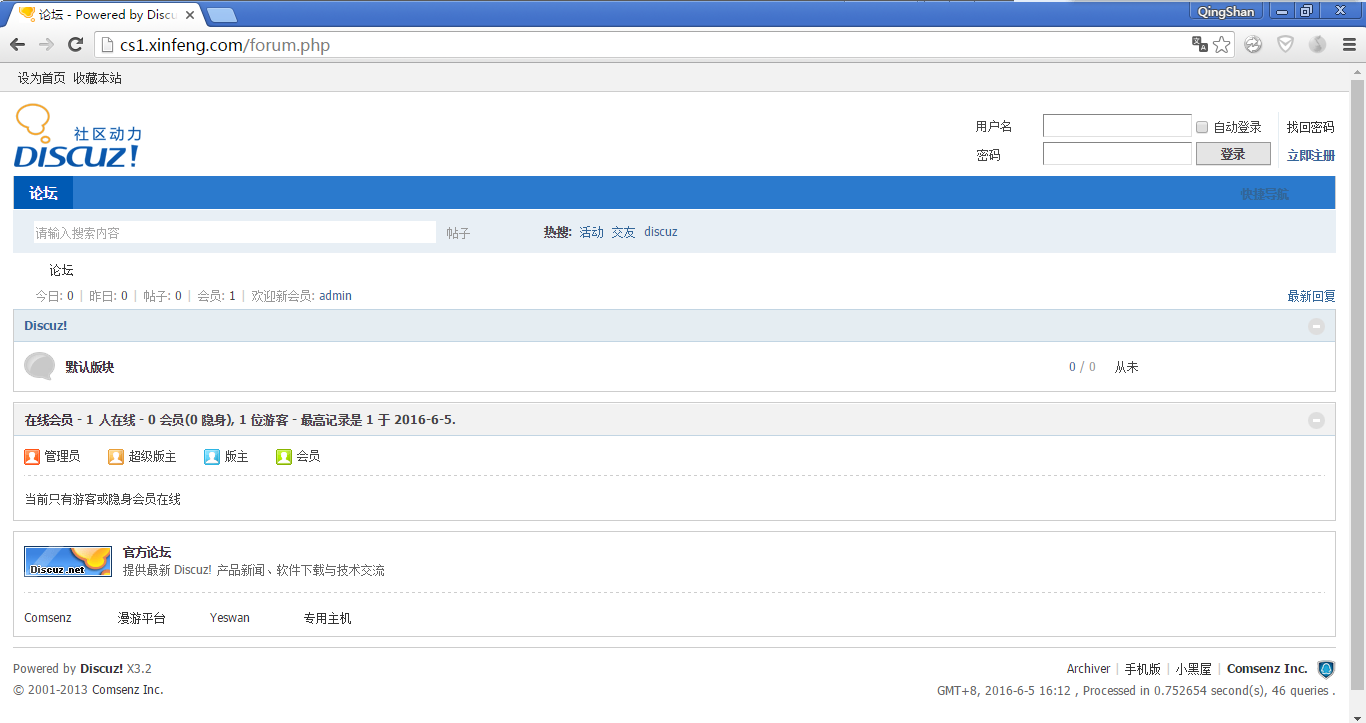
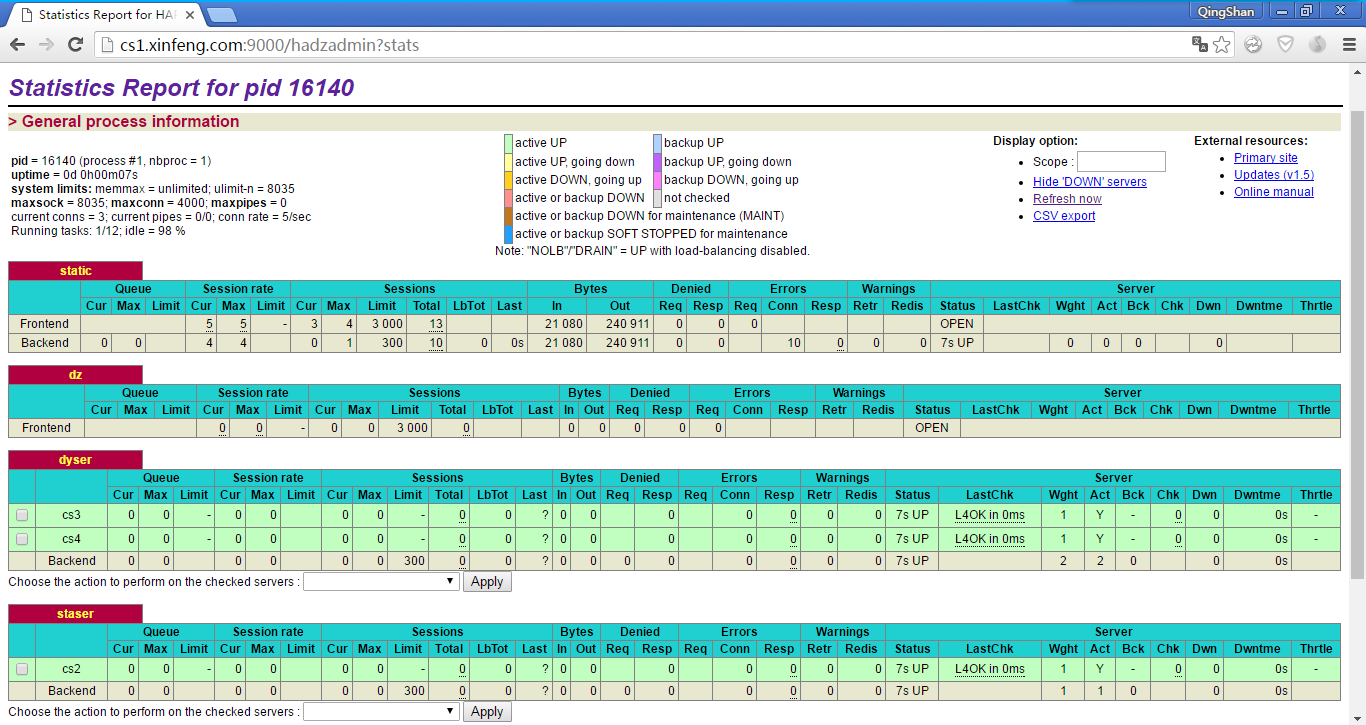

分別看下cs2,cs3,cs4最近的訪問日誌
[[email protected] ~]# tail -1 /var/log/httpd/access_log
192.168.1.110 - - [05/Jun/2016:16:36:12 +0800] "GET /data/attachment/forum/201606/05/161843j4au463pthh432zf.png HTTP/1.1" 304 - "-" "Mozilla/5.0 (Windows NT 6.1; WOW64) AppleWebKit/537.36 (KHTML, like Gecko) Chrome/38.0.2125.122 Safari/537.36 SE 2.X MetaSr 1.0"
[[email protected] uc_server]# tail -1 /var/log/httpd/access_log
192.168.1.110 - - [05/Jun/2016:16:33:07 +0800] "GET /misc.php?mod=patch&action=ipnotice&_r=0.40765136777967004&inajax=1&ajaxtarget=ip_notice HTTP/1.1" 200 65 "http://cs1.xinfeng.com/forum.php?mod=viewthread&tid=1&extra=page%3D1" "Mozilla/5.0 (Windows NT 6.1; WOW64) AppleWebKit/537.36 (KHTML, like Gecko) Chrome/50.0.2661.102 Safari/537.36
[[email protected] data]# tail -1 /var/log/httpd/access_log
192.168.1.110 - - [05/Jun/2016:16:33:07 +0800] "GET /misc.php?mod=patch&action=pluginnotice&inajax=1&ajaxtarget=plugin_notice HTTP/1.1" 200 65 "http://cs1.xinfeng.com/forum.php?mod=viewthread&tid=1&extra=page%3D1" "Mozilla/5.0 (Windows NT 6.1; WOW64) AppleWebKit/537.36 (KHTML, like Gecko) Chrome/50.0.2661.102 Safari/537.36"