Redis介紹、安裝部署、操作
一、Redis介紹
Redis是NoSql的一種。
NoSql,全名:Not Only Sql,是一種非關係型資料庫,它不能替代關係弄資料庫,只是關係型資料庫的一個補充,是可以解決高併發、高可用、高擴充套件、大資料儲存等一系列問題而產生的資料庫解決方案。
NoSql有以下4種分類:鍵值(Key-Value)儲存資料庫、列儲存資料庫、文件型資料庫、圖形(Graph)資料庫。而Redis屬於第一種:鍵值(Key-Value)儲存資料庫。
Redis是使用c語言開發的一個高效能鍵值資料庫,即通過一些鍵值型別來儲存資料。Redis支援的鍵值型別有:String字元型別、map雜湊型別、list列表型別、set集合型別、sortedset有序集合型別。
redis的應用場景如下:二、Redis基本知識
快取(資料查詢、短連線、新聞內容、商品內容等等)、分散式叢集架構中的session分離、聊天室的線上好友列表、任務佇列。
(秒殺、搶購、12306等等)、應用排行榜、網站訪問統計、資料過期處理(可以精確到毫秒)。
作為快取的應用場景是最多的。
1、Redis的資料型別: 字串、列表(lists)、集合(sets)、有序集合(sorts sets)、雜湊表(hashs) 2、Redis和memcache相比的獨特之處: (1)redis可以用來做儲存(storge)、而memcache是來做快取(cache)。這個特點主要是因為其有“持久化”功能 (2)儲存的資料有“結構”,對於memcache來說,儲存的資料,只有一種型別——“字串”,而redis則可以儲存字串、連結串列、集合、有序集合、哈序結構 3、持久化的兩種方式: Redis將資料儲存於記憶體中,或被配置為使用虛擬記憶體。 實現資料持久化的兩種方式:(1)使用截圖的方式,將記憶體中的資料不斷寫入磁碟(效能高,但可能會引起一定程度的資料丟失) (2)使用類似mysql的方式,記錄每次更新的日誌 4、Redis的主從同步:對提高讀取效能非常有益 5、Redis服務端的預設埠是6379
三、redis安裝部署
一般redis安裝於linux伺服器,故本例介紹的是Linux下的安裝,也支援window或mac,請自行百度安裝方法。
我這裡使用的Linux系統是CentOS release 6.5。
1、Redis下載
可以到redis的官網找到各個Redis版本的下載地址,如:http://download.redis.io/releases https://redis.io/download
我這裡用的是:redis-5.0.2.tar.gz
上傳、解壓過程略
我的路經:/opt/redis/redis-5.0.2
2、編譯安裝Redis
進入redis原始碼:
cd /opt/redis/redis-5.0.2
[[email protected] redis-5.0.2]# ll
total 248
-rw-rw-r--.  1 root root 85327 Nov 22 18:26 00-RELEASENOTES
-rw-rw-r--.  1 root root    53 Nov 22 18:26 BUGS
-rw-rw-r--.  1 root root  1894 Nov 22 18:26 CONTRIBUTING
-rw-rw-r--.  1 root root  1487 Nov 22 18:26 COPYING
drwxrwxr-x.  6 root root  4096 Nov 22 18:26 deps
-rw-rw-r--.  1 root root    11 Nov 22 18:26 INSTALL
-rw-rw-r--.  1 root root   151 Nov 22 18:26 Makefile
-rw-rw-r--.  1 root root  4223 Nov 22 18:26 MANIFESTO
-rw-rw-r--.  1 root root 20555 Nov 22 18:26 README.md
-rw-rw-r--.  1 root root 62155 Nov 22 18:26 redis.conf
-rwxrwxr-x.  1 root root   275 Nov 22 18:26 runtest
-rwxrwxr-x.  1 root root   280 Nov 22 18:26 runtest-cluster
-rwxrwxr-x.  1 root root   281 Nov 22 18:26 runtest-sentinel
-rw-rw-r--.  1 root root  9710 Nov 22 18:26 sentinel.conf
drwxrwxr-x.  3 root root  4096 Nov 22 18:26 src
drwxrwxr-x. 10 root root  4096 Nov 22 18:26 tests
drwxrwxr-x.  8 root root  4096 Nov 22 18:26 utils
[[email protected] redis-5.0.2]#
使用make命令編譯Redis需要c語言環境,CentOS自帶c語言環境,若是使用其他Linux系統中沒有c語言環境,則需要安裝。
[[email protected] redis-5.0.2]# make
cd src && make all
make[1]: Entering directory `/opt/redis/redis-5.0.2/src'
    CC Makefile.dep
make[1]: Leaving directory `/opt/redis/redis-5.0.2/src'
make[1]: Entering directory `/opt/redis/redis-5.0.2/src'
rm -rf redis-server redis-sentinel redis-cli redis-benchmark redis-check-rdb redis-check-aof *.o *.gcda *.gcno *.gcov redis.info lcov-html Makefile.dep dict-benchmark
(cd ../deps && make distclean)
make[2]: Entering directory `/opt/redis/redis-5.0.2/deps'
(cd hiredis && make clean) > /dev/null || true
(cd linenoise && make clean) > /dev/null || true
(cd lua && make clean) > /dev/null || true
(cd jemalloc && [ -f Makefile ] && make distclean) > /dev/null || true
(rm -f .make-*)
make[2]: Leaving directory `/opt/redis/redis-5.0.2/deps'
(rm -f .make-*)
......(略)
...... (略)
Hint: It's a good idea to run 'make test' ;)

make[1]: Leaving directory `/opt/redis/redis-5.0.2/src'
[[email protected] redis-5.0.2]#
編譯過後,就是安裝了,安裝Redis的命令如下:
make install PREFIX=/opt/redis
[[email protected] redis-5.0.2]# make install PREFIX=/opt/redis
cd src && make install
make[1]: Entering directory `/opt/redis/redis-5.0.2/src'

Hint: It's a good idea to run 'make test' ;)

    INSTALL install
    INSTALL install
    INSTALL install
    INSTALL install
    INSTALL install
make[1]: Leaving directory `/opt/redis/redis-5.0.2/src'
[[email protected] redis-5.0.2]#
該命令中,前面的”make install PREFIX=”是固定的,而”/opt/redis”是Redis的安裝目錄,一般就這麼寫,如若需要安裝在其他地方,只需將此路徑更換即可。
檢視Redis是否安裝成功
[[email protected] redis-5.0.2]# cd /opt/redis/
[[email protected] redis]# ll
total 1920
drwxr-xr-x. 2 root root    4096 Nov 22 20:38 bin
四、Redis啟動與停止
Redis有兩種啟動,分別是:前端啟動、後端啟動。要啟動Redis,就需要到Redis的bin目錄下執行啟動命令,先看看bin目錄結構:
[[email protected] redis]# cd bin/
[[email protected] bin]# ll
total 54316
-rwxr-xr-x. 1 root root  9200155 Nov 22 20:38 redis-benchmark
-rwxr-xr-x. 1 root root 12251871 Nov 22 20:38 redis-check-aof
-rwxr-xr-x. 1 root root 12251871 Nov 22 20:38 redis-check-rdb
-rwxr-xr-x. 1 root root  9564766 Nov 22 20:38 redis-cli     --->客戶端
lrwxrwxrwx. 1 root root       12 Nov 22 20:38 redis-sentinel -> redis-server
-rwxr-xr-x. 1 root root 12251871 Nov 22 20:38 redis-server    --->服務端
[[email protected] bin]#
1、前端啟動與停止
1)前端啟動的命令:
[[email protected] bin]# ./redis-server
啟動後可以看到Redis的啟動埠為6379(預設),程序id是26765,同時,前端啟動Redis後,終端將進入Redis控制檯,沒辦法繼續別的Linux命令,即這個終端視窗就”廢了”,只能輸入Redis自己的命令。下圖:Port: 6379 PID: 26765
[[email protected] bin]# ./redis-server
26765:C 22 Nov 2018 20:46:31.066 # oO0OoO0OoO0Oo Redis is starting oO0OoO0OoO0Oo
26765:C 22 Nov 2018 20:46:31.066 # Redis version=5.0.2, bits=64, commit=00000000, modified=0, pid=26765, just started
26765:C 22 Nov 2018 20:46:31.066 # Warning: no config file specified, using the default config. In order to specify a config file use ./redis-server /path/to/redis.conf
26765:M 22 Nov 2018 20:46:31.067 * Increased maximum number of open files to 10032 (it was originally set to 1024).
                _._
           _.-``__ ''-._
      _.-``    `.  `_.  ''-._           Redis 5.0.2 (00000000/0) 64 bit
  .-`` .-```.  ```\/    _.,_ ''-._
 (    '      ,       .-`  | `,    )     Running in standalone mode
 |`-._`-...-` __...-.``-._|'` _.-'|     Port: 6379
 |    `-._   `._    /     _.-'    |     PID: 26765
  `-._    `-._  `-./  _.-'    _.-'
 |`-._`-._    `-.__.-'    _.-'_.-'|
 |    `-._`-._        _.-'_.-'    |           http://redis.io
  `-._    `-._`-.__.-'_.-'    _.-'
 |`-._`-._    `-.__.-'    _.-'_.-'|
 |    `-._`-._        _.-'_.-'    |
  `-._    `-._`-.__.-'_.-'    _.-'
      `-._    `-.__.-'    _.-'
          `-._        _.-'
              `-.__.-'

26765:M 22 Nov 2018 20:46:31.104 # WARNING: The TCP backlog setting of 511 cannot be enforced because /proc/sys/net/core/somaxconn is set to the lower value of 128.
26765:M 22 Nov 2018 20:46:31.104 # Server initialized
26765:M 22 Nov 2018 20:46:31.104 # WARNING overcommit_memory is set to 0! Background save may fail under low memory condition. To fix this issue add 'vm.overcommit_memory = 1' to /etc/sysctl.conf and then reboot or run the command 'sysctl vm.overcommit_memory=1' for this to take effect.
26765:M 22 Nov 2018 20:46:31.105 # WARNING you have Transparent Huge Pages (THP) support enabled in your kernel. This will create latency and memory usage issues with Redis. To fix this issue run the command 'echo never > /sys/kernel/mm/transparent_hugepage/enabled' as root, and add it to your /etc/rc.local in order to retain the setting after a reboot. Redis must be restarted after THP is disabled.
26765:M 22 Nov 2018 20:46:31.105 * Ready to accept connections
2)前端啟動的關閉命令:
強制關閉:Ctrl+c

正常關閉:[[email protected] bin]# ./redis-cli shutdown
對這兩個命令進行對比:
強制關閉只需在Redis控制檯直接執行即可(redis可能會丟失部分資料)。
正常關閉需要另開一個終端窗口才可執行(redis不會丟失資料,推薦使用)。
[[email protected] bin]# ./redis-cli shutdown
26765:M 22 Nov 2018 20:52:43.151 # User requested shutdown...
26765:M 22 Nov 2018 20:52:43.151 * Saving the final RDB snapshot before exiting.
26765:M 22 Nov 2018 20:52:43.161 * DB saved on disk
26765:M 22 Nov 2018 20:52:43.161 # Redis is now ready to exit, bye bye...
[[email protected] bin]#
需要注意一點,一旦前端啟動的關閉命令執行,則redis控制檯關閉,redis服務也會停掉。
2、後端啟動與停止
後端啟動是我們開發中絕對會用到的方式,但在使用後端啟動命令之後,需要做如下幾步配置:
1)後端啟動的配置:
第一步,需要把redis原始碼目錄下的redis.conf檔案複製到redis安裝目錄的bin目錄下。
[[email protected] bin]# cp /opt/redis/redis-5.0.2/redis.conf /opt/redis/bin/
[[email protected] bin]# ll
total 54388
-rw-r--r--. 1 root root       92 Nov 22 20:52 dump.rdb
-rwxr-xr-x. 1 root root  9200155 Nov 22 20:38 redis-benchmark
-rwxr-xr-x. 1 root root 12251871 Nov 22 20:38 redis-check-aof
-rwxr-xr-x. 1 root root 12251871 Nov 22 20:38 redis-check-rdb
-rwxr-xr-x. 1 root root  9564766 Nov 22 20:38 redis-cli
-rw-r--r--. 1 root root    62155 Nov 22 20:57 redis.conf
lrwxrwxrwx. 1 root root       12 Nov 22 20:38 redis-sentinel -> redis-server
-rwxr-xr-x. 1 root root 12251871 Nov 22 20:38 redis-server
[[email protected] bin]#
第二步,修改redis.conf檔案,將daemonize的值改為yes後儲存。
[[email protected] bin]# vim redis.conf
# By default Redis does not run as a daemon. Use 'yes' if you need it.
# Note that Redis will write a pid file in /var/run/redis.pid when daemonized.
daemonize no

--->

# By default Redis does not run as a daemon. Use 'yes' if you need it.
# Note that Redis will write a pid file in /var/run/redis.pid when daemonized.
daemonize yes
如果發現內容太多,可以通過命令來查詢要修改的內容:
/demonize no   --->向下查詢
?demonize no   --->向上查詢
經過上面配置後,以後就無需再配置,下面就可以通過命令讓redis後臺啟動了。
2)後端啟動的命令:
[[email protected] bin]# ./redis-server redis.conf
[[email protected] bin]# ./redis-server redis.conf
27131:C 22 Nov 2018 21:09:41.117 # oO0OoO0OoO0Oo Redis is starting oO0OoO0OoO0Oo
27131:C 22 Nov 2018 21:09:41.117 # Redis version=5.0.2, bits=64, commit=00000000, modified=0, pid=27131, just started
27131:C 22 Nov 2018 21:09:41.117 # Configuration loaded
[[email protected] bin]#
後端啟動命令加了” redis.conf”引數,讓redis根據這個配置檔案的配置執行。
在啟動完redis後臺,終端不會進入redis控制檯,這就是將redis執行後臺
我們可以查檢視系統現在是不是有redis的程序:
[[email protected] bin]# ps -aux | grep redis
Warning: bad syntax, perhaps a bogus '-'? See /usr/share/doc/procps-3.2.8/FAQ
root     27132  0.1  0.4 152416  7796 ?        Ssl  21:09   0:00 ./redis-server 127.0.0.1:6379
root     27153  0.0  0.0 103252   840 pts/1    S+   21:10   0:00 grep redis
[[email protected] bin]#
3)後端啟動的關閉命令:
強制關閉:[[email protected] bin]# kill -9 程序id

正常關閉:[[email protected] bin]# ./redis-cli shutdown
專案中,建議使用正常關閉。
因為redis作為快取來使用的話,將資料儲存到記憶體中,如果使用正常關閉,則會將記憶體資料持久化到本地之後,再關閉。如果強制關閉,則不會進行持久化操作,可能會造成部分資料丟失。
五、Redis客戶端
1、redis自帶客戶端
在前面介紹redis安裝目錄下bin目錄的結構時,就已經標記出了redis的客戶端,它就是redis-cli。
這個客戶端有兩個常用的功能:
- 用來正常關閉redis服務。
- 讓終端進入redis控制檯(後臺執行redis的場景下用到)。
1)啟動啟動客戶端命令:
[[email protected] bin]# ./redis-cli -h 127.0.0.1 -p 6379
-h:指定訪問的redis伺服器的ip地址
-p:指定訪問的redis伺服器的port埠
如果使用的ip地址與埠都是預設的,則:
[[email protected] bin]# ./redis-cli
使用預設配置:預設的ip【127.0.0.1】,預設的port【6379】
進入客戶端:
[[email protected] bin]# ./redis-cli -h 127.0.0.1 -p 6379
127.0.0.1:6379>
2)關閉/退出客戶端
ctrl+c

127.0.0.1:6379> quit
要關閉該客戶端,使用上述兩個命令中任意一個均可,都不會影響redis資料的儲存。
2、圖形介面客戶端
有一個redis的圖形介面客戶端軟體,名為redis-destop-manager。
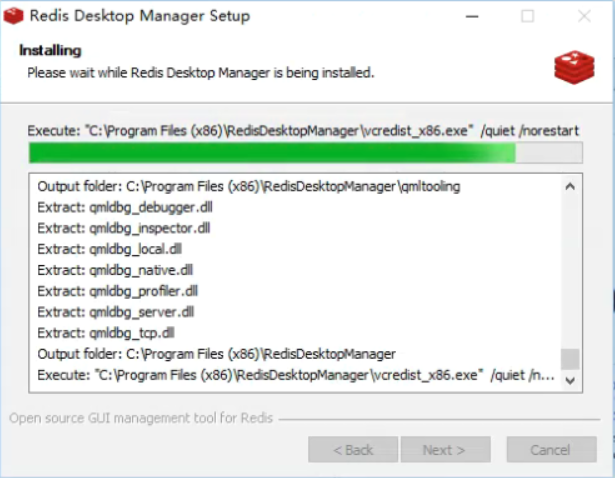
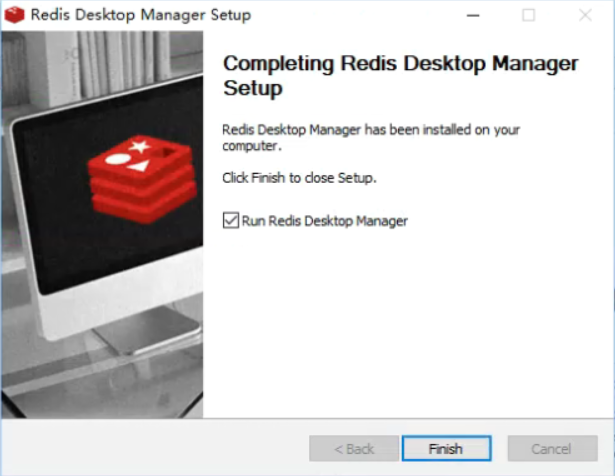
支援Windows、Mac OS X、Linux,請根據自己的電腦系統選擇下載,這裡以windows為例,簡單說下這軟體的使用,安裝很簡單,一路下一步即可,安裝後開啟該應用。
下載 https://redisdesktop.com/download,百度網盤:https://pan.baidu.com/s/1iM1kIwahhs9vV-mAQLV41A
redis-desktop-manager-0.8.8.384.exe 傻瓜式安裝,點選下一步就行。


1)開啟redis伺服器連線配置

2)新增redis伺服器連線並測試是否成功連線

