0377-如何在Redhat7.4安裝CDH6.0
Fayson的github: https://github.com/fayson/cdhproject
推薦關注微信公眾號:“Hadoop實操”,ID:gh_c4c535955d0f,或者掃描文末二維碼。
1.文件編寫目的
Cloudera在前天8月30日,對外宣佈正式釋出Cloudera Enterprise 6,相關介紹可以參考Fayson昨天的文章《Cloudera Enterprise 6正式釋出》。本文件Fayson主要描述如何在Redhat7.4安裝CDH6.0。CDH6與CDH5的安裝步驟一致,主要包括以下四部分:
-
安全前置準備,包括安裝作業系統、關閉防火牆、同步伺服器時鐘等;
-
外部資料庫如MySQL安裝
-
安裝Cloudera Manager;
-
安裝CDH叢集;
請務必注意CDH6的安裝前置條件包括如下:
外部資料庫支援:
-
MySQL 5.7或更高
-
MariaDB 5.5或更高
-
PostgreSQL 8.4或更高
-
Oracle 12c或更高
JDK
- Oracle JDK1.8,將不再支援JDK1.7
作業系統支援
-
RHEL 6.8或更高
-
RHEL 7.2或更高
-
SLES 12 SP2或更高
-
Ubuntu 16或更高
本次Fayson的測試環境為
-
CM和CDH版本為6.0
-
Redhat7.4
-
JDK1.8.0_141
-
MariaDB-5.5.56
-
root使用者安裝
2.前置準備
2.1.hostname及hosts配置
叢集中各個節點之間能互相通訊使用靜態IP地址。IP地址和主機名通過/etc/hosts配置,主機名通過/etc/hostname進行配置。
以cm節點(172.31.6.83)為例:
- hostname配置
/etc/hostname檔案如下:
ip-172-31-6-83.ap-southeast-1.compute.internal
或者你可以通過命令修改立即生效
[[email protected] ~]$ hostnamectl set-hostname ip-172-31-6-83.ap-southeast-1.compute.internal
注意:這裡修改hostname跟REDHAT6的區別
- hosts配置
/etc/hosts檔案如下:
127.0.0.1   localhost localhost.localdomain localhost4 localhost4.localdomain4
::1         localhost localhost.localdomain localhost6 localhost6.localdomain6

172.31.6.83 ip-172-31-6-83.ap-southeast-1.compute.internal
172.31.12.142 ip-172-31-12-142.ap-southeast-1.compute.internal
172.31.9.113 ip-172-31-9-113.ap-southeast-1.compute.internal
172.31.4.105 ip-172-31-4-105.ap-southeast-1.compute.internal
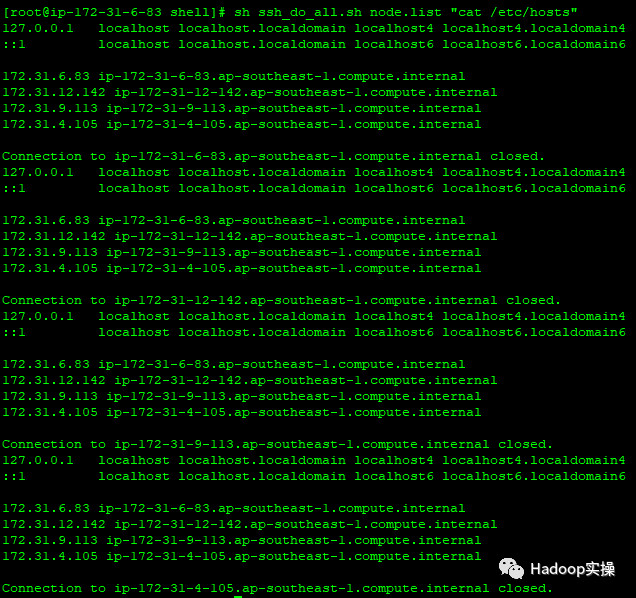
以上兩步操作,在叢集中其它節點做相應配置。確認需要安裝的4臺主機的hosts檔案:
2.2.禁用SELinux
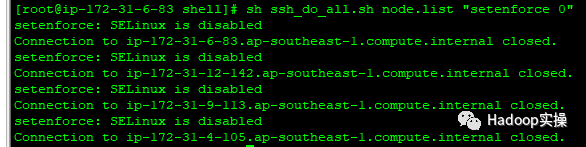
在所有節點執行setenforce 0 命令,此處使用批處理shell執行:
[[email protected] shell]# sh ssh_do_all.sh node.list "setenforce 0"
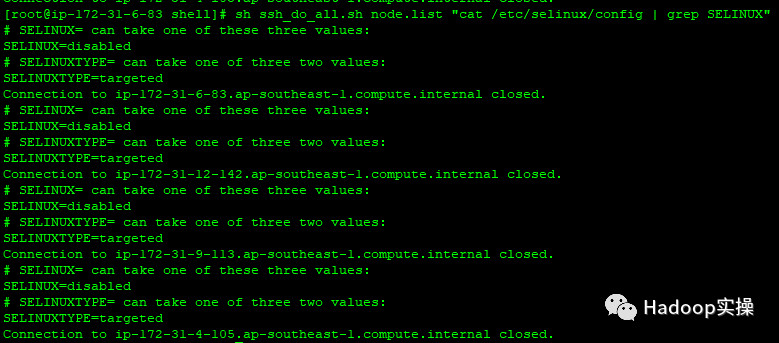
叢集所有節點修改/etc/selinux/config檔案如下:
# This file controls the state of SELinux on the system.
# SELINUX= can take one of these three values:
#     enforcing - SELinux security policy is enforced.
#     permissive - SELinux prints warnings instead of enforcing.
#     disabled - No SELinux policy is loaded.
SELINUX=disabled
# SELINUXTYPE= can take one of three two values:
#     targeted - Targeted processes are protected,
#     minimum - Modification of targeted policy. Only selected processes are protected.
#     mls - Multi Level Security protection.
SELINUXTYPE=targeted
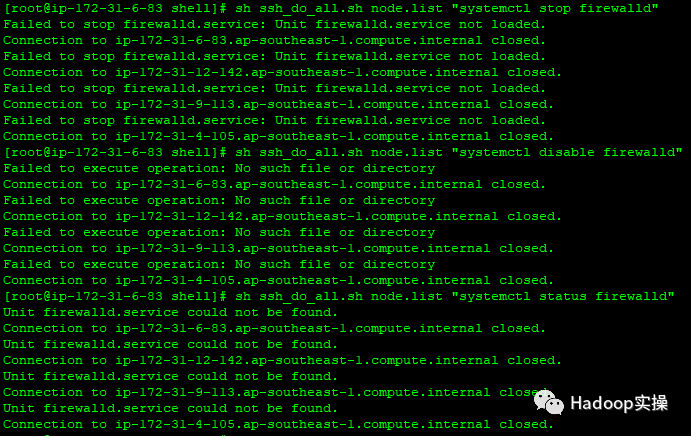
2.3.關閉防火牆
叢集所有節點執行 systemctl stop命令,此處通過shell批量執行命令如下:
[[email protected] shell]# sh ssh_do_all.sh node.list "systemctl stop firewalld"
[[email protected] shell]# sh ssh_do_all.sh node.list "systemctl disable firewalld"
[[email protected] shell]# sh ssh_do_all.sh node.list "systemctl status firewalld"
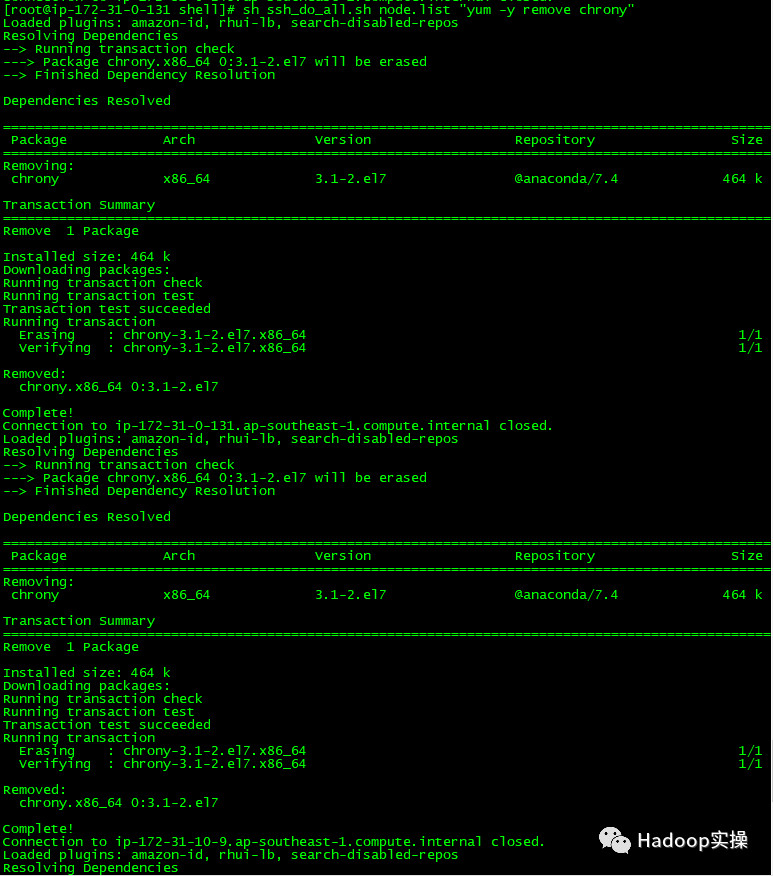
2.4.叢集時鐘同步
在Redhat7.x的作業系統上,已經預設的安裝了chrony,我們這裡先解除安裝chrony,然後安裝ntp。使用ntp來配置各臺機器的時鐘同步,將cm(172.31.6.83)服務作為本地ntp伺服器,其它3臺伺服器與其保持同步。
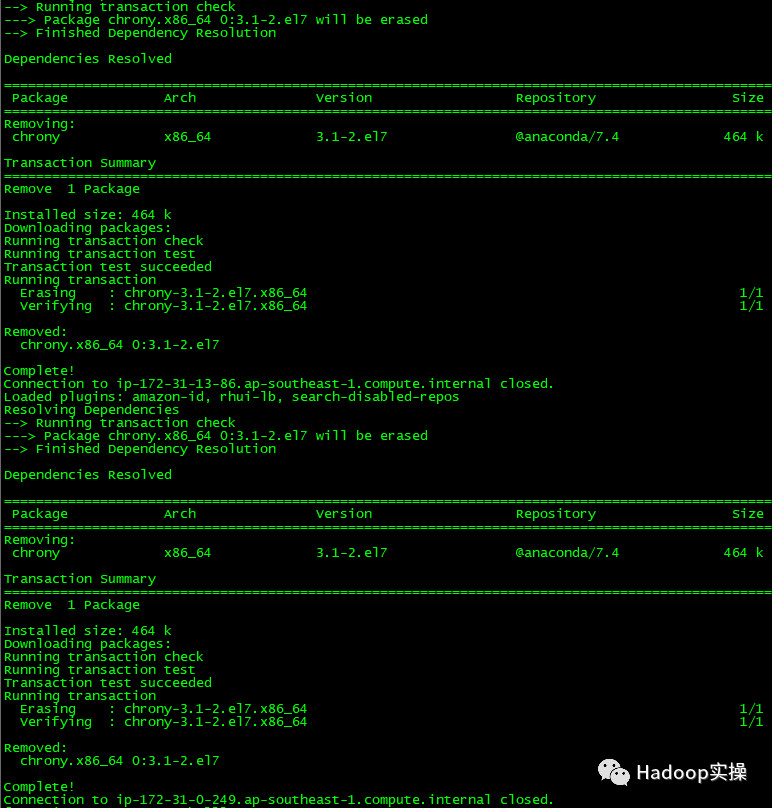
1.所有機器解除安裝chrony
[[email protected] shell]# sh ssh_do_all.sh node.list "yum -y remove chrony"
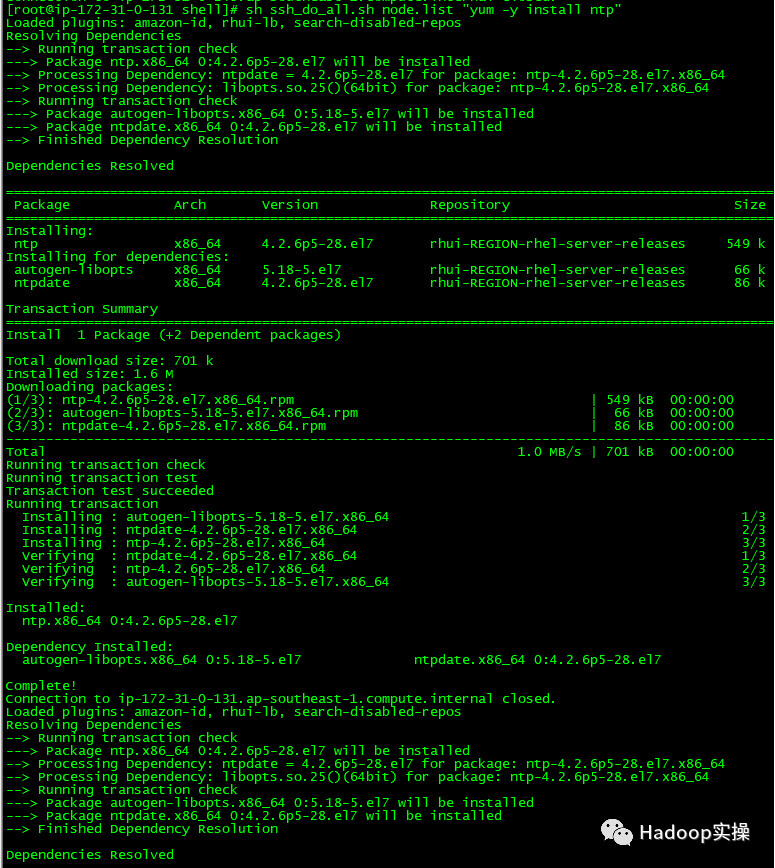
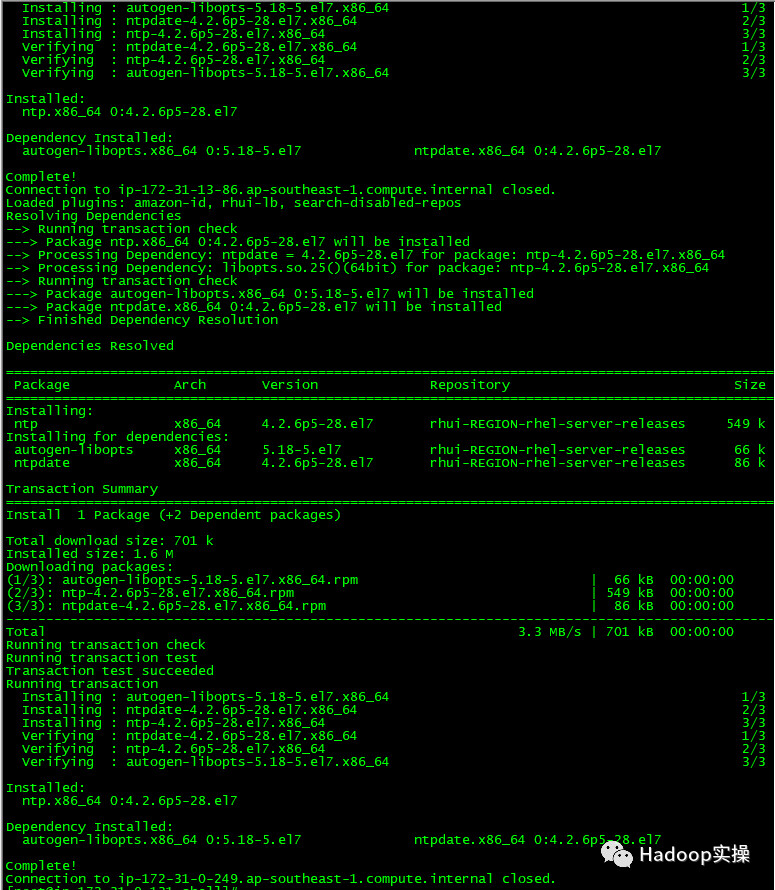
2.所有機器安裝ntp
[[email protected] shell]# sh ssh_do_all.sh node.list "yum -y install ntp"
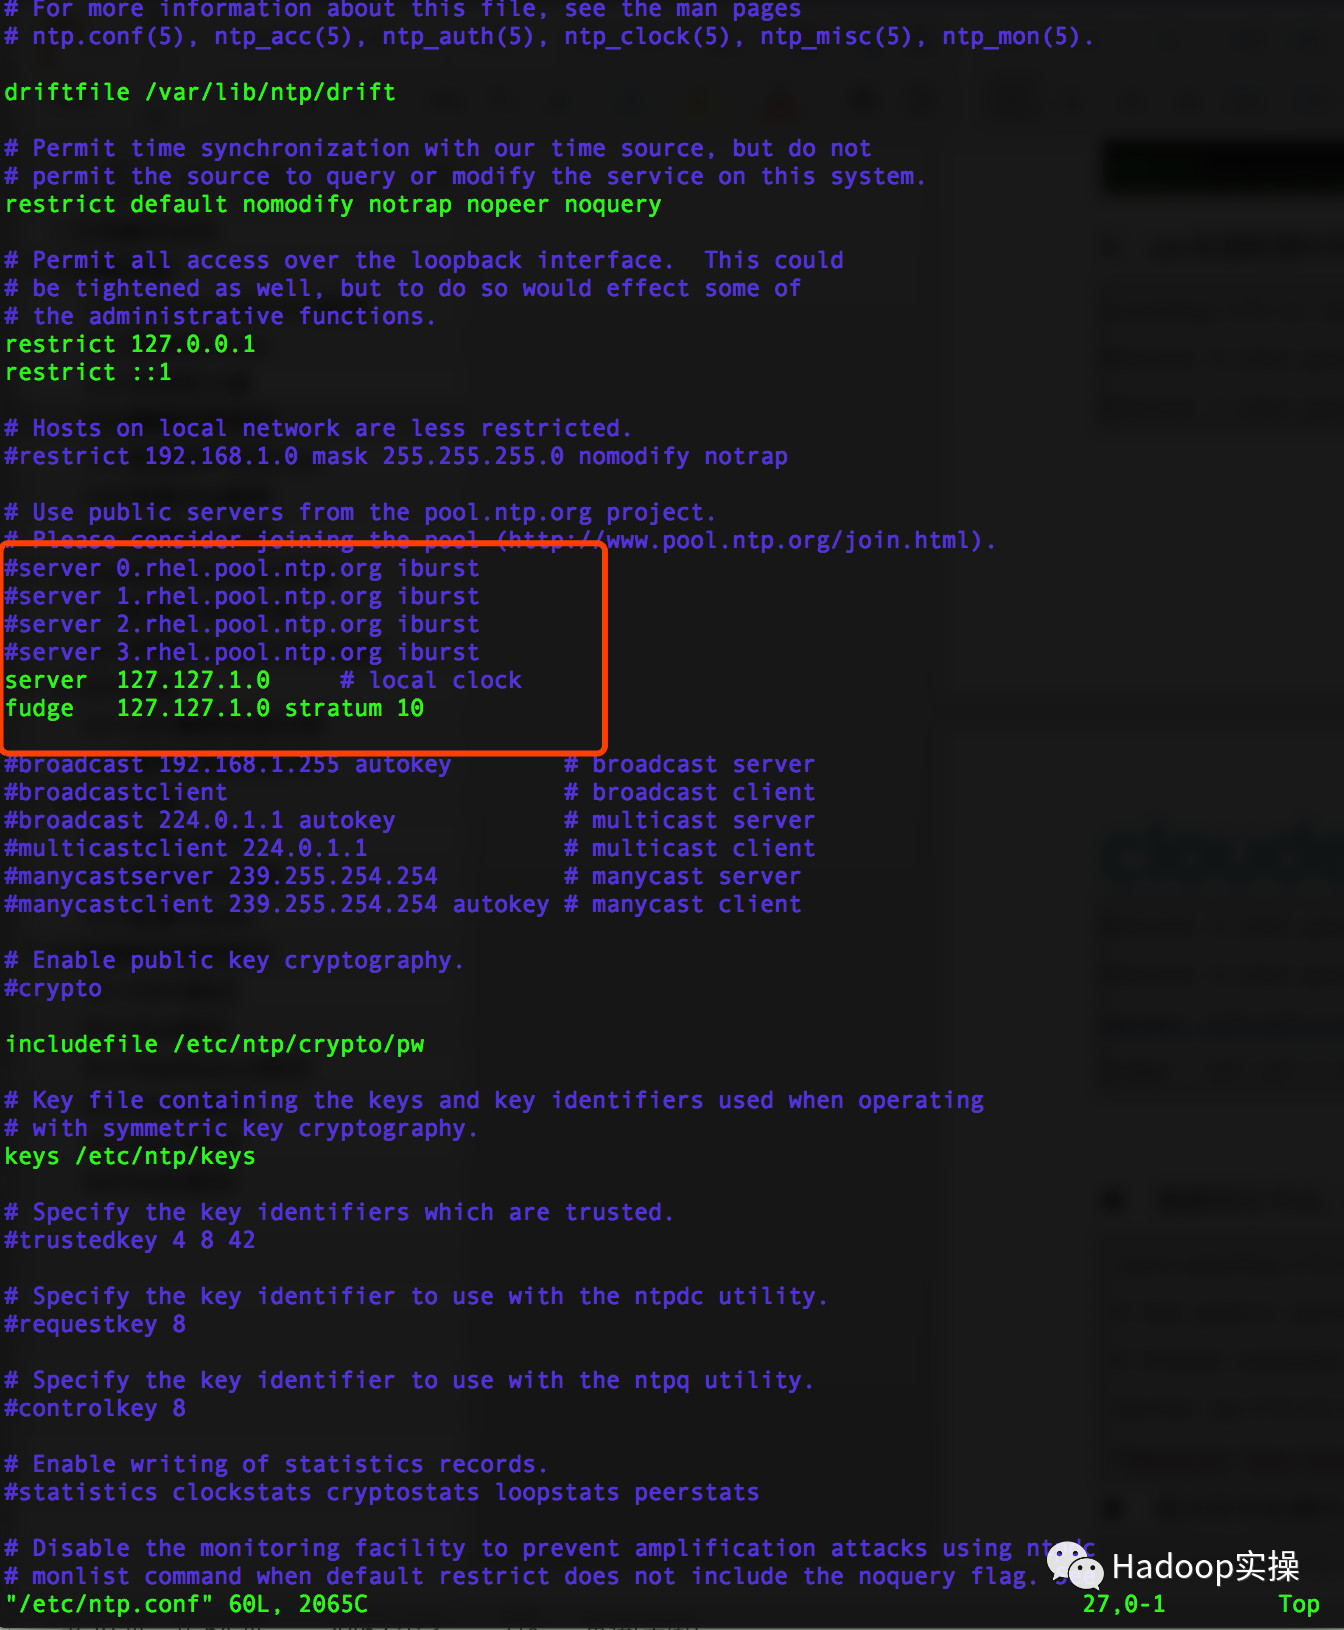
3.cm機器配置時鐘與自己同步
[[email protected] ip-172-31-6-83 shell]# vim /etc/ntp.conf
#server 0.rhel.pool.ntp.org iburst
#server 1.rhel.pool.ntp.org iburst
#server 2.rhel.pool.ntp.org iburst
#server 3.rhel.pool.ntp.org iburst
server  127.127.1.0     # local clock
fudge   127.127.1.0 stratum 10
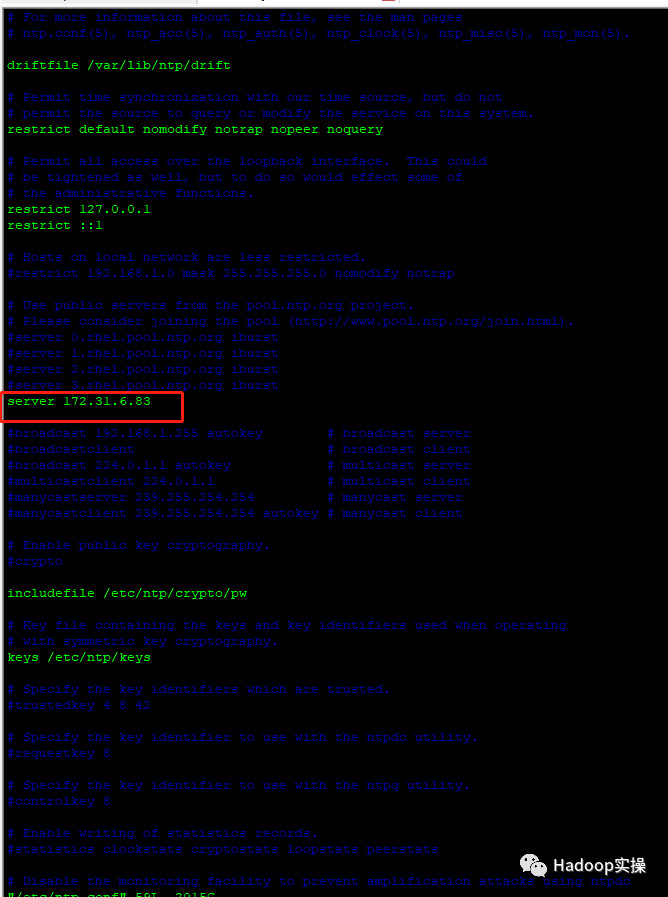
4.叢集其它節點,配置找cm機器去同步
#server 0.rhel.pool.ntp.org iburst
#server 1.rhel.pool.ntp.org iburst
#server 2.rhel.pool.ntp.org iburst
#server 3.rhel.pool.ntp.org iburst
server 172.31.6.83
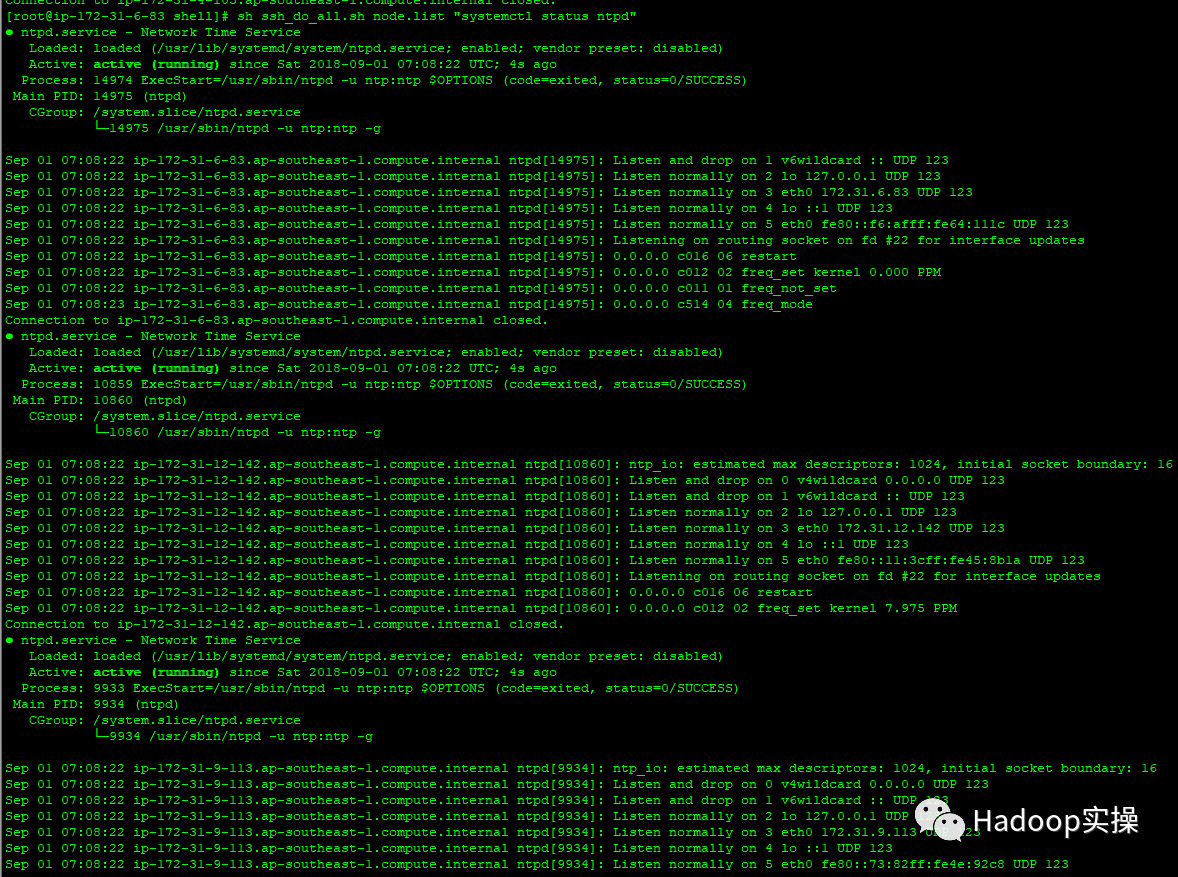
5.重啟所有機器的ntp服務
[[email protected] ip-172-31-6-83 shell]# sh ssh_do_all.sh node.list "systemctl restart ntpd"
[[email protected] ip-172-31-6-83 shell]# sh ssh_do_all.sh node.list "systemctl status ntpd"

6.驗證始終同步,在所有節點執行ntpq -p命令,如下使用指令碼批量執行
[[email protected] ip-172-31-6-83 shell]# sh ssh_do_all.sh node.list "ntpq -p"
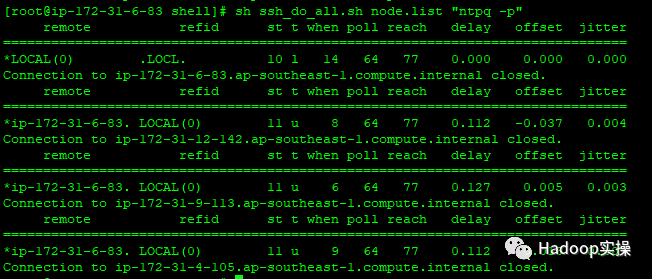
左邊出現*號表示同步成功。
2.5.設定swap
所有節點執行
[[email protected] ip-172-31-6-83 shell]# sh ssh_do_all.sh node.list "echo vm.swappiness = 10 >> /etc/sysctl.conf"
[[email protected] ip-172-31-6-83 shell]#

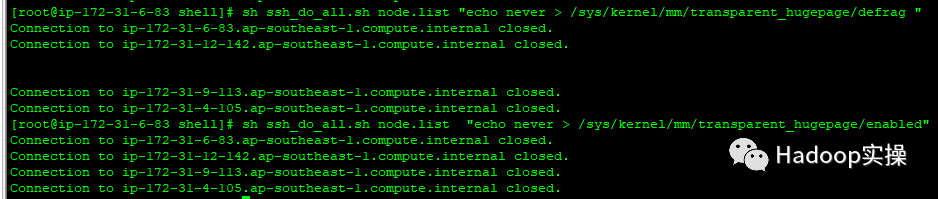
2.6.設定透明大頁面
所有節點執行:
[[email protected] ip-172-31-6-83 shell]# sh ssh_do_all.sh node.list "echo never > /sys/kernel/mm/transparent_hugepage/defrag "
[[email protected] ip-172-31-6-83 shell]# sh ssh_do_all.sh node.list  "echo never > /sys/kernel/mm/transparent_hugepage/enabled"
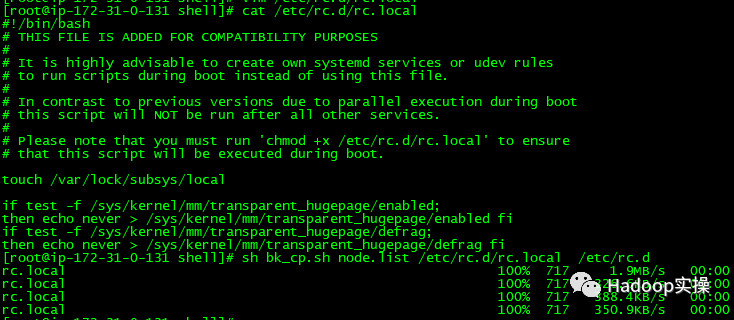
設定開機自關閉
將如下指令碼新增到/etc/rc.d/rc.local檔案中
if test -f /sys/kernel/mm/transparent_hugepage/enabled; then echo never > /sys/kernel/mm/transparent_hugepage/enabled fi if test -f /sys/kernel/mm/transparent_hugepage/defrag; then echo never > /sys/kernel/mm/transparent_hugepage/defrag fi
同步到所有節點
2.7.配置作業系統repo
Fayson用的是AWS的環境,這步是可以省略的,放在這裡供物理機部署的兄弟們參考。
- 掛載作業系統iso檔案
[[email protected] ~]$ sudo mkdir /media/DVD1
[[email protected] ~]$ sudo mount -o loop
CentOS-7-x86_64-DVD-1611.iso /media/DVD1/

- 配置作業系統repo
[[email protected] ~]$ sudo vim /etc/yum.repos.d/local_os.repo
[local_iso]
name=CentOS-$releasever - Media
baseurl=file:///media/DVD1
gpgcheck=0
enabled=1
[[email protected] ~]$ sudo yum repolist
2.8.安裝http服務
- 安裝httpd服務
[[email protected] ~]$ sudo yum -y install httpd
- 啟動httpd服務
[[email protected] ~]$ sudo systemctl start httpd
- 安裝完httpd後,重新制作作業系統repo,換成http的方式方便其它伺服器也可以訪問
[[email protected] ~]$ sudo mkdir /var/www/html/iso
[[email protected] ~]$ sudo scp -r /media/DVD1/* /var/www/html/iso/
[[email protected] ~]$ sudo vim /etc/yum.repos.d/os.repo
[osrepo]
name=os_repo
baseurl=http://172.31.2.159/iso/
enabled=true
gpgcheck=false
[[email protected] ~]$ sudo yum repolist
1.修改/etc/httpd/conf/httpd.conf配置檔案,在中修改以下內容
AddType application/x-gzip .gz .tgz .parcel
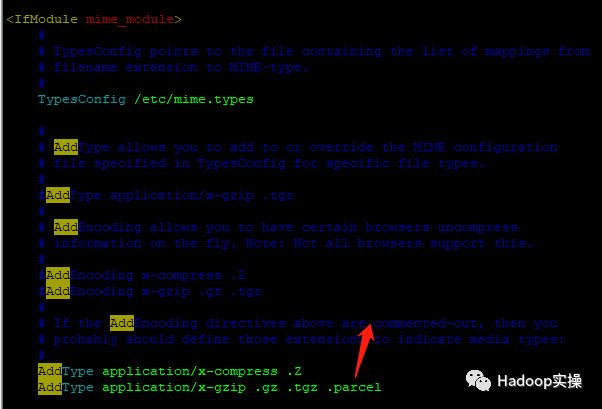
2.儲存httpd.conf的修改,並重啟httpd服務
[[email protected] java]# systemctl restart httpd

2.9.安裝MariaDB
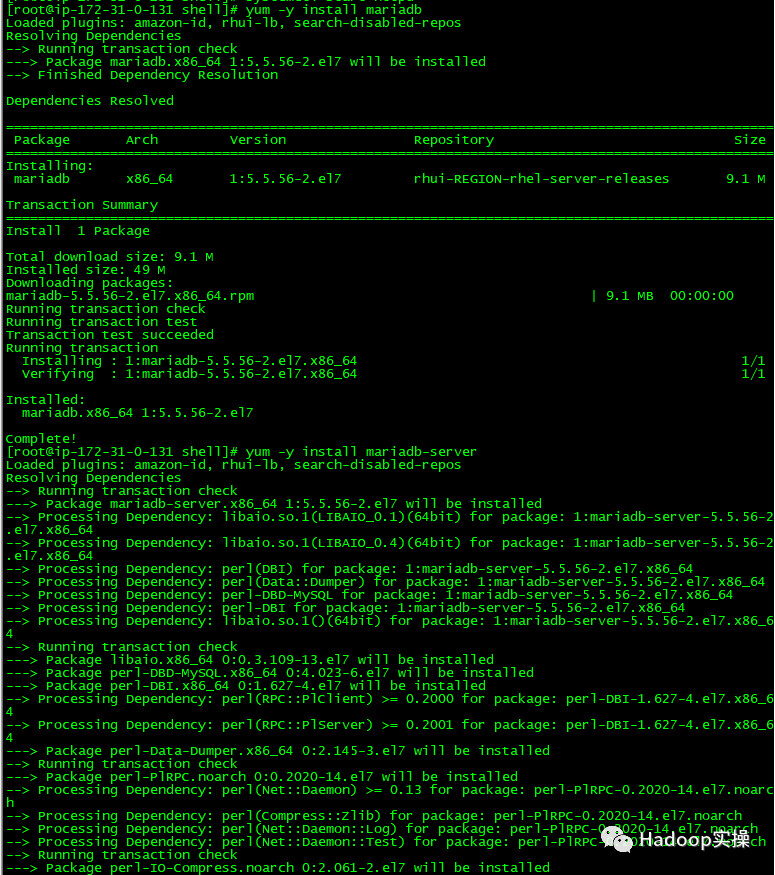
1.安裝MariaDB
[[email protected] ip-172-31-6-83 ~]# yum -y install mariadb
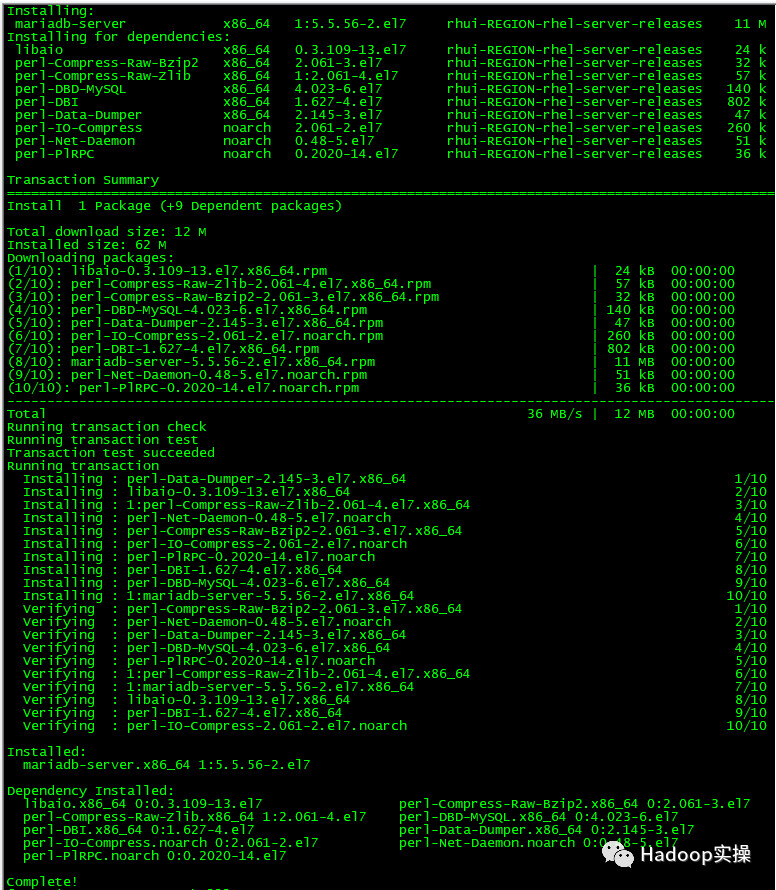
[[email protected] ip-172-31-6-83 ~]# yum -y install mariadb-server
2.啟動並配置MariaDB
[[email protected] ip-172-31-6-83 ~]# systemctl start mariadb
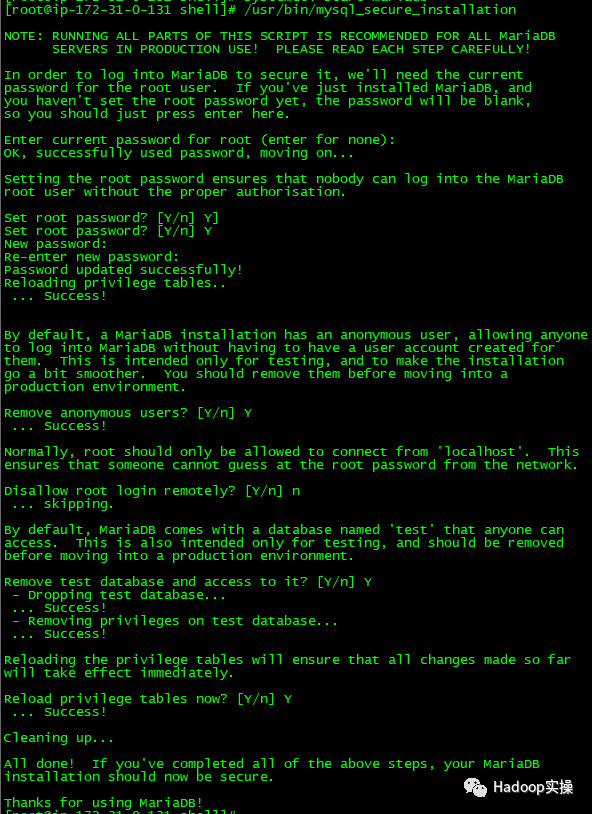
[[email protected] ip-172-31-6-83 ~]# /usr/bin/mysql_secure_installation
NOTE: RUNNING ALL PARTS OF THIS SCRIPT IS RECOMMENDED FOR ALL MariaDB
SERVERS IN PRODUCTION USE! PLEASE READ EACH STEP CAREFULLY!
In order to log into MariaDB to secure it, we'll need the current
password for the root user. If you've just installed MariaDB, and
you haven't set the root password yet, the password will be blank,
so you should just press enter here.
Enter current password for root (enter for none):
OK, successfully used password, moving on...
Setting the root password ensures that nobody can log into the MariaDB
root user without the proper authorisation.
Set root password? [Y/n] Y
New password:
Re-enter new password:
Password updated successfully!
Reloading privilege tables..
... Success!
By default, a MariaDB installation has an anonymous user, allowing anyone
to log into MariaDB without having to have a user account created for
them. This is intended only for testing, and to make the installation
go a bit smoother. You should remove them before moving into a
production environment.
Remove anonymous users? [Y/n] Y
... Success!
Normally, root should only be allowed to connect from 'localhost'. This
ensures that someone cannot guess at the root password from the network.
Disallow root login remotely? [Y/n] n
... skipping.
By default, MariaDB comes with a database named 'test' that anyone can
access. This is also intended only for testing, and should be removed
before moving into a production environment.
Remove test database and access to it? [Y/n] Y
- Dropping test database...
... Success!
- Removing privileges on test database...
... Success!
Reloading the privilege tables will ensure that all changes made so far
will take effect immediately.
Reload privilege tables now? [Y/n] Y
... Success!
Cleaning up...
All done! If you've completed all of the above steps, your MariaDB
installation should now be secure.
Thanks for using MariaDB!
3.建立CM,Hive等需要的表
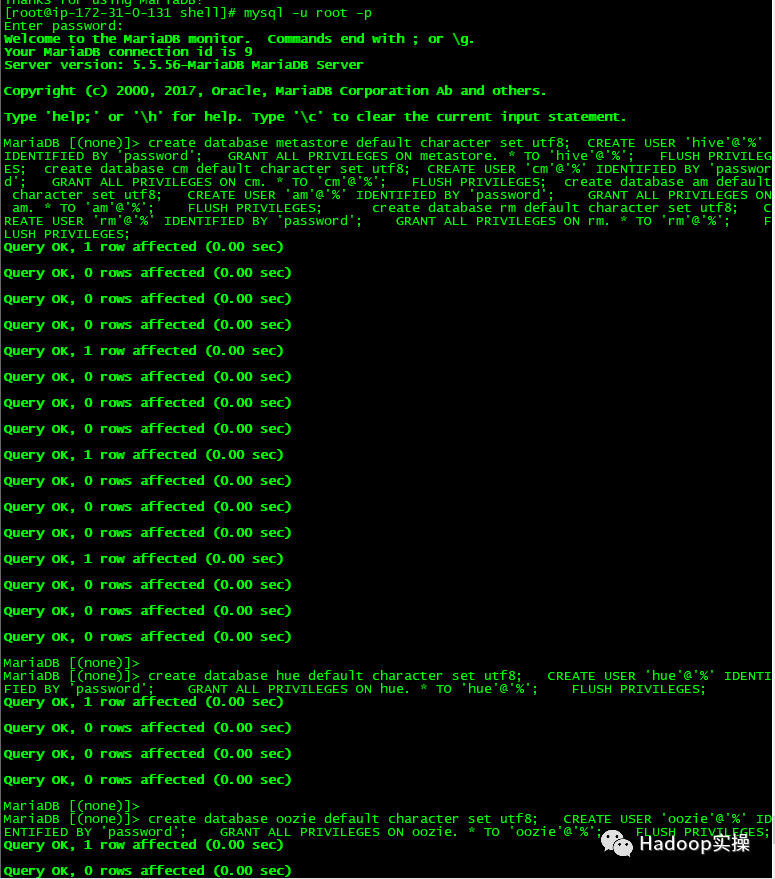
[[email protected] ~]# mysql -u root -p
Enter password:
Welcome to the MariaDB monitor. Commands end with ; or \g.
Your MariaDB connection id is 9
Server version: 5.5.56-MariaDB MariaDB Server
Copyright (c) 2000, 2017, Oracle, MariaDB Corporation Ab and others.
Type 'help;' or '\h' for help. Type '\c' to clear the current input statement.
MariaDB [(none)]>
create database metastore default character set utf8; CREATE USER 'hive'@'%' IDENTIFIED BY 'password'; GRANT ALL PRIVILEGES ON metastore. * TO 'hive'@'%'; FLUSH PRIVILEGES; create database cm default character set utf8; CREATE USER 'cm'@'%' IDENTIFIED BY 'password'; GRANT ALL PRIVILEGES ON cm. * TO 'cm'@'%'; FLUSH PRIVILEGES; create database am default character set utf8; CREATE USER 'am'@'%' IDENTIFIED BY 'password'; GRANT ALL PRIVILEGES ON am. * TO 'am'@'%'; FLUSH PRIVILEGES; create database rm default character set utf8; CREATE USER 'rm'@'%' IDENTIFIED BY 'password'; GRANT ALL PRIVILEGES ON rm. * TO 'rm'@'%'; FLUSH PRIVILEGES;
create database hue default character set utf8; CREATE USER 'hue'@'%' IDENTIFIED BY 'password'; GRANT ALL PRIVILEGES ON hue. * TO 'hue'@'%'; FLUSH PRIVILEGES;
create database oozie default character set utf8; CREATE USER 'oozie'@'%' IDENTIFIED BY 'password'; GRANT ALL PRIVILEGES ON oozie. * TO 'oozie'@'%'; FLUSH PRIVILEGES;
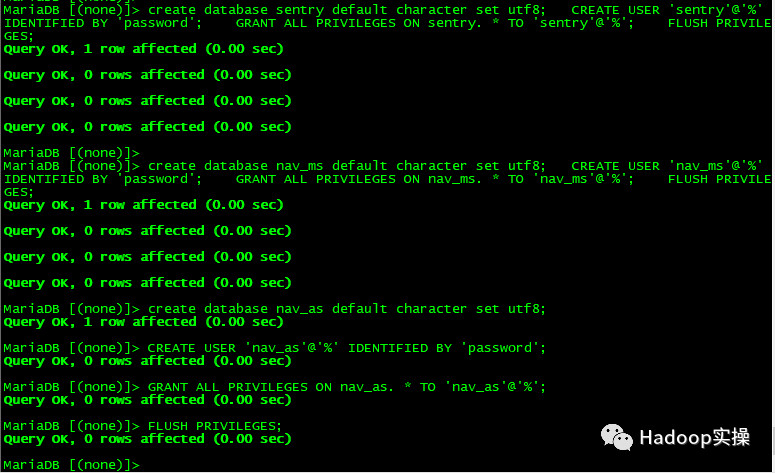
create database sentry default character set utf8; CREATE USER 'sentry'@'%' IDENTIFIED BY 'password'; GRANT ALL PRIVILEGES ON sentry. * TO 'sentry'@'%'; FLUSH PRIVILEGES;
create database nav_ms default character set utf8; CREATE USER 'nav_ms'@'%' IDENTIFIED BY 'password'; GRANT ALL PRIVILEGES ON nav_ms. * TO 'nav_ms'@'%'; FLUSH PRIVILEGES;
create database nav_as default character set utf8;
CREATE USER 'nav_as'@'%' IDENTIFIED BY 'password';
GRANT ALL PRIVILEGES ON nav_as. * TO 'nav_as'@'%';
FLUSH PRIVILEGES;
- 安裝jdbc驅動
[[email protected] shell]# mkdir -p /usr/share/java/
[[email protected] ~]# mv mysql-connector-java-5.1.34.jar /usr/share/java/
[[email protected] ~]# cd /usr/share/java
[[email protected] java]# chmod 777 mysql-connector-java-5.1.34.jar
[[email protected] java]# ln -s mysql-connector-java-5.1.34.jar mysql-connector-java.jar
[[email protected] java]# ll
total 940
-rwxrwxrwx. 1 root root 960372 May 16 15:53 mysql-connector-java-5.1.34.jar
lrwxrwxrwx. 1 root root     31 May 16 15:53 mysql-connector-java.jar -> mysql-connector-java-5.1.34.jar


3.Cloudera Manager安裝
3.1.配置本地repo源
1.下載CM6.0的安裝包,地址為:
https://archive.cloudera.com/cm6/6.0.0/redhat7/yum/RPMS/x86_64/cloudera-manager-agent-6.0.0-530873.el7.x86_64.rpm
https://archive.cloudera.com/cm6/6.0.0/redhat7/yum/RPMS/x86_64/cloudera-manager-daemons-6.0.0-530873.el7.x86_64.rpm
https://archive.cloudera.com/cm6/6.0.0/redhat7/yum/RPMS/x86_64/cloudera-manager-server-6.0.0-530873.el7.x86_64.rpm
https://archive.cloudera.com/cm6/6.0.0/redhat7/yum/RPMS/x86_64/cloudera-manager-server-db-2-6.0.0-530873.el7.x86_64.rpm
https://archive.cloudera.com/cm6/6.0.0/redhat7/yum/RPMS/x86_64/oracle-j2sdk1.8-1.8.0+update141-1.x86_64.rpm
https://archive.cloudera.com/cm6/6.0.0/allkeys.asc
2.下載CDH6.0的安裝包,地址為:
https://archive.cloudera.com/cdh6/6.0.0/parcels/CDH-6.0.0-1.cdh6.0.0.p0.537114-el7.parcel
https://archive.cloudera.com/cdh6/6.0.0/parcels/CDH-6.0.0-1.cdh6.0.0.p0.537114-el7.parcel.sha256
https://archive.cloudera.com/cdh6/6.0.0/parcels/manifest.json
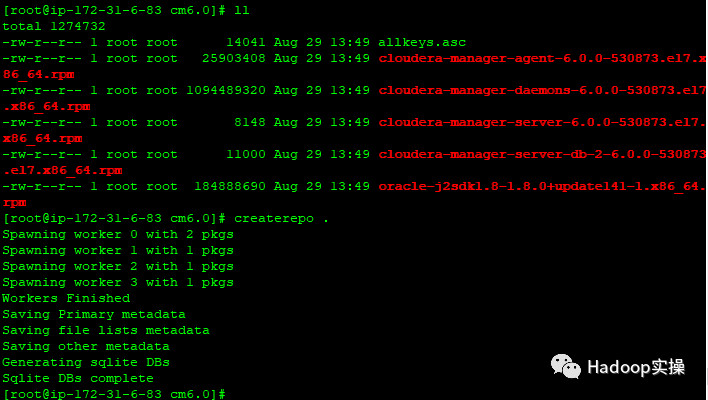
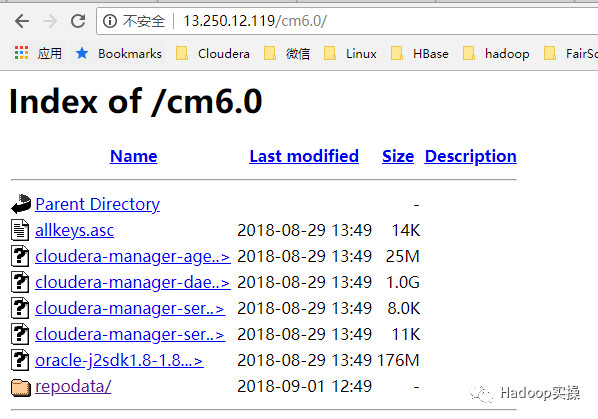
3.將Cloudera Manager安裝需要的5個rpm包以及一個asc檔案下載到本地,放在同一目錄,執行createrepo命令生成rpm元資料。
[[email protected] cm6.0]# ll
total 1274736
-rw-r--r-- 1 root root      14041 Aug 29 13:49 allkeys.asc
-rw-r--r-- 1 root root   25903408 Aug 29 13:49 cloudera-manager-agent-6.0.0-530873.el7.x86_64.rpm
-rw-r--r-- 1 root root 1094489320 Aug 29 13:49 cloudera-manager-daemons-6.0.0-530873.el7.x86_64.rpm
-rw-r--r-- 1 root root       8148 Aug 29 13:49 cloudera-manager-server-6.0.0-530873.el7.x86_64.rpm
-rw-r--r-- 1 root root      11000 Aug 29 13:49 cloudera-manager-server-db-2-6.0.0-530873.el7.x86_64.rpm
-rw-r--r-- 1 root root  184888690 Aug 29 13:49 oracle-j2sdk1.8-1.8.0+update141-1.x86_64.rpm
drwxr-xr-x 2 root root       4096 Sep  1 11:43 repodata
[[email protected] cm6.0]# createrepo .
Spawning worker 0 with 2 pkgs
Spawning worker 1 with 1 pkgs
Spawning worker 2 with 1 pkgs
Spawning worker 3 with 1 pkgs
Workers Finished
Saving Primary metadata
Saving file lists metadata
Saving other metadata
Generating sqlite DBs
Sqlite DBs complete
4.配置Web伺服器
將上述cdh6.0 /cm6.0目錄移動到/var/www/html目錄下, 使得使用者可以通過HTTP訪問這些rpm包。
[[email protected] ~]# mv cdh6.0/ cm6.0/ /var/www/html/
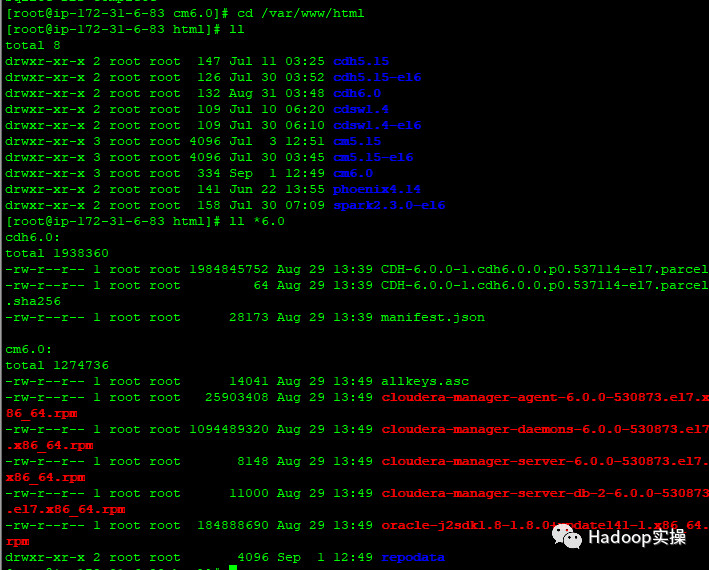
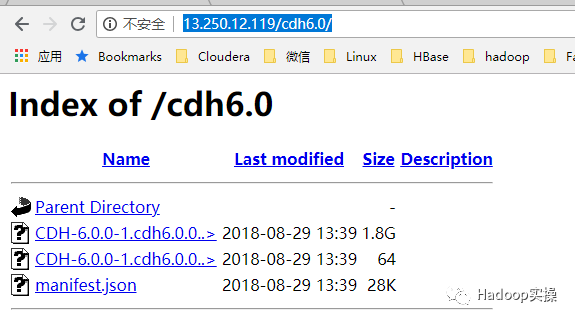
驗證瀏覽器能否正常訪問
5.製作Cloudera Manager的repo源
[[email protected] ~]# vim /etc/yum.repos.d/cm.repo
[cmrepo]
name = cm_repo
baseurl = baseurl=http://172.31.6.83/cm6.0
enable = true
gpgcheck = false
[[email protected] yum.repos.d]# yum repolist
Loaded plugins: amazon-id, rhui-lb, search-disabled-repos
Repodata is over 2 weeks old. Install yum-cron? Or run: yum makecache fast
repo id                                                                                    repo name                                                                                                 status
!cmrepo                                                                                    cm_repo                                                                                                        7
!rhui-REGION-client-config-server-7/x86_64                                                 Red Hat Update Infrastructure 2.0 Client Configuration Server 7                                                1
!rhui-REGION-rhel-server-releases/7Server/x86_64                                           Red Hat Enterprise Linux Server 7 (RPMs)                                                                  20,672
!rhui-REGION-rhel-server-rh-common/7Server/x86_64                                          Red Hat Enterprise Linux Server 7 RH Common (RPMs)                                                           233
repolist: 20,913

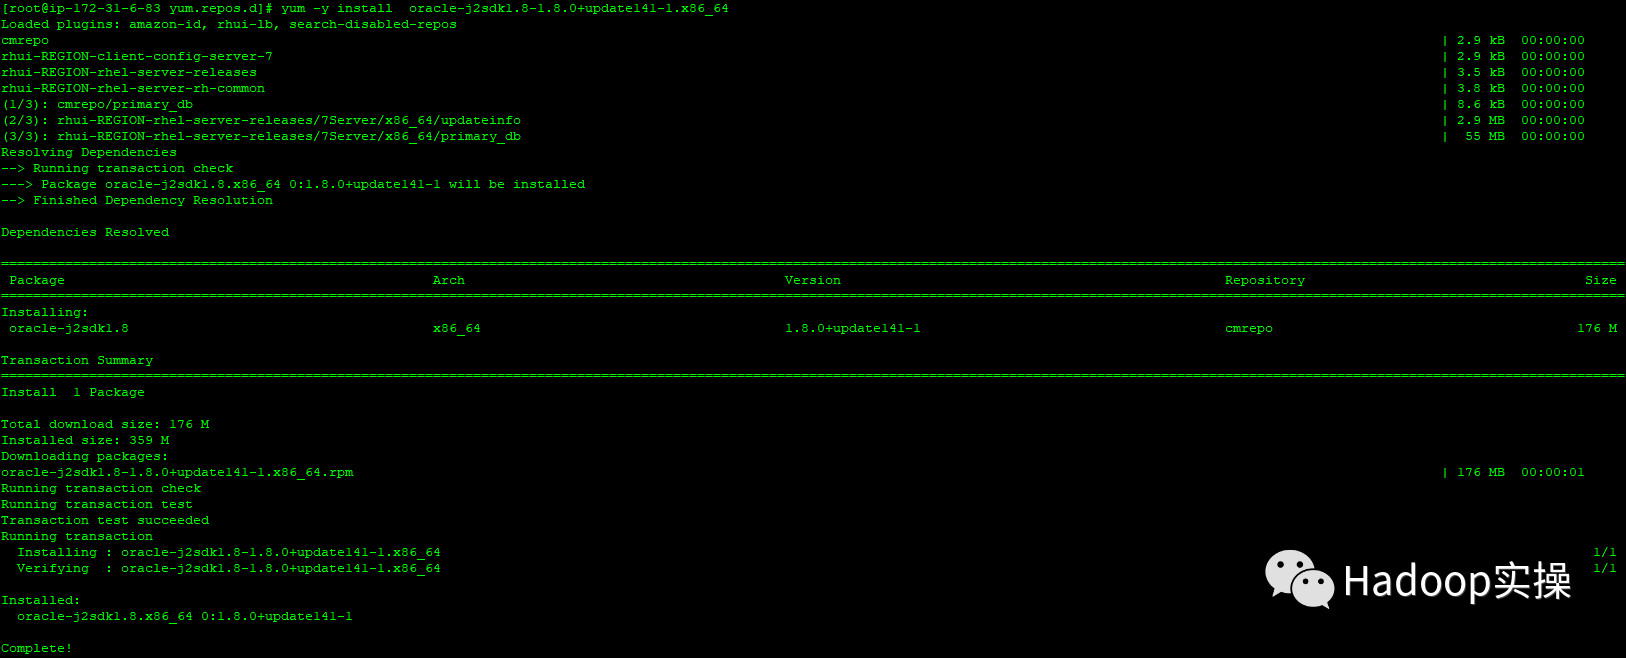
6.驗證安裝JDK
[[email protected] yum.repos.d]# yum -y install oracle-j2sdk1.8-1.8.0+update141-1.x86_64
3.2.安裝Cloudera Manager Server
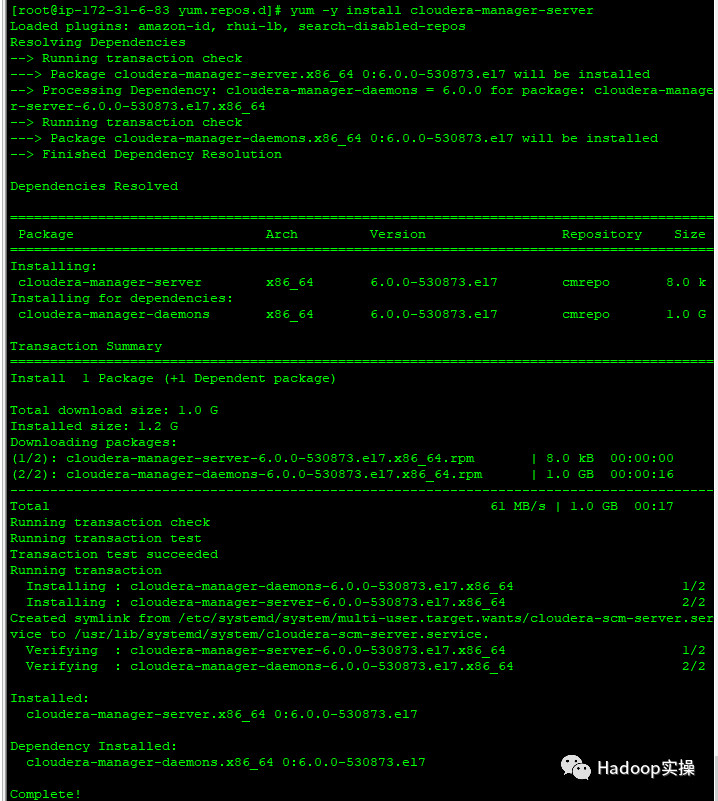
1.通過yum安裝Cloudera Manager Server
yum -y install cloudera-manager-server
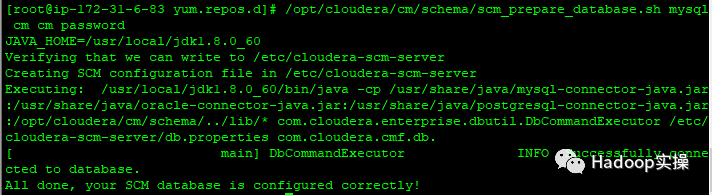
2.初始化資料庫
 [[email protected] yum.repos.d]# /opt/cloudera/cm/schema/scm_prepare_database.sh mysql cm cm password
JAVA_HOME=/usr/local/jdk1.8.0_60
Verifying that we can write to /etc/cloudera-scm-server
Creating SCM configuration file in /etc/cloudera-scm-server
Executing:  /usr/local/jdk1.8.0_60/bin/java -cp /usr/share/java/mysql-connector-java.jar:/usr/share/java/oracle-connector-java.jar:/usr/share/java/postgresql-connector-java.jar:/opt/cloudera/cm/schema/../lib/* com.cloudera.enterprise.dbutil.DbCommandExecutor /etc/cloudera-scm-server/db.properties com.cloudera.cmf.db.
[                          main] DbCommandExecutor              INFO  Successfully connected to database.
All done, your SCM database is configured correctly!
3.啟動Cloudera Manager Server
[[email protected] ip-172-31-6-83 ~]# systemctl start cloudera-scm-server
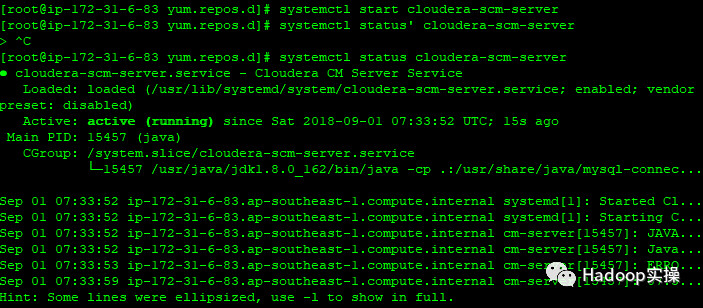
4.檢查埠是否監聽
[[email protected] share]# netstat -lnpt | grep 7180
tcp        0      0 0.0.0.0:7180            0.0.0.0:*               LISTEN      21257/java

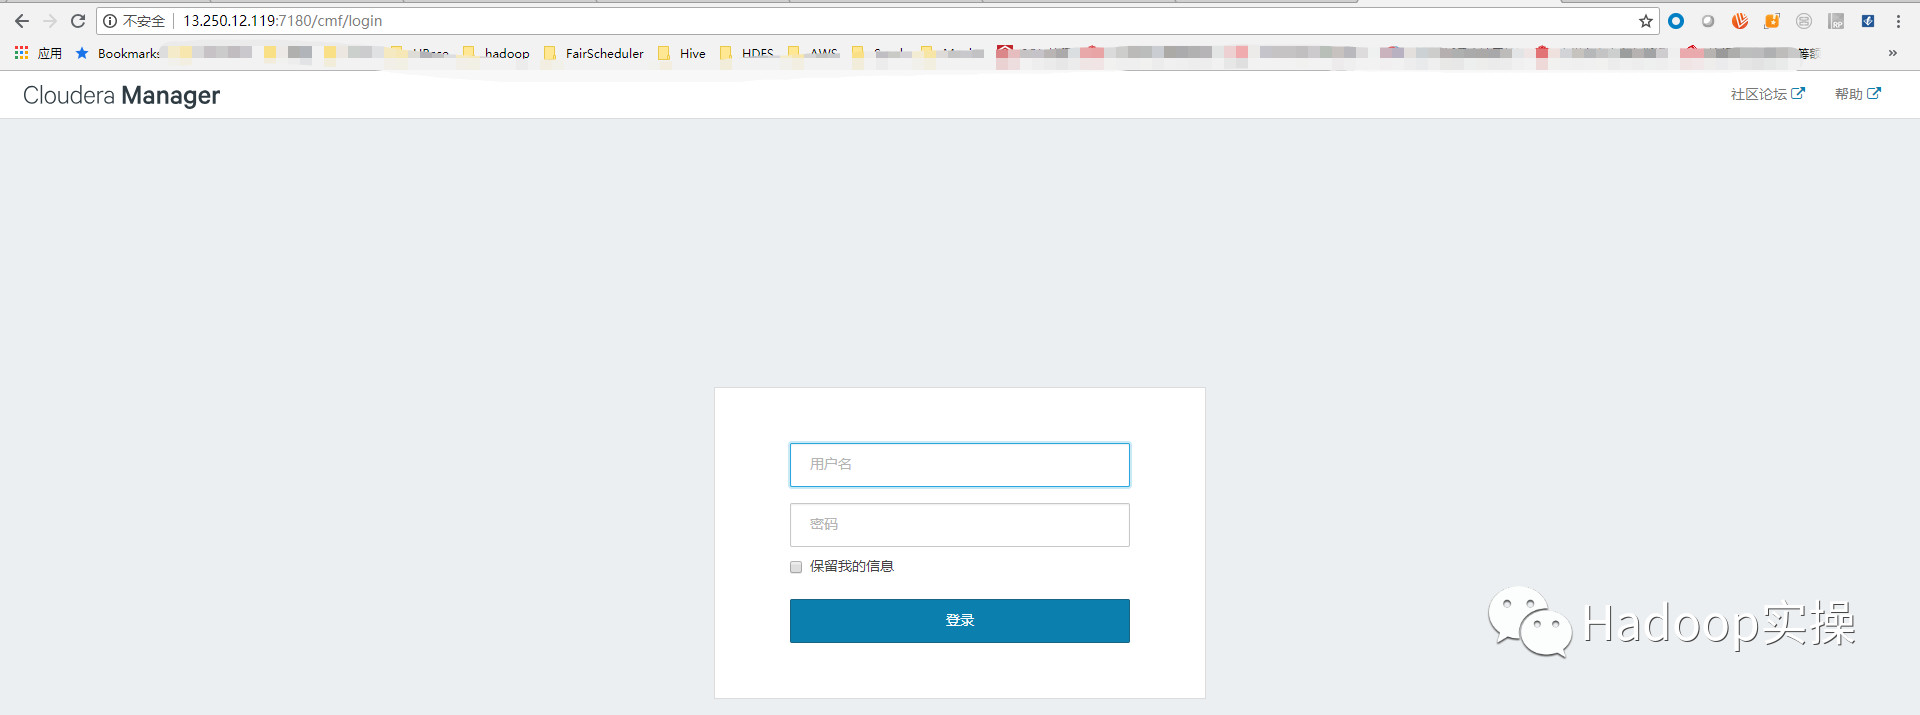
5.通過http://52.77.255.89:7180/cmf/login訪問CM
4.CDH安裝
4.1.CDH叢集安裝嚮導
1.admin/admin登入到CM
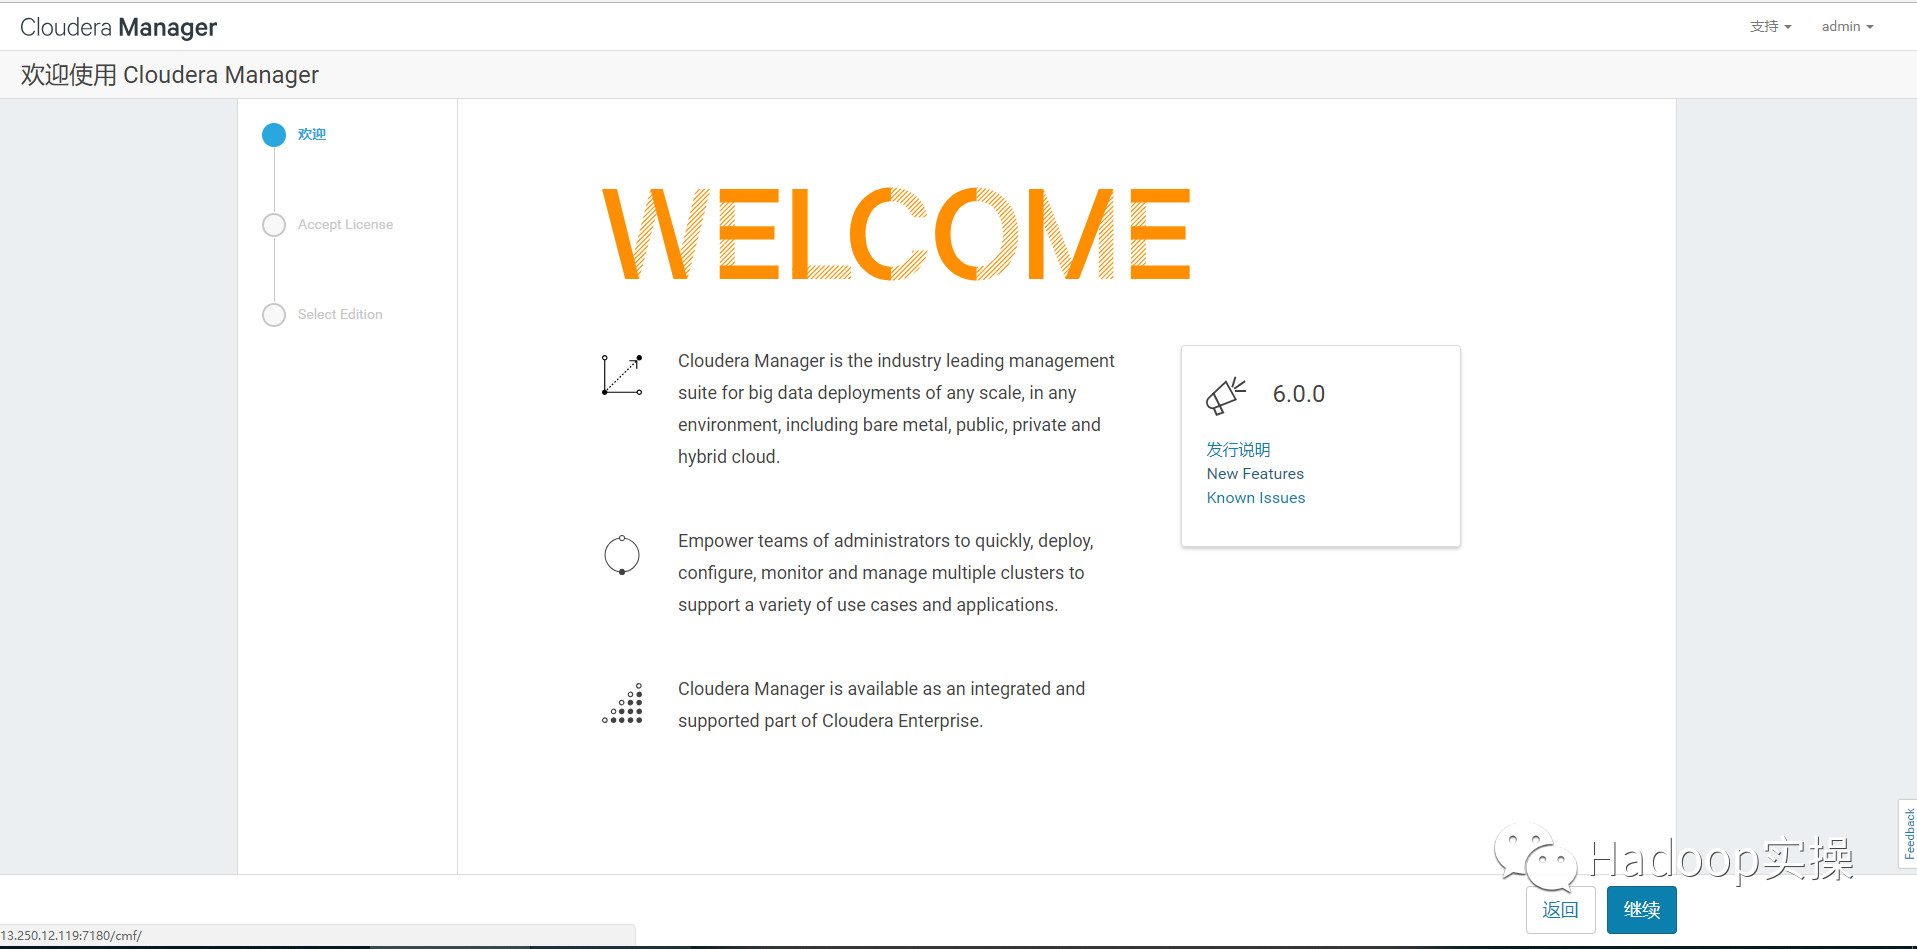
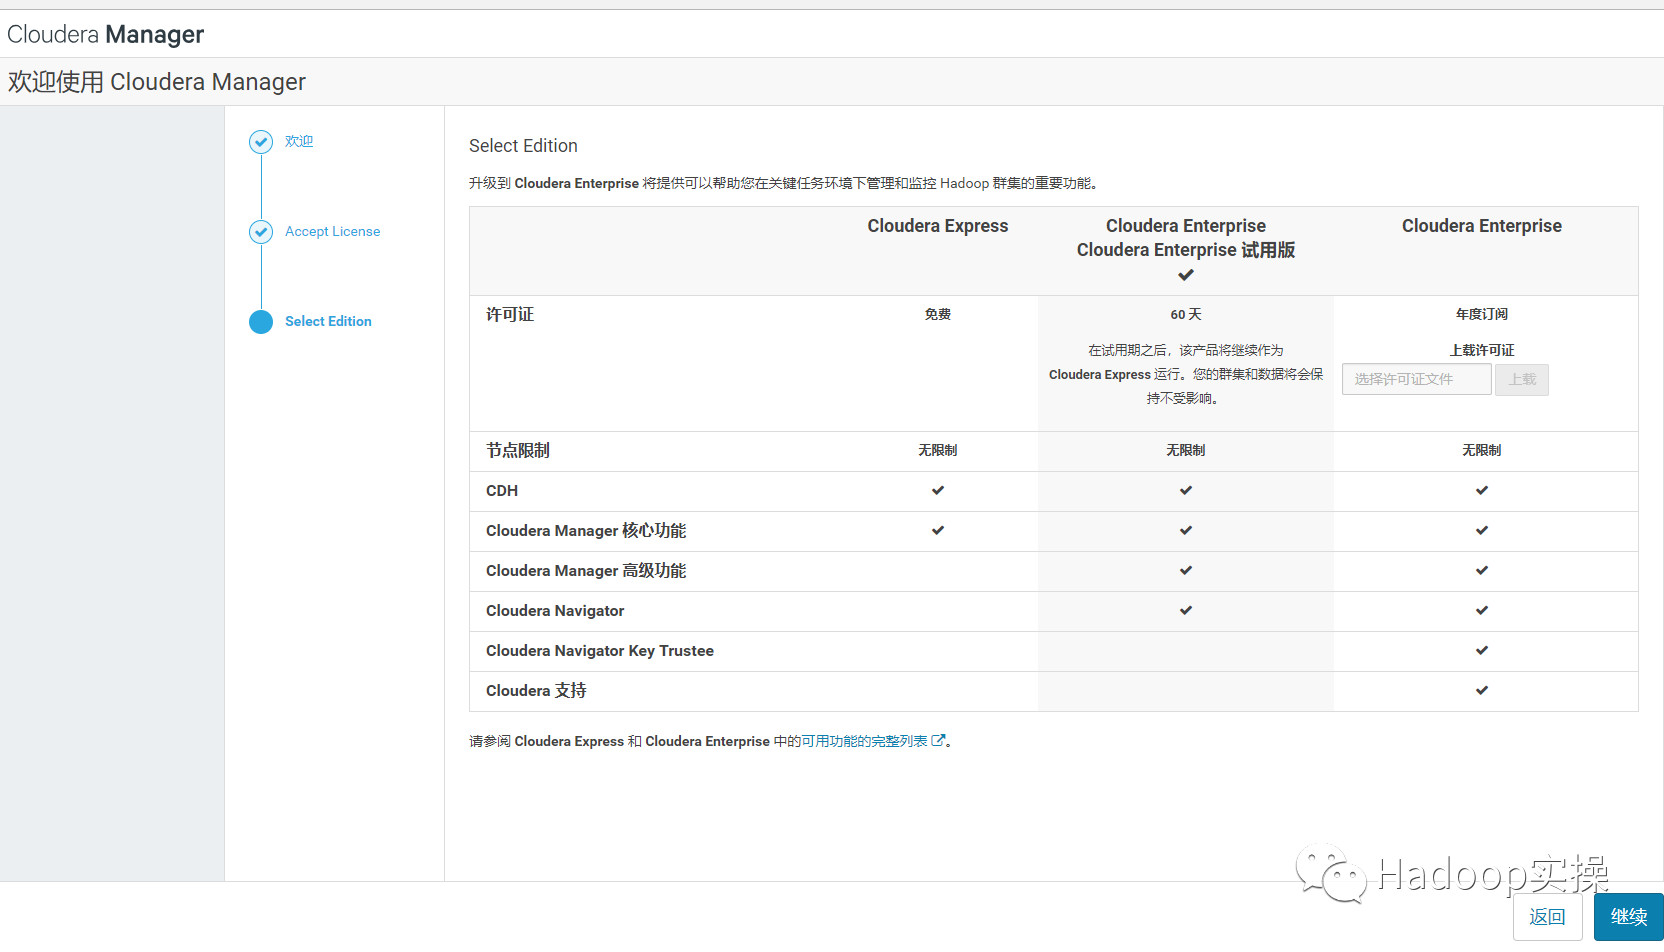
2.同意license協議,點選繼續
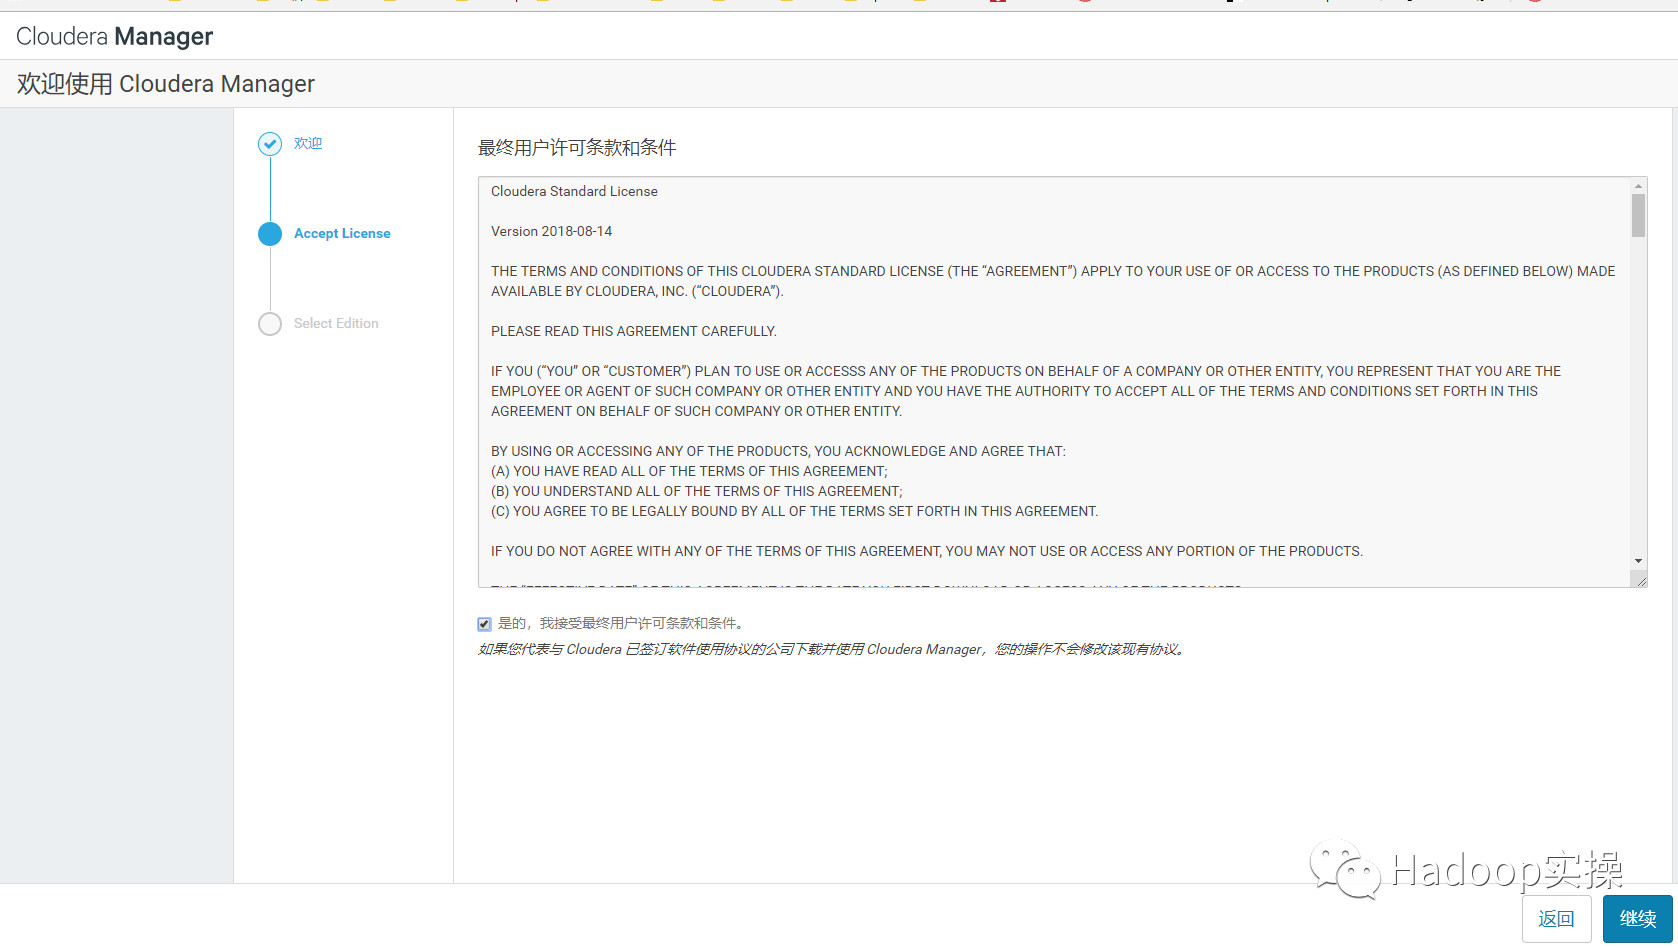
3.選擇60試用,點選繼續
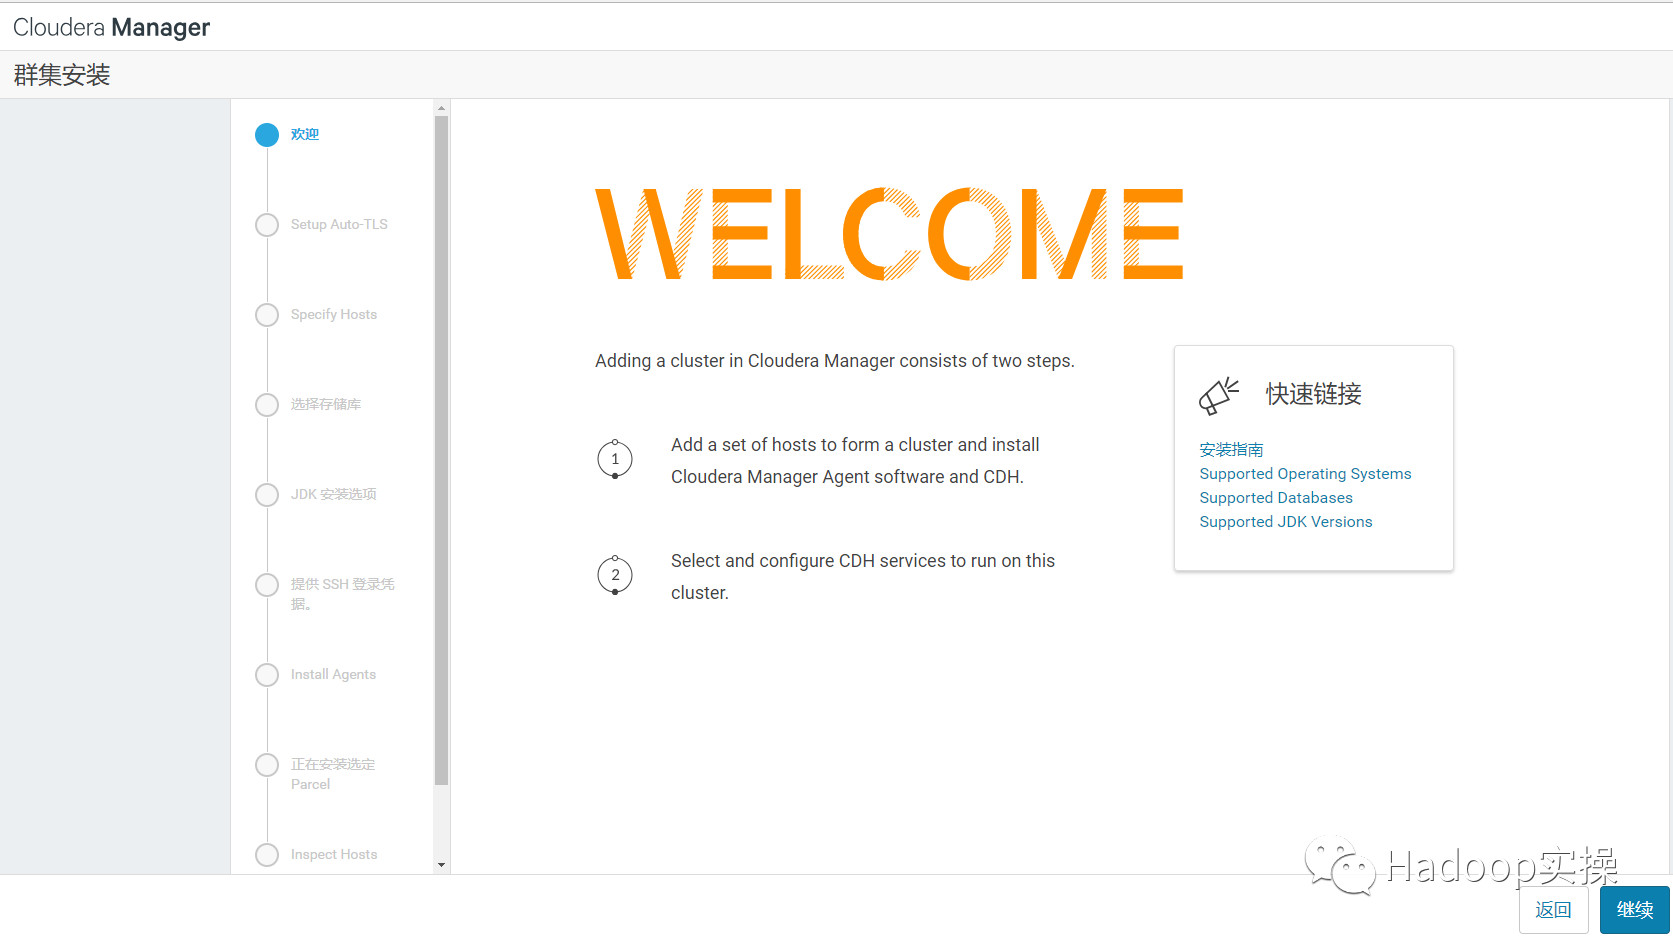
4.點選“繼續”
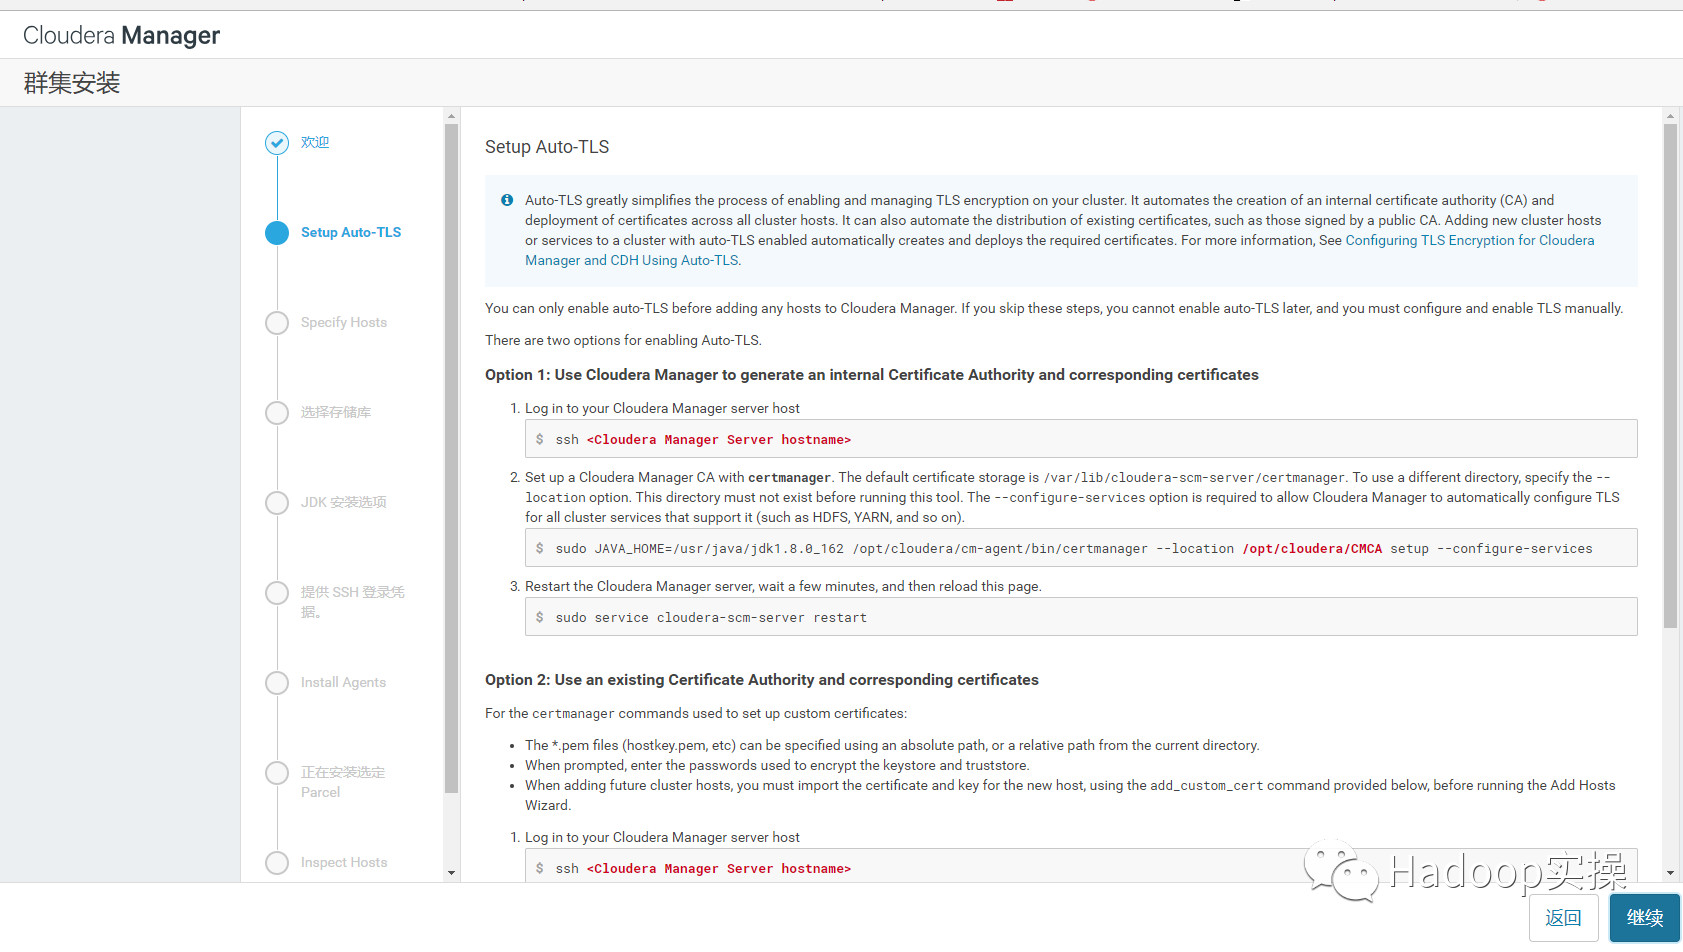
5.點選“繼續”,可以忽略這個自動TLS自動安裝。
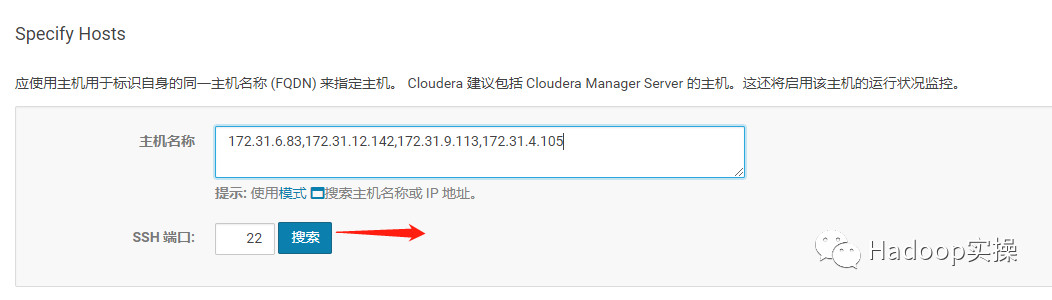
6.輸入主機ip或者名稱,點選搜尋找到主機後點擊繼續
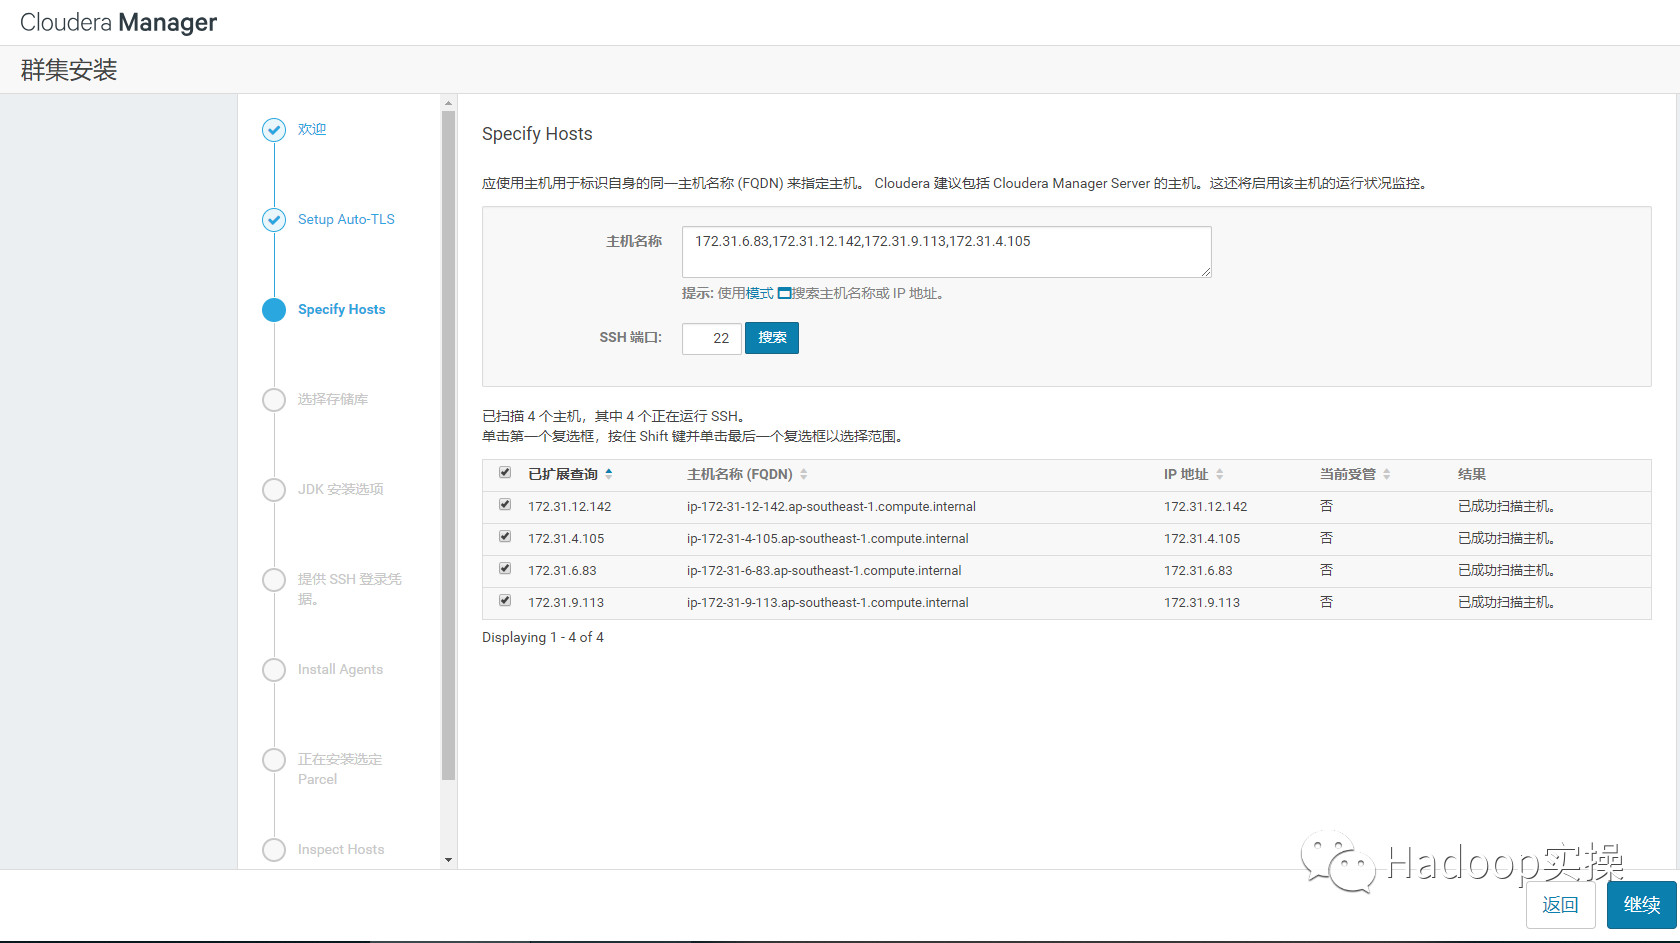
7.點選“繼續”
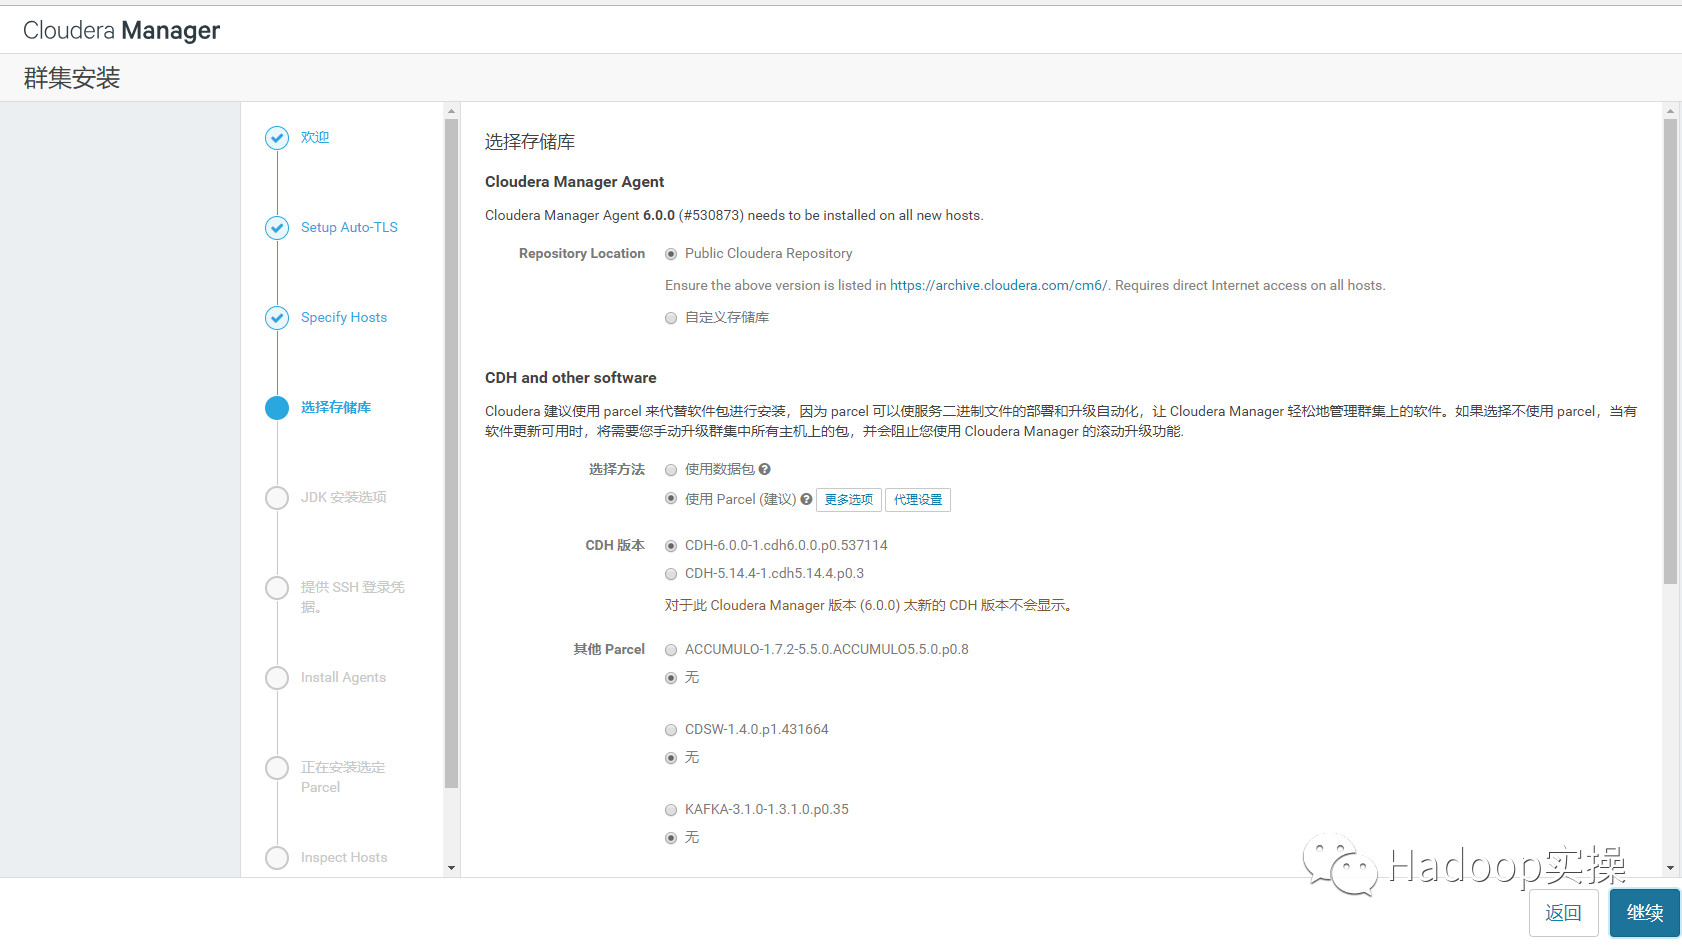
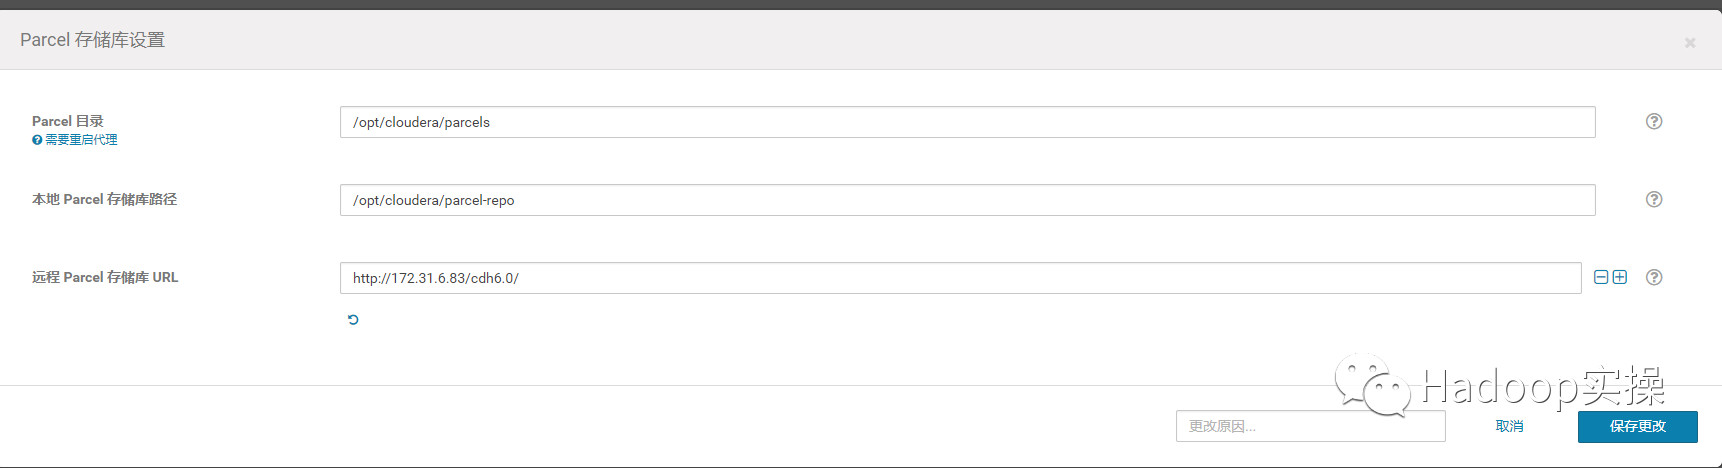
8.使用Parcel選擇,點選“更多選項”,點選“-”刪除其它所有地址,輸入http://172.31.6.83/cdh6.0,點選“儲存更改”
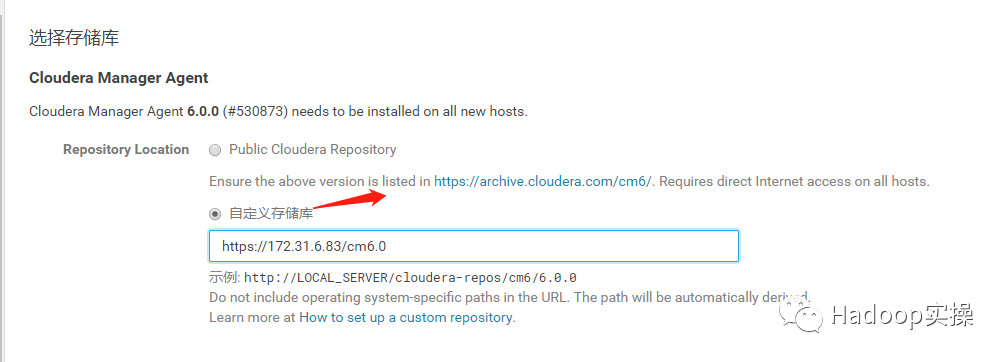
9.選擇自定義儲存庫,輸入cm的http地址
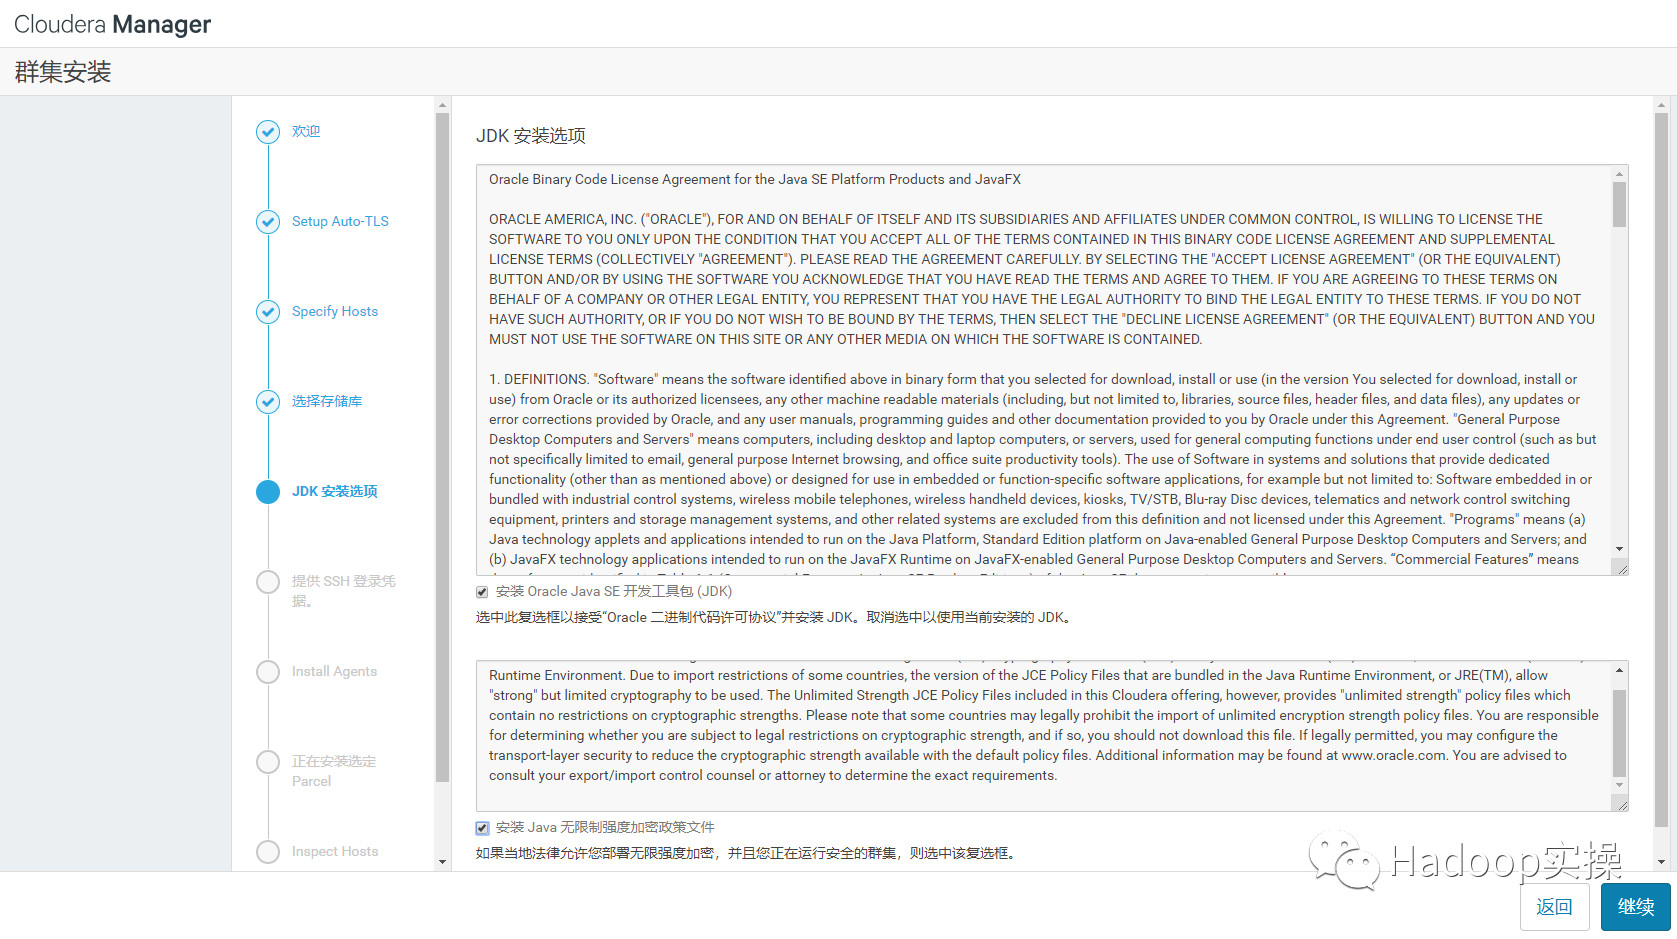
10.點選“繼續”,進入下一步安裝jdk
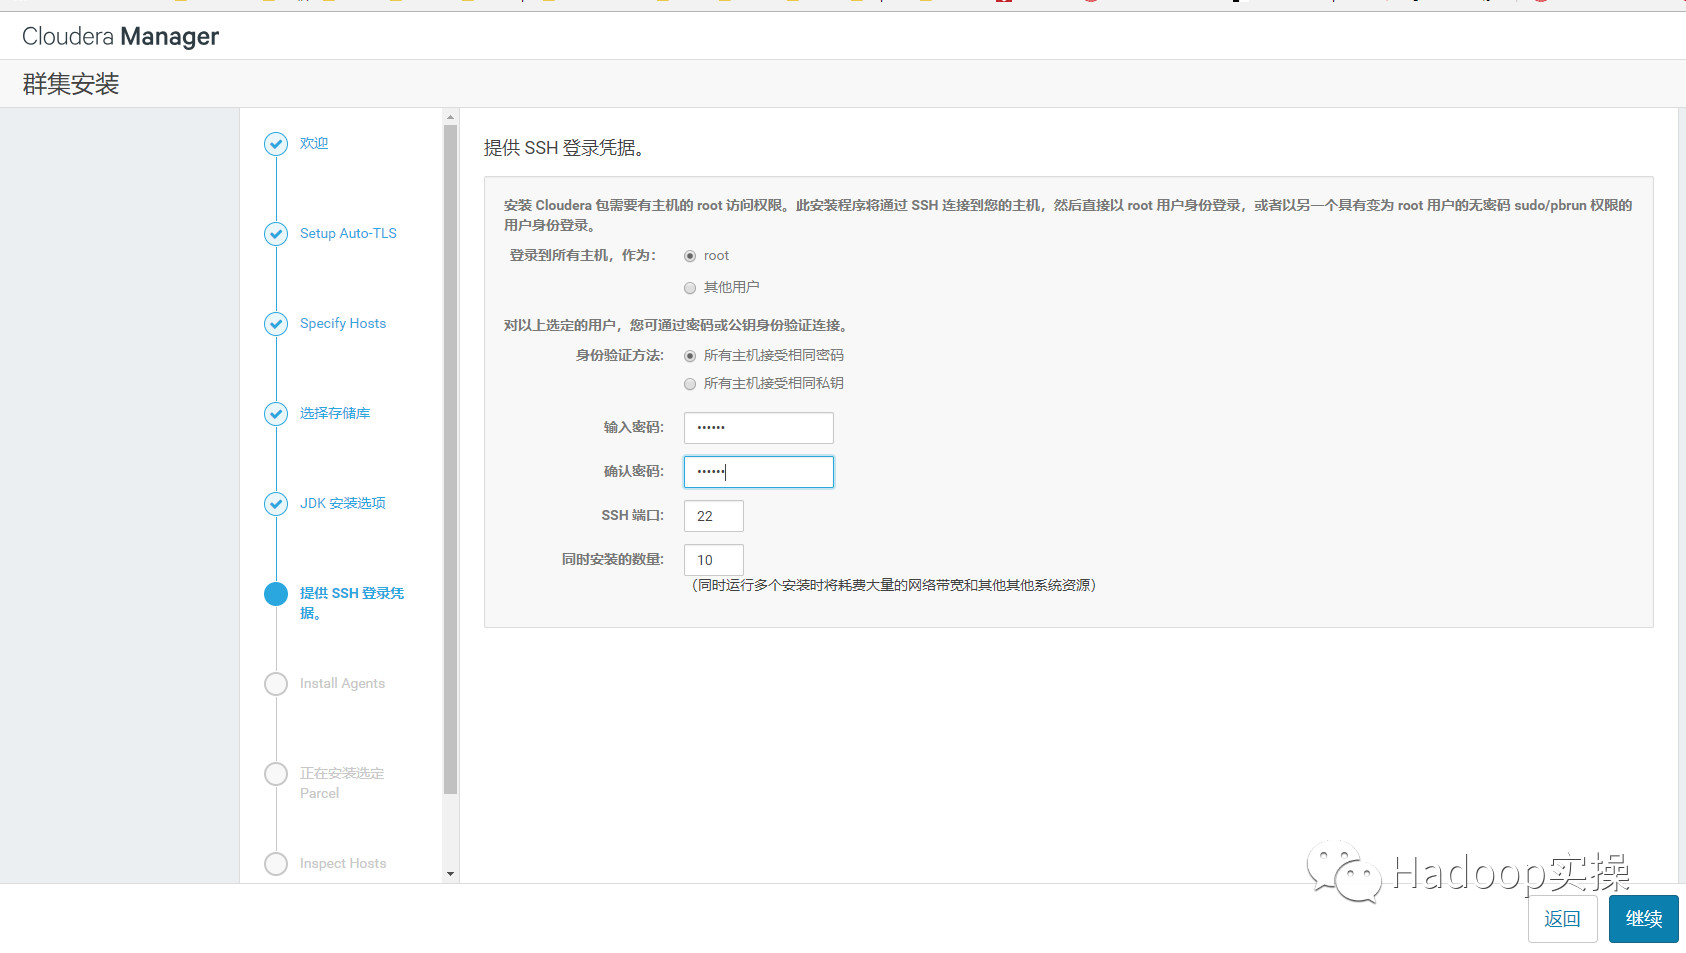
11.點選“繼續”,進入下一步配置ssh賬號密碼
12.點選“繼續”,進入下一步,安裝Cloudera Manager相關到各個節點
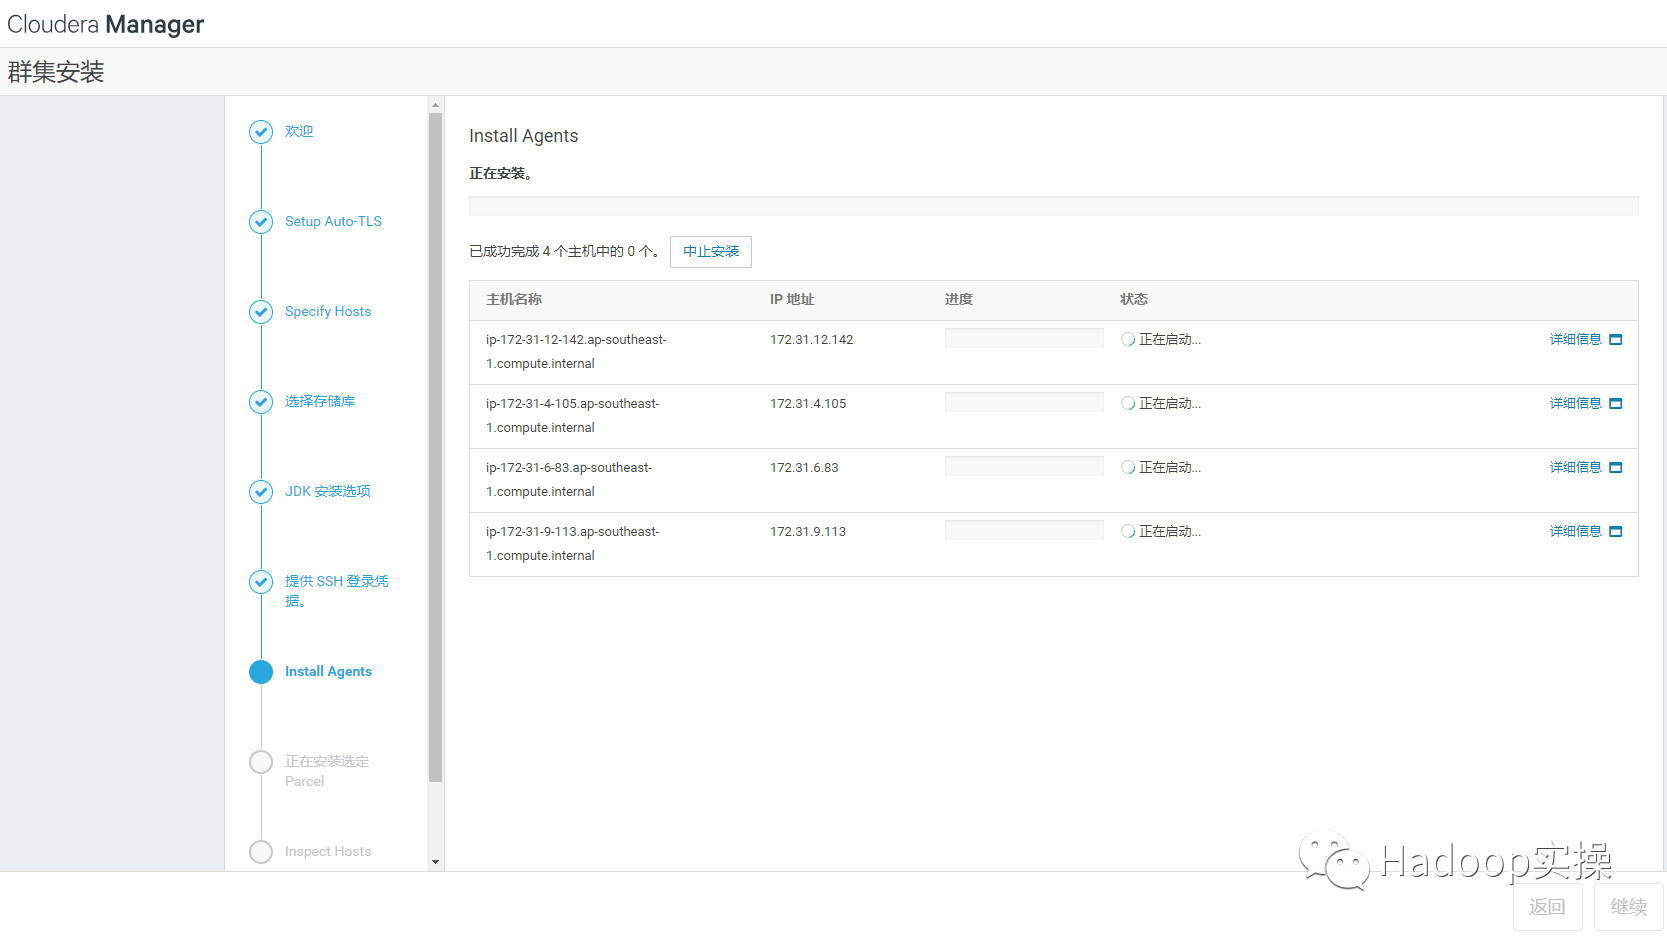
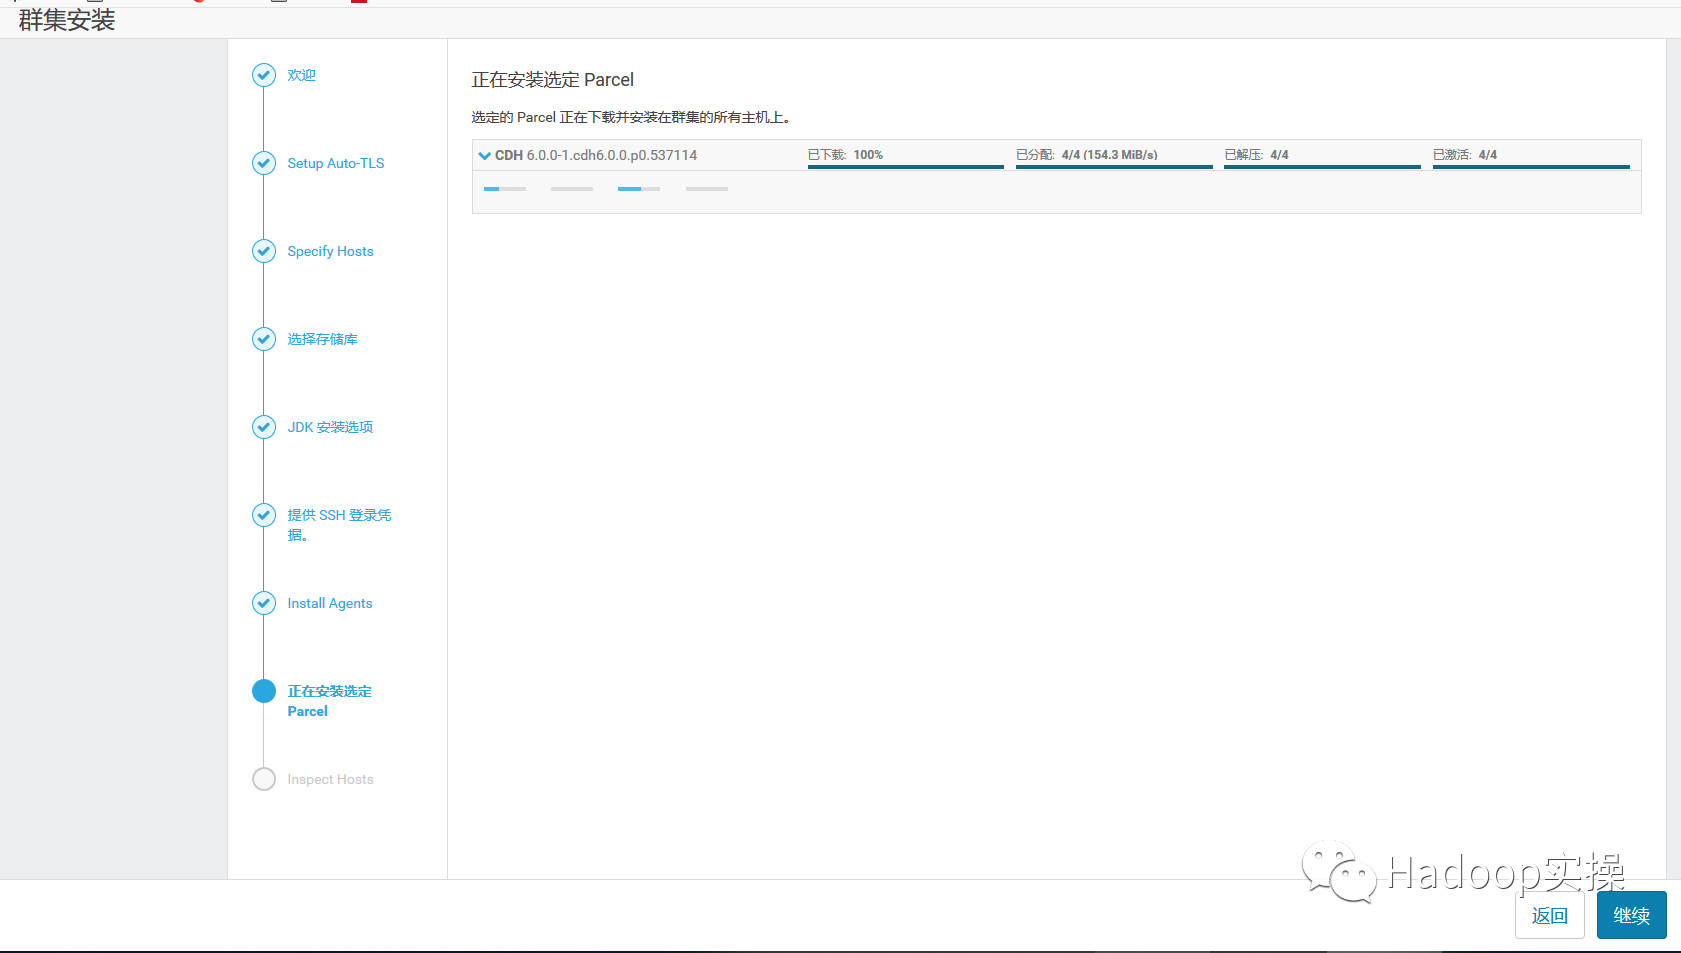
等待agent安裝完畢後,自動跳轉到下一步開始分發parcel
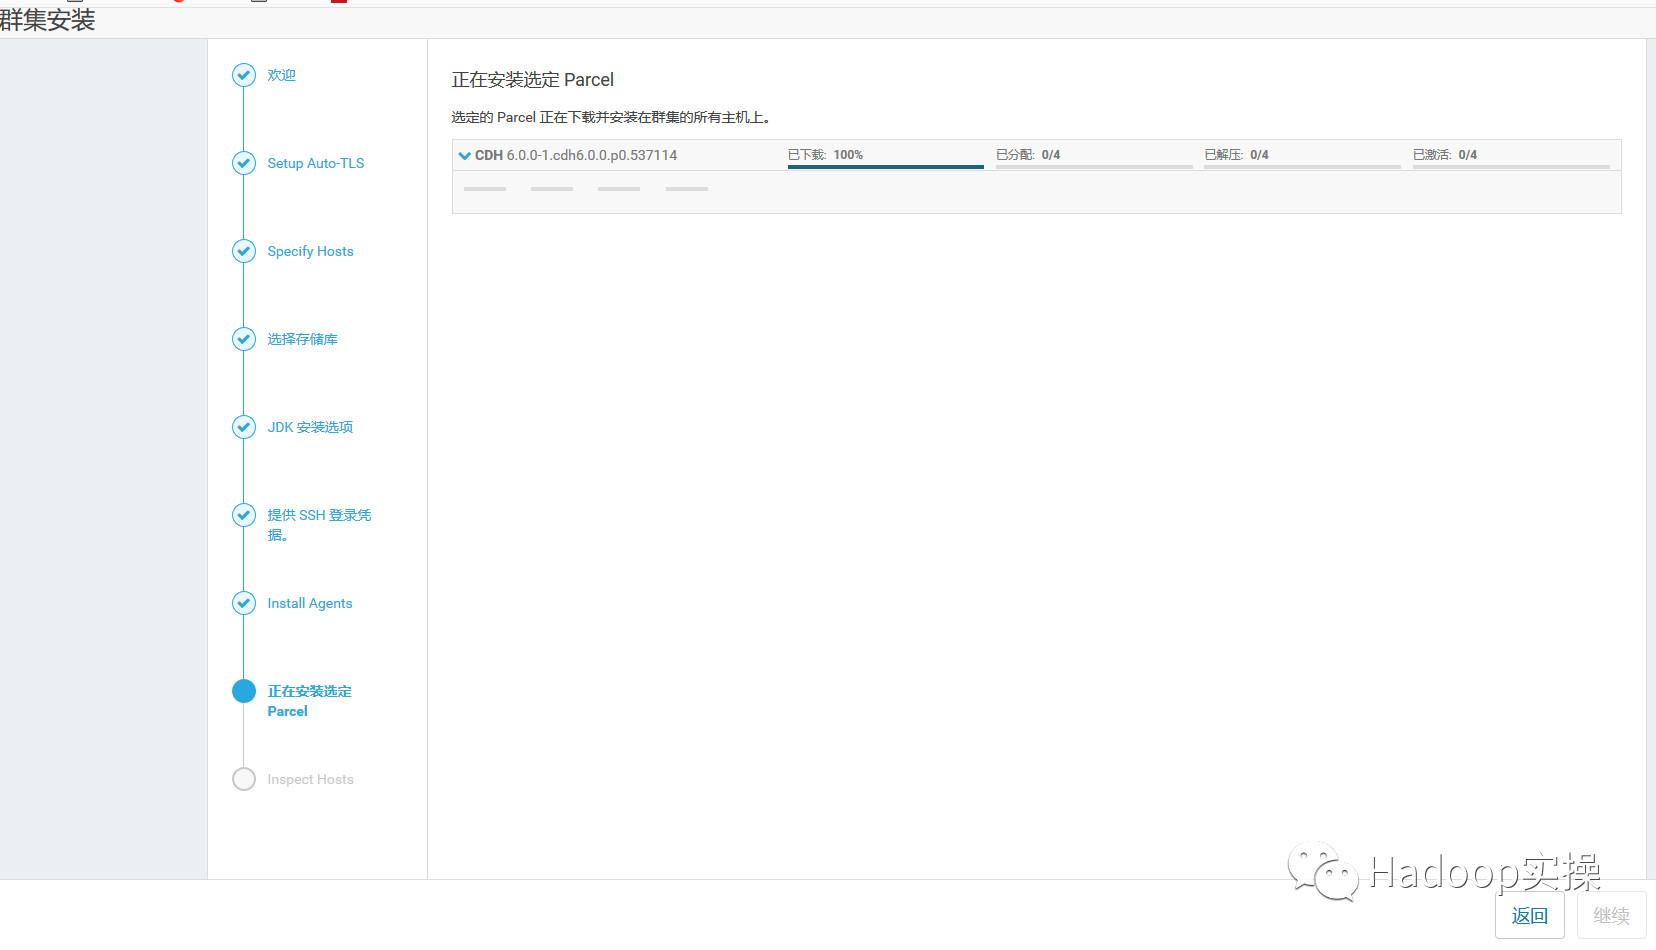
13.點選“繼續”,進入下一步安裝cdh到各個節點
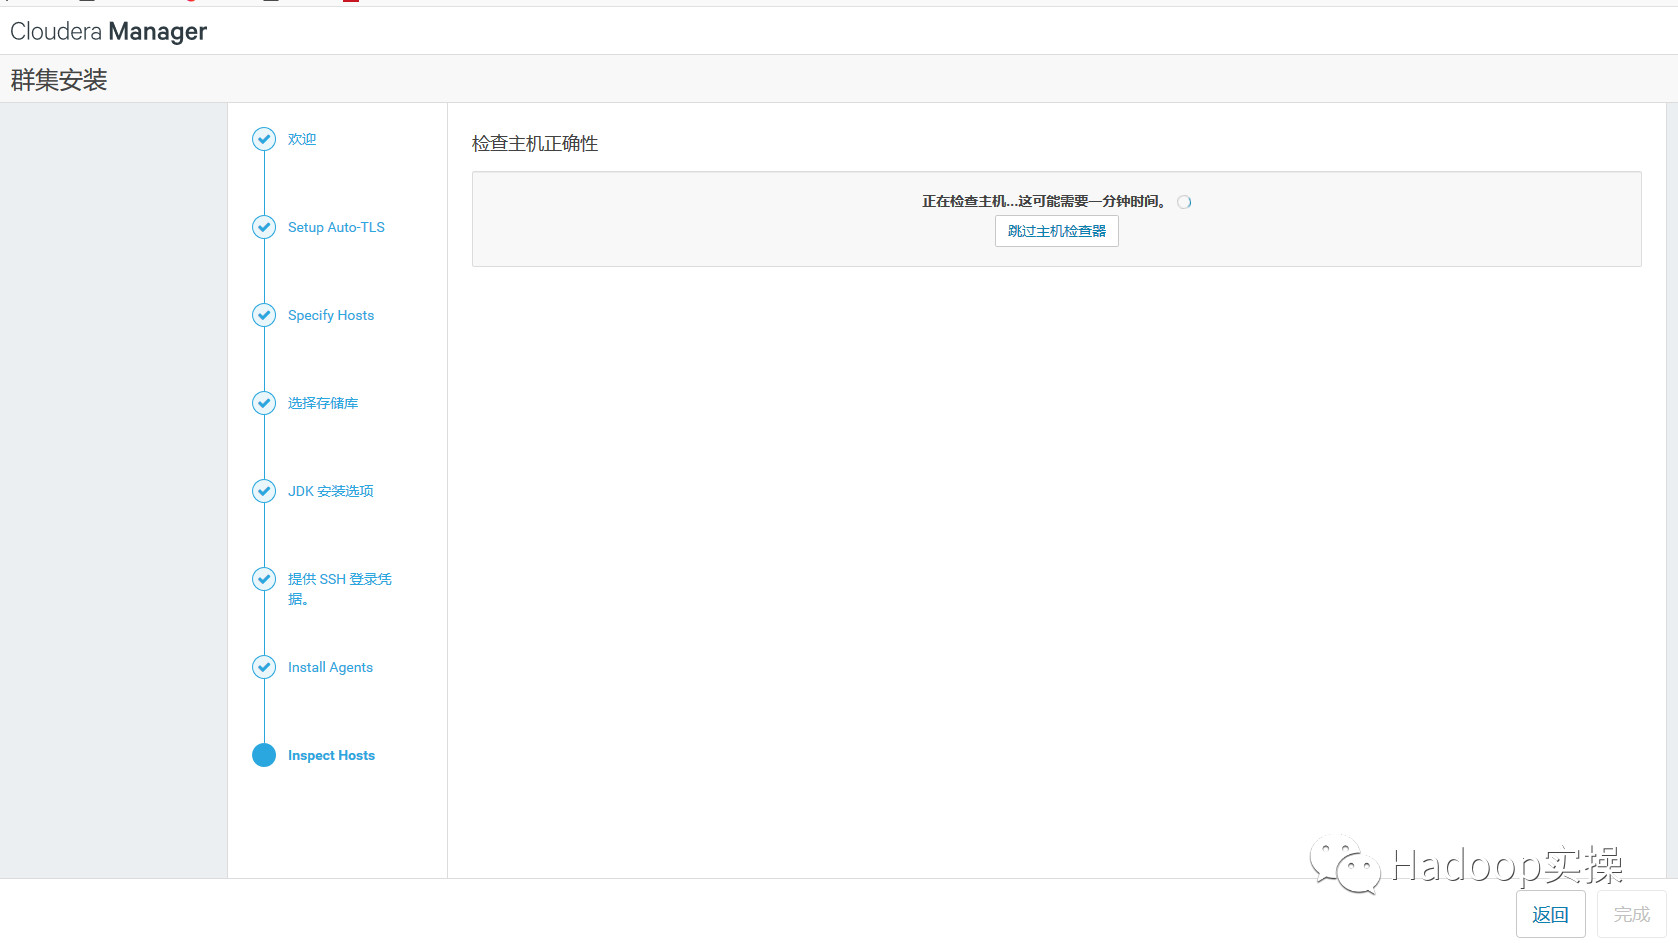
14.點選“繼續”,進入下一步主機檢查,確保所有檢查項均通過。Fayson的機器因為有多個Java版本有一些警告,此步忽略。
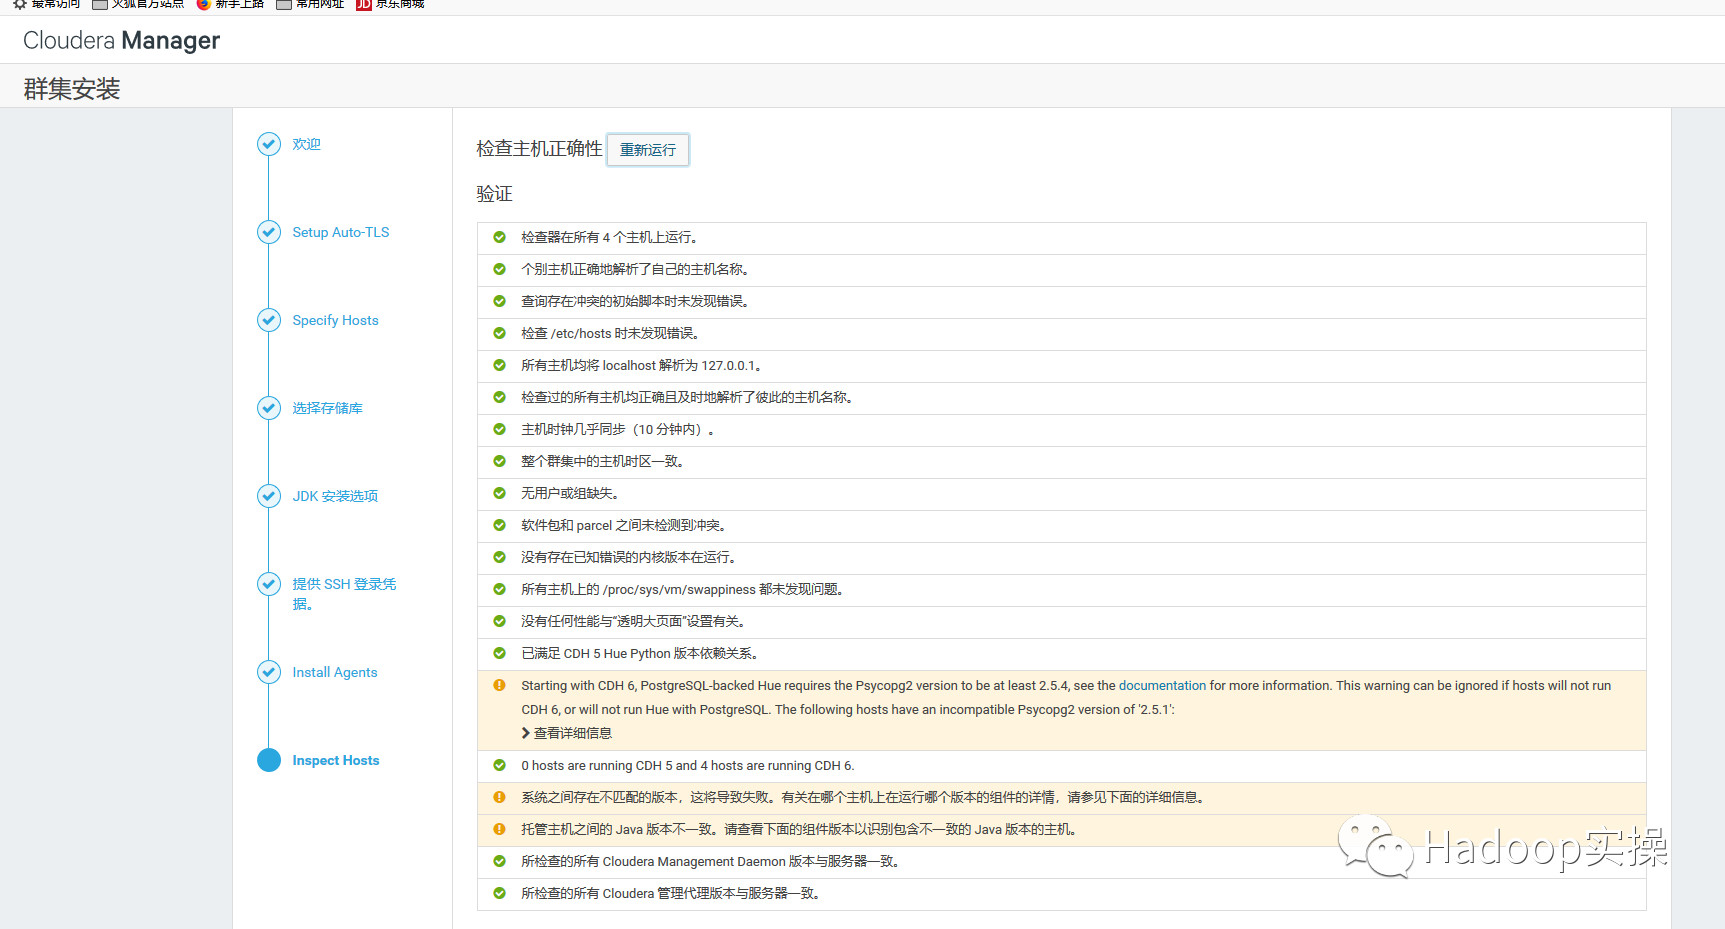
點選完成進入服務安裝嚮導。
4.2.叢集設定安裝嚮導
1.選擇需要安裝的服務
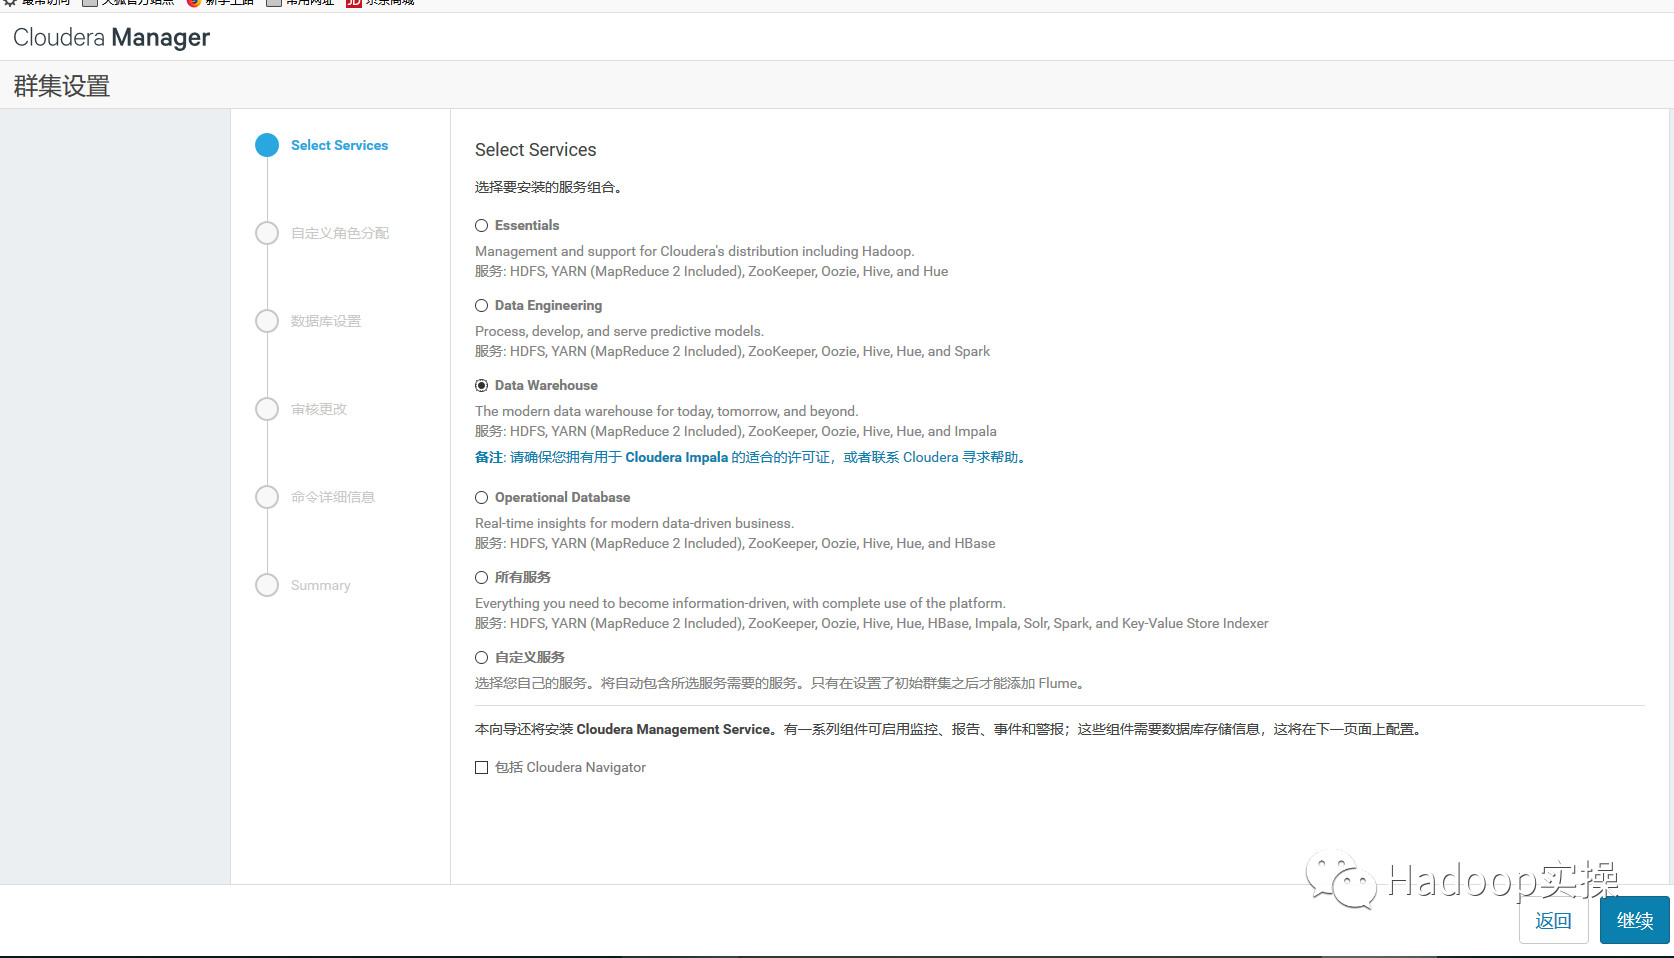
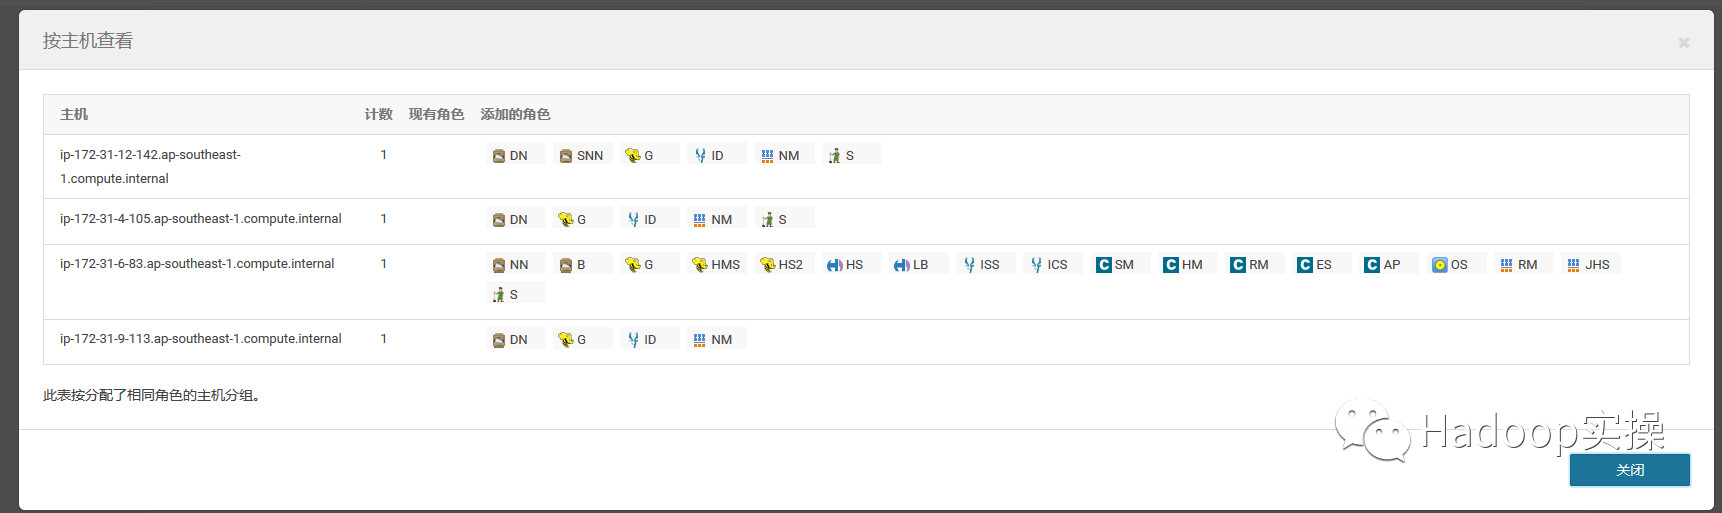
2.點選“繼續”,進入叢集角色分配

3.點選“繼續”,進入下一步,測試資料庫連線
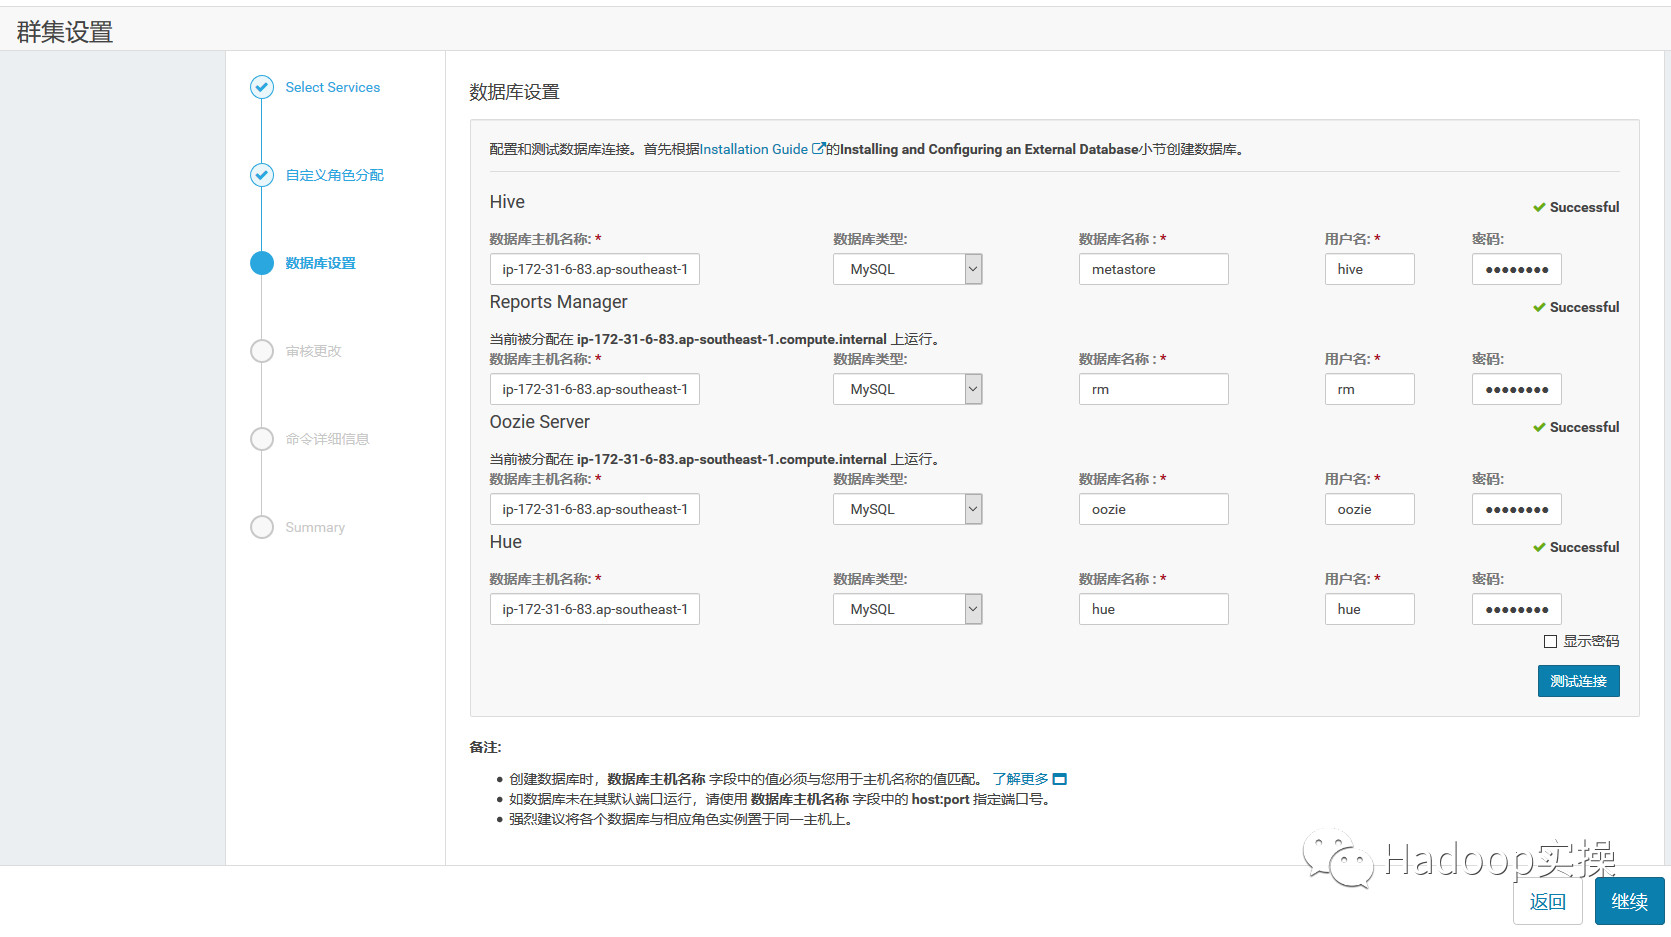
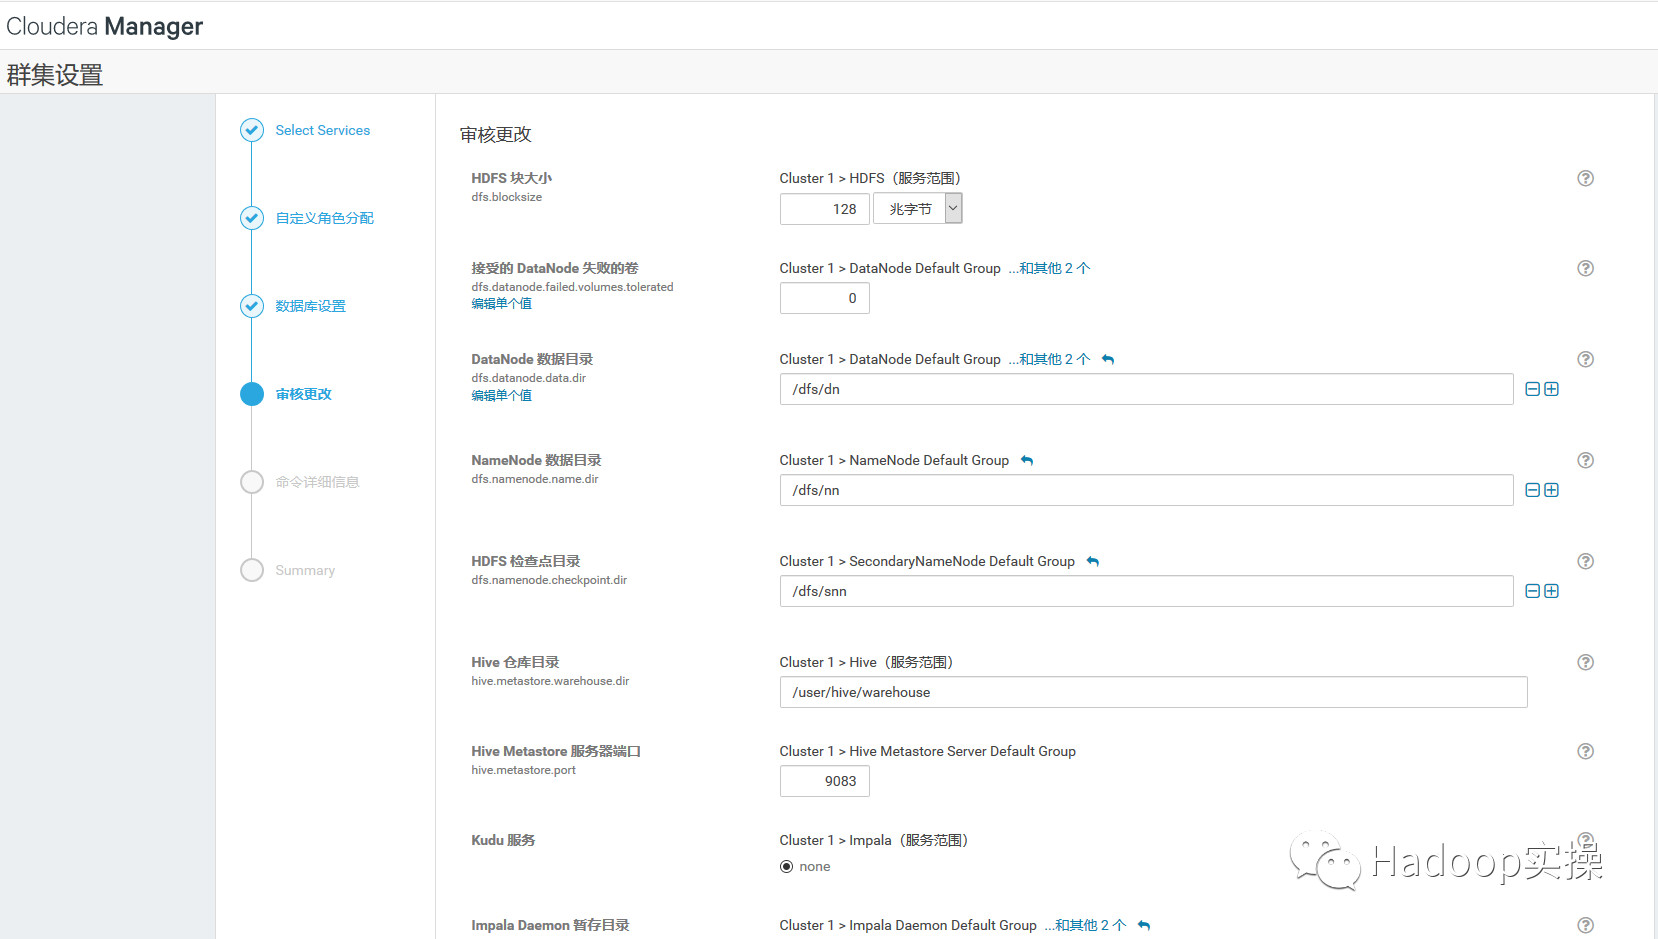
4.測試成功,點選“繼續”,進入目錄設定,此處使用預設預設目錄,根據實際情況進行目錄修改
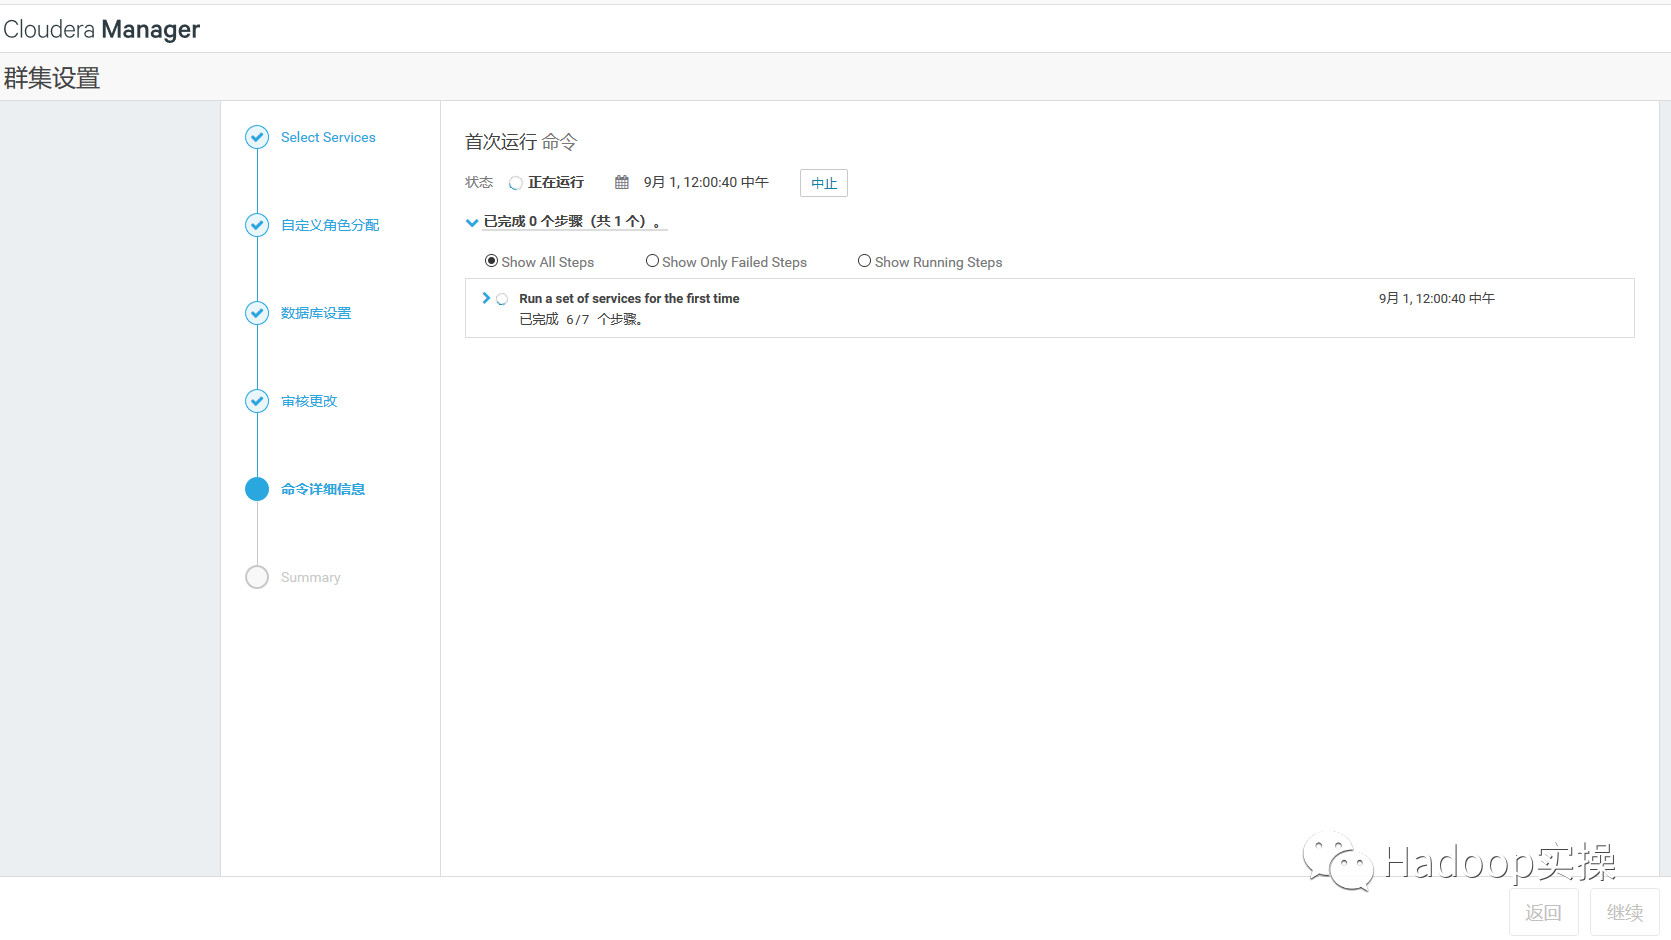
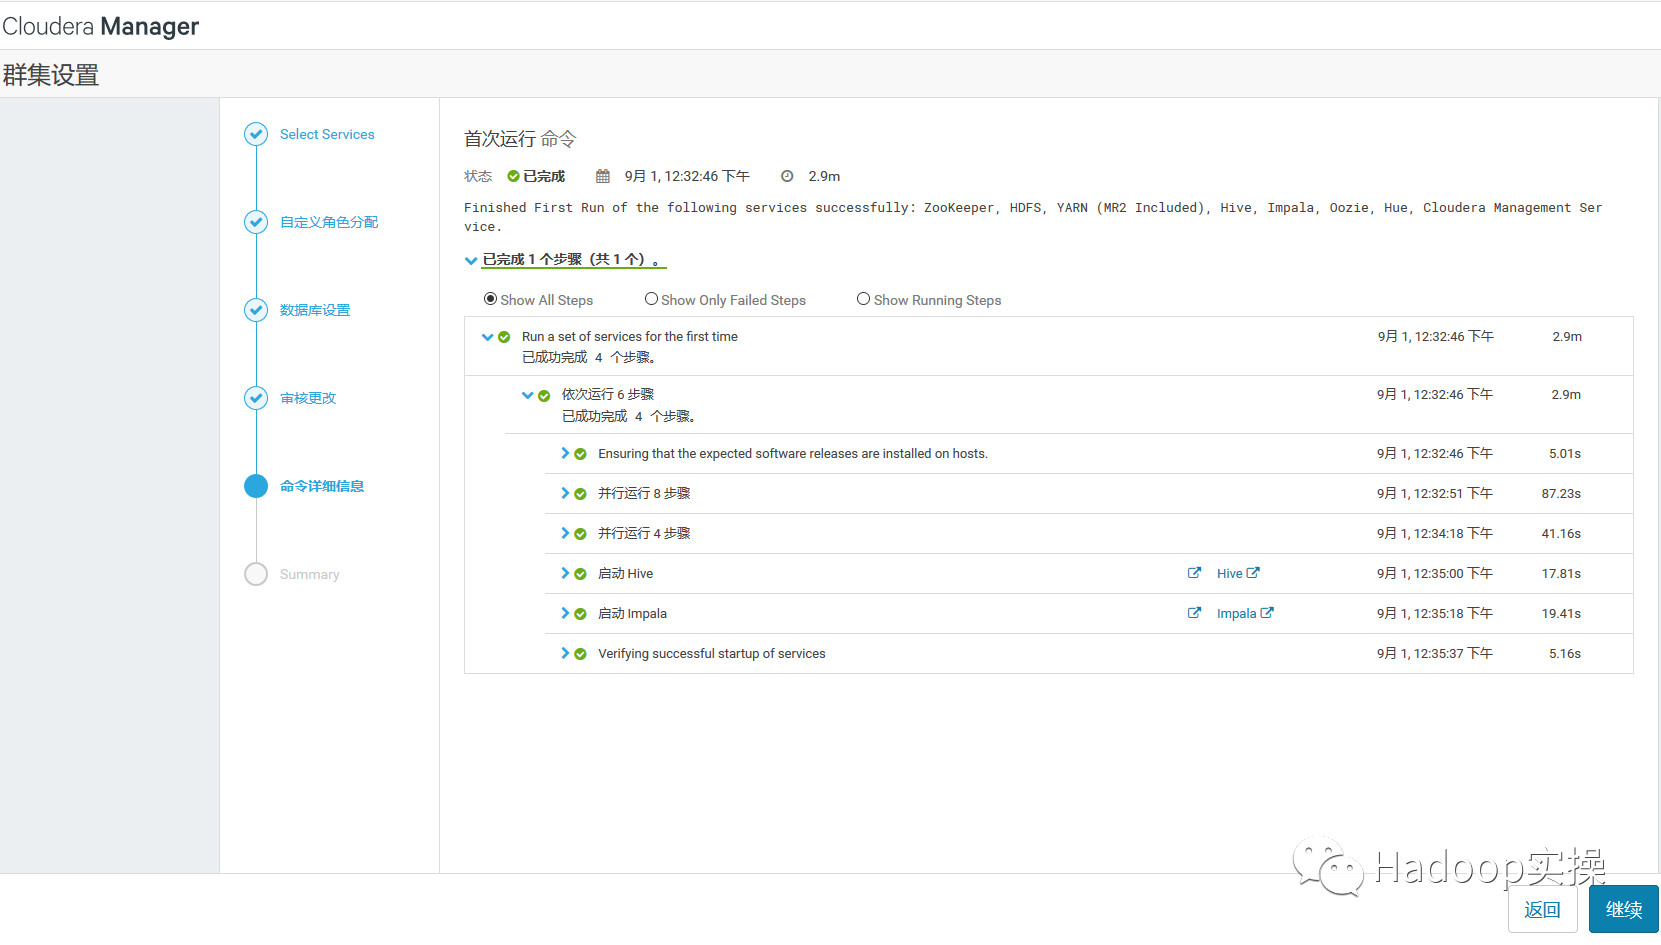
5.點選“繼續”,進入各個服務啟動
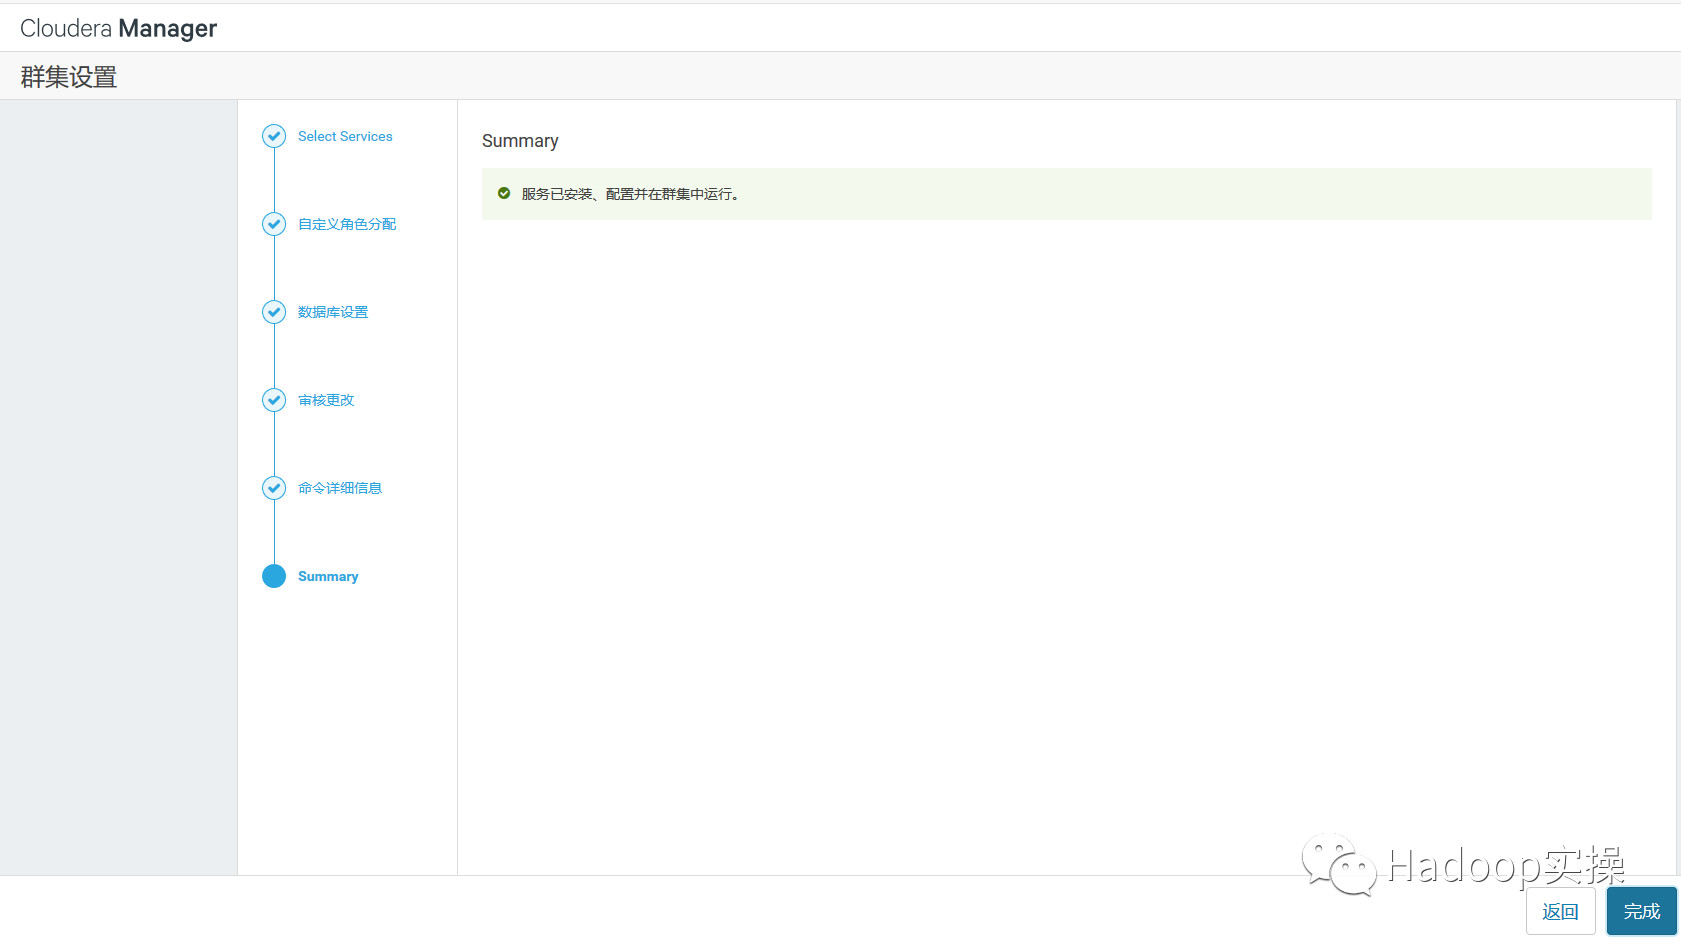
6.安裝成功,點選繼續
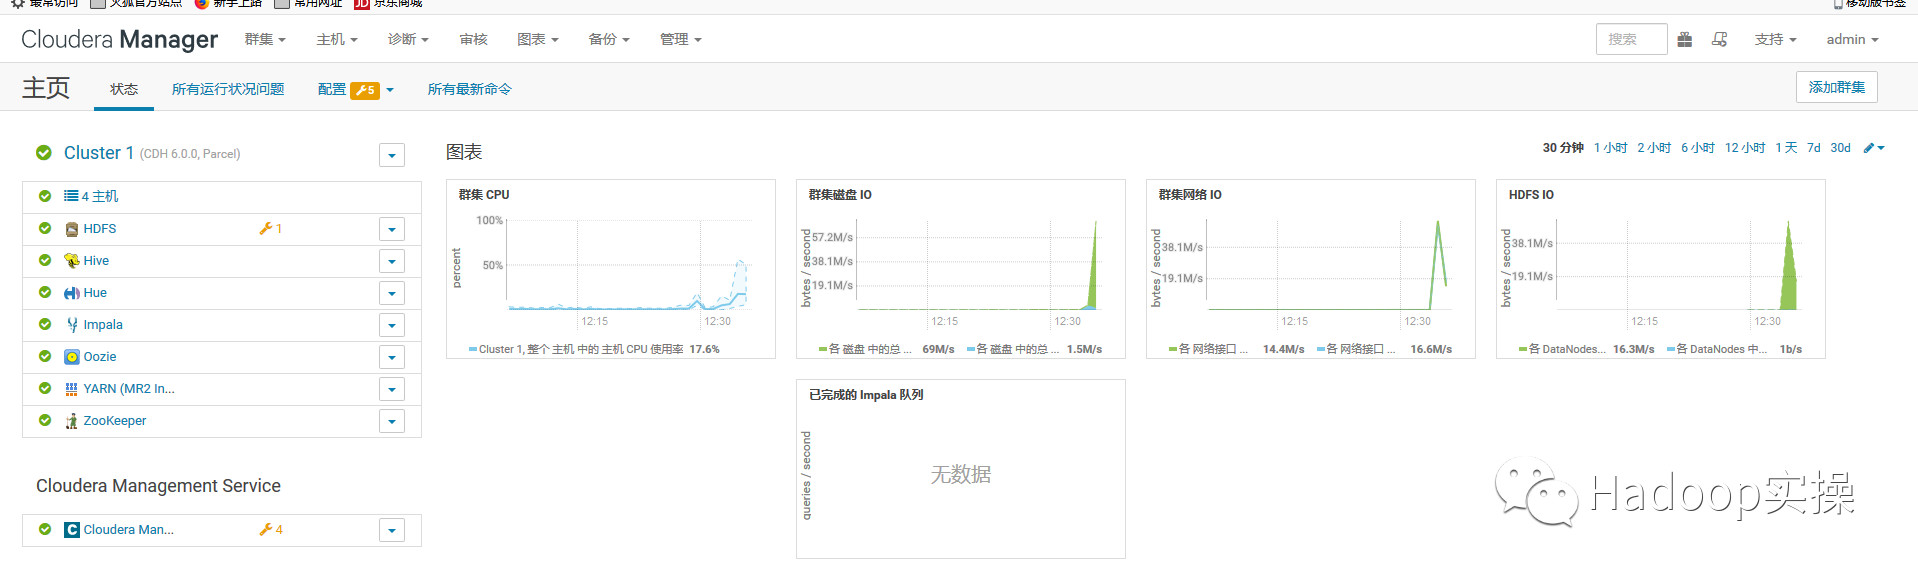
7.安裝成功後進入home管理介面
4.3.元件版本檢查
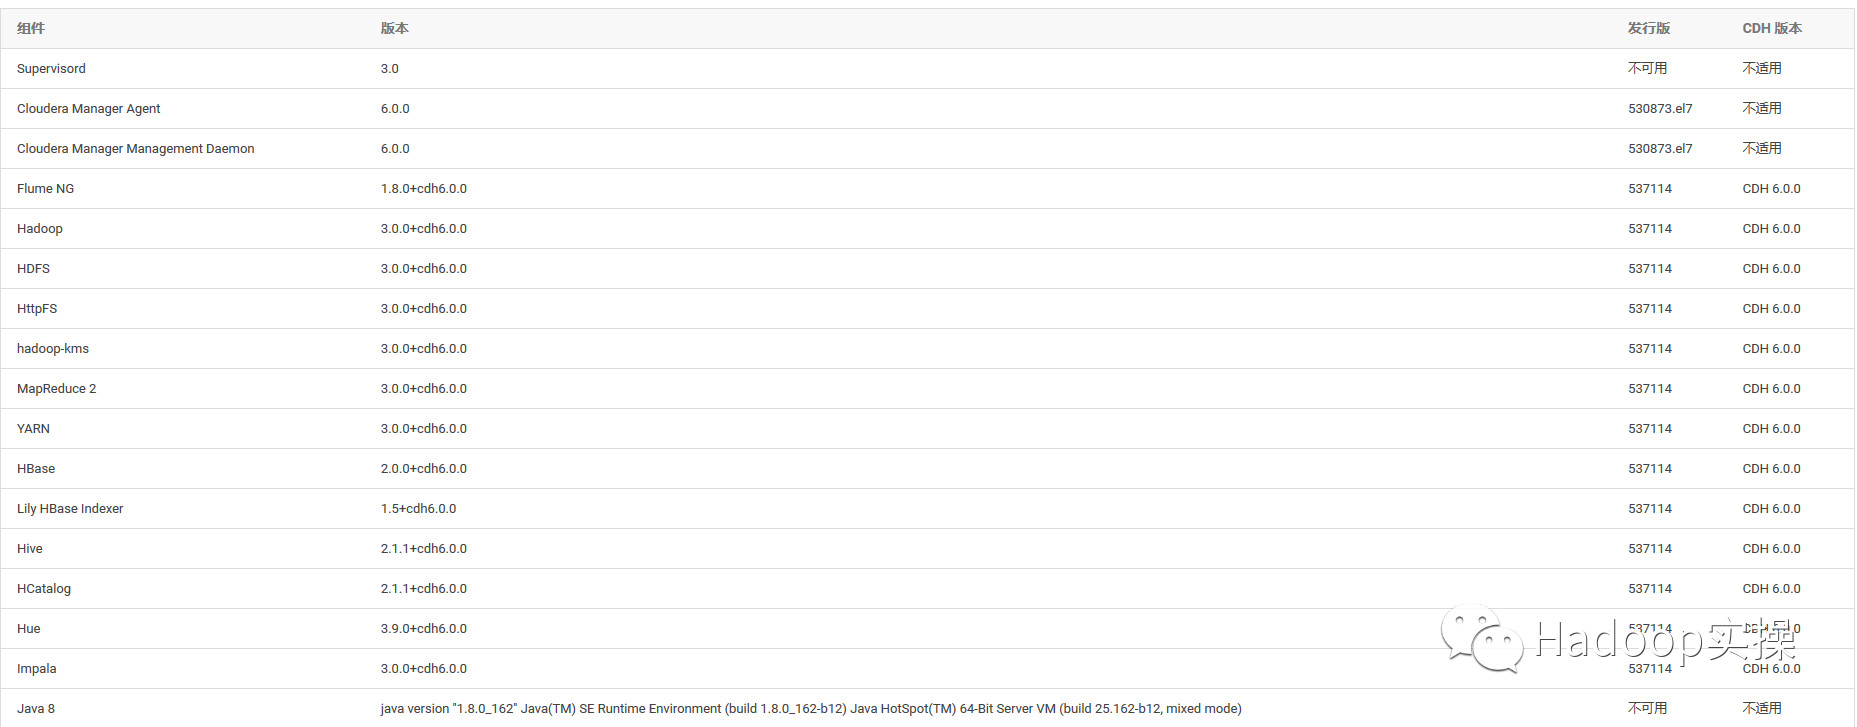
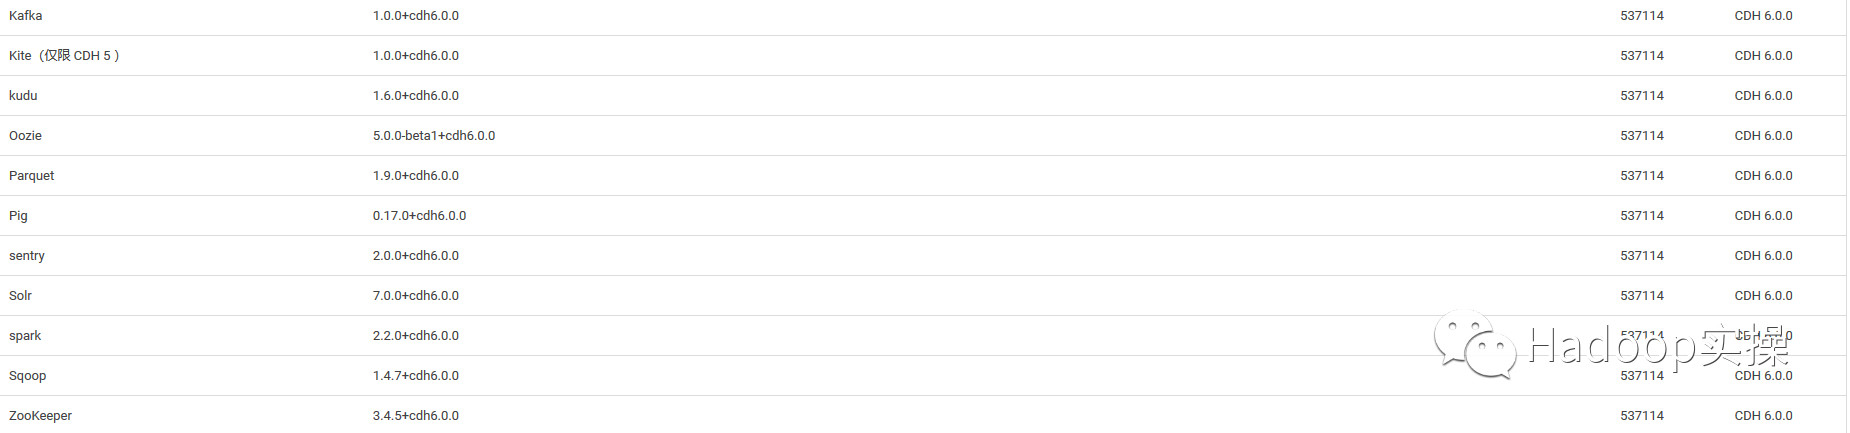
可以看到Hadoop3.0,Flume1.8,HBase2.0,Hive2.1,Spark2.2,Hue3.9,Impala3.0,Kafka1.0.0,Kudu1.6,Oozie5.0,Pig0.17,Senty2.0,Solr7.0,Sqoop1.4.7,Zookeeper3.4.5等。
5.總結
1.從安裝方式上來看,CDH6與CDH5變化不大,這也方便了CDH5的使用者可以較為快速的遷移到CDH6,以及適應CDH6的安裝與使用。
2.安裝嚮導介面有一些變化,現在可以一目瞭然的看到一共多少步驟,以及每個步驟是幹什麼。
3.安裝條件前置沒有任何變化,包括防火牆,Selinux關閉,ntp同步等等。可以參考Fayson之前的文章《CDH安裝前置準備》
4.進到主介面變化也不大,主要是Cloudera的logo變成了黑色,與Cloudera主頁的整體風格一致。
5.在配置Cloudera Manager連線到資料庫時的指令碼有所變化。以前是/usr/share/cmf/schema/scm_prepare_database.sh,現在是/opt/cloudera/cm/schema/scm_prepare_database.sh
6.Cloudera Manager服務的狀態在Redhat7通過systemctl status cloudera-scm-server檢視是顯示正確,而以前是不正確的,可以參考Fayson之前的文章《Cloudera Manager Server服務在RedHat7狀態顯示異常分析》
7.Cloudera Manager的rpm安裝包由之前的7個變成了5個,去掉了之前的JDK6的包,然後自帶JDK1.8.0_141,將不再支援JDK1.7。
8.注意CM的安裝除了下載rpm包以外,還要下載allkeys.asc檔案,否則安裝agent的時候會報以下錯誤:
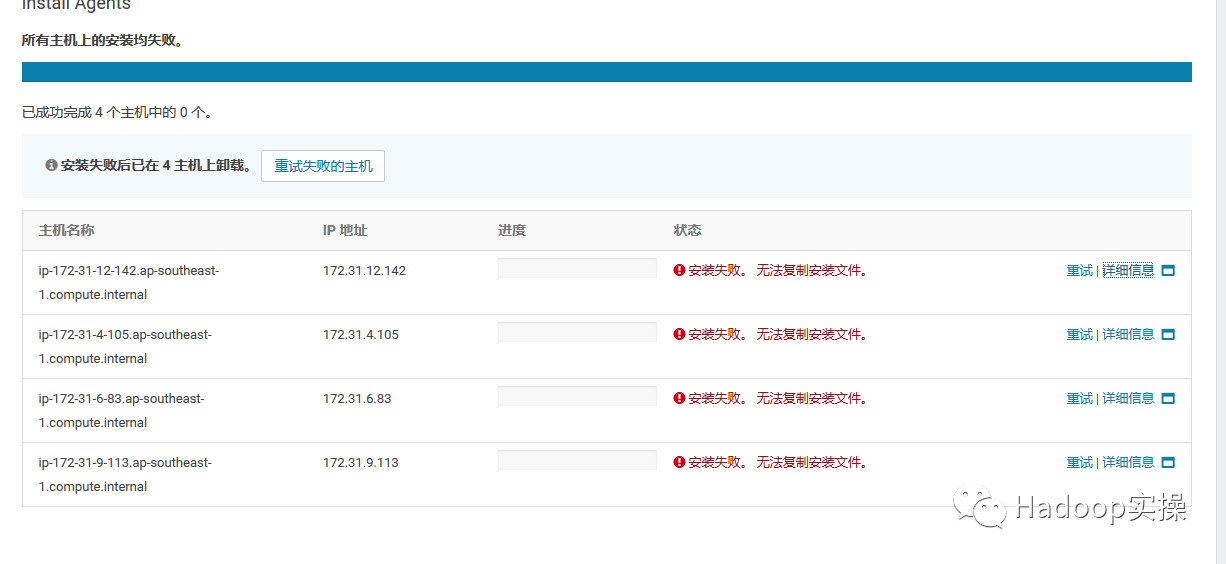
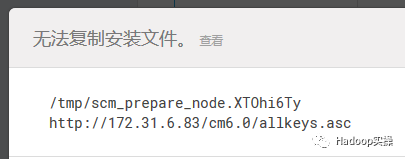
9.對於離線安裝CDH6.0,分發Parcel出現hash校驗失敗的問題,是因為在CM6中修復了一個bug,讓它不再忽略由http伺服器傳送的“Content-Encoding”的header資訊,但是我們在Redhat中安裝的httpd服務,當它傳輸parcel檔案時,預設會錯誤的設定“Content-Encoding”。於是CM server會錯誤的認為parcel檔案已經被httpd壓縮並嘗試解壓縮。所以會導致失敗。解決辦法是參考2.8章節的,設定httpd的conf檔案,AddType application/x-gzip .gz .tgz .parcel,然後重啟httpd服務和CM服務。這個問題在beta的時候就已經存在了,具體請參考《Redhat7.4安裝CDH6.0_beta1時分發Parcel異常分析》
10.在安裝過程中會有頁面提示Auto-TLS,該步驟可以忽略,不過如果對主機通訊或者CM頁面訪問有SSL/TLS需求的話,也可以按照提示進行配置。
11.更多CDH6相關Hadoop3元件的新功能,Fayson將在接下來的文章繼續分享,歡迎大家持續關注。
為天地立心,為生民立命,為往聖繼絕學,為萬世開太平。
推薦關注Hadoop實操,第一時間,分享更多Hadoop乾貨,歡迎轉發和分享。
原創文章,歡迎轉載,轉載請註明:轉載自微信公眾號Hadoop實操