IDEA建立簡單servlet程式
阿新 • • 發佈:2018-11-27
建立專案
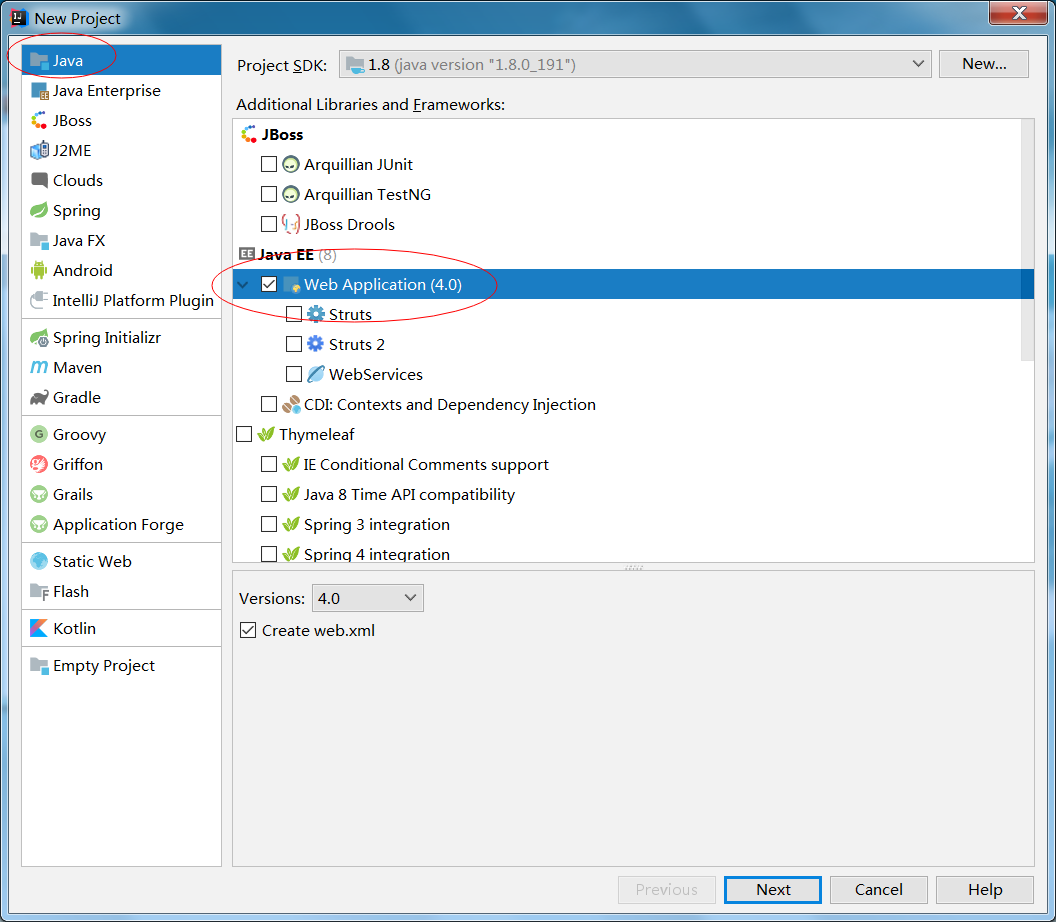

建立完後的目錄結構為:
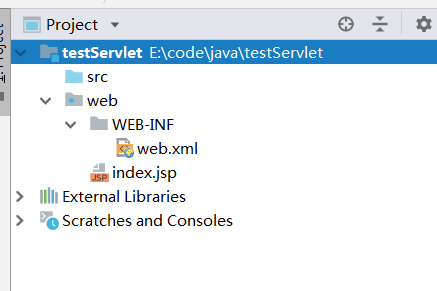
web專案配置
在WEB-INF目錄下新建兩個資料夾,分別命名未classes和lib(classes目錄用於存放編譯後的class檔案,lib用於存放依賴的jar包)

專案設定:File –> Project Structure…,進入 Project Structure視窗,點選 Modules –> 選中專案“JavaWeb” –> 切換到 Paths 選項卡 –> 勾選 “Use module compile output path”,將 “Output path” 和 “Test output path” 都改為之前建立的classes目錄 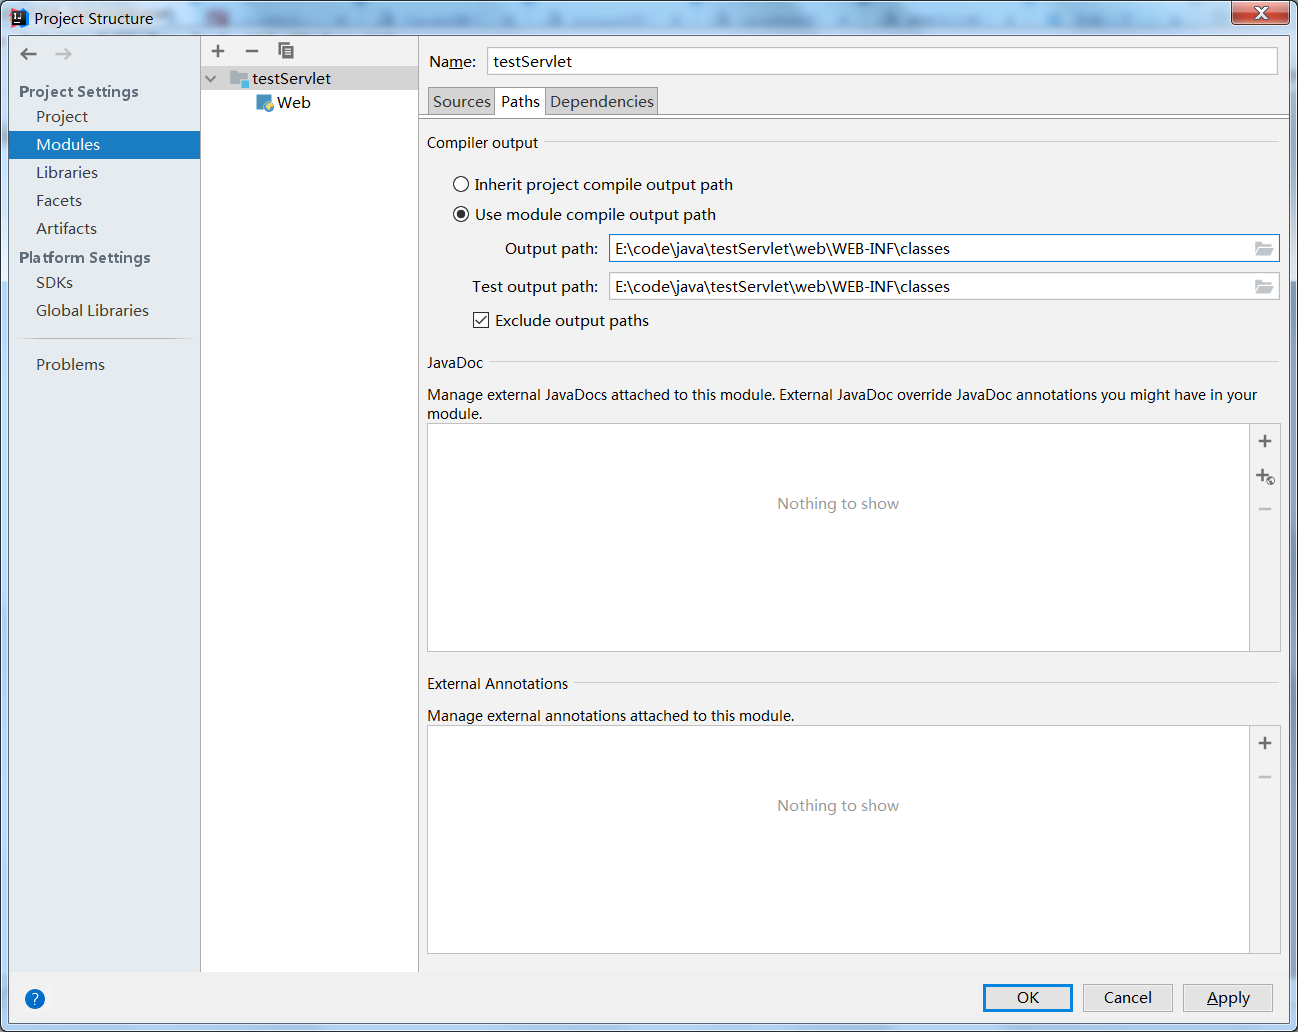
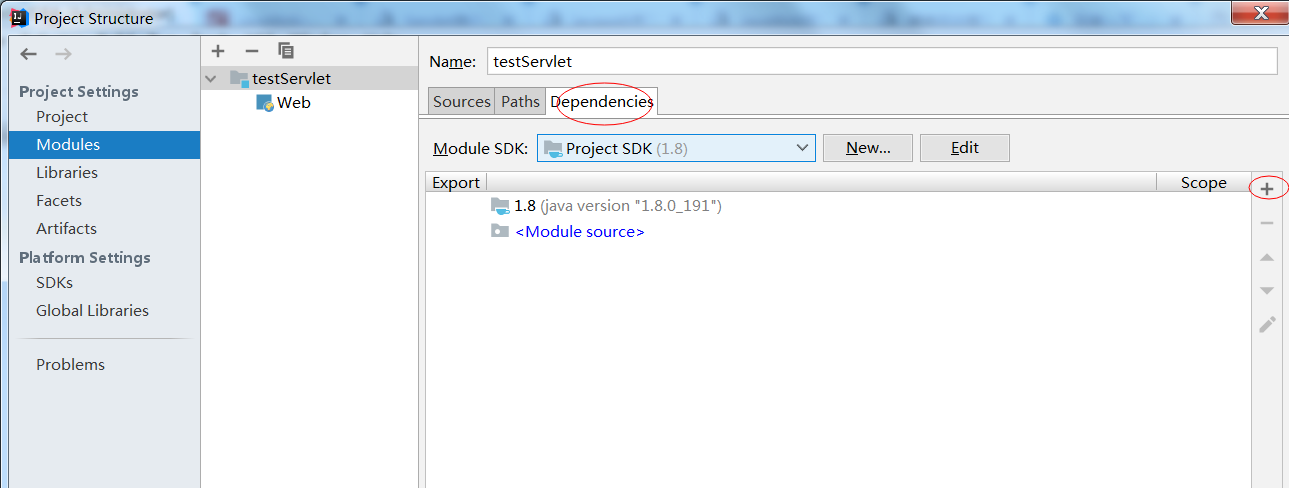
點選 Modules –> 選中專案“JavaWeb” –> 切換到 Dependencies 選項卡 –> 點選右邊的“+”,選擇 “Library…”,選擇tomcat的庫


編寫servlet程式
在src目錄下建立servlet檔案:起名為testDemo,自動生成的介面沒有@Override需要自己加上,並且在doGet介面中新增內容
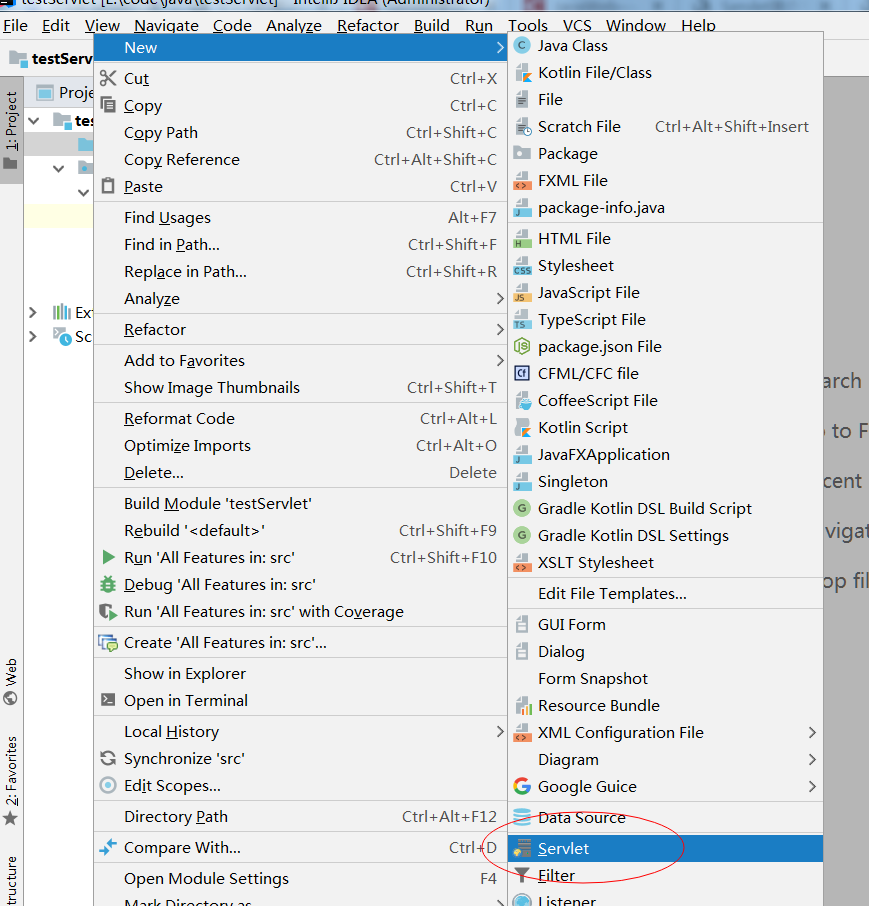
@WebServlet(name = "testDemo") public class testDemo extendsHttpServlet { @Override protected void doPost(HttpServletRequest request, HttpServletResponse response) throws ServletException, IOException { } @Override protected void doGet(HttpServletRequest request, HttpServletResponse response) throws ServletException, IOException { response.setContentType("text/html"); PrintWriter out = response.getWriter(); out.println("<h1>hello world</h1>"); } }
修改web.xml檔案內容:在webapp標籤內部加上以下內容:
<?xml version="1.0" encoding="UTF-8"?>
<web-app xmlns="http://xmlns.jcp.org/xml/ns/javaee"
         xmlns:xsi="http://www.w3.org/2001/XMLSchema-instance"
         xsi:schemaLocation="http://xmlns.jcp.org/xml/ns/javaee http://xmlns.jcp.org/xml/ns/javaee/web-app_4_0.xsd"
         version="4.0">
    <servlet>
        <servlet-name>Test</servlet-name>
        <servlet-class>testDemo</servlet-class>
    </servlet>

    <servlet-mapping>
        <servlet-name>Test</servlet-name>
        <url-pattern>/</url-pattern>
    </servlet-mapping>
</web-app>
執行程式
配置Tomcat容器:
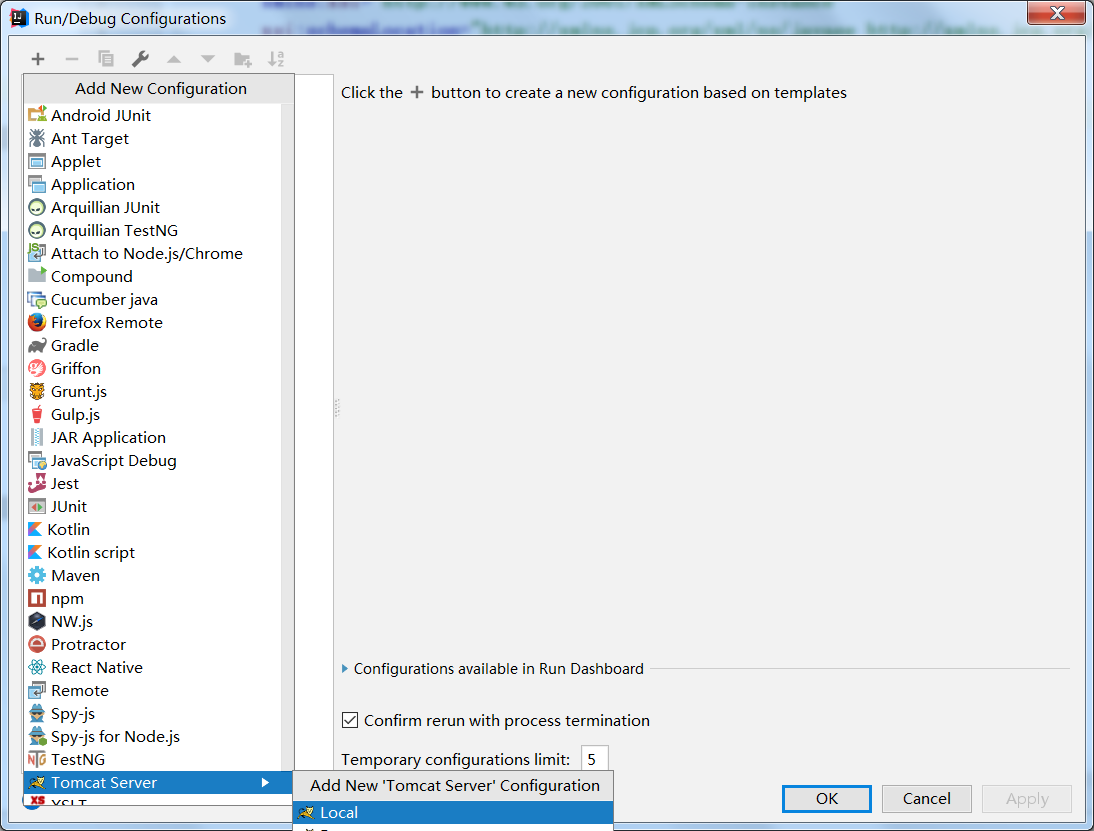
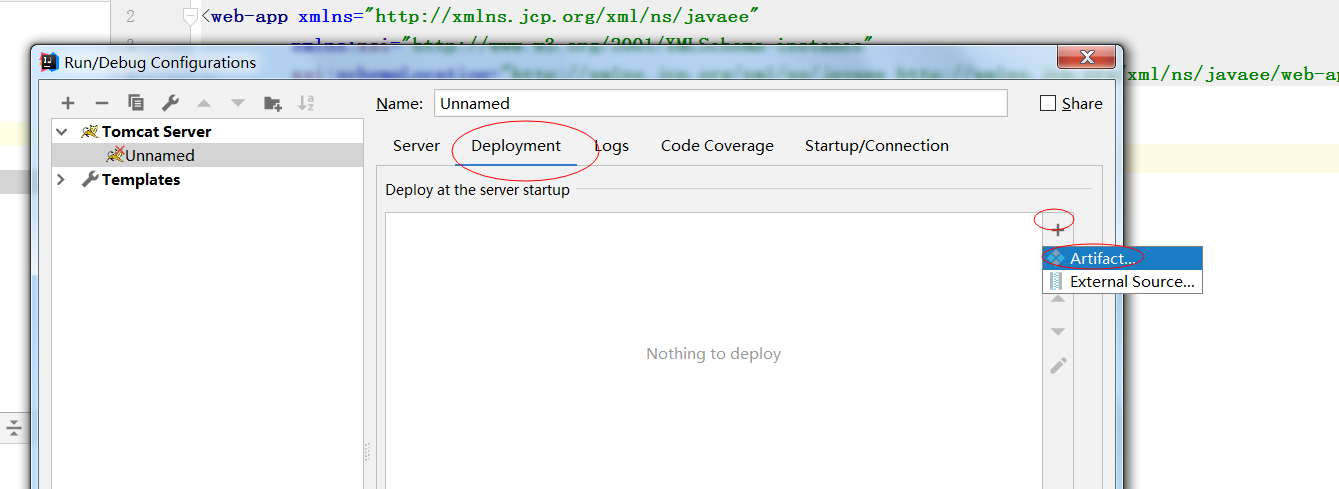
配置好後執行程式,然後訪問:http://localhost:8080/test
得到結果

