
ssi框架中釋出webservie與簡單呼叫
阿新 • • 發佈:2018-11-28
1.在spring配置檔案中引用cxf定義相關檔案
將cxf的catlog加在spring的檔案頭部分,然後
xmlns:jaxws="http://cxf.apache.org/jaxws"
xsi:schemaLocation=“http://cxf.apache.org/jaxws
					 http://cxf.apache.org/schemas/jaxws.xsd”
<!-- 引入cfx 框架的bean定義xml檔案 -->
<import resource="classpath:META-INF/cxf/cxf.xml"/>
<import resource= 在引用cxf配置檔案之後寫一個應用WebService的介面類
package ws;

import javax.jws.WebService;

@WebService
public interface HelloWebService {
	public String helloWeb();
}
然後寫介面實現
package ws.impl;
import 2.寫完介面類之後還需要在spring的配置檔案中釋出當前的webservice
<!-- 釋出webservice介面 -->
	<jaxws:endpoint
		id="testWS" //識別webservice的id
		implementor="#helloWebServiceimpl"  介面實現,使用#獲取spring注入的物件
		address="/hello" //訪問路徑
		implementorClass="ws.HelloWebService" 介面
	/>
3.釋出完之後最重要的一步,配置專案web.xml
<servlet>
		<servlet-name>cxf</servlet-name>
		<servlet-class>org.apache.cxf.transport.servlet.CXFServlet</servlet-class>
		<load-on-startup>1</load-on-startup>
	</servlet>

	<servlet-mapping>
		<servlet-name>cxf</servlet-name>
		<url-pattern>/WebService/*</url-pattern>
	</servlet-mapping>
最後webservice的路徑就是 localhost:8001/專案名/web.xml中servlet-mapping配置的url/在spring配置檔案中的address 組成
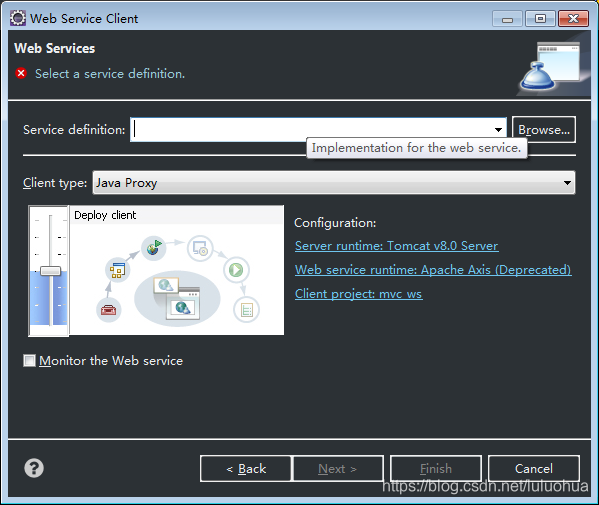
4.釋出完WebService後建立一個客戶端專案
使用eclipes自帶的模板
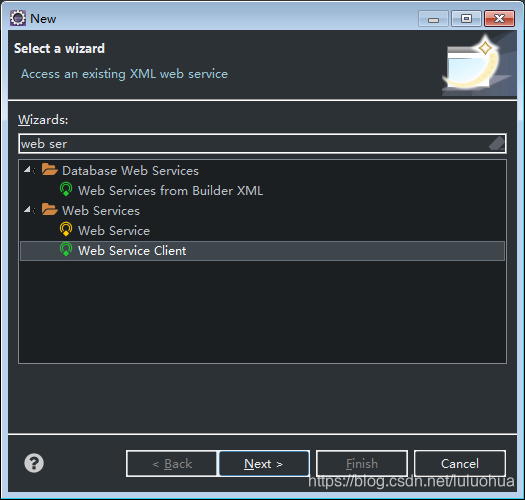
在下圖填入webservice的url,eclipes 會自動建立一個webservice的客戶端程式
建立完之後就是一個簡單的專案可以呼叫接口裡的內容了