基於struts+hibernate+ajax的登入註冊驗證與購物車demo解析
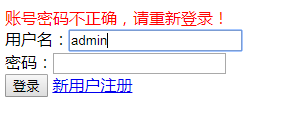
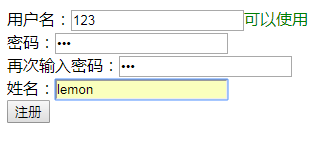
本博文主要介紹使用struts完成頁面跳轉和hibernate訪問資料庫的方式,完成簡單的ajax註冊驗證和購物車功能demo例項。將搭建過程和一些心得分享出來。此文為流程分析,並不介紹具體實現過程的每個細節,原始碼放在了下載頁。頁面截圖如下(請忽略頁面醜,只為功能齊全...)
一:struts+hibernate環境搭建
二:使用者登入實現
三. 註冊功能的動態重新整理驗證
四:加入購物車


一:struts+hibernate環境搭建
在此demo中,使用struts完成跳轉、hibernate訪問資料庫,則需要配置struts與hibernate。新建web專案,配置struts(web.xml新建filter-struts.xml),src下struts.xml檔案如下:
<struts>
	<include file="struts/login.xml"></include>
	<include file="struts/product.xml"></include>
</struts>
配置hibernate,src下新建hibernate.cfg.xml,配置請參考hibernate使用博文。
新建user類,id,name,userName,passWord屬性,並配置與資料庫對映關係 。
<hibernate-mapping package="pojo">
	<class name="User" table="user_">
		<id name="id" column="id">
			<generator class="native"/>
		</id>
		<property name="name" column="name"/>
		<property name="userName" column="username"/>
		<property name="passWord" column="password"/>
		<property name="createTime" column="createtime"/>
	</class>
</hibernate-mapping>
二:使用者登入實現
1. 新建login.jsp,登入驗證實現思路主要為以下幾要點:
form表單提交使用者輸入的資料,表單內容的name屬性為user.name等物件.屬性名的形式,提交form表單,請求login.action,交給struts跳轉到後臺,後臺通過hibernate查詢資料庫,如果輸入正確跳轉至首頁,否則重新跳轉至登入頁面,並在session中存入log提示資訊,告訴使用者登入失敗。
2. struts-login.xml:
<struts>
	<package name="login" extends="struts-default" namespace="/login">
		<!-- 登入驗證 -->
		<action name="loginCheck" class="action.LoginCheck" method="loginCheck">
			<result name="success">index.jsp</result>
			<result name="fail" type="redirect">/</result>
		</action>
		<!-- 執行註冊操作 -->
		<action name="zhuce" class="action.LoginCheck" method="zhuce">
			<result name="success" type="redirect">/</result>
			<result name="fail">fail.jsp</result>
		</action>
		<!-- 註冊時檢測使用者名稱是否重複 -->
		<action name="zhuceCheck" class="action.LoginCheck" method="zhuceCheck">
		</action>
		<action name="myMsg" class="action.LoginCheck" method="myMsg">
			<result name="myIndex">/user/myIndex.jsp</result>
		</action>
		<!-- 使用者點選退出登入 -->
		<action name="exit" class="action.LoginCheck" method="exit">
			<result name="login" type="redirect">/</result>
		</action>
	</package>
</struts>
login.jsp:
<% Map m = ActionContext.getContext().getSession();
	String result = (String)m.get("result");
	if(result == "yes") {%>
		<font color="green">註冊成功</font>
	<% }%>
	<%if(result == "fail") { %>
		<font color="red">賬號密碼不正確,請重新登入!</font>
	<%} %>
<% m.remove("result"); %>
	<form action="login/loginCheck" method="post">
		使用者名稱:<input type="text" name="user.userName"/><br/>
		密碼:<input type="password" name="user.passWord"/><br/>
		<input type="submit" value="登入"/>
		<a href="login/zhuce.jsp">新使用者註冊</a>
	</form>
action.LoginCheck.java:
public String loginCheck() {
		Session s = sf.openSession();
		Map m = ActionContext.getContext().getSession();//獲取session
		s.beginTransaction();
		if(user != null) {
			Query q = s.createQuery("from User where username=? and password=?");
			q.setString(0, user.getUserName());
			q.setString(1, user.getPassWord());
			List<User> lu = q.list();
			if(lu.size() > 0) {
				for (User u : lu) {
					user = u;
				}
				m.put("loginOk", user.getName());//登入成功,在session中存放使用者姓名
				m.put("userId", user.getId());//登陸成功,在session存放使用者ID,以便後續使用
				return "success";
			}else {
				m.put("result", "fail");//驗證失敗,則session存放驗證結果,在前臺顯示
				return "fail";
			}
		}else {
			m.put("result", "fail");
			return "fail";
		}
	}
至此,登入驗證完成。相比不比我多解釋,大家都能看懂。
三. 註冊功能的動態重新整理驗證
1. zhuce.jsp:
<form method="post">
	使用者名稱:<input type="text" name="user.userName" id="userName"/><font id="check" color=""></font><br/>
	密碼:<input type="password" name="user.passWord" id="passWord"/><br/>
	再次輸入密碼:<input type="password" id="passWord2"/><br/>
	姓名:<input type="text" name="user.name" id="name"/><br/>
	<button onclick="check()">註冊</button>
</form>
<script src="../js/login/zhuce.js?t=2018007"></script>
form表單中,編寫註冊所需填寫資訊,使用者名稱後面加一個font標籤,用以顯示是否存在驗證結果顯示。
button註冊按鈕,對應js中的check()方法。用以提交使用者輸入的資訊提交form表單。
使用者名稱的ajax動態驗證在js中預載入函式中,通過對使用者名稱input框的輸入監控函式keyup(),也就是當鍵盤彈起式,觸發該函式,來完成使用者名稱的ajax驗證。
2. zhuce.js
var userNameIOk;      //用來驗證form提交時,使用者名稱是否存在,設為全域性變數
$(function() {
	$("#userName").keyup(function() {               //使用者名稱輸入鍵盤彈起時,觸發該方法
		var userName = $("#userName").val();
		var url = "zhuceCheck";   //請求action地址
		$.ajax({
			url:url,
			data:{
				userName:userName
			},
			type:"post",
			dataType:"text",
			success:function(result) {
				if(result == '1') {
					userNameIOk = "OK";
					$("#check").attr("color","green");   //修改fone標籤的顏色屬性值
					$("#check").html("可以使用");
				}
				if(result == '0') {
					userNameIOk = "NO";
					$("#check").attr("color","red");
					$("#check").html("已經存在");
				}
			}
		});
	});
});

//該方法為點選提交時,驗證使用者是否輸入完整以及資料的正確性,然後確定提不提交from
function check() {
	var userName = $("#userName").val();
	var passWord = $("#passWord").val();
	var passWord2 = $("#passWord2").val();
	var name = $("#name").val();
	var resulrt;
	if(userName == "" || userName == null) {
		alert("使用者名稱不能為空");
		resulrt = 0;
	}else if(passWord == "" || passWord == null) {
		alert("密碼不能為空");
		resulrt = 0;
	}else if(passWord2 == "" || passWord2 == null) {
		alert("請再次輸入密碼");
		resulrt = 0;
	}else if(name == "" || name == null) {
		alert("姓名不能為空");
		resulrt = 0;
	}else if(passWord2 != passWord) {
		alert("兩次輸入的密碼不一致,請檢查!");
		resulrt = 0;
	}else if (userNameIOk != "OK") {
		alert("該使用者名稱已經存在,請重新輸入");
		resulrt = 0;
	}else {
		resulrt = 1;
	}
	if(resulrt == 1) {
		var form = window.document.forms[0];  //獲取該html文件中的form
		form.action = "zhuce";                //設定該form的action地址
		form.submit();                        //提交該form
	}else {
		$("form").submit(function() {        //獲取所有的form表單,並設定submit屬性執行
                                             //function,返回false,代表不提交
			return false;
		});
	}
}
3. 請求的後臺方法:
public void zhuceCheck() {
		HttpServletResponse response = ServletActionContext.getResponse();//獲取response物件
		response.setCharacterEncoding("UTF-8");
		System.out.println(userName);
		checkResult = loginService.clickUserName(userName);  //hibernate驗證使用者名稱是否存在
		try {
			response.getWriter().write(checkResult);//通過response返回ajax返回結果
		} catch (IOException e) {
			e.printStackTrace();
		}
	}
至此,通過ajax完成動態驗證完成。點選註冊,插入資料庫的操作,這裡不再贅述。
四:加入購物車
1. 新建product實體類,並配置好hibernate對映關係,新增幾條商品資訊,然後通過hibernate查詢所有商品資訊存在list集合中,struts返回jsp頁面,此過程不再贅述,以下為返回的jsp頁面:
<table style="width: 555px" border="1" cellpadding="0" align="center">
	<tr>
		<td><font color="blue">服務編號</font></td>
		<td><font color="blue">服務名稱</font></td>
		<td colspan="2"><font color="blue">服務價格</font></td>
	</tr>
	<s:iterator value="lc" var="p" status="st">
		<tr>
			<td>${p.id}</td>
			<td>${p.name}</td>
			<td>${p.price}</td>
			<td>
				<input class="addCart" pid="${p.id}" type="submit" value="加入購物車">
			</td>
		</tr>
	</s:iterator>
</table>
<a href="carList">檢視我的購物車</a>
<font id="msg"></font>
使用struts的s:標籤,遍歷迴圈出list中的資料,並加入一個加入購物車的按鈕,js中設定該按鈕的點選事件,通過ajax根據該產品的id獲取該產品資訊,並存在後臺購物車中(購物車使用session存放),實現不跳轉加入到購物車,並在下方新增fone標籤,用來顯示新增成功或者失敗的提示資訊。
2. js檔案如下:class為addCart的input觸發點選事件,並執行函式,該函式中設定了ajax請求,獲取到該條產品的id,並把id值傳到後臺,根據後臺response返回的結果顯示新增成功或者失敗的提示資訊
$(function(){
	$("#msg").hide();
	$("input.addCart").click(function(){
		var url = "joinCar";
		var pid = $(this).attr("pid");
		$.ajax({
			url:url,
			type:"post",
			data:{
				pid:pid
			},
			dataType:"text",
			success:function(rel) {
				if(rel == "joinOk") {
					$("#msg").attr("color","green");
					$("#msg").html("新增成功!");
					$("#msg").fadeIn(1200);  //設定fone延遲1200ms顯示
					$("#msg").fadeOut(1200);//設定fone延遲1200ms隱藏
				}
				if(rel == "joinFail") {
					$("#msg").attr("color","red");
					$("#msg").html("新增失敗,請重新新增到購物車!");
					$("#msg").fadeIn(1200);
					$("#msg").fadeOut(1200);
				}
			}

		});
	});
});
3. 後臺方法:
public void joinCar() {
		HttpServletResponse response = ServletActionContext.getResponse();
		List<Product> mapPro;
		if(pid > 0) {
			pro = proService.getById(pid);//根據ajax傳來的id獲取該產品的全部資訊
            //獲取session中的該使用者購物車中的內容,key為proCar+id用來區分不用登入使用者使用不同
            //的key值
			mapPro = (List<Product>) m.get("proCar"+id);
			if(mapPro == null) {
				mapPro = new ArrayList<Product>();
			}
			mapPro.add(pro);//將該條產品加入到購物車
			m.remove("proCar");
			m.put("proCar"+id, mapPro);加入該條產品的list重新放回session中
			msg = "joinOk";
		}else {
			msg = "joinFail";
		}
		try {
			response.getWriter().write(msg);  //返回ajax的結果值
		} catch (IOException e) {
			e.printStackTrace();
		}
	}
至此,購物車動態加入功能結束。
