
基於Elastalert的安全告警剖析
https://www.freebuf.com/sectool/164591.html
*本文作者:bigface,本文屬 FreeBuf 原創獎勵計劃,未經許可禁止轉載。elastalert 是一款基於elasticsearch的開源告警產品(官方說明文件)。相信許多人都會使用ELK做日誌收集系統,但是產生一個基於日誌的“優秀”的安全告警確是一個難題。告警規則難編寫,告警規則難管理等。本文是作者探索的安全告警的一些思路,希望能幫助到有需要的人。
本人對ELK告警處理思路:
elastalert 通過post的告警模式,post一個告警資料包到服務端,通過服務端匹配需要告警的物件,告警的方式,最終將安全告警發出。
告警物件(企業人員) 怎麼來? 來源呼叫釘釘API、CMDB、LDAP。
告警方式 怎麼選擇?根據告警級別、告警來源(wazuh、馭龍HIDS、elastalert規則)採用不同的告警方式。

環境說明
Elastic Stack v6.2.2 (適用於6.0+)
Elastalert v0.1.29
elastalert 原始碼部署
下載 elastalert 原始碼
git clone https://github.com/Yelp/elastalert.git
安裝依賴
pip install -r requirements.txt
pip install "elasticsearch>=6.0.0"
建立elastalert索引(Index)&對映(Mapping)
python elastalert/create_index.py --host localhost --port 9200 --index elastalert
建立elastalert的配置檔案 config.yaml :
# 告警規則存放的資料夾
rules_folder: myrules

# 每2分鐘查詢一次elasticsearch run_every:  minutes: 2 # 查詢時間範圍5分鐘 buffer_time:  minutes: 5 # 連線elasticsearch配置 es_host: localhost es_port: 9200 # elasticsearch認證,如果未使用可註釋 es_username: kibana es_password: kibana # elastalert狀態索引 writeback_index: elastalert
開啟elastalert
python elastalert/elastalert.py --config config.yaml
elastalert規則型別
官方規則型別描述並不是太清晰,以下給出alert方式為post的json資料,便於後續大家速查速寫。
以下的規則型別均使用以下文件樣本作觸發告警:
    doc = {
        "@timestamp": get_now(),
        "codec": "nodejs", "tags": "31", "level": "high", "server": "nginx", "status": "anystatus", "message": ">>> [ xxx ]: valid id error ." }
elastalert索引中,
hits表示規則命中條數;matches表示規則命中條數,並且匹配規則觸發告警數量。
any型別
說明:任何規則都會匹配, 查詢返回的每個命中將生成一個警報。
規則:當匹配status欄位為anystatus,觸發告警。
# rule名稱
name: any_rule

# 規則型別 type: any # 監控索引 index: testalert # 監控時間1分鐘內 timeframe:  minutes: 1 # Elastic DSL語法 filter: - term:  status: "anystatus" # 告警方式 alert: post # 服務端介面 http_post_url: "http://localhost:8088/alertapi" http_post_static_payload: # 新增到post包中的資料,規則名稱  rule_name: any_rule # 新增到post包中的資料,告警級別  rule_level: medium
post結果:
{
    "status": "anystatus",
    "_type": "mydata", "level": "high", "num_hits": 5, "@timestamp": "2018-01-31T02:26:52.268477Z", "rule_level": "medium", "server": "nginx", "rule_name": "any_rule", "_index": "testalert", "num_matches": 5, "message": ">>> [ xxx ]: valid id error .", "_id": "AWFKCd4a5xzN_sFQhZgO", "codec": "nodejs", "tags": "31" }
blacklist型別
說明:黑名單規則將檢查黑名單中的某個欄位,如果它在黑名單中則匹配。
規則:當欄位status匹配到關鍵字hacker、huahua,觸發告警
name: blacklist_rule
type: blacklist
index: testalert

timeframe:  minutes: 1  compare_key: status  blacklist: - "hacker" - "huahua"  alert: post http_post_url: "http://localhost:8088/alertapi" http_post_static_payload:  rule_name: blacklist_rule  rule_level: medium
若關鍵字在檔案中,可用
- "!file /path/to/file",目測關鍵字不支援正則(未測過)。
post結果:
{
    "status": "huahua",
    "_type": "mydata", "level": "high", "num_hits": 2, "@timestamp": "2018-01-31T02:37:46.071850Z", "rule_level": "medium", "server": "nginx", "rule_name": "blacklist_rule", "_index": "testalert", "num_matches": 1, "message": ">>> [ xxx ]: valid id error .", "_id": "AWFKE9gM5xzN_sFQhZg2", "codec": "nodejs", "tags": "31" }
whitelist型別
說明:與黑名單類似,此規則將某個欄位與白名單進行比較,如果列表中不包含該字詞,則匹配。
change型別
說明:此規則將監視某個欄位,並在該欄位更改時進行匹配,該領域必須相對於最後一個事件發生相同的變化。
規則:當server欄位值相同,codec欄位值不同時,觸發告警。
name: change_rule
type: change
index: testalert

timeframe:  minutes: 1  compare_key: codec  ignore_null: true  query_key: server  alert: post http_post_url: "http://localhost:8088/alertapi" http_post_static_payload:  rule_name: change_rule  rule_level: medium
欄位解析:
compare_key:與上一條記錄做對比的欄位
query_key:與上一條記錄相同的欄位
ignore_null:忽略記錄不存在compare_key欄位的情況
post結果:
{
    "status": "up",
    "_type": "mydata", "_id": "AWFKIgZA5xzN_sFQhZh5", "tags": "31", "num_hits": 4, "@timestamp": "2018-01-31T02:53:15.413240Z", "rule_level": "medium", "old_value": [ "nodejs" ], "server": "nginx", "rule_name": "change_rule", "_index": "testalert", "new_value": [ "java" ], "num_matches": 1, "message": ">>> [ xxx ]: valid id error .", "level": "high", "codec": "java" }
frequency型別
說明:當給定時間範圍內至少有一定數量的事件時,此規則匹配。 這可以按照每個query_key來計數。
規則:當欄位status匹配到關鍵字frequency超過3次(包括3次),觸發告警
name: frequency_rule
type: frequency
index: testalert

num_events: 3 timeframe:  minutes: 1  filter: - term:  status: "frequency"  alert: post http_post_url: "http://localhost:8088/alertapi" http_post_static_payload:  rule_name: frequency_rule  rule_level: medium
post結果:
{
    "status": "frequency",
    "_type": "mydata", "level": "high", "num_hits": 3, "@timestamp": "2018-01-31T03:28:00.793290Z", "rule_level": "medium", "server": "nginx", "rule_name": "frequency_rule", "_index": "testalert", "num_matches": 1, "message": ">>> [ xxx ]: valid id error .", "_id": "AWFKQdg_5xzN_sFQhZjW", "codec": "java", "tags": "31" }
spike型別
說明:當某個時間段內的事件量比上一個時間段的spike_height時間大或小時,這個規則是匹配的。它使用兩個滑動視窗來比較事件的當前和參考頻率。 我們將這兩個視窗稱為“參考”和“當前”。
規則:當前視窗資料量為3,當前視窗超過參考視窗資料量次數1次,觸發告警。
name: spike_rule
type: spike
index: testalert

timeframe:  minutes: 1  threshold_cur: 3  spike_height: 1  spike_type: "up"  filter: - term:  status: "spike"  alert: post http_post_url: "http://localhost:8088/alertapi" http_post_static_payload:  rule_name: spike_rule  rule_level: medium
欄位解析:
threshold_cur:當前視窗初始值
spike_height:當前視窗資料量連續比參考視窗資料量高(/低)的次數
spike_type:高或低
post結果:
{
    "status": "spike",
    "_type": "mydata", "_id": "AWFLMbye5xzN_sFQhZlk", "tags": "31", "num_hits": 13, "@timestamp": "2018-01-31T07:50:02.382708Z", "rule_level": "medium", "server": "nginx", "rule_name": "spike_rule", "_index": "testalert", "spike_count": 8, "reference_count": 0, "num_matches": 1, "message": ">>> [ xxx ]: valid id error .", "level": "high", "codec": "java" }
flatline型別
說明:當一個時間段內的事件總數低於一個給定的閾值時,匹配規則。
規則:當資訊量低於3條時,觸發告警。
name: flatline_rule
type: flatline
index: testalert

timeframe:  minutes: 1  threshold: 3  alert: post http_post_url: "http://localhost:8088/alertapi" http_post_static_payload:  rule_name: flatline_rule  rule_level: medium
post結果:
{
    "count": 1,
    "num_hits": 1, "@timestamp": "2018-01-31T09:02:35.720517Z", "rule_level": "medium", "rule_name": "flatline_rule", "key": "all", "num_matches": 1 }
cardinality型別
說明:當一個時間範圍內的特定欄位的唯一值的總數高於或低於閾值時,該規則匹配
規則:1分鐘內,level的唯一數量超過2個(不包括2個),觸發告警。
name: test_rule
index: testalert
type: cardinality

timeframe:  minutes: 1  cardinality_field: level  max_cardinality: 2  alert: post http_post_url: "http://localhost:8088/api/alert" http_post_static_payload:  rule_name: test_rule  rule_level: medium
post結果:
{
    "status": "cardinality",
    "_type": "mydata", "level": "info", "num_hits": 3, "@timestamp": "2018-01-31T09:17:02.276937Z", "rule_level": "medium", "server": "nginx", "rule_name": "cardinality_rule", "_index": "testalert", "num_matches": 1, "message": ">>> [ xxx ]: valid id error .", "_id": "AWFLgWKw5xzN_sFQhZvg", "codec": "java", "tags": "31" }
percentage match型別
說明:當計算視窗內的匹配桶中的文件的百分比高於或低於閾值時,此規則匹配。計算視窗預設為buffer_time。
規則:當level欄位未high,時間視窗內日誌量高於前一個時間視窗95%,觸發告警。(未完整測試)
name: percentage_match_rule
type: percentage_match
index: testalert

# description: "test description"  buffer_time:  minutes: 1  max_percentage: 95  match_bucket_filter: - term:  level: high  doc_type: mydata  alert: post http_post_url: "http://localhost:8088/alertapi" http_post_static_payload:  rule_name: percentage_match_rule  rule_level: medium
post結果:
{
    "num_hits": 10,
    "@timestamp": "2018-01-31T09:39:05.199394Z", "rule_level": "medium", "rule_name": "percentage_match_rule", "num_matches": 1, "percentage": 100.0 }
告警方式
elastalert內建的告警方式並不太使用與國人的習慣,所以這塊建議自行寫服務端重新定義。
為什麼不在elastalert原始碼alerts.py中直接加類,而通過post出來自己做服務端接收告警? 主要考慮到elastalert專案更新。
目前比較常用的告警模式有:釘釘、微信、郵件、簡訊。
首先設計好的告警內容,於是我們可以建立好4種告警型別,並逐步實現功能。

釘釘告警
目前釘釘有兩種告警方法,一種是獲得管理員token,可以呼叫企業通知產生告警,這種方式的好處是可以通知到企業中對應的人,對應部門中所有人等。
這裡分享一下實現的大致思路:
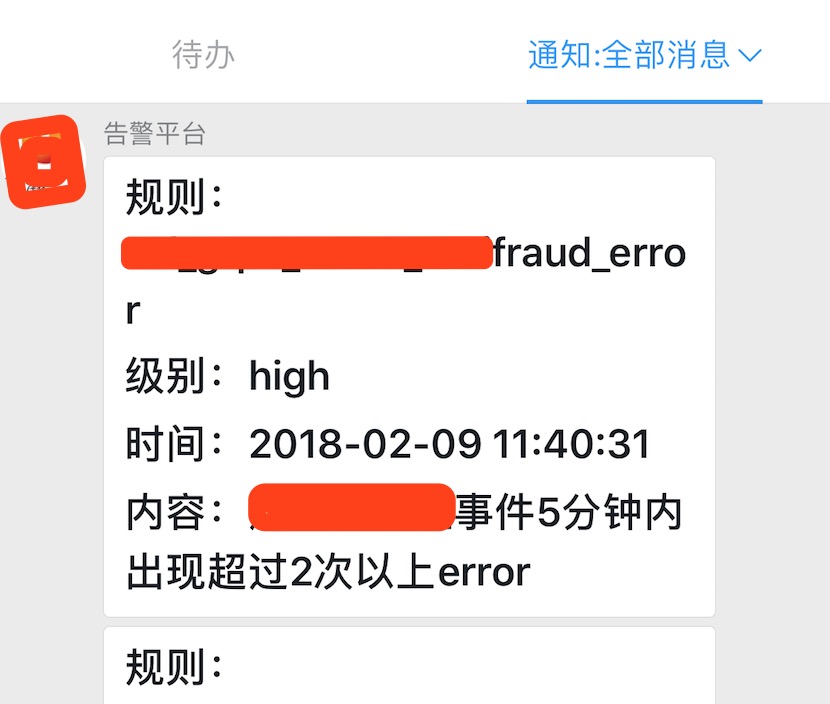
def send(self, post_alert_content): # 告警內容 msgcontent = { "title": post_alert_content["name"], "text": "## 規則:{0} \n ## 級別:{1} \n ## 時間:{2} \n ## 內容:{3}".format( post_alert_content["name"],post_alert_content["level"],post_alert_content["create_at"],post_alert_content["content"] ) } # 獲取需要通知的使用者列表 userid_list = users.getDingDingUserIdByName(post_alert_content["contact_users"]) msgtype = "markdown" agent_id = DD_AgentId dept_id_list = None try: msgcontent = json.dumps(msgcontent) except JSONDecodeError: pass args = locals().copy() payload = {} for k, v in args.items(): if k in ('msgtype', 'agent_id', 'msgcontent', 'userid_list', 'dept_id_list'): if v is not None: payload.update({k: v}) # 傳送釘釘告警資訊 resp = self.callDingDingWebApi(self.access_token, 'dingtalk.corp.message.corpconversation.asyncsend', **payload) if "error_response" in resp.json().keys(): self.getAccessToken() self.send(post_alert_content) 效果:告警出現在企業通知中。
另一種則是通過釘釘建立群,新增釘釘機器人告警。
def sendByRobot(self, post_alert_content): DD_level = post_alert_content.get("level", "") DD_name = post_alert_content.get("name", "") DD_content = post_alert_content.get("content", "") DD_url = post_alert_content.get("url", "") headers = {"Content-Type": "application/json"} message = { "msgtype": "markdown", "markdown": { "title": "【" + DD_level + "】" + DD_name, "text": "### 時間:" + datetime.now().strftime("%Y-%m-%d %X") + "\n" \ "### 規則:" + "【" + DD_level + "】" + DD_name + "\n" \ "### 內容:" + DD_content + "\n" } } r = requests.post(url=DD_url, headers=headers, data=json.dumps(message)) return True 簡訊告警
短息告警的具體實現與企業採用的簡訊通道有關,但是方式基本相似。
def send(self, post_alert_content): """ param: phone @string raw_content @string return: @bool """ self.params['phone'] = post_alert_content["users_phone"] self.params['report'] = True content = self.getContent(post_alert_content) self.params['msg'] = urllib.quote(content) response = requests.post(SMS_SEND_MSG_URL, json=self.params) rv = response.json() 微信告警
微信告警,實現的大致思路:
def send(self, users, subject, content): """ params: users @string subject @string content @string return: @bool """ # 微信API post_url = WECHAT_MSG_URL + self.token for user in users.split(","): message = { # 企業號中的使用者帳號 "touser": user, # 訊息型別 "msgtype": "text", # 企業號中的應用id "agentid": WECHAT_AGENTID, "text": { "content": subject + '\n' + content }, "safe": "0" } # 觸發告警 r = requests.post(url=post_url, data=json.dumps(message), verify=False) print r.text return True 郵件告警
郵箱告警要注意使用SSL,不然郵箱賬密被擼了就呵呵了。
def send(self, post_alert_content): to_addrs = "{}".format(post_alert_content["to_addrs"]) subject = "【規則】 {}".format(post_alert_content["name"]) message = "【時間】{} \n 【內容】{}".format(post_alert_content["create_at"], post_alert_content["content"]) # to_addr = to_addrs.split(",") for to_addr in to_addrs.split(","): msg = self.format_msg(self.from_addr, to_addr, subject, message) s = smtplib.SMTP_SSL(Mail_Host, Mail_Port) s.login(Mail_User, Mail_Pass) s.sendmail(self.from_addr, [to_addr], msg.as_string()) s.quit() return True 規則管理
為了方便遠端管理規則,我們需要資料庫儲存規則資訊,然後通過服務端介面檢視當前規則資訊,數量;操作YAML規則檔案實現規則管理。
如果我們需要新增規則,那麼在規則目錄下,建立對應的yaml規則檔案即可。
def insertElastRule(params): # 檢視資料庫中是否存在同名規則 _es_rule = ElastRule.query.filter_by(rule_esalert_name=rule_esalert_name).first() if _es_rule: return False else: now = datetime.now() insertRule = ElastRule( rule_name=params["rule_name"], rule_type=params["rule_type"], rule_index=params["rule_index"], rule_num_events=params["rule_num_events"], rule_timeframe=params["rule_timeframe"], rule_filter=params["rule_filter"], rule_level=params["rule_level"], rule_content=params["rule_content"], create_at=now, end_at=now ) db.session.add(insertRule) db.session.commit() # 建立yaml規則檔案 createRuleYAML(params["rule_name"]) return True 建立YAML函式:
def createRuleYAML(rule_esalert_name): _rule = ElastRule.query.filter_by(rule_esalert_name=rule_esalert_name).first() ruleJson = { "name": _rule.rule_esalert_name, "type": _rule.rule_type, "index": _rule.rule_index, "num_events": int(_rule.rule_num_events), "timeframe": {'minutes': int(_rule.rule_timeframe)}, "filter": _rule.rule_filter, "alert": "post", "http_post_url": "http://localhost:8088/api/alert", "http_post_static_payload":{"rule_name": _rule.rule_esalert_name, "rule_level": _rule.rule_level} } with open('/easywatch/elastalert_rules/{}.yaml'.format(rule_esalert_name),'w') as fw: yaml.safe_dump(ruleJson, stream=fw, allow_unicode=True, default_flow_style=False) 告警思考
渠道的使用,通過級別組合使用告警方式:
高級別告警使用3個或以上的方式告警 – 簡訊、釘釘(微信)、郵件
中級別告警使用2個或以上的方式告警 – 釘釘(微信)、郵件
低級別告警使用1個或以上的方式告警 – 郵件
ELK展示告警效果:
通過構建檢視、面板,檢視具體告警態勢
*本文作者:bigface,本文屬 FreeBuf 原創獎勵計劃,未經許可禁止轉載。