一步一步完成坦克大戰:一、遊戲關鍵難點實現
寫在前面
入園這麼久以來,一直都是工作中遇到了問題,才在園子裡找各位大神的部落格看,從來沒有自己寫過。前段時間為了找工作,做了一些面試準備,看了一些書,才發現一直以來都對.NET的基礎知識掌握的不夠熟練,會導致很多問題。所以就想著向園子裡的各位大佬學習,從寫部落格開始加強自己對基礎知識的鞏固,也以此來督促自己要不斷的學習和總結。
為什麼要寫坦克大戰呢?原因還是因為坦克大戰非常適合面向物件程式設計,結合自己這段時間看《C#圖解教程》這本書的理解,可以做到一個很好的專案實踐,加深自己對類,類的建構函式、屬性,類的繼承,抽象類,虛方法,方法的過載等等基礎知識的運用。
遊戲實現思路
坦克大戰的實現思路還是比較好想到的,大概可以分為3個步驟
1、可以通過繪圖片的方式,在一個畫布上根據座標繪製我們要的元素,這些元素包括:玩家坦克、敵方坦克,玩家子彈,敵方子彈,道具,磚牆,草地等。
2、對於元素的動作,這些動作包括:玩家移動,敵方坦克移動,玩家子彈移動,敵方子彈移動,磚牆爆炸等等。可以設定一個定時重新整理的時間,在這個時間內完成所有的動作,完成之後每個元素都產生新的座標資料。
3、根據新的座標資料在畫布中繪製所有元素
遊戲中的主要問題其實就集中在如何繪製元素,如何實現元素的動作(比如移動,射擊,爆炸等),在本文中會先用面向過程的方式實現這些關鍵問題,後續再從面向物件的方式來實現遊戲。
一、準備工作
- 遊戲資源 。可以自己網上找找,也可以從我後續的原始碼中獲取
- 需要具備一些.NET Winform 開發的基礎知識
- 需要了解GDI程式設計的基礎用法
二、繪製元素
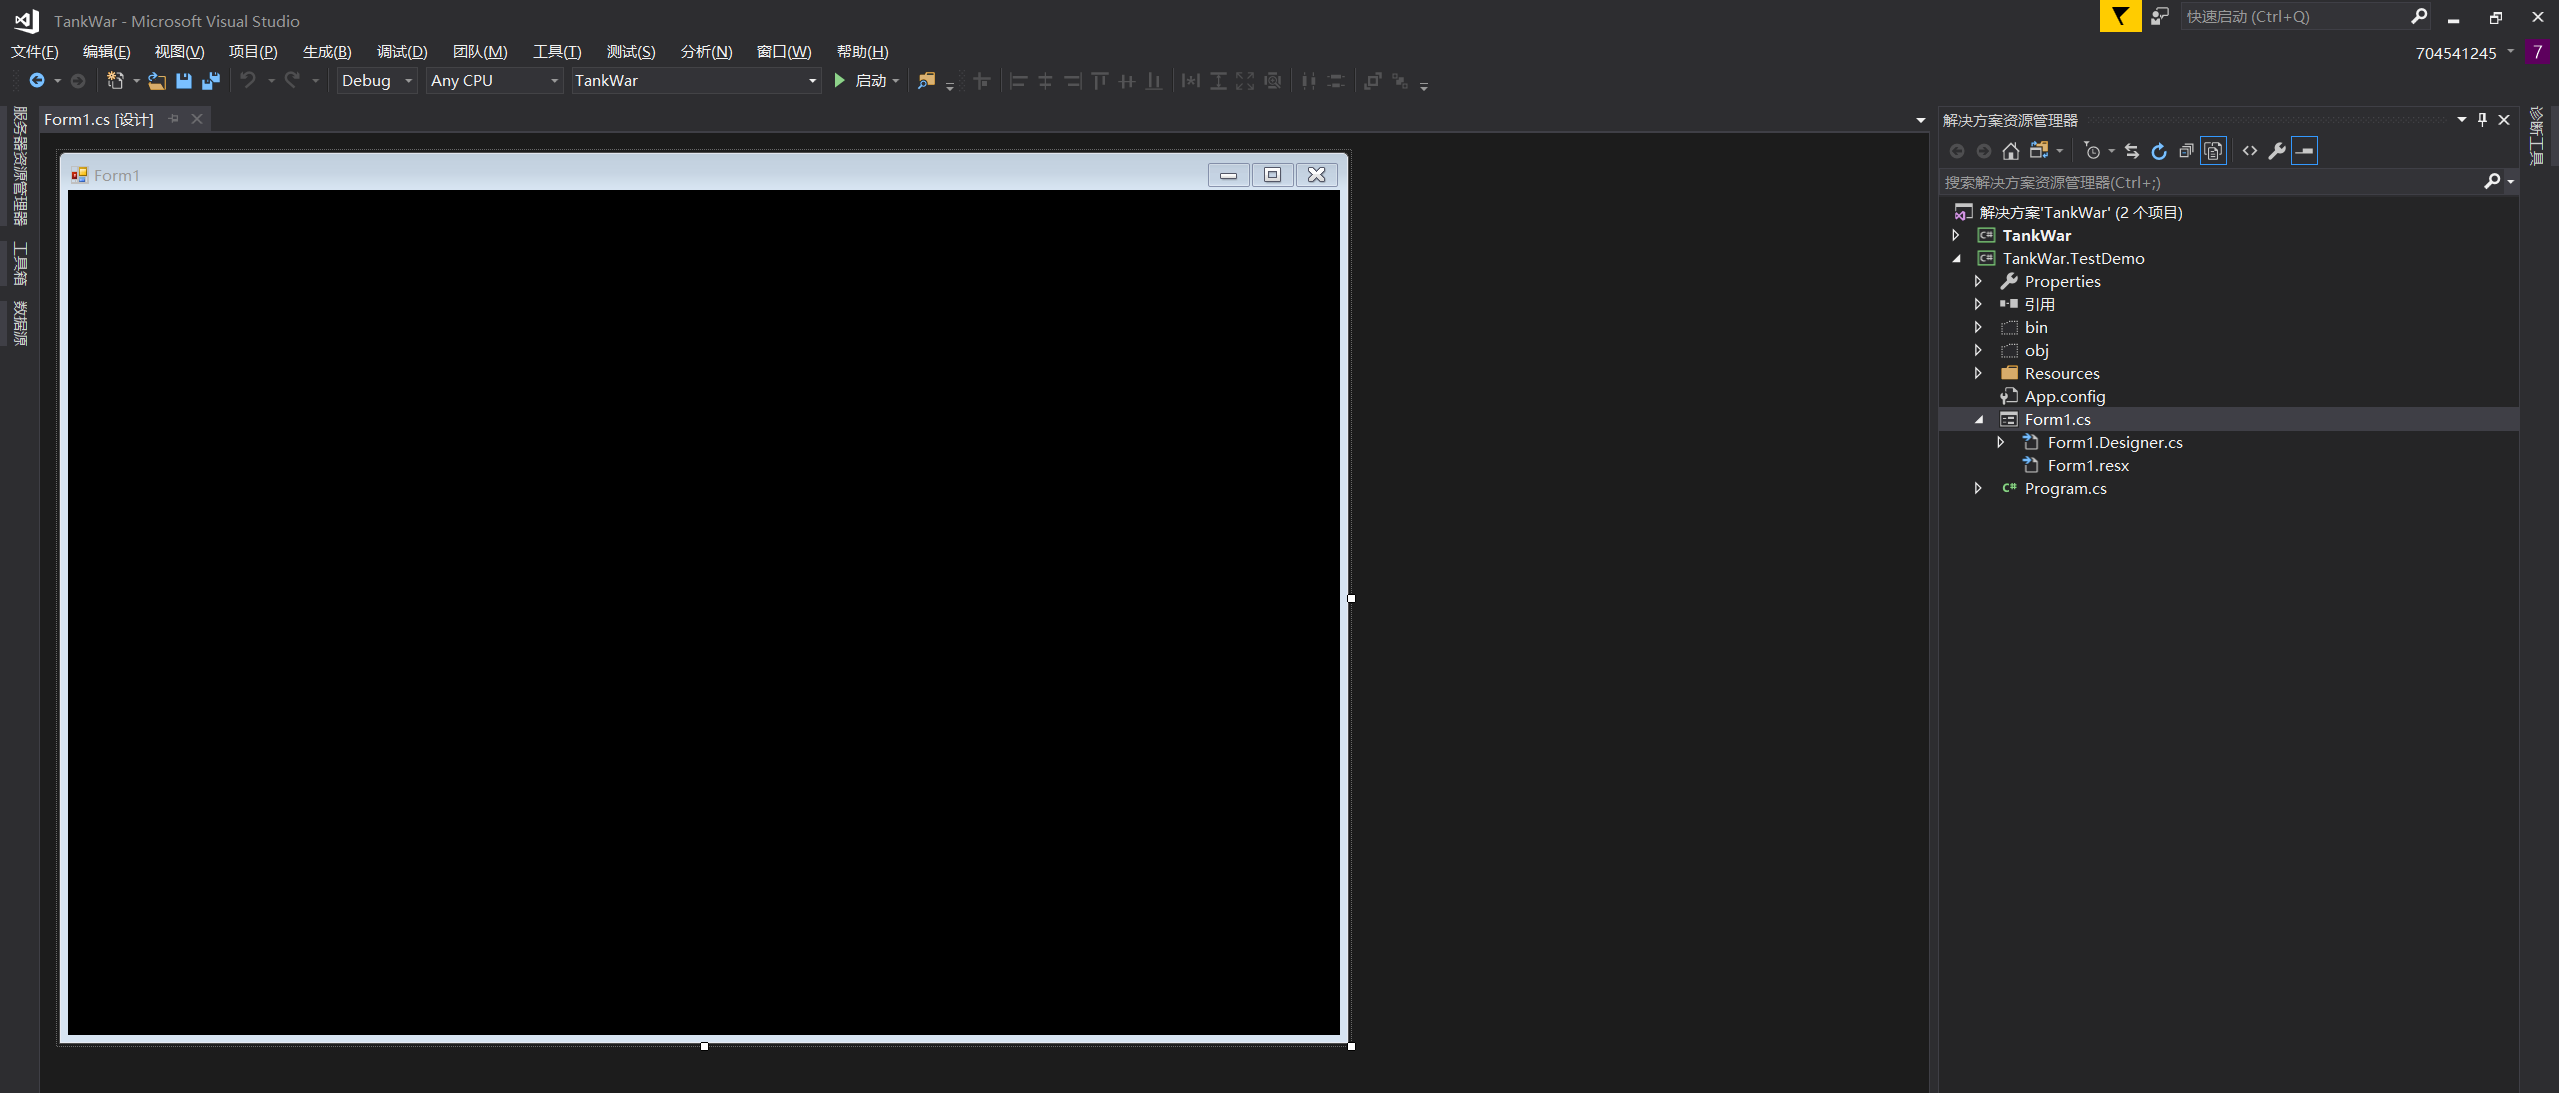
1、首先建立一個專案TankWar.TestDemo,在vs中調整好視窗大小,黑色背景,大概就是下面這樣

2、匯入遊戲資源:右鍵專案=>屬性=》資源=》新增資源,把下載好的遊戲資源全都匯入進來,大概就是下面這樣

3、繪製一個坦克圖片
在窗體中初始化好我們需要的坦克圖片,然後在窗體的Paint事件中新增繪製程式碼

//玩家坦克圖片 private static Image[] imgs_play = { Resources.p1tankU, Resources.p1tankD, Resources.p1tankL, Resources.p1tankR, };View Codepublic Form1() { InitializeComponent(); } /// <summary> /// 窗體繪製事件 /// </summary> private void Form1_Paint(object sender, PaintEventArgs e) { Graphics g = e.Graphics; g.DrawImage(imgs_play[0], 0, 0);//繪製圖片到(0,0)位置,(0,0)對應的是圖片imgs[0]的左上角 }
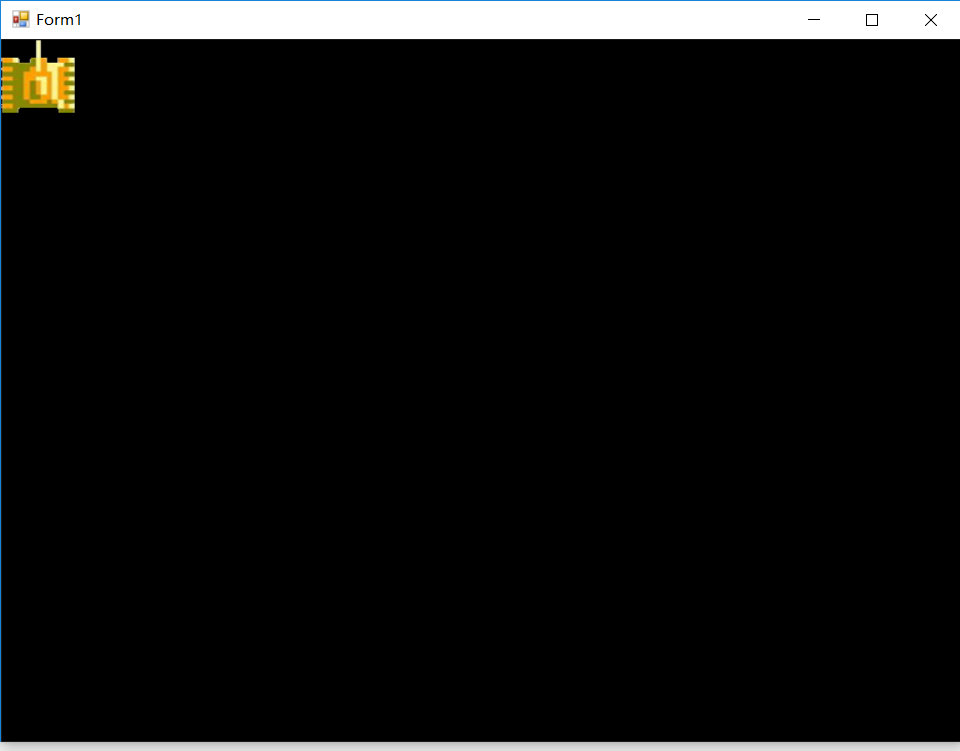
執行效果大概是下面這樣:

通過同樣的方式我們可以在窗體中的不同座標上繪製敵方坦克,子彈等等,第一個關鍵點繪製圖片就完成了。
三、元素的動作
3.1坦克移動
根據實現思路,這裡我們需要給窗體設定一個重新整理時間,然後在這個時間內完成坦克的移動,再重新繪製坦克
- 首先新增一個timer控制元件到窗體中,並新增timer控制元件的事件,並在窗體建構函式中初始化timer
- 然後為窗體新增KeyDown事件,這裡我對方向的定義為:W=》上,S=》下,D=》右,A=》左
假設每次坦克移動10個座標,具體的程式碼實現如下:

public partial class Form1 : Form
    {
        //玩家坦克圖片
        private static Image[] imgs_play = {
            Resources.p1tankU,
            Resources.p1tankD,
            Resources.p1tankL,
            Resources.p1tankR,
                               };

        private int p_speed = 10;//玩家速度
        private int p_x = 0;//玩家x座標
        private int p_y = 0;//玩家y座標
        private int p_direction = 0;//玩家方向  0向上,1向下,2向左,3向右

        public Form1()
        {
            InitializeComponent();
            //初始化timer
            this.timer1.Interval = 50;
            this.timer1.Enabled = true;
        }

        /// <summary>
        /// 窗體繪製事件
        /// </summary>
        private void Form1_Paint(object sender, PaintEventArgs e)
        {
            Graphics g = e.Graphics;
            //g.DrawImage(imgs_play[0], 0, 0);//繪製圖片到(0,0)位置,(0,0)對應的是圖片imgs[0]的左上角
            g.DrawImage(imgs_play[p_direction], p_x, p_y);
        }

        /// <summary>
        /// timer事件
        /// </summary>
        private void timer1_Tick(object sender, EventArgs e)
        {
            // 對窗體進行重新繪製
            this.Invalidate();
        }

        /// <summary>
        /// 按下按鍵
        /// </summary>
        private void Form1_KeyDown(object sender, KeyEventArgs e)
        {
            switch (e.KeyCode)
            {
                case Keys.W:
                    p_direction = 0;
                    p_y = p_y - p_speed;
                    break;
                case Keys.S:
                    p_direction = 1;
                    p_y = p_y + p_speed;
                    break;
                case Keys.A:
                    p_direction = 2;
                    p_x = p_x - p_speed;
                    break;
                case Keys.D:
                    p_direction = 3;
                    p_x = p_x + p_speed;
                    break;
            }
        }
    }
View Code
以上程式碼就能讓我們的坦克移動起來了
3.2坦克射擊
當玩家按下K的時候,坦克射擊子彈
- 初始化子彈的圖片、子彈速度、和儲存子彈的列表
- 新增一個發射子彈的方法,在KeyDown事件中按下K時,執行該方法
- 在timer事件中移動子彈,在窗體重繪實踐中繪製子彈

public partial class Form1 : Form
    {
        //玩家坦克圖片
        private static Image[] imgs_play = {
            Resources.p1tankU,
            Resources.p1tankD,
            Resources.p1tankL,
            Resources.p1tankR,
                               };

        private int p_speed = 10;//玩家速度
        private int p_x = 0;//玩家x座標
        private int p_y = 0;//玩家y座標
        private int p_width = 60;//玩家圖片寬度
        private int p_height = 60;//玩家圖片高度
        private int p_direction = 0;//玩家方向  0向上,1向下,2向左,3向右

        private static Image imgs_pbullet = Resources.tankmissile;//子彈圖片
        private int b_width = 17;//子彈圖片寬度
        private int b_height = 17;//子彈圖片高度
        private int b_speed = 15;//子彈速度(最好比paly大)
        private List<int[]> listBullet = new List<int[]>();//存放畫布中的子彈


        public Form1()
        {
            InitializeComponent();
            //初始化timer
            this.timer1.Interval = 50;
            this.timer1.Enabled = true;
        }

        /// <summary>
        /// 窗體繪製事件
        /// </summary>
        private void Form1_Paint(object sender, PaintEventArgs e)
        {
            Graphics g = e.Graphics;
            //g.DrawImage(imgs_play[0], 0, 0);//繪製圖片到(0,0)位置,(0,0)對應的是圖片imgs[0]的左上角
            //繪製玩家坦克
            g.DrawImage(imgs_play[p_direction], p_x, p_y);

            //繪製子彈
            DrawPlayBullet(g);
        }

        /// <summary>
        /// timer事件
        /// </summary>
        private void timer1_Tick(object sender, EventArgs e)
        {
            //每次重繪就移動子彈
            PlayBulletMove();
            // 對窗體進行重新繪製
            this.Invalidate();
        }

        /// <summary>
        /// 按下按鍵
        /// </summary>
        private void Form1_KeyDown(object sender, KeyEventArgs e)
        {
            switch (e.KeyCode)
            {
                case Keys.W:
                    p_direction = 0;
                    p_y = p_y - p_speed;
                    break;
                case Keys.S:
                    p_direction = 1;
                    p_y = p_y + p_speed;
                    break;
                case Keys.A:
                    p_direction = 2;
                    p_x = p_x - p_speed;
                    break;
                case Keys.D:
                    p_direction = 3;
                    p_x = p_x + p_speed;
                    break;
                case Keys.K:
                    AddPlayBullet(p_direction, p_x, p_y);
                    break;
            }
        }

        /// <summary>
        /// 新增玩家子彈
        /// </summary>
        /// <param name="b_direction">子彈方向</param>
        /// <param name="p_x">玩家的x座標</param>
        /// <param name="p_y">玩家的y座標</param>
        private void AddPlayBullet(int b_direction, int p_x, int p_y)
        {
            int b_x = p_x;
            int b_y = p_y;
            //因為圖片的大小,玩家方向,需要調整下子彈的位置,讓其再玩家前正中方
            switch (b_direction)
            {
                case 0:
                    b_x += (int)(Math.Abs(b_width - p_width) / 2);
                    b_y -= imgs_pbullet.Height;
                    break;
                case 1:
                    b_x += (int)(Math.Abs(b_width - p_width) / 2);
                    b_y += imgs_play[b_direction].Height;
                    break;
                case 2:
                    b_x -= imgs_pbullet.Width;
                    b_y += (int)(Math.Abs(b_height - p_height) / 2);
                    break;
                case 3:
                    b_x += imgs_play[b_direction].Width;
                    b_y += (int)(Math.Abs(b_height - p_height) / 2);
                    break;
            }
            int[] _b = new int[4] { b_direction, b_x, b_y, b_speed };
            listBullet.Add(_b);
        }

        /// <summary>
        /// 繪製玩家子彈
        /// </summary>
        /// <param name="g"></param>
        private void DrawPlayBullet(Graphics g)
        {
            foreach (var item in listBullet)
            {
                g.DrawImage(imgs_pbullet, item[1], item[2]);
            }
        }

        /// <summary>
        /// 移動子彈
        /// </summary>
        private void PlayBulletMove()
        {
            foreach (var item in listBullet)
            {
                switch (item[0])
                {
                    case 0:
                        item[2] -= item[3];
                        break;
                    case 1:
                        item[2] += item[3];
                        break;
                    case 2:
                        item[1] -= item[3];
                        break;
                    case 3:
                        item[1] += item[3];
                        break;
                    default:
                        break;
                }
            }
        }
    }
View Code
執行後的效果圖如下:

3.3坦克的碰撞
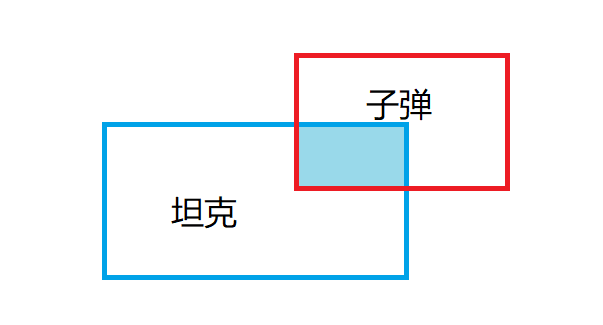
坦克的碰撞可以看作是兩個矩形圖片存在了交集,我們可以使用Rectangle的IntersectsWith方法來判斷兩個矩形是否有交集。

接下來我們按照上面3.1,3.2的方式繪製一些敵方坦克,然後在timer事件中執行碰撞的檢測,並執行繪製爆炸效果
程式碼稍微比較長,這裡直接上效果圖

到這裡,坦克大戰遊戲的關鍵難點就基本實現了,後面將會用面向物件的方式來實現整個遊戲
四、原始碼下載
本文的內容對應解決方案中的TankWar.TestDemo專案
Github:https://github.com/Okarlchen/TankWar

