【Spring Boot】--整合Spring Security
目錄
2、在pom.xml新增spring security的依賴
摘要:本文介紹了在spring boot如何使用spring security,spring security的基本配置。如何實現自定義登入,自定義登入成功處理,自定義登入失敗處理。
1、建立工程
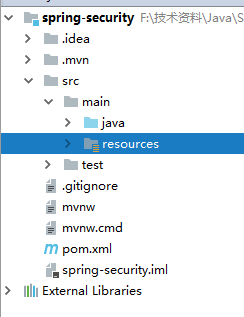
建立一個spring boot的工程,新增一個web功能,工程目錄結構如下:
建立controller包,建立一個UserController測試控制器類,新增一個測試介面:

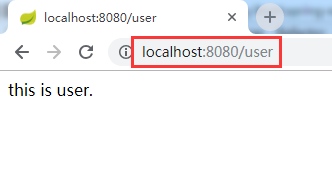
啟動,在瀏覽器上面輸入http://localhost:8080/user,檢視輸出結果:
2、在pom.xml新增spring security的依賴
<dependency>

    <groupId>org.springframework.boot</groupId>

    <artifactId>spring-boot-starter-security</artifactId>

</dependency>
重啟專案,在次請求http://localhost:8080/user
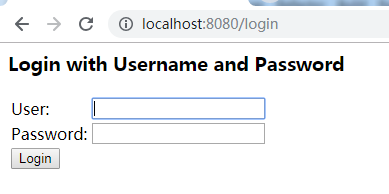
跳轉到如下介面,這是應為spring security生效了。此時所有的介面是被保護的,需要通過驗證後才能登入。spring security提供了一個預設的使用者user,密碼在啟動的時候輸出在日誌上面了。

輸入user,和日誌輸出的密碼

點選登入後,跳轉到輸出的結果介面:

如果不想在配置spring security就生效的話,可以在配置檔案application.properties中輸入:
# security 使能 -- 好像並沒有什麼用 -_-!

spring.security.basic.enabled=false
剛才看到的登入框是SpringSecurity是框架自己提供的,被稱為httpBasicLogin。顯示它不是我們產品上想要的,我們前端一般是通過表單提交的方式進行使用者登入驗證的,所以我們就需要自定義自己的認證邏輯了。
3、自定義使用者認證邏輯
每個系統肯定是有自己的一套使用者體系的,所以我們需要自定義自己的認證邏輯以及登入介面。 這裡我們需要先對SpringSecurity進行相應的配置。
新增Spring Security配置類WebSecurityConfig,該類是實現抽象類WebSecurityConfigurerAdapter。
@Configuration
public class WebSecurityConfig extends WebSecurityConfigurerAdapter {

    @Override
    protected void configure(HttpSecurity http) throws Exception {
        http.formLogin()                    //  定義當需要使用者登入時候,轉到的登入頁面。
                .loginPage("/login.html")           // 設定登入頁面
                .loginProcessingUrl("/login")  // 自定義的登入介面
                .and()
                .authorizeRequests()        // 定義哪些URL需要被保護、哪些不需要被保護
                .antMatchers("/login.html").permitAll()     // 設定所有人都可以訪問登入頁面
                .anyRequest()               // 任何請求,登入後可以訪問
                .authenticated()
                .and()
                .csrf().disable();          // 關閉csrf防護
    }

}配置使用者認證邏輯,實現介面UserDetailsService的實現類MyUserDetailsService。
/**
 * @Auther: chisj [email protected]
 * @Date: 2018-10-26 17:13
 * @Description:
 */
@Component
@Slf4j
public class MyUserDetailsService implements UserDetailsService {

    @Autowired
    private PasswordEncoder passwordEncoder;

    @Override
    public UserDetails loadUserByUsername(String username) throws UsernameNotFoundException {
        log.info("使用者的使用者名稱: {}", username);

        String password = passwordEncoder.encode("123456");
        log.info("password: {}", password);

        // 引數分別是:使用者名稱,密碼,使用者許可權
        User user = new User(username, password, AuthorityUtils.commaSeparatedStringToAuthorityList("admin"));
        return user;
    }

}可以看到,這裡沒有做過多的校驗,僅僅是驗證了密碼必須為123456。重啟應用程式:
在瀏覽器上面訪問:http://localhost:8080/user

發現登入介面發生了變化,這是因為在配置類WebSecurityConfig中設定了預設的登入介面:
http.formLogin().loginPage("/login.html")這個時候,使用者名稱隨便填寫,密碼填寫不為123456,結果如下:

同時也在控制檯列印了使用者名稱資訊:

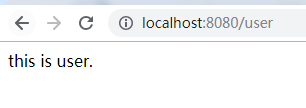
然後我們使用正確的密碼(123456)登入就會成功呼叫介面:
4、關於使用者物件UserDetails
public interface UserDetails extends Serializable {
    // 封裝了許可權資訊
    Collection<? extends GrantedAuthority> getAuthorities();
    // 密碼資訊
    String getPassword();
    // 登入使用者名稱
    String getUsername();
    // 帳戶是否過期
    boolean isAccountNonExpired();
    // 帳戶是否被凍結
    boolean isAccountNonLocked();
    // 帳戶密碼是否過期,一般有的密碼要求性高的系統會使用到,比較每隔一段時間就要求使用者重置密碼
    boolean isCredentialsNonExpired();
    // 帳號是否可用
    boolean isEnabled();
}

我們在返回UserDetails的實現類User的時候,可以通過User的構造方法,設定對應的引數
5、密碼加密解密PasswordEncoder
SpringSecurity中有一個PasswordEncoder介面:
public interface PasswordEncoder {
    // 對密碼進行加密
    String encode(CharSequence var1);
    // 對密碼進行判斷匹配
    boolean matches(CharSequence var1, String var2);
}
我們只需要自己實現這個介面,並在配置檔案中配置一下就可以了。
這裡我暫時以預設提供的一個實現類進行測試
@Bean
public PasswordEncoder passwordEncoder() {
    return new BCryptPasswordEncoder();
}
使用方法:

這裡簡單的對123456進行了加密的處理。我們可以進行測試,發現每次打印出來的password都是不一樣的,這就是配置的BCryptPasswordEncoder所起到的作用。
6、自定義登入介面
實現簡單的登入介面login.html:
<!DOCTYPE html>
<html lang="en">
<head>
    <meta charset="UTF-8">
    <title>登入頁面</title>
</head>
<body>
<h2>自定義登入頁面</h2>
<form action="/login"  method="post">
    <table>
        <tr>
            <td>使用者名稱:</td>
            <td><input type="text" name="username"></td>
        </tr>
        <tr>
            <td>密碼:</td>
            <td><input type="password" name="password"></td>
        </tr>
        <tr>
            <td colspan="2"><button type="submit">登入</button></td>
        </tr>
    </table>
</form>
</body>
</html>完成了登入頁面之後,就需要將它配置進行SpringSecurity
@Override
protected void configure(HttpSecurity http) throws Exception {
    http.formLogin()                    //  定義當需要使用者登入時候,轉到的登入頁面。
            .loginPage("/login.html")           // 設定登入頁面
            .loginProcessingUrl("/login")  // 自定義的登入介面
            .and()
            .authorizeRequests()        // 定義哪些URL需要被保護、哪些不需要被保護
            .antMatchers("/login.html").permitAll()     // 設定所有人都可以訪問登入頁面
            .anyRequest()               // 任何請求,登入後可以訪問
            .authenticated()
            .and()
            .csrf().disable();          // 關閉csrf防護
}
這樣,每當我們訪問被保護的介面的時候,就會調轉到login.html頁面。
7、自定義登入介面
使用http.formLogin().loginPage()之後,必須要設定自定義介面,不然怎麼security怎麼驗證使用者名稱和密碼呢?
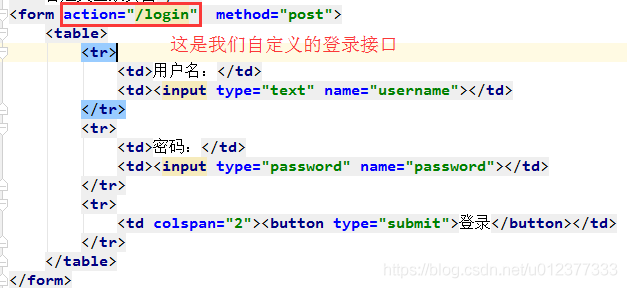
在自定義登入介面,大家可以看到,設定的請求路徑為”/login“。可是我們並沒有在controller中定義login的對映。
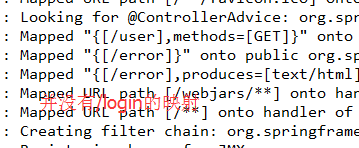
所以需要在http.formLogin().loginProcessingUrl("/login")來生成一個端點給前端呼叫。我們可以使用postman來模擬一下登入介面:

8、自定義處理成功
上面可以看到,當登入成功後,系統返回的404。提示我們找不到資源路徑。我們可以通過自定義處理成功的方式返回我們想要的資訊。

第一步:實現自定義成功處理實現類MyAuthenctiationSuccessHandler
/**
 * @Auther: chisj [email protected]
 * @Date: 2018-11-13 17:43
 * @Description:
 */
@Component
@Slf4j
public class MyAuthenctiationSuccessHandler extends SimpleUrlAuthenticationSuccessHandler {

    @Autowired
    private ObjectMapper objectMapper;

    @Autowired
    private SecurityProperties securityProperties;

    @Override
    public void onAuthenticationSuccess(HttpServletRequest request, HttpServletResponse response,
                                        Authentication authentication) throws IOException, ServletException {

        logger.info("登入成功");

        response.setContentType("application/json;charset=UTF-8");
        response.getWriter().write(objectMapper.writeValueAsString(authentication));
    }
}第二步:在WebSecurityConfig配置類中新增自定義處理功能方法
.successHandler(successHandler)
/**
 * @Auther: chisj [email protected]
 * @Date: 2018-10-26 17:09
 * @Description:
 */
@Configuration
public class WebSecurityConfig extends WebSecurityConfigurerAdapter {

    @Autowired
    private MyAuthenctiationSuccessHandler successHandler;

    @Override
    protected void configure(HttpSecurity http) throws Exception {
        http.formLogin()                            //  定義當需要使用者登入時候,轉到的登入頁面。
                .loginPage("/login.html")           // 設定登入頁面
                .loginProcessingUrl("/login")       // 自定義的登入介面
                .successHandler(successHandler)
                .and()
                .authorizeRequests()        // 定義哪些URL需要被保護、哪些不需要被保護
                .antMatchers("/login.html", "/login").permitAll()     // 設定所有人都可以訪問登入頁面
                .anyRequest()               // 任何請求,登入後可以訪問
                .authenticated()
                .and()
                .csrf().disable();          // 關閉csrf防護
    }

}
如下設定:

9、自定義處理失敗
當登入失敗的時候呢?security提供自定義失敗處理介面來提供給使用者處理驗證失敗的情況。

第一步:實現自定義失敗處理實現類MyAuthenctiationFailureHandler
/**
 * @Auther: chisj [email protected]
 * @Date: 2018-11-13 17:57
 * @Description:
 */
@Component
@Slf4j
public class MyAuthenctiationFailureHandler extends SimpleUrlAuthenticationFailureHandler {

    @Autowired
    private ObjectMapper objectMapper;

    @Autowired
    private SecurityProperties securityProperties;

    @Override
    public void onAuthenticationFailure(HttpServletRequest request, HttpServletResponse response,
                                        AuthenticationException exception) throws IOException, ServletException {

        logger.info("登入失敗");

        response.setStatus(HttpStatus.INTERNAL_SERVER_ERROR.value());
        response.setContentType("application/json;charset=UTF-8");
        response.getWriter().write(objectMapper.writeValueAsString("登入失敗"));
    }
}第二步:在WebSecurityConfig配置類中新增自定義處理功能方法
.failureHandler(failureHandler)
/**
 * @Auther: chisj [email protected]
 * @Date: 2018-10-26 17:09
 * @Description:
 */
@Configuration
public class WebSecurityConfig extends WebSecurityConfigurerAdapter {

    @Autowired
    private MyAuthenctiationSuccessHandler successHandler;

    @Autowired
    private MyAuthenctiationFailureHandler failureHandler;

    @Override
    protected void configure(HttpSecurity http) throws Exception {
        http.formLogin()                            //  定義當需要使用者登入時候,轉到的登入頁面。
                .loginPage("/login.html")           // 設定登入頁面
                .loginProcessingUrl("/login")       // 自定義的登入介面
                .successHandler(successHandler)
                .failureHandler(failureHandler)
                .and()
                .authorizeRequests()        // 定義哪些URL需要被保護、哪些不需要被保護
                .antMatchers("/login.html", "/login").permitAll()     // 設定所有人都可以訪問登入頁面
                .anyRequest()               // 任何請求,登入後可以訪問
                .authenticated()
                .and()
                .csrf().disable();          // 關閉csrf防護
    }

}
如下設定:

10、示例程式碼
GitHub下載:點我下載
CSDN下載:點我下載
