springboot系列十 Spring-Data-Redis
阿新 • • 發佈:2018-12-04
基本使用
依賴和配置
依賴
<dependency>
	<groupId>org.springframework.boot</groupId>
	<artifactId>spring-boot-starter-data-redis</artifactId>
</dependency>
配置
spring:
  redis:
    database: 0
    host: localhost
    port: 6379
    password:
    jedis:
      pool:
        max-active: 8 #=最大連線數(使用負值表示沒有限制)
        max-wait: -1s #最大阻塞時間(使用負值表示沒有限制)
        max-idle: 8 #最大空閒連線
        min-idle: 0 #最小空閒連線
    timeout: 10s
使用
@RestController
@RequestMapping("/redis")
public class RedisResource {
    @Autowired
    private StringRedisTemplate stringRedisTemplate;

    @PostMapping("/test")
    public String test(@RequestParam(defaultValue = "key") String key, @RequestParam(defaultValue = "val") String val) {
        stringRedisTemplate.opsForValue().set(key, val);
        return "key:" + key + ", val=" + stringRedisTemplate.opsForValue().get(key);
    }
}
測試
寫個啟動類,啟動後訪問 http://localhost:8080/redis/test?key=a&val=abc

檢視redis
$ telnet localhost 6379
Trying ::1...
Connected to localhost.
Escape character is '^]'.

$ get a
abc

CacheManager快取管理
使用cacheManager,結合spring可以使用@Cacheable、@CachePut、@CacheEvict新增到方法上面,來基於方法引數和返回值看來操作快取
RedisConfig配置
@Configuration
@EnableCaching
public class RedisCachingConfigurer extends CachingConfigurerSupport {

    private static final Duration timeToLive = Duration.ZERO;

    @Bean
    public CacheManager cacheManager(RedisConnectionFactory factory) {
        RedisSerializer<String> redisSerializer = new StringRedisSerializer();
        Jackson2JsonRedisSerializer jackson2JsonRedisSerializer = new Jackson2JsonRedisSerializer(Object.class);

        //解決查詢快取轉換異常的問題
        ObjectMapper om = new ObjectMapper();
        om.setVisibility(PropertyAccessor.ALL, JsonAutoDetect.Visibility.ANY);
        om.enableDefaultTyping(ObjectMapper.DefaultTyping.NON_FINAL);
        jackson2JsonRedisSerializer.setObjectMapper(om);

        // 配置序列化(解決亂碼的問題)
        RedisCacheConfiguration config = RedisCacheConfiguration.defaultCacheConfig()
                .entryTtl(timeToLive)
                .serializeKeysWith(RedisSerializationContext.SerializationPair.fromSerializer(redisSerializer))
                .serializeValuesWith(RedisSerializationContext.SerializationPair.fromSerializer(jackson2JsonRedisSerializer))
                .disableCachingNullValues();

        RedisCacheManager cacheManager = RedisCacheManager.builder(factory)
                .cacheDefaults(config)
                .build();
        return cacheManager;
    }
}
註解操作快取
@Service
@Slf4j
public class UserService {

    private Map<Integer, User> data = new ConcurrentHashMap<>(10);
    //新增快取
    @Cacheable(value = "userCache", key = "#id", unless = "#result==null")
    public User get(int id){
        log.info("不走redis快取,查詢使用者,id={}", id);
        return data.get(id);
    }
    //修改快取
    @CachePut(value = "userCache", key = "#id")
    public User save(int id, String name){
        data.put(id, new User(id, name));
        return data.get(id);
    }
    //刪除快取
    @CacheEvict(value = "userCache", key = "#p0")
    public void del(int id){
        data.remove(id);
    }

    @Data
    @AllArgsConstructor
    @NoArgsConstructor
    public static class User implements Serializable{
        private int id;
        private String name;
    }
}
介面測試
@RestController
@RequestMapping("/redis")
public class RedisResource {
    @Autowired private StringRedisTemplate stringRedisTemplate;

    @Autowired private UserService userService;

    @PostMapping("/test")
    public String test(@RequestParam(defaultValue = "key") String key, @RequestParam(defaultValue = "val")String val){
        stringRedisTemplate.opsForValue().set(key, val);
        return "key:" + key + ", val=" + stringRedisTemplate.opsForValue().get(key);
    }

    /**--------------cacheManager測試--------------*/
    @GetMapping("/user")
    public UserService.User get(int id){
        return userService.get(id);
    }

    @PostMapping("/user")
    public UserService.User save(int id, String name){
        return userService.save(id, name);
    }

    @DeleteMapping("/user")
    public String del(int id){
        userService.del(id);
        return "delete success.";
    }
}
啟動專案後,測試。第一次redis沒有任何快取值
GET http://localhost:8080/redis/user?id=1
控制檯列印:
[nio-8080-exec-4] c.yimingkeji.redis.service.UserService : 不走redis快取,查詢使用者,id=1
然後呼叫post方法來新增快取
POST http://localhost:8080/redis/user?id=1&name=哈哈哈
{
    "id": 1,
    "name": "哈哈哈"
}
再次查詢
GET http://localhost:8080/redis/user?id=1
{
    "id": 1,
    "name": "哈哈哈"
}
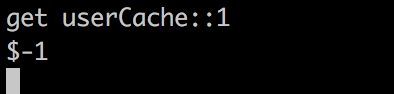
檢視redis

然後再呼叫delete方法刪除快取
DELETE http://localhost:8080/redis/user?id=1
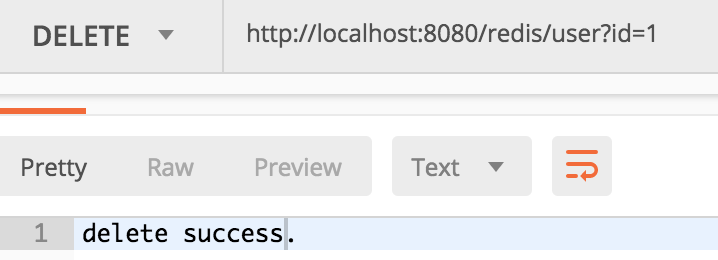
再次檢視redis