nodejs 生成樹形目錄
阿新 • • 發佈:2018-12-04
分享一下我老師大神的人工智慧教程!零基礎,通俗易懂!http://blog.csdn.net/jiangjunshow
也歡迎大家轉載本篇文章。分享知識,造福人民,實現我們中華民族偉大復興!
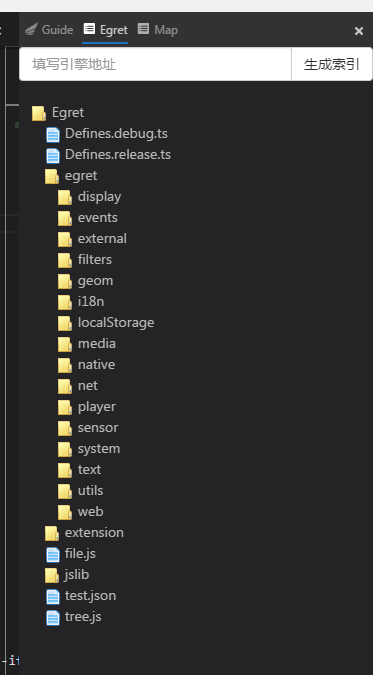
最近在開發wing外掛的時候要用到一些樹形結構,這些結構使用是想做一個引擎類庫的導航。下面藉助了nodejs 能夠讀取專案的目錄,並生成一些json的資料,有了這個基礎後,我們就可以實現遍歷目錄來獲取想要的資料了。這個時候,還需要藉助了vue裡面一個樹形結構的案例完成。
當然還有jq的樹形選單,主要配合一些jq的外掛一些庫就可以完成了。不過vue提供的案例也滿足了我們使用。
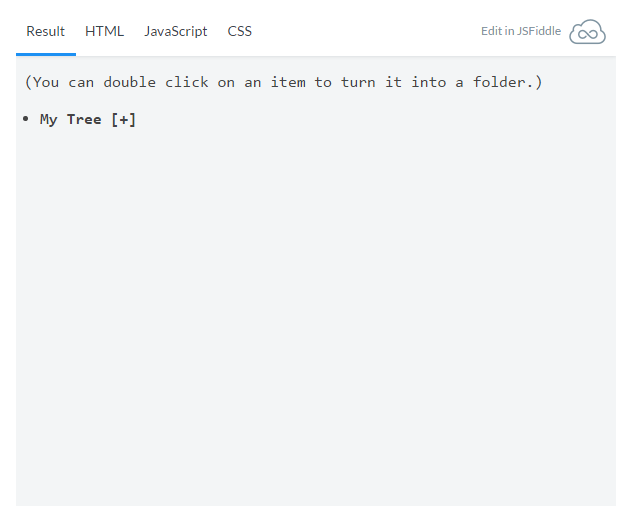
http://cn.vuejs.org/examples/tree-view.html
生成的格式 需要滿足這種父子格式。因此在遍歷過程當中也在生成這種格式。
var data = {name: 'My Tree', children: [ { name: 'hello' } ]}
- 1
- 2
- 3
- 4
下面一段nodejs生成樹形資料。
var fs = require('fs')//遍歷資料夾,獲取所有資料夾裡面的檔案資訊/* * @param path 路徑 * */function geFileList(path){ var filesList = []; var targetObj = {}; readFile(path,filesList,targetObj); return filesList;}//遍歷讀取檔案function readFile(path,filesList,targetObj)
- 1
- 2
- 3
- 4
- 5
- 6
- 7
- 8
- 9
- 10
- 11
- 12
- 13
- 14
- 15
- 16
- 17
- 18
- 19
- 20
- 21
- 22
- 23
- 24
- 25
- 26
- 27
- 28
- 29
- 30
- 31
- 32
- 33
- 34
- 35
- 36
- 37
- 38
- 39
- 40
- 41
- 42
- 43
- 44
- 45
- 46
- 47
- 48
- 49
- 50
- 51
- 52
- 53
- 54
- 55
- 56
- 57
- 58
- 59
- 60
- 61
- 62
- 63
- 64
- 65
- 66
- 67
- 68
- 69
- 70
- 71
- 72
- 73
- 74
- 75
- 76
- 77
- 78
建立一個網頁,引用生成好的tree.js 資料。同時引入到vue.js
<!DOCTYPE html><html> <head> <meta charset="UTF-8"> <title></title> </head> <style> body { font-family: Menlo, Consolas, monospace; color: #444; } .item { cursor: pointer; } .bold { font-weight: bold; } ul { padding-left: 13px; line-height: 1.5em; list-style-type:none; } </style><body><!-- item template --><script type="text/x-template" id="item-template"> <li> <div :class="{bold: isFolder}" @click="toggle" @dblclick="changeType"> <!-- <img src="{{open ? 'images/icon-right.png':'images/icon-right.png'}}" v-if="isFolder"/>--> <img src="{{isFolder ? 'images/folder.png':'images/card.png'}}"/> {{model.name}} <!--<span v-if="isFolder">[{{open ? '-' : '+'}}]</span>--> <!-- <span v-if="isFolder">[{{open ? '-' : '+'}}]</span>--> </div> <ul v-show="open" v-if="isFolder"> <item class="item" v-for="model in model.children" :model="model"> </item> </ul> </li></script><ul id="demo"> <item class="item" :model="treeData"> </item></ul></body> <script type="text/javascript" src="js/vue.js"></script> <script type="text/javascript" src="js/tree.js"></script> <script type="text/javascript" src="js/demo.js"></script></html>
- 1
- 2
- 3
- 4
- 5
- 6
- 7
- 8
- 9
- 10
- 11
- 12
- 13
- 14
- 15
- 16
- 17
- 18
- 19
- 20
- 21
- 22
- 23
- 24
- 25
- 26
- 27
- 28
- 29
- 30
- 31
- 32
- 33
- 34
- 35
- 36
- 37
- 38
- 39
- 40
- 41
- 42
- 43
- 44
- 45
- 46
- 47
- 48
- 49
- 50
- 51
- 52
- 53
- 54
- 55
- 56
- 57
- 58
- 59
- 60
- 61
- 62
- 63
- 64
- 65
- 66
Vue.component('item', { template: '#item-template', props: { model: Object }, data: function () { return { open: false } }, computed: { isFolder: function () { return this.model.children && this.model.children.length } }, methods: { toggle: function () { if (this.isFolder) { this.open = !this.open } else { alert(this.model.value); } }, changeType: function () { if (!this.isFolder) { Vue.set(this.model, 'children', []) this.addChild() this.open = true } }, addChild: function () { this.model.children.push({ name: 'new stuff' }) }, openFolder:function(){ } }})// boot up the demovar demo = new Vue({ el: '#demo', data: { treeData: data }})
- 1
- 2
- 3
- 4
- 5
- 6
- 7
- 8
- 9
- 10
- 11
- 12
- 13
- 14
- 15
- 16
- 17
- 18
- 19
- 20
- 21
- 22
- 23
- 24
- 25
- 26
- 27
- 28
- 29
- 30
- 31
- 32
- 33
- 34
- 35
- 36
- 37
- 38
- 39
- 40
- 41
- 42
- 43
- 44
- 45
- 46
- 47
- 48
- 49
- 50
- 51
為了生成上面效果圖,還需要找一些資料夾和檔案的圖片素材。因此nodejs做的工作就是生成出樹形選單所需要的json資料。
接下去就可以把這個選單導航放置在wingIDE開發當中。
給我老師的人工智慧教程打call!http://blog.csdn.net/jiangjunshow


