
1、ElasticSearch的安裝配置和使用
一、安裝
按照個人習慣我習慣把自己的軟體都安裝到opt下

解壓 tar -zxvf elasticsearch-6.3.2.tar.gz 重新命名 mv elasticsearch-6.3.2.tar.gz esearch 移動 mv elasticsearch-6.3.2.tar.gz /opt/
二、配置檔案
jvm.options         虛擬機器引數配置檔案

                    配置heap記憶體一樣

elasticsearch.yml   主配置檔案

                    cluster.name  叢集名稱,同一個網段自動加入

                    node.name        節點名稱

                    http.port     http埠

預設情況下,Elastic 只允許本機訪問,如果需要遠端訪問,可以修改 Elastic 安裝目錄的config/elasticsearch.yml檔案,去掉network.host的註釋,將它的值改成0.0.0.0,然後重新啟動 Elastic。
三、啟動
Root使用者無法啟動es

su admin

進入bin目錄啟動:./elasticsearch

或者守護程序啟動:nohup ./bin/elasticsearch &

==========================================
重啟  sh elasticsearch -d
==========================================
關閉
ps -ef|grep elastic
kill -9 【PID】
這期間會出現各種煩問題,我們一個一個解決:
1、遠端無法訪問的問題
es預設不能遠端訪問

修改config/elasticsearch.yml檔案
network.host: 0.0.0.0
2、max file descriptors [4096] for elasticsearch process is too low, increase to at least [65536]
彈性搜尋過程的最大檔案描述符[4096]太低,至少增加到[65536]

#切換到root使用者修改
vim /etc/security/limits.conf

# 在最後面追加下面內容
admin hard nofile 65536
admin soft nofile 65536

======admin=====為你啟動es的使用者名稱====
3、max number of threads [1024] for user [elk] is too low, increase to at least [4096]
使用者[elk]的最大執行緒數[1024]太低,增加到至少[4096]

進入limits.d下的配置檔案:vi /etc/security/limits.d/90-nproc.conf ,修改配置如下:

*          soft    nproc     4096
root       soft    nproc     unlimited
4、max virtual memory areas vm.max_map_count [65530] is too low, increase to at least [262144]
最大虛擬記憶體區域vm.max_map_count[65530]太低,增加到至少[262144]

#切換到root使用者修改
修改sysctl檔案:vi /etc/sysctl.conf ,增加下面配置項

增加改行配置:vm.max_map_count=655360
儲存退出後,執行:
sysctl -p
5、system call filters failed to install; check the logs and fix your configuration or disable system call filters at your own risk
系統呼叫篩選器安裝失敗;檢查日誌並修復您的配置或禁用系統呼叫篩選器,這是您自己的風險。

在elasticsearch.yml中加入下面命令即可
bootstrap.system_call_filter: false
這些都修改後es應該也就能啟動了
=================================================================================
一、kibana的安裝使用
解壓 tar -zxvf kibana-6.3.2-linux-x86_64.tar.gz 重新命名 mv kibana-6.3.2-linux-x86_64.tar.gz kibana6.3 移動 mv kibana6.3 /opt/
二、配置
kibana.yml常見配置項
elasticsearch.pingTimeout 日常用的ping
elasticsearch.requestTimeout 讀取es的超時時間
elasticsearch.url es主機地址
elasticsearch.username es鑑權的使用者名稱
elasticsearch.password es鑑權的密碼
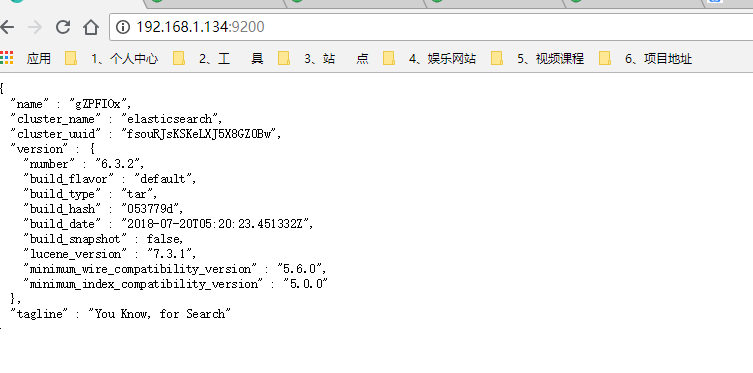
elasticsearch.url: "http://192.168.1.134:9200"
server.host: "0.0.0.0" #這一個配上之後筆記本就可以通過ip:5601訪問了三、啟動
進入bin目錄啟動:./kibana

或者守護程序啟動:nohup ./kibana &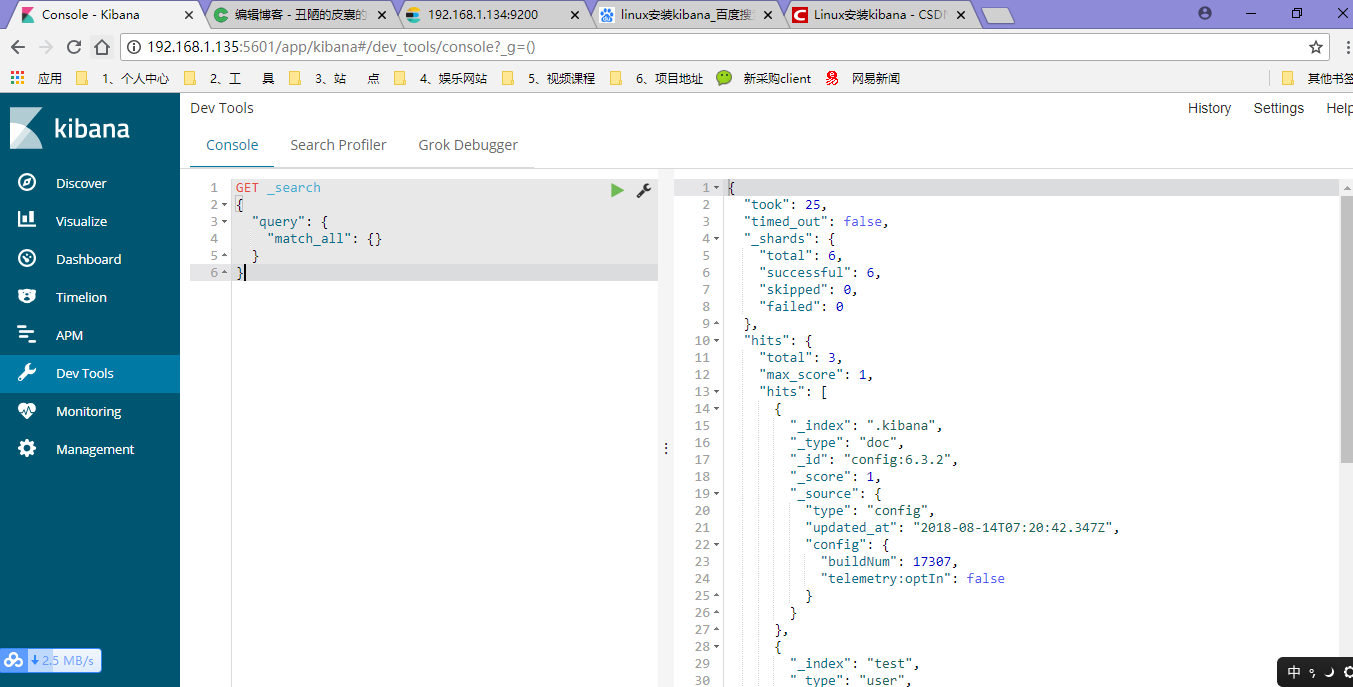
開用吧