
ElasticSearch 2.4.4安裝配置 記錄
文章目錄
環境說明
centos 7
jdk 1.8
安裝過程
假設 centos的ip地址為192.168.0.127
-
首先進去官網 https://www.elastic.co,也可從本文末尾分享的百度連結下載
-
選擇版本
-
建立安裝目錄
mkdir es -
將下載的壓縮包解壓到安裝目錄
tar -zxvf elasticsearch-2.4.4.tar.gz -C /usr/local/es/ -
建立專門的使用者組,使用者(前提 root使用者)
groupadd ES useradd es gpasswd -a ES es -
給使用者組分配許可權
chown -R es:ES /usr/local/es/ elasticsearch-2.4.4
-
切換到es
su es -
啟動 elasticsearch
cd /usr/local/es/ elasticsearch-2.4.4/bin/ ./elasticsearch -
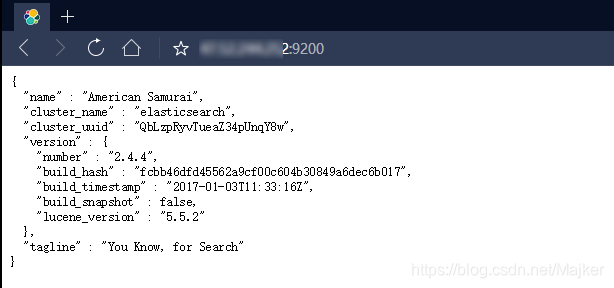
瀏覽器訪問 192.168.0.127:9200,結果如下
-
安裝head外掛
為了便於管理ES,使用head外掛,即可在瀏覽器中顯示ES叢集,索引等資訊,十分好用。- 下載地址: https://github.com/mobz/elasticsearch-head
- elasticsearch-head介紹:https://mobz.github.io/elasticsearch-head/
- 將下載的包解壓後上傳到elasticsearch安裝目錄的plugins目錄下,本文的地址為
/usr/local/es/elasticsearch-2.4.4/plugins
將外掛的名字改成head
- 下載地址: https://github.com/mobz/elasticsearch-head
-
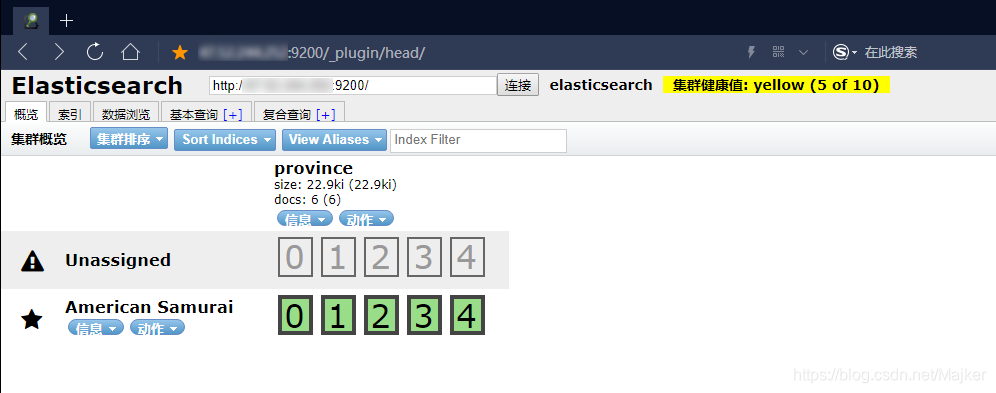
訪問http://192.168.0.127:9200/_plugin/head/
即在原來的位址列上加/_plugin/head/,訪問結果如下:(為了伺服器安全性,此處將ip模糊掉)
注意:
啟動elasticsearch 不能用root使用者去啟動,所以上文才有建立使用者一步驟。
elasticsearch啟動指令碼
elasticsearch安裝目錄在/usr/local/es/elasticsearch-2.4.4/
| 路徑 | 備註 |
|---|---|
| /usr/local/es/elasticsearch-2.4.4/bin | elasticsearch執行命令所在目錄 |
| /usr/local/jdk1.8 | jdk安裝目錄 |
| /usr/local/es/elasticsearch-2.4.4/logs/out.log | 控制檯輸出目錄 |
簡單版
echo "開始啟動"
/usr/local/es/elasticsearch-2.4.4/bin/elasticsearch >/usr/local/es/elasticsearch-2.4.4/logs/out.log  2>&1 &
echo "啟動成功"
複雜版
#! /bin/bash
SERVER=/usr/local/es/elasticsearch-2.4.4/bin
cd $SERVER

start(){
    echo "啟動elasticsearch"
    JAVA_HOME=/usr/local/jdk1.8
    export JAVA_HOME
    PATH=$JAVA_HOME/bin:.:$PATH
    export PATH
    cd /usr/local/es/elasticsearch-2.4.4/bin
    classPath="./elasticsearch"
    nohup  $classPath > /usr/local/es/elasticsearch-2.4.4/logs/out.log 2>&1 &
    echo $! > $SERVER/server.pid
    echo "啟動成功"
}

stop(){
    echo "暫停elasticsearch"
    if [ ! -d "$SERVER/server.pid" ]; then
      kill `cat $SERVER/server.pid`
      rm -rf $SERVER/server.pid
      echo "暫停成功"
    else
      echo "沒有程序可以殺死"
    fi
}


restart(){
    echo "開始重新執行"
    stop
    sleep 1
    start
}

restart
所遇問題
BindTransportException[Failed to bind to [9300-9400]]
如下圖:
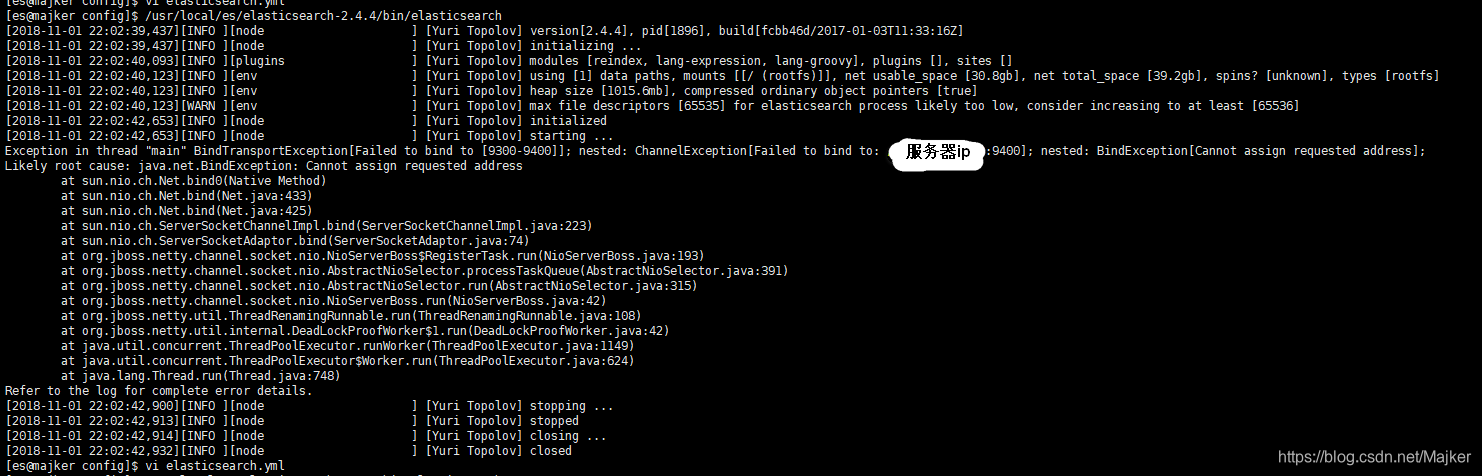
修改:/config/elasticsearch.yml 中的 network.host: 0.0.0.0
參考地址:
https://www.elastic.co/guide/en/elasticsearch/reference/2.3/modules-network.html#network-interface-values
https://discuss.elastic.co/t/bindtransportexception-failed-to-bind-to-9300-9400/65443
注:
本文只做學習記錄,待日後需要時查詢方便,若有所侵權請聯絡lz,
安裝過程主要參考部落格 Linux 安裝Elasticsearch 2.4.4,感謝該lz分享。
參考文獻:
Linux 安裝Elasticsearch 2.4.4
Linux 伺服器上建立使用者並分配許可權
Linux解壓檔案到指定目錄
linux 建立多級目錄 mkdir -p
安裝包分享
連結:https://pan.baidu.com/s/1eE5cOjmec_a4aCYR-cffFw
提取碼:ulh6