7 - Schemas and client libraries
教程 7:模式和客戶端庫
schema 是一個機器可讀文件,描述可用的 API 端點,它們的 URL 以及它們支援的操作。
Schemas 可以是自動生成文件的有用工具,也可以用來驅動可以與 API 互動的動態客戶端庫。
Core API
為了提供 schema 支援,REST framework 使用 Core API。
Core API 是用於描述 API 的文件規範。它用於提供可用端點的內部表示格式和 API 公開的可能互動。它既可以用於伺服器端,也可以用於客戶端。
當使用伺服器端時,Core API 允許 API 支援對各種 schema 或超媒體格式的渲染。
當使用客戶端時,Core API 允許動態驅動的客戶端庫,可以與任何公開支援的 schema 或超媒體格式的 API 進行互動。
新增 schema
REST framework 支援顯式定義的 schema 檢視或自動生成的 schemas。由於我們使用檢視集和路由器,因此我們可以簡單地使用自動 schema 生成。
您需要安裝 coreapi Python 包以便包含 API 模式。
$ pip install coreapi
我們現在可以通過在我們的 URL 配置中包含一個自動生成的 schema 檢視來為我們的 API 包含schema。
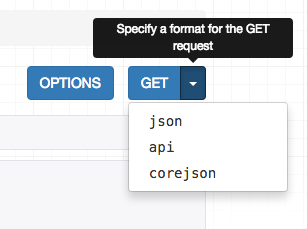
from rest_framework. 如果你在瀏覽器中訪問 /schema/ 端點,那麼你現在應該看到 corejson 表示成為可選項。

我們還可以通過在 Accept 頭中指定所需的內容型別來從命令列請求 schema。
(env) [email protected]:~/django_rest_framework/tutorial$ http http: 預設的輸出風格是使用 Core JSON 編碼。
還支援其他架構格式,如 Open API (以前稱為Swagger)。
使用命令列客戶端
現在我們的 API 公開了一個 schema 端點,我們可以使用一個動態客戶端庫來與 API 進行互動。為了演示這一點,我們使用 Core API 命令列客戶端。
命令列客戶端可用作 coreapi-cli 軟體包:
$ pip install coreapi-cli
現在檢查它在命令列上是否可用…
(env) [email protected]:~/django_rest_framework/tutorial$ coreapi
Usage: coreapi [OPTIONS] COMMAND [ARGS]...

  Command line client for interacting with CoreAPI services.

  Visit http://www.coreapi.org for more information.

Options:
  --version  Display the package version number.
  --help     Show this message and exit.

Commands:
  action       Interact with the active document.
  bookmarks    Add, remove and show bookmarks.
  clear        Clear the active document and other state.
  codecs       Manage the installed codecs.
  credentials  Configure request credentials.
  describe     Display description for link at given PATH.
  dump         Dump a document to console.
  get          Fetch a document from the given URL.
  headers      Configure custom request headers.
  history      Navigate the browser history.
  load         Load a document from disk.
  reload       Reload the current document.
  show         Display the current document.
首先,我們將使用命令列客戶端載入 API schema。
(env) [email protected]u:~/django_rest_framework/tutorial$ coreapi get http://127.0.0.1:8000/schema/
<Pastebin API "http://127.0.0.1:8000/schema/">
    snippets: {
        list([page])
        read(id)
        highlight(id)
    }
    users: {
        list([page])
        read(id)
    }
我們還沒有進行身份驗證,所以現在我們只能看到只讀端點,與我們如何設定 API 的許可權一致。
讓我們嘗試使用命令列客戶端列出現有的 snippets:
(env) [email protected]:~/django_rest_framework/tutorial$ coreapi action snippets list
{
    "count": 4,
    "next": null,
    "previous": null,
    "results": [
        {
            "url": "http://127.0.0.1:8000/snippets/1/",
            "id": 1,
            "highlight": "http://127.0.0.1:8000/snippets/1/highlight/",
            "owner": "djrest",
            "title": "test one",
            "code": "hello, world",
            "linenos": false,
            "language": "abap",
            "style": "abap"
        },
        ...
    ]
}
一些 API 端點需要命名引數。例如,為了要獲取特定的高亮 HTML 表示的 snippet,我們需要提供一個 id。
(env) [email protected]:~/django_rest_framework/tutorial$ coreapi action snippets highlight --param id=1
<!DOCTYPE html PUBLIC "-//W3C//DTD HTML 4.01//EN"
   "http://www.w3.org/TR/html4/strict.dtd">

<html>
<head>
  <title>test one</title>
  <meta http-equiv="content-type" content="text/html; charset=None">
  <style type="text/css">
td.linenos { background-color: #f0f0f0; padding-right: 10px; }
span.lineno { background-color: #f0f0f0; padding: 0 5px 0 5px; }
pre { line-height: 125%; }
  </style>
</head>
<body>
<h2>test one</h2>

<div class="highlight"><pre><span></span><span class="nv">hello</span><span class="p">,</span> <span class="nv">world</span>
</pre></div>
</body>
</html>
認證我們的客戶端
如果我們希望能夠建立,編輯和刪除 snippets,我們需要進行有效性使用者身份驗證。在這種情況下,我們只使用基本的 auth。
請確保使用您的實際的使用者名稱和密碼替換下面的 <username> 和 <password>。
(env) [email protected]:~/django_rest_framework/tutorial$ coreapi credentials add 127.0.0.1 djrest:aa112211 --auth basic
Added credentials
127.0.0.1 "Basic ZGpyZXN0OmFhMTEyMjEx"
現在,如果我們再次獲取 schema,我們應該能夠看到一組完整的可用互動。
(env) [email protected]:~/django_rest_framework/tutorial$ coreapi reload
<Pastebin API "http://127.0.0.1:8000/schema/">
    snippets: {
        list([page])
        create(code, [title], [linenos], [language], [style])
        read(id)
        update(id, code, [title], [linenos], [language], [style])
        partial_update(id, [title], [code], [linenos], [language], [style])
        delete(id)
        highlight(id)
    }
    users: {
        list([page])
        read(id)
    }
我們現在可以與這些端點進行互動。例如,要建立一個新的 snippet:
(env) [email protected]:~/django_rest_framework/tutorial$ coreapi action snippets create --param title="Example" --param code="print('hello, world')"
{
    "url": "http://127.0.0.1:8000/snippets/6/",
    "id": 6,
    "highlight": "http://127.0.0.1:8000/snippets/6/highlight/",
    "owner": "djrest",
    "title": "Example",
    "code": "print('hello, world')",
    "linenos": false,
    "language": "python",
    "style": "friendly"
}
並刪除 snippet:
(env) [email protected]:~/django_rest_framework/tutorial$ coreapi action snippets delete --param id=6
除了命令列客戶端之外,開發人員還可以使用客戶端庫與 API 進行互動。Python 客戶端庫是第一個可用的客戶端庫,並且計劃很快釋出 Javascript 客戶端庫。
有關自定義 schema 生成和使用 Core API 客戶端庫的更多詳細資訊,您需要參閱完整的文件。
回顧我們的工作
擁有非常小的程式碼量,現在我們有了一個完整的 pastebin Web API,它完全是 Web 可瀏覽的,包括一個模式驅動的客戶端庫,並完成了身份驗證、每個物件許可權和多個渲染器格式。
我們已經走過了設計過程的每個步驟,並且看到如果我們需要自定義任何東西,我們都可以按部就班的簡單地使用常規的 Django 檢視實現。
您可以在 GitHub 上檢視最終的教程程式碼,或者在沙箱中試用一個例項。
勇往直前
我們已經到達了教程的最後。如果您想更多地參與 REST framework 專案,可以從以下幾個地方開始:
- 通過審查和提交問題,並提出拉取請求,為 GitHub 做出貢獻。
- 加入 REST framework 討論組,並幫助構建社群。
- 在 Twitter 上關注作者並打個招呼。
現在就去構建非常棒的東西吧。
