
Spring Cloud--Honghu Cloud 分散式微服務雲系統-Eureka(六)
阿新 • • 發佈:2018-12-09
我們針對於HongHu cloud的eureka專案做以下構建,整個構建的過程很簡單,我會將每一步都構建過程記錄下來,希望可以幫助到大家。
1. 建立一個名為common-eureka的maven專案,繼承commonservice,具體的pom.xml配置檔案如下:
<?xml version="1.0" encoding="UTF-8"?>

<project xmlns="http://maven.apache.org/POM/4.0.0"

xmlns:xsi="http://www.w3.org/2001/XMLSchema-instance" xsi:schemaLocation="http://maven.apache.org/POM/4.0.0

http://maven.apache.org/xsd/maven-4.0.0.xsd">

<modelVersion>4.0.0</modelVersion>

<parent>

<groupId>com.ml.honghu</groupId>

<artifactId>commonservice</artifactId>

<version>0.0.1-SNAPSHOT</version>

</parent>

<artifactId>commonservice-eureka</artifactId>

<packaging>jar</packaging>

<name>commonservice-eureka</name>

<description>commonservice project for Spring Boot</description>

<dependencies>

<dependency>

<groupId>org.springframework.cloud</groupId>

<artifactId>spring-cloud-starter-eureka-server</artifactId>

</dependency>

<dependency>

<groupId>org.springframework.boot</groupId>

<artifactId>spring-boot-starter-security</artifactId>

</dependency>

<dependency>

<groupId>org.springframework.boot</groupId>

<artifactId>spring-boot-devtools</artifactId>

</dependency>

<dependency>

<groupId>org.springframework.boot</groupId>

<artifactId>spring-boot-starter-test</artifactId>

<scope>test</scope>

</dependency>


</dependencies>


<build>

<plugins>

<plugin>

<groupId>org.springframework.boot</groupId>

<artifactId>spring-boot-maven-plugin</artifactId>

<executions>

<execution>

<id>1</id>

<goals>

<goal>repackage</goal>

</goals>

</execution>

<execution>

<id>2</id>

<goals>

<goal>build-info</goal>

</goals>

</execution>

</executions>

<configuration>

<executable>true</executable>

</configuration>


</plugin>

</plugins>

</build>

</project>
2. 在啟動類入口引用eureka的相關配置,程式碼如下:
package com.ml.honghu;

import org.springframework.boot.SpringApplication;

import org.springframework.boot.autoconfigure.SpringBootApplication; import org.springframework.cloud.netflix.eureka.server.EnableEurekaServer;

@EnableEurekaServer

@SpringBootApplication public class ServiceApplication{ public static void main(String[] args) {

SpringApplication.run(ServiceApplication.class, args);
3. 配置application.yml檔案
# server (eureka 預設埠為:8761)
server: port: 8761 # spring spring: application:
name: commonservice-erueka
# eureka eureka: client:
# 是否註冊到 eureka
register-with-eureka: true
# 是否從 eureka 獲取註冊資訊
fetch-registry: false availability-zones: honghu: honghuZone service-url:
honghuZone: http://honghu: 4. 增加專案的log機制和打包執行機制(後面我們會詳細編寫針對於Linux
Centos下的打包部署機制)
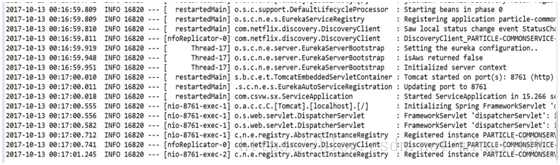
5. 自此整個專案部署完成,通過手動方式進行Run As --> Spring Boot App,執行結果如下:控制檯執行結果:歡迎大家一起學習研究相關技術願意瞭解原始碼的朋友直接求求交流分享技術:2147775633
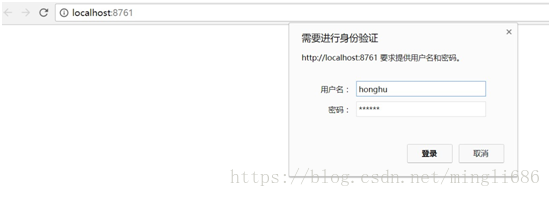
訪問控制檯並登陸:
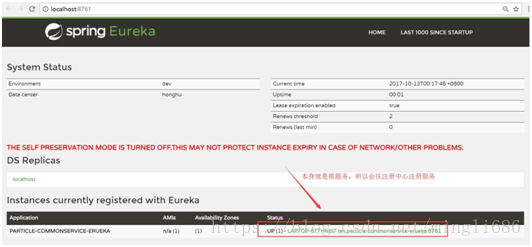
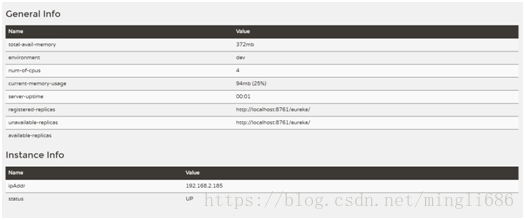
控制檯執行效果:
在開始,我這邊會將近期研發的spring cloud微服務雲架構的搭建過程和精髓記錄下來,幫助更多有興趣研發spring cloud框架的朋友,大家來一起探討spring cloud架構的搭建過程及如何運用於企業專案。