
JAVA Socket通訊 打造屬於自己的網盤
近一個月沒敲JAVA程式碼了,最近老師佈置了一個寫JAVA網盤的作業,總共花了十幾個小時,總算寫完了,debug真的累,感覺自己還是菜了,沒有那種有一個想法就能馬上用程式碼實現的能力。。。。不扯了,下面開始正題。
功能介紹
- 支援1個客戶端,1個伺服器端。伺服器提供網盤空間。
- 首先執行伺服器。伺服器執行之後,客戶端執行網盤客戶端。
- 執行客戶端。使用者能夠輸入暱稱。確定,則連線到伺服器。連線成功,即可出現客戶端面。
- 可以在網盤中新建資料夾,刪除空資料夾,重新命名資料夾;可以將自己電腦上某個檔案上傳到網盤中的某個資料夾下(支援單檔案),可以刪除單個檔案、重新命名檔案、下載單個檔案。
- 可實現大檔案傳輸
整體思路
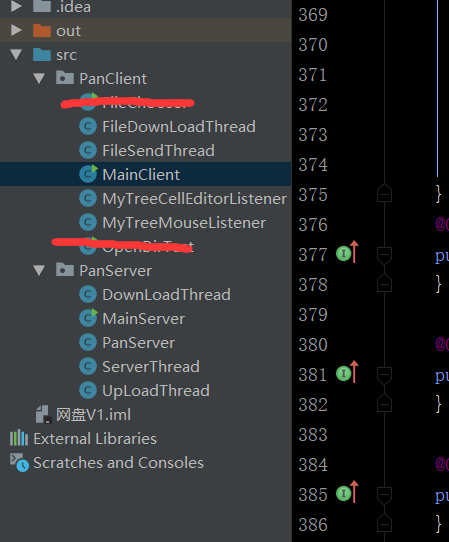
大概分了這麼幾個類
伺服器端
MainServer:
原來是想做個伺服器介面的,但還是有點懶,就算了,所以這個類現在就用來建立Panserver物件
public class MainServer { private PanServer panServer;//伺服器物件 public static void main(String[] args){ MainServer ms =new MainServer(); ms.actionServer(); }// 開啟伺服器 public void actionServer() { // 1.要得到伺服器狀態 if (null == panServer) { panServer = new PanServer(8888); panServer.start(); } else if (panServer.isRunning()) {// 己經在執行 panServer.stopPanServer(); panServer = null; } } }
Panserver:
用於建立伺服器SocketServer的類
package PanServer;

import java.io.IOException;
import java.net.ServerSocket;
import java.net.Socket;

/**
 * 〈伺服器socketserver建立〉
 *
 * @author ITryagain
 * @create 2018/12/5
 * @since 1.0.0
 */

public class PanServer extends Thread {
    private ServerSocket ss;//伺服器物件
    private int port;//埠
    private boolean running=false;//伺服器是否在執行中

    PanServer(int port){
        this.port=port;
    }

    public void run(){
        setupServer();
    }

    //在指定埠上啟動伺服器
    private void setupServer(){
        try{
            ss=new ServerSocket(this.port);
            running=true;
            System.out.println("伺服器建立成功:"+this.port);
            while(running){
                Socket client = ss.accept();
                System.out.println("進入了一個客戶機物件:"+client.getRemoteSocketAddress());
                ServerThread ct = new ServerThread(client);
                ct.start();
            }
        }catch(IOException e){
            // TODO Auto-generated catch block
            e.printStackTrace();
        }
    }

    /*
     * 查詢伺服器是否在執行
     *
     * @return: true為執行中
     */
    public boolean isRunning() {
        return this.running;
    }

    // 關閉伺服器
    public void stopPanServer() {
        this.running = false;
        try {
            ss.close();
        } catch (Exception e) {}
    }
}
else
剩下的三個類就是伺服器實現的關鍵了
其中最重要的是ServerThread類,該類用於實現與客戶端的通訊,通過接收客戶端的指令進行不同的操作,其中函式如下圖所示
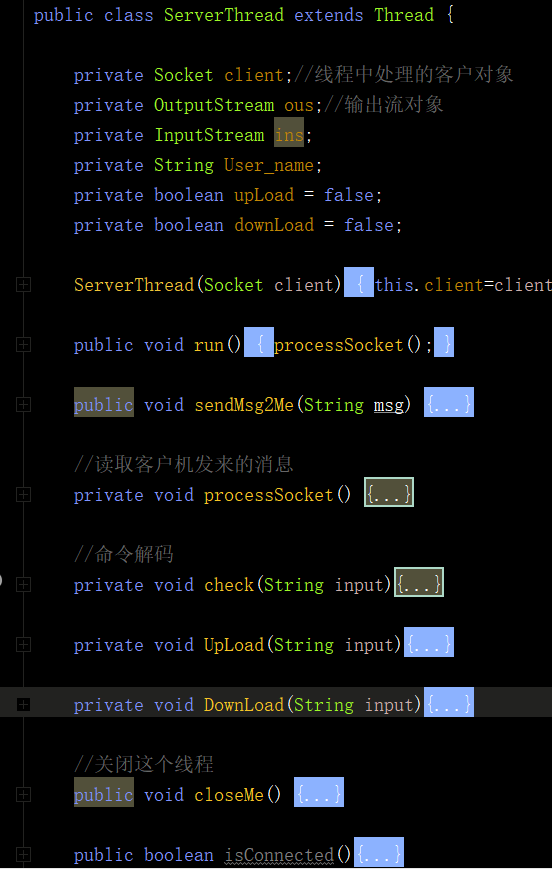
首先,我們在建立連線時,需要輸入使用者名稱,並建立一個資料夾,檔名為使用者名稱,因此,我們需要一個接收一開始傳送的使用者名稱資訊,寫在processSocket內
Socket sc=this.client;
ins=sc.getInputStream();
ous=sc.getOutputStream();
//將輸入流ins封裝為可以讀取一行字串也就是以\r\n結尾的字串
BufferedReader brd=new BufferedReader(new InputStreamReader(ins));
sendMsg2Me("歡迎您使用!請輸入你的使用者名稱:");
User_name=brd.readLine();
System.out.println(User_name);
這樣我們就讀取了使用者名稱,讀取使用者名稱後,馬上就能建立資料夾
File directory = new File("D:\\"+User_name);
if(!directory.exists()){
       directory.mkdir();
}
然後就進入while迴圈,不斷從客戶端讀取使用者操作資訊
String input=brd.readLine();//一行一行的讀取客戶機發來的訊息
while(true) {
          System.out.println("伺服器收到的是"+input);
          if((!this.upLoad)&&(!this.downLoad)){
                check(input);
          }
          if(this.upLoad){//上傳中
                UpLoad(input);
          }
          if(this.downLoad){//下載中
                DownLoad(input);
          }
          input=brd.readLine();//讀取下一條
          System.out.println(input);
}
這裡我用了三個函式來分別處理三種狀態,其中check函式用來解碼,這裡我給出其中新建資料夾的寫法示例,刪除和重新命名與之類似
private void check(String input){
        if(input.charAt(0)=='~'){
            String tmp=input.substring(input.indexOf("~")+1,input.indexOf("#"));
            System.out.println(tmp);
            if(tmp.equals("downLoad")){
                this.downLoad=true;
            }else if(tmp.equals("upLoad")){
                this.upLoad=true;
            }else if(tmp.equals("new")){
           //新建資料夾
                System.out.println(input.substring(input.indexOf("#")+1));
                File directory = new File(input.substring(input.indexOf("#")+1));
                if(!directory.exists()){
                    directory.mkdir();
                }
            }else if(tmp.equals("delete")){
                //刪除資料夾
            }else if(tmp.equals("change")){
               //重新命名資料夾
            }
        }
    }
然後剩下的就是UpLoad和DownLoad函數了,這兩個函式分別對應了上傳和下載功能,我一開始把這兩個功能都放在一開始建立的SockerServer裡面了,結果發現檔案上傳了之後關閉流時把我執行緒也關了orz。。。還是太菜了,這種錯都能寫出來,百度了一番,看到好多人都是再開幾個埠解決的。。。一開始就想到這方法了,但不想這麼幹,總覺的應該還有更好的辦法,可最終還是決定用這種方法了(真香)。這裡就給出其中一個函式的寫法吧
    private void UpLoad(String input){
        System.out.println("上傳檔案");
        UpLoadThread upLoadThread = new UpLoadThread(8889,input);
        upLoadThread.start();
        this.upLoad=false;
    }
既然給了UoLoad的寫法,就順便講講upLoadThread吧
/**
 * 〈伺服器接受檔案執行緒〉
 *
 * @author ITryagain
 * @create 2018/12/8
 * @since 1.0.0
 */

public class UpLoadThread extends Thread{
    private ServerSocket UpLoadServer;
    private int port;
    private String input;
    private FileOutputStream fos;

    UpLoadThread(int port,String input){
        this.port=port;
        this.input=input;
    }

    public void run(){

    }


    private static DecimalFormat df = null;

    static {
        // 設定數字格式,保留一位有效小數
        df = new DecimalFormat("#0.0");
        df.setRoundingMode(RoundingMode.HALF_UP);
        df.setMinimumFractionDigits(1);
        df.setMaximumFractionDigits(1);
    }

    /**
     * 格式化檔案大小
     * @param length
     * @return
     */
    private String getFormatFileSize(long length) {

    }
}
大致函式就是這樣的,其中run方法裡面就是檔案接收了,(如果發現缺了什麼自己補一補,就一個變數的申明沒加上去)
    try{
            UpLoadServer = new ServerSocket(port);
            socket = UpLoadServer.accept();
            dis = new DataInputStream(socket.getInputStream());
            //檔名和長度
            String fileName = input.substring(input.indexOf("#")+1);
            long fileLength = dis.readLong();
            File file = new File(fileName);
            fos = new FileOutputStream(file);

            //開始接收檔案
            byte[] bytes = new byte[1024];
            int length=0;
            while((length = dis.read(bytes, 0, bytes.length)) != -1) {
                fos.write(bytes, 0, length);
                fos.flush();
            }
            System.out.println("======== 檔案接收成功 [File Name:" + fileName + "] [Size:" + getFormatFileSize(fileLength) + "] ========");

            try {
                if(fos!=null)
                    fos.close();
                if(dis != null)
                    dis.close();
                if(socket !=null)
                    socket.close();
                if(UpLoadServer!=null)
                    UpLoadServer.close();

            } catch (Exception e) {}

        }catch(IOException e){

        }
然後就是 getFormatFileSize() 函數了,這個函式是用來幹嘛的呢?就是用來轉化一下檔案大小單位的,不然到時候一個幾 GB 的檔案顯示的就是 *****
******B了,那麼長一串,看著也不舒服。
    private String getFormatFileSize(long length) {
        double size = ((double) length) / (1 << 30);
        if(size >= 1) {
            return df.format(size) + "GB";
        }
        size = ((double) length) / (1 << 20);
        if(size >= 1) {
            return df.format(size) + "MB";
        }
        size = ((double) length) / (1 << 10);
        if(size >= 1) {
            return df.format(size) + "KB";
        }
        return length + "B";
    }
伺服器端剩下沒講的程式碼其實都差不多,就自己去實現吧
客戶端
客戶端就比較麻煩了,尤其是這個介面,花了我老半天時間
MainClient:
這個類就是客戶端用於建立介面以及管理執行緒的類了,介面我是用JTree來實現的,看下函式先吧
public class MainClient extends JFrame implements ActionListener, TreeModelListener {

    private JTree tree;
    private int ServerIP = 8888;
    private JLabel statusLabel;
    private DefaultTreeModel treeModel;
    private String oldNodeName;
    private OutputStream ous;
    private Socket client;
    private String name;
    private String stress = "D:\\";
    private String downLoadStress="D:\\下載\\";

    public static void main(String[] args){
        MainClient mc=new MainClient();
        mc.showLoginUI();
    }

    public void showLoginUI(){

    }

    // 登陸事件處理
    private void loginAction() {

    }

    //顯示操作視窗
    private void showMainUI() {

    }

    @Override
    public void actionPerformed(ActionEvent e) {
        if (e.getActionCommand().equals("新建資料夾")) {

        }
        if (e.getActionCommand().equals("刪除資料夾")) {

        }
        if (e.getActionCommand().equals("上傳檔案")) {

        }
        if(e.getActionCommand().equals("下載檔案")){

        }

    }

    @Override
    /*
     *  修改檔名字
     */
    public void treeNodesChanged(TreeModelEvent e) {

    }

    //選擇上傳檔案
    public void chooseSendFile(){

    }

    public void sendFile(File file,String path) throws IOException{

    }

    private String getSendPath(TreePath parentPath){

    }

    //選擇下載檔案
    public void chooseDownLoadFile() {

    }
    //下載檔案
    public void downloadFile(String path) throws IOException{

    }

    private String getDownLoadPath(TreePath parentPath){

    }

    private void newFile(String path){

    }

    private void deleteFile(String path){

    }

    private void ChangeFileName(String NewName,String path){

    }
    @Override
    public void treeNodesInserted(TreeModelEvent e) {
    }

    @Override
    public void treeNodesRemoved(TreeModelEvent e) {
    }

    @Override
    public void treeStructureChanged(TreeModelEvent e) {
    }

}
先來看看介面吧,開啟後你可能只能看到三個按鈕,拉動一下框框就能看到第四個了,大小設定有點問題。
 private void showMainUI() {
        JFrame frame=new JFrame("網盤");
        Container contentPane = frame.getContentPane();

        DefaultMutableTreeNode root = new DefaultMutableTreeNode(name);
        tree = new JTree(root);
        tree.addMouseListener(new MyTreeMouseListener(oldNodeName));
        treeModel = (DefaultTreeModel)tree.getModel();
        treeModel.addTreeModelListener(this);
        tree.setEditable(true);
        tree.getCellEditor().addCellEditorListener(new MyTreeCellEditorListener(tree));
        JScrollPane scrollPane = new JScrollPane();
        scrollPane.setViewportView(tree);

        JPanel toolBarPanel = new JPanel();
        JButton b = new JButton("新建資料夾");
        b.addActionListener(this);
        toolBarPanel.add(b);
        b = new JButton("刪除資料夾");
        b.addActionListener(this);
        toolBarPanel.add(b);
        b = new JButton("上傳檔案");
        b.addActionListener(this);
        toolBarPanel.add(b);
        b = new JButton("下載檔案");
        b.addActionListener(this);
        toolBarPanel.add(b);

        statusLabel = new JLabel("Action");
        contentPane.add(toolBarPanel, BorderLayout.NORTH);
        contentPane.add(scrollPane, BorderLayout.CENTER);
        contentPane.add(statusLabel, BorderLayout.SOUTH);
        frame.pack();
        frame.setVisible(true);
        frame.requestFocus();
        frame.setSize(400, 400);
        frame.setLocationRelativeTo(null);
        frame.setDefaultCloseOperation(JFrame.EXIT_ON_CLOSE);
        tree.setRootVisible(false);
    }
裡面兩監聽類的實現(提醒一下,可能到後面你做重新命名資料夾會遇到坑,跟其中一個監聽類有關,提醒一下oldNodeName是用來記錄修改前的資料夾名稱的,想辦法獲取這個變數的值就能很快實現資料夾重新命名的功能),還有檔案路徑的實現也自己好好想想
至於介面的其它一些功能實現可以去看這篇部落格(包括兩個監聽類的實現以及 actionPerformed() 和 treeNodesChanged() 等函式的實現)https://www.cnblogs.com/freshier/p/4614811.html
然後這裡給出NewFile()函式寫法
    private void newFile(String path){
        String fileName = "~new#"+path+"\r\n";
        System.out.println(fileName);
        try {
            this.ous.write(fileName.getBytes());
            this.ous.flush();
        } catch (IOException e) {
            e.printStackTrace();
        }
    }
至於 delete 和 change 的寫法與此類似
前面我給出了伺服器上傳檔案的類,這裡就給出客戶端上傳檔案的類的寫法
先看下 sendFile() 函式
 public void sendFile(File file,String path) throws IOException{
        String fileName = "~upLoad#"+path+"\\"+file.getName()+"\r\n";
        System.out.println(fileName);
        this.ous.write(fileName.getBytes());
        this.ous.flush();
        FileSendThread send_socket = new FileSendThread(8889,file,path);
        send_socket.start();
    }
FileSendThread:
客戶端上傳檔案的類
public class FileSendThread extends Thread {

    private Socket fileSendSocket;
    private int port;
    private String path;
    private File file;
    private OutputStream ous;
    private FileInputStream fis;
    private DataOutputStream dos;

    FileSendThread(int port, File file,String path){
        this.port=port;
        this.file=file;
        this.path=path;
    }
    public void run(){
        try{
            fileSendSocket = new Socket("localhost",this.port);
            // 傳送: 檔名稱 檔案長度
            this.ous = fileSendSocket.getOutputStream();
            dos = new DataOutputStream(this.ous);
            dos.writeLong(file.length());

            //開始傳輸檔案
            System.out.println("======開始傳輸檔案=======");
            byte[] bytes = new byte[1024];
            int length;
            long progress = 0;
            fis = new FileInputStream(file);
            while((length=fis.read(bytes,0,bytes.length))!=-1){
                dos.write(bytes,0,length);
                dos.flush();
                progress = progress + length;
                System.out.print("| " + (100*progress/file.length()) + "% |");
            }
            System.out.println();
            System.out.println("======== 檔案傳輸成功 ========");
        }catch(IOException e1){

        }finally {
            try {
                if (fis != null)
                    fis.close();
                if (dos != null)
                    dos.close();
            }catch(IOException e){
                // TODO Auto-generated catch block
                e.printStackTrace();
            }
        }
    }
}
至於下載功能,與上傳類似,把伺服器和客戶端上傳類中的部分程式碼換一換就好了。
到了這裡你們是否還記得我們在通訊連線建立時需要傳輸使用者名稱?實現方式如下
登陸框的實現,我這裡算是偷懶了,直接利用了 JOptionPane
    public void showLoginUI(){

        name = JOptionPane.showInputDialog("請輸入使用者名稱");
        System.out.println(name);
        loginAction();
    }
    // 登陸事件處理
    private void loginAction() {

        try {
            this.client = new Socket("localhost",ServerIP);
            if(loginServer()){
                showMainUI();
            }else{
                JOptionPane.showMessageDialog(null,"登陸失敗","確定",JOptionPane.WARNING_MESSAGE);
            }
        } catch (IOException e) {
            JOptionPane.showMessageDialog(null,"連線失敗","確定",JOptionPane.WARNING_MESSAGE);
        }

    }
    private boolean loginServer(){
        try{
            this.ous = this.client.getOutputStream();
            String _name=name+"\r\n";
            this.ous.write(_name.getBytes());
            this.ous.flush();
            return true;
        }catch(IOException e){
            return false;
        }
    }
順便介紹幾個方法
資料夾重新命名
File directory = new File("D:\a.txt");
directory.renameTo(new File("D:\b.txt"));
這裡實現的是將a.txt重新命名為b.txt,對資料夾也有效
資料夾刪除
 boolean success = (new File("D:\a.txt").delete();
 if(success){
   System.out.println("刪除成功");
 }else{
    ystem.out.println("刪除失敗");
 }
還有String的幾個操作
1、我的編碼
- 上傳檔案 ~upLoad#檔案路徑+檔案
- 下載檔案 ~downLoad#檔案路徑+檔案
- 檔案重新命名 ~change#檔案路徑+原檔名@檔案路徑+新檔名
- 新建資料夾 ~new#檔案路徑+檔名
- 刪除資料夾 ~delete#檔案路徑+檔名
2.String中的 subString() 和 indexOf() 函式
總結
到這裡,我的網盤介紹算是完了,因為這是作業並且還沒檢查的緣故,就沒有把所有程式碼放出來了,就介紹了下思路,順便給將要寫網盤或者正在寫網盤的你們一點思路,相信有了這些思路,你們能很快地寫完網盤,或者有了寫的思路。太久沒寫程式碼果然不行,搞了一個多月的強化學習、機器學習和資料探勘,差點就不會寫程式碼了(面向搜尋引擎程式設計感覺還行。。。百度有時很強大,可能只是你沒學會正確的搜尋的姿勢)