(二)Docker映象管理
阿新 • • 發佈:2018-12-10
文章目錄
1 製作一個簡單映象
# 先啟動一個容器,增加一些檔案,然後基於此做成一個映象
[[email protected] ~]# docker run --name b1 -it busybox
/ # mkdir /data/html -p
/ # vi /data/html/index.html
/ # cat /data/html/index.html
<h1>Busybox httpd server.</h1>
新建終端視窗操作
[[email protected] ~]# docker commit -p b1
[[email protected] ~]# docker image ls
REPOSITORY               TAG                 IMAGE ID            CREATED             SIZE
<none>                   <none>              50290c5e9b46        5 seconds ago       1.15MB
redis                    4-alpine            05097a3a0549        4 weeks ago         30MB
busybox                  latest              59788edf1f3e        4 weeks ago         1.15MB
nginx                    1.14-alpine         14d4a58e0d2e        7 weeks ago         17.4MB
quay.io/coreos/flannel   v0.10.0-amd64       f0fad859c909        9 months ago        44.6MB
給新建立的映象打標籤
[[email protected] ~]# docker tag 50290c5e9b46 rsqlh/httpd:v1.0.0
[[email protected] ~]# docker image ls
REPOSITORY TAG IMAGE ID CREATED SIZE
rsqlh/httpd v1.0.0 50290c5e9b46 59 seconds ago 1.15MB
redis 4-alpine 05097a3a0549 4 weeks ago 30MB
busybox latest 59788edf1f3e 4 weeks ago 1.15MB
nginx 1.14-alpine 14d4a58e0d2e 7 weeks ago 17.4MB
quay.io/coreos/flannel v0.10.0-amd64 f0fad859c909 9 months ago 44.6MB [ 此時最新的那個映象相當於連結檔案,如果刪除不會影響到原始檔
[[email protected] ~]# docker image rm rsqlh/httpd:latest
Untagged: rsqlh/httpd:latest
[[email protected] ~]# docker image ls
REPOSITORY               TAG                 IMAGE ID            CREATED             SIZE
rsq/busybox_httpd        latest              50290c5e9b46        3 minutes ago       1.15MB
rsqlh/httpd              v1.0.0              50290c5e9b46        3 minutes ago       1.15MB
redis                    4-alpine            05097a3a0549        4 weeks ago         30MB
busybox                  latest              59788edf1f3e        4 weeks ago         1.15MB
nginx                    1.14-alpine         14d4a58e0d2e        7 weeks ago         17.4MB
quay.io/coreos/flannel   v0.10.0-amd64       f0fad859c909        9 months ago        44.6MB
啟動我們之前建立的新映象,看是否有我們最開始建立的index.html檔案
[[email protected] ~]# docker run --name t1 -it rsqlh/httpd:v1.0.0
/ # ls /
bin   data  dev   etc   home  proc  root  sys   tmp   usr   var
/ # cat /data/html/index.html
<h1>Busybox httpd server.</h1>
在做映象的時候更改預設啟動命令,把httpd啟動命令作為預設啟動命令測試
[[email protected] ~]# docker commit -a "RSQ <[email protected]>" -c 'CMD ["/bin/httpd","-f","-h","/data/html"]' -p b1 rsqlh/httpd:v1.0.1
[[email protected] ~]# docker run --name t2 rsqlh/httpd:v1.0.1
換個終端檢視
[[email protected] ~]# docker ps
CONTAINER ID        IMAGE                COMMAND                  CREATED             STATUS              PORTS               NAMES
51464876dbea        rsqlh/httpd:v1.0.1   "/bin/httpd -f -h /d…"   2 minutes ago       Up 2 minutes                            t2
[[email protected] ~]# docker inspect t2 | grep IPAddress
[[email protected] ~]# curl 172.17.0.2
<h1>Busybox httpd server.</h1>
推送到docker hub
[[email protected] ~]# docker login -u rsqlh   # 先登陸到伺服器上
Password:
WARNING! Your password will be stored unencrypted in /root/.docker/config.json.
Configure a credential helper to remove this warning. See
https://docs.docker.com/engine/reference/commandline/login/#credentials-store

Login Succeeded
[[email protected] ~]# docker push rsqlh/httpd
Tips:若刪除映象失敗,可有以下操作,原因是因為有依賴
[[email protected] ~]# docker rmi rsq/busybox_httpd:v1.0.0
Error response from daemon: conflict: unable to remove repository reference "rsq/busybox_httpd:v1.0.0" (must force) - container c7bc06d55b36 is using its referenced image 10231b71c4ab
[[email protected] ~]# docker rm c7bc06d55b36
c7bc06d55b36
[[email protected] ~]# docker rmi rsq/busybox_httpd:v1.0.0
若要換成阿里雲的hub,則先登出,然後登陸阿里雲的賬號
[[email protected] ~]# docker login --username=rsqlh registry.cn-shenzhen.aliyuncs.com
映象的匯入和匯出
[[email protected] ~]# docker save -o myimages.gz rsqlh/httpd:v1.0.1 rsqlh/httpd:v1.0.0
[[email protected] ~]# ll -h myimages.gz
-rw-------. 1 root root 1.4M Nov  4 22:16 myimages.gz
[[email protected] ~]# scp myimages.gz [email protected]:/root/
在另外一臺裝置上載入此映象
[[email protected] ~]# docker load -i myimages.gz
但是這種方式,若是本地沒有映象,還是會從倉庫pull下來映象,所以事先還需要下載好映象
2 Docker網路
2.1 暴露埠,相當於DNAT
(1)將指定的容器埠對映至宿主機所有地址的一個動態埠,這個埠會隨機生成
	-p <containerPort>

(2)將容器埠<containerPort>對映至指定的宿主機埠<hostPort>
	-p <hostPort>:<containerPort>

(3)將指定的容器埠<containerPort>對映至宿主機指定<ip>的動態埠
	-p <ip>::<containerPort>

(4)將指定的容器埠<containerPort>對映至宿主機指定<ip>的指定埠<hostPort>
	-p <ip>:<hostPort>:<containerPort>

“動態埠”指隨機埠,具體的對映結果可以使用docker port命令檢視
執行busybox,使得可以修改主機名,更改網路模式
docker run --name b1 -it --network bridge -h b1.rsql.com --rm busybox:latest
自定義dns
docker run --name b1 -it --network bridge -h b1.rsql.com --dns 114.114.114.114 --rm 4.114 --rm busybox:latest
在外部新增dns解析
[[email protected] ~]# docker run --name b1 -it --network bridge -h b1.rsql.com --dns-search ilinux.io --add-host www.rsq.com:1.1.1.1  --rm busybox:latest
/ # cat /etc/hosts
127.0.0.1	localhost
::1	localhost ip6-localhost ip6-loopback
fe00::0	ip6-localnet
ff00::0	ip6-mcastprefix
ff02::1	ip6-allnodes
ff02::2	ip6-allrouters
1.1.1.1	www.rsq.com
172.17.0.4	b1.rsql.com b1
終端1開啟http服務
[[email protected] ~]# docker run --name t2 -it --network bridge --rm -p 80 rsqlh/httpd:v1.0.1
終端2檢視程序轉換埠
[[email protected] ~]# docker ps
CONTAINER ID        IMAGE                COMMAND                  CREATED             STATUS              PORTS                   NAMES
7b0c262f2bb4        rsqlh/httpd:v1.0.1   "/bin/httpd -f -h /d…"   24 seconds ago      Up 23 seconds       0.0.0.0:32770->80/tcp   t2
[[email protected] ~]# docker port t2
80/tcp -> 0.0.0.0:32770
[[email protected] ~]# curl 172.17.0.2
<h1>Busybox httpd server.</h1>
外部測試

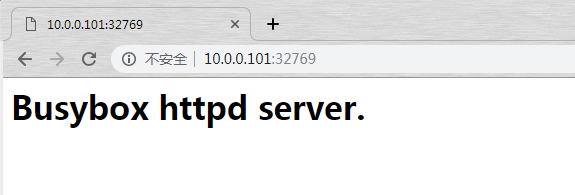
固定IP地址,-p x.x.x.x::80 兩個冒號中間指定宿主機埠,空的話預設動態自動分配
[[email protected] ~]# docker run --name t2 --network bridge --rm -p 10.0.0.101::80 rsqlh/httpd:v1.0.1
[[email protected] ~]# docker port t2
80/tcp -> 10.0.0.101:32769

[[email protected] ~]# docker run --name t2 --network bridge --rm -p 80:80 rsqlh/httpd:v1.0.1
[[email protected] ~]# docker port t2
80/tcp -> 0.0.0.0:80

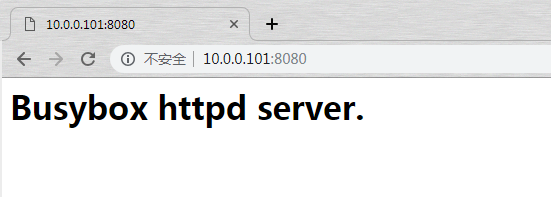
指定宿主機IP有指定宿主機埠
[[email protected] ~]# docker run --name t2 --network bridge --rm -p 10.0.0.101:8080:80 rsqlh/httpd:v1.0.1
[[email protected] ~]# docker port t2
80/tcp -> 10.0.0.101:8080

2.2 聯盟式容器
- 聯盟式容器是指使用某個已存在的容器的網路介面的容器,介面被聯盟內的個容器共享使用,因此,聯盟式容器彼此之間完全無隔離。
- 聯盟式容器彼此間雖然共享同一個網路名稱空間(
UTS、NETWORK、IPC),但其它名稱空間如User、Mount、PID還是隔離的。 - 聯盟式容器彼此間存在埠衝突的可能性,因此,通常只會在多個容器上的程式需要程式
loopback介面互相通訊、或對某已存在的容器的網路屬性進行監控時才使用此種模式的網路模型。
建立兩個容器b1和b2
[[email protected] ~]# docker run --name b1 -it --rm busybox
/ # hostname -i
172.17.0.2
[[email protected] ~]# docker run --name b2 -it --rm busybox
/ # hostname -i
172.17.0.3
共用網路,可用ifconfig檢視到兩個容器的網絡卡IP一樣
[[email protected] ~]# docker run --name b2 --network container:b1 -it --rm busybox
/ # hostname -i
172.17.0.2
測試檔案系統是分離的,b1上建立一檔案
/ # touch /tmp/test
/ # ls /tmp/test
/tmp/test
b2上檢視,可以發現非網路namespace是不共享的
/ # ls /tmp
/ #
測試共用網路系統,在b1上啟動httpd,在b2上訪問自己
/ # echo "This is a test file." > /tmp/index.html
/ # httpd -h /tmp/
/ # netstat -lntup
Active Internet connections (only servers)
Proto Recv-Q Send-Q Local Address           Foreign Address         State       PID/Program name
tcp        0      0 :::80                   :::*                    LISTEN      12/httpd
/ #
b2訪問,可以發現會共享網路
/ # wget -O - -q 127.0.0.1
This is a test file.
自定義docker0橋的網路屬性資訊:
# 核心選項為`bip`,即bridge ip之意,用於指定`docker0`橋自身的IP地址;其它選項可通過此地址計算得出。
vim /etc/docker/daemon.json
	{
	"bip": "172.25.0.1/24",
	"fixed-cidr": "10.20.0.0/16",
	"fixed-cidr-v6": "2001:db8::/64",
	"mtu": 1500,
	"default-gateway": "10.20.1.1",
	"default-gateway-v6": "2001:db8:abcd::89",
	"dns": ["10.20.1.2","10.20.1.3"]
	}
docker守護程序的C/S,其預設僅監聽Unix Socket格式的地址,/var/run/docker.sock;如果使用TCP套接字則新增如下資訊
[[email protected] ~]# vim /etc/docker/daemon.json
{
	"registry-mirrors": ["https://3po4uu60.mirror.aliyuncs.com","https://registry.docker-cn.com"]
"bip": "172.25.0.1/24",
	"hosts": ["tcp://0.0.0.0:2375","unix:///var/run/docker.sock"]
}
也可向docker直接傳遞"-H|–host"選項執行遠端連線命令
[[email protected] ~]# docker -H 10.0.0.101:2375 ps
手動建立docker網絡卡
[[email protected] ~]# docker network create -d bridge --subnet "172.25.0.0/16" --gateway "172.25.0.1" mybr0
1972a1e1e51d47a5bff155cbb67a91fc11b229fb9c06e5682ee1617781cefdc2
[[email protected] ~]# docker network ls
NETWORK ID          NAME                DRIVER              SCOPE
a38e08270902        bridge              bridge              local
8a64c907bbdc        host                host                local
1972a1e1e51d        mybr0               bridge              local
645fe58f5d5d        none                null                local
[[email protected] ~]# ifconfig
br-1972a1e1e51d: flags=4099<UP,BROADCAST,MULTICAST>  mtu 1500
        inet 172.25.0.1  netmask 255.255.0.0  broadcast 172.25.255.255
        ether 02:42:0d:a0:07:56  txqueuelen 0  (Ethernet)
        RX packets 1031  bytes 95743 (93.4 KiB)
        RX errors 0  dropped 0  overruns 0  frame 0
        TX packets 621  bytes 62157 (60.7 KiB)
        TX errors 0  dropped 0 overruns 0  carrier 0  collisions 0
修改網絡卡名字為docker1,此時會報錯,先關掉此網絡卡
[[email protected] ~]# ip link set dev br-1972a1e1e51d name docker1
RTNETLINK answers: Device or resource busy
[[email protected] ~]# ip link set dev br-1972a1e1e51d down
[[email protected] ~]# ip link set dev br-1972a1e1e51d name docker1
[[email protected] ~]# ip link set dev docker1 up
[[email protected] ~]# ifconfig docker1
docker1: flags=4163<UP,BROADCAST,RUNNING,MULTICAST>  mtu 1500
        inet 172.25.0.1  netmask 255.255.0.0  broadcast 172.25.255.255
        inet6 fe80::42:dff:fea0:756  prefixlen 64  scopeid 0x20<link>
        ether 02:42:0d:a0:07:56  txqueuelen 0  (Ethernet)
        RX packets 6  bytes 392 (392.0 B)
        RX errors 0  dropped 0  overruns 0  frame 0
        TX packets 24  bytes 1856 (1.8 KiB)
        TX errors 0  dropped 0 overruns 0  carrier 0  collisions 0
在建立容器的時候可以直接加入此網絡卡即可
[[email protected] ~]# docker run --name t1 -it --net mybr0 busybox:latest
/ # ifconfig
eth0      Link encap:Ethernet  HWaddr 02:42:AC:19:00:02
          inet addr:172.25.0.2  Bcast:172.25.255.255  Mask:255.255.0.0
          UP BROADCAST RUNNING MULTICAST  MTU:1500  Metric:1
          RX packets:12 errors:0 dropped:0 overruns:0 frame:0
          TX packets:0 errors:0 dropped:0 overruns:0 carrier:0
          collisions:0 txqueuelen:0
          RX bytes:1016 (1016.0 B)  TX bytes:0 (0.0 B)
再建立一個容器,這個容器選擇預設的bridge,此時看二則能否通訊,先關閉防火牆
[[email protected] ~]# systemctl stop firewalld.service
[[email protected] ~]# systemctl disable firewalld.service

[[email protected] ~]# docker run --name t2 -it --net bridge busybox:latest
/ # ifconfig
eth0      Link encap:Ethernet  HWaddr 02:42:AC:11:00:02
          inet addr:172.17.0.2  Bcast:172.17.255.255  Mask:255.255.0.0
          UP BROADCAST RUNNING MULTICAST  MTU:1500  Metric:1
          RX packets:12 errors:0 dropped:0 overruns:0 frame:0
          TX packets:0 errors:0 dropped:0 overruns:0 carrier:0
          collisions:0 txqueuelen:0
          RX bytes:1016 (1016.0 B)  TX bytes:0 (0.0 B)
/ # ping 172.25.0.2
PING 172.25.0.2 (172.25.0.2): 56 data bytes
64 bytes from 172.25.0.2: seq=0 ttl=63 time=0.104 ms
64 bytes from 172.25.0.2: seq=1 ttl=63 time=0.145 ms
64 bytes from 172.25.0.2: seq=2 ttl=63 time=0.088 ms
^C
--- 172.25.0.2 ping statistics ---
3 packets transmitted, 3 packets received, 0% packet loss
round-trip min/avg/max = 0.088/0.112/0.145 ms
