
SpringBoot(二) 手動搭建springboot簡單框架
阿新 • • 發佈:2018-12-11
1、新建maven工程
2、在pom.xml檔案中配置springboot需要的依賴
   <parent>
		<groupId>org.springframework.boot</groupId>
		<artifactId>spring-boot-starter-parent</artifactId>
		<version>1.4.1.RELEASE</version>
	</parent>

	<dependencies>
		<dependency>
			<groupId>org.springframework.boot</groupId>
			<artifactId>spring-boot-starter-web</artifactId>
		</dependency>
	</dependencies>
3、在resource目錄下新建application.properties(或者application.yml)檔案,後者配置時需要按照json格式配置,本例以properties配置檔案為主。
zw.name=寶寶
zw.age=20

#時間格式化
spring.jackson.date-format=yyyy-MM-dd HH:mm:ss
#時區設定
spring.jackson.time-zone=Asia/Chongqing
以上的配置引數和時間格式相關,可有可無,但是檔案必需存在
4、編寫啟動類
啟動類需要注意(1、啟動類一定要位於所有檔案的根目錄上;2、類名稱可以隨意命名但是類名稱和run執行的class名稱必需一致)
檔案位置如圖:
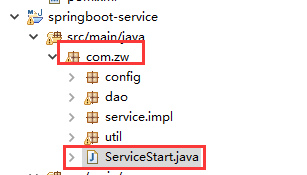
樣例程式碼如下:
package com.zw;

import org.springframework.boot.SpringApplication;
import org.springframework.boot.autoconfigure.SpringBootApplication;
import org.springframework.context.annotation.ImportResource;

@SpringBootApplication
public class ServiceStart {

	public static void main(String[] args) {
		SpringApplication.run(ServiceStart.class, args);
	}
}
5、編寫rest介面類進行測試
本例rest介面程式碼如下:
package com.demo.rest;

import java.util.Date;
import java.util.List;

@Controller
@RequestMapping("/student")
public class StudentController {

	@Value(value = "${zw.name}")
	private String name;

	@Value(value = "${zw.age}")
	private int age;

	@RequestMapping("/student")
	@ResponseBody
	public String user() {
		Date date = new Date();
		return name + " " + age + " " + date;
	}
}
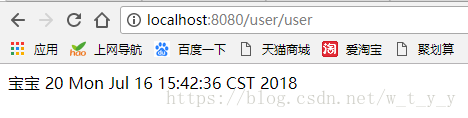
6、啟動ServiceStart.java檔案,專案沒有報錯,報出如下的日誌

在瀏覽器訪問網址
http://localhost:8080/student/student
如下圖:
總結:
業精於勤,對於基礎的東西不瞭解,而一味去追求更高階的東西總是得不償失。慢慢起步學習自己搭建框架和環境,越是覺得自己不擅長不想嘗試就越要跨過自己這道心裡。跨過去了才會天高雲淡,跨不過去就總是學不會,總是覺得自己不如別人。