Vue路由基本功能 demo
阿新 • • 發佈:2018-12-12
<!DOCTYPE html>
<html>
<head>
<meta charset="utf-8">
<title></title>
<script src="https://cdn.bootcss.com/vue/2.5.17/vue.js"></script>
<script src="https://cdn.bootcss.com/vue-router/3.0.1/vue-router.js"></script>
</head>
<body>
<div id="app"></div>
<script>
//安裝路由外掛
Vue.use(VueRouter);
//定義(路由)元件
var Home = {
props: ['stu'],
template: `
<transition name="slide">
<div>
<h1>{{ $route.meta.title}}</h1>
<!-- $route.params.stu 從路由解耦 -->
<p> {{ stu }}</p>
</div>
</transition>
`
};
var HomeA = {
props: ['stu'],
template: '<p>HomeA {{ stu }}</p>'
};
var HomeB = {
props: ['stu'],
template: '<p>HomeB {{ stu }}</p>'
};
var About = {
template: `
<div>
<h1>{{ $route.meta.title}}</h1>
<p>{{ $route.params.id }}</p>
<!--這裡的About頁面是被渲染的元件,同樣也可以包含自己的渲染 -->
<router-view></router-view>
<router-view name="aboutA1"></router-view>
</div>
`
};
var AboutA = {
template: '<p>我是關於 AboutA </p>'
};
var AboutA1 = {
template: '<p>我是關於 頁面的巢狀命名檢視展示 </p>'
};
var AboutB = {
template: '<p>我是關於 AboutB </p>'
}
var NotFound = {
template: '<p>Not Found Page</p>'
};
var routes = [
{
path: '/:stu',
components: { <!-- 加上 s -->
default: Home,
homeA: HomeA,
homeB: HomeB
},
// 對於包含命名檢視的路由,你必須分別為每個命名檢視新增 `props` 選項:
props: {
default: true,
homeA: true,
homeB: false
},
name: 'home',
meta: {
title: '首頁'
}
},
{
path: '/about/:id',
component: About,
meta: {
title: '關於'
},
children: [{
// 當 /about/:id/a 匹配成功,
// AboutA 會被渲染在 About 的 <router-view> 中
path: 'a',
components: { <!-- 巢狀命名檢視 -->
default: AboutA,
aboutA1: AboutA1
},
meta: {
title: 'AboutA'
}
},
{
// 當 /about/:id/b 匹配成功
// AboutB 會被渲染在 About 的 <router-view> 中
path: 'b',
component: AboutB,
meta: {
title: 'AboutB'
}
}
]
},
{
path:'/notFound',
component:NotFound
}
];
//對映路由
var router = new VueRouter({
routes: routes
});
//全域性路由改變前鉤子
router.beforeEach(function(to, from, next) {
if (to.matched.length === 0) { //匹配前往的路由不存在
next('/notFound');
} else {
//meta 資料並不是只讀的,我們可以在程式碼中根據需求動態地改變它。
//例如:this.$route.meta.title = "還是首頁";
window.document.title = to.meta.title;
next();
}
});
var app = {
data: function() {
return {
}
},
template: `
<div>
<h1>Hello App!</h1>
<button @click="$router.push('/about/aaaaaaa')">程式設計式的導航</button>
<button @click="$router.go(-1)">後退</button>
<button @click="$router.go(1)">前進</button>
<p>
<!-- 使用 router-link 元件來導航. -->
<!-- 通過傳入 to 屬性指定連結. -->
<!-- <router-link> 預設會被渲染成一個 <a> 標籤 -->
<router-link :to="{name:'home',params:{stu:'李四'}}">首頁</router-link>
<router-link to="/about/aaaaaaa">關於</router-link>
<router-link to="/about/aaaaaaa/a">關於 內的route頁面a</router-link>
<router-link to="/about/bbbbbbbb/b">關於 內的route頁面b</router-link>
</p>
<!-- 路由匹配到的元件將渲染在這裡 -->
<router-view></router-view>
<!-- 命名檢視。有時候想一個頁面展示多個檢視,而不是巢狀展示 -->
<router-view name="homeA"></router-view>
<router-view name="homeB"></router-view>
</div>
`
};
new Vue({
el: '#app',
data: function() {
return {
}
},
router: router, //掛載路由配置
components: {
"app": app
},
template: '<app/>'
});
</script>
</body>
</html>
demo按照vue官網搭建的demo
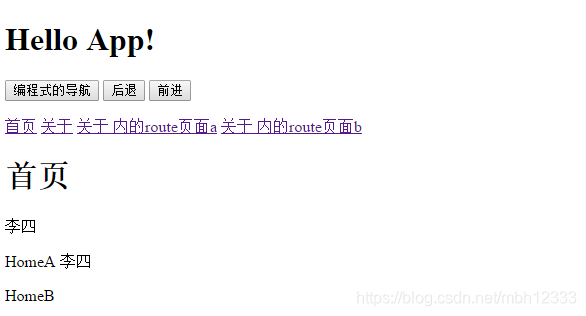
效果展示: