SpringBoot基礎教程4-1-1 使用JdbcTemplate操作資料庫及事務管理
阿新 • • 發佈:2018-12-12
1 概述
SpringBoot封裝的JdbcTemplate,使用模板模式,去除JDBC繁瑣的重複程式碼,並提供了基於註解的事務管理;下面詳細介紹如何使用JdbcTemplate操作資料和事務管理。
2 新增依賴
<dependency>
            <groupId>org.springframework.boot</groupId>
            <artifactId>spring-boot-starter-jdbc</artifactId>
        </dependency>

        <dependency>
            <groupId>mysql</groupId>
            <artifactId>mysql-connector-java</artifactId>
            <scope>runtime</scope>
</dependency>
SpringBoot會自動初始化JdbcTemplate
3 資料來源配置
spring:
  datasource:
    url: jdbc:mysql://127.0.0.1:3306/springboot
    username: root
    password: 123456
    driver-class-name: com.mysql.jdbc.Driver
以上就是需要新增的配置,是不是非常簡單
4 業務程式碼,實現資料庫增刪改查
4.1 新建資料庫,新建表
資料庫:SpringBoot
表:
 CREATE TABLE `t_user` (
`user_id` INT ( 11 ) NOT NULL AUTO_INCREMENT,
`user_name` VARCHAR ( 255 ) NOT NULL,
`password` VARCHAR ( 255 ) NOT NULL,
`phone` VARCHAR ( 20 ) NOT NULL,
PRIMARY KEY ( `user_id` )
) ENGINE = INNODB AUTO_INCREMENT = 1018 DEFAULT CHARSET = utf8;
4.2 新建實體
@Data
@Builder
public class User {
    private Integer userId;
    private String userName;
    private String password;
    private String phone;
}
4.3 增刪改查
public interface UserService {

    /**
     * 新增一個使用者
     */
    Integer create(User user);

    /**
     * 根據Name刪除一個使用者
     */
    void deleteByName(String userName);

    /**
     * 獲取使用者總量
     */
    Integer getAllUsers();

    /**
     * 刪除所有使用者
     */
    void deleteAllUsers();

    /**
     * 先清空資料
     * 再新增資料
     * 要求再一個事物中執行
     */
    void clearAdd(User user);
}
@Service
public class UserServiceImpl implements UserService {

    @Autowired
    private JdbcTemplate jdbcTemplate;

    @Override
    public Integer create(User user) {
        return jdbcTemplate.update("insert into T_USER(USER_NAME, PASSWORD, PHONE) values (?, ?, ?)",
                user.getUserName(), user.getPassword(), user.getPhone());
    }

    @Override
    public void deleteByName(String userName) {
        jdbcTemplate.update("delete from T_USER where USER_Name = ?", userName);
    }

    @Override
    public Integer getAllUsers() {
        return jdbcTemplate.queryForObject("select count(1) from T_USER", Integer.class);
    }

    @Override
    public void deleteAllUsers() {
        jdbcTemplate.update("delete from T_USER");
    }

    @Transactional
    @Override
    public void clearAdd(User user) {
        this.deleteAllUsers();
        this.create(user);
    }
}
當引入jdbc依賴之後,SpringBoot會自動預設分別注入DataSourceTransactionManager或JpaTransactionManager,所以我們不需要任何額外配置就可以用@Transactional註解進行事務的使用。spring-boot-starter-jdbc會觸發DataSourceTransactionManagerAutoConfiguration這個自動化配置類,構造事務管理器。
@Transactional不僅可以註解在方法上,也可以註解在類上。當註解在類上的時候意味著所有的public方法都是開啟事務的。
4.4 編寫測試用例
@SpringBootTest
@RunWith(SpringRunner.class)
public class UserServiceImplTest {

    @Resource
    private UserService userService;

    @Before
    public void setUp() {
        // 準備,清空user表
        userService.deleteAllUsers();
    }

    @Test
    public void test() {
        // 插入5個使用者
        userService.create(User.builder().userName("a").password("123").phone("110").build());
        userService.create(User.builder().userName("b").password("1234").phone("119").build());
        userService.create(User.builder().userName("c").password("12345").phone("120").build());
        userService.create(User.builder().userName("d").password("123456").phone("122").build());
        userService.create(User.builder().userName("e").password("1234567").phone("135").build());

        // 查資料庫,應該有5個使用者
        Assert.assertEquals(5, userService.getAllUsers().intValue());

        // 刪除兩個使用者
        userService.deleteByName("a");
        userService.deleteByName("e");

        // 查資料庫,應該有5個使用者
        Assert.assertEquals(3, userService.getAllUsers().intValue());
    }

    @Test
    public void transactionalTest(){
        // 插入5個使用者
        userService.create(User.builder().userName("a").password("123").phone("110").build());
        userService.create(User.builder().userName("b").password("1234").phone("119").build());
        userService.create(User.builder().userName("c").password("12345").phone("120").build());
        userService.create(User.builder().userName("d").password("123456").phone("122").build());
        userService.create(User.builder().userName("e").password("1234567").phone("135").build());

        User otherUser = User.builder().userName("f").password("12345678").phone("911").build();

        // 查資料庫,應該有5個使用者
        Assert.assertEquals(5, userService.getAllUsers().intValue());

        userService.clearAdd(otherUser);
        userService.create(User.builder().userName("a").password("123").phone("110").build());

        // 查資料庫,應該有2個使用者
        Assert.assertEquals(2, userService.getAllUsers().intValue());

        UserService mockService = mock(UserServiceImpl.class);

        when(mockService.create(otherUser)).thenThrow(new RuntimeException());

        mockService.clearAdd(otherUser);

        // 查資料庫,應該有2個使用者
        Assert.assertEquals(2, userService.getAllUsers().intValue());
    }
}
5 測試結果
請讀者動動手,執行測試用例test(), transactionalTest()
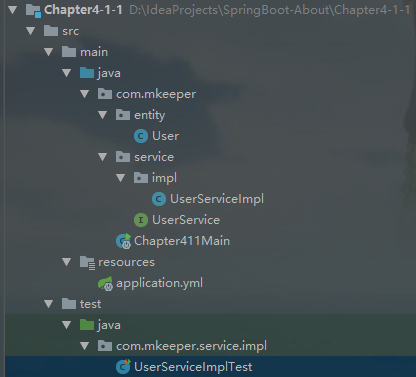
6 工程目錄
7 結束語
本文是SpringBoot操作資料庫的開篇,後續會介紹基於Mybatis、JPA、Mybatis Puls的資料庫操作,已經基於Sharding Jdbc分庫分表,讀寫分離操作,敬請期待,本文原始碼。
歡迎關注博主公眾號,第一時間推送最新文章