
Mark標記功能的實現(像手工標記的一樣)
阿新 • • 發佈:2018-12-13
今天看到一個網站的標記功能,覺得很不錯,先記錄一下,emma

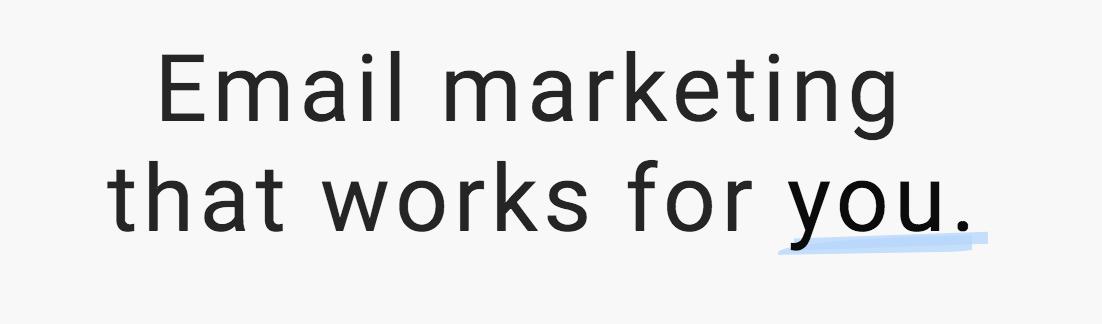


1 <!DOCTYPE html> 2 <html lang="en"> 3 <head> 4 <meta charset="UTF-8"> 5 <meta name="viewport" content="width=device-width, initial-scale=1.0"> 6 <meta http-equiv="X-UA-Compatible" content="ie=edge"View Code> 7 <title>Document</title> 8 <style> 9 mark { 10 position: relative; 11 display: inline-block; 12 z-index: 2 13 } 14 mark:before,mark:after { 15 content: ' '; 16 display: block; 17 height: 90%; 18 width: 100%; 19 margin-left: -3px; 20 margin-right: -3px; 21 position: absolute; 22 z-index: -1 23 } 24 mark.highlight { 25 background-color: rgba(179,213,255,0.4); 26 border-top-right-radius: 28%; 27 border-bottom-right-radius: 60%; 28 border-bottom-left-radius: 90%; 29 border-top-left-radius: 19% 30 } 31 mark.highlight:before { 32 height: .7em; 33 top: 5px; 34 left: -1px; 35 background: rgba(179,213,255,0.5); 36 border-top-right-radius: 30%; 37 border-bottom-right-radius: 17%; 38 border-bottom-left-radius: 24%; 39 border-top-left-radius: 16%; 40 transform: rotate(1deg) 41 } 42 mark.highlight:after { 43 height: .8em; 44 top: .3em; 45 right: -4px; 46 background: rgba(179,213,255,0.8); 47 border-top-right-radius: 20%; 48 border-bottom-right-radius: 90%; 49 border-bottom-left-radius: 28%; 50 transform: rotate(-1deg) 51 } 52 mark.underline { 53 background-color: transparent 54 } 55 56 mark.underline:before { 57 height: .12em; 58 top: .98em; 59 left: 6px; 60 background: rgba(179,213,255,0.8); 61 transform: rotate(-2deg) 62 } 63 mark.underline:after { 64 height: .18em; 65 top: 1em; 66 left: -2px; 67 background: rgba(179,213,255,0.8); 68 border-bottom-left-radius: 6%; 69 border-bottom-right-radius: 16%; 70 border-top-left-radius: 90%; 71 transform: rotate(-1deg) 72 } 73 </style> 74 </head> 75 <body> 76 <h2> 77 Emma HQ: 78 <mark class="highlight">Command central</mark> 79 for your marketing 80 </h2> 81 <h1> 82 Email marketing that works for 83 <mark class="underline">you</mark> 84 </h1> 85 </body> 86 </html>