
崛起於Springboot2.X之通訊WebSocket(40)
阿新 • • 發佈:2018-12-13
技術簡介:Springboot2.0.3+freemaker+websocket
1、新增pom依賴
<dependencies>
    <dependency>
        <groupId>org.springframework.boot</groupId>
        <artifactId>spring-boot-starter-web</artifactId>
    </dependency>

    <dependency>
        <groupId>org.springframework.boot</groupId>
        <artifactId>spring-boot-starter-test</artifactId>
        <scope>test</scope>
    </dependency>

    <dependency>
        <groupId>org.springframework.boot</groupId>
        <artifactId>spring-boot-starter-websocket</artifactId>
    </dependency>

    <dependency>
        <groupId>org.springframework.boot</groupId>
        <artifactId>spring-boot-starter-freemarker</artifactId>
    </dependency>

    <dependency>
        <groupId>com.alibaba</groupId>
        <artifactId>fastjson</artifactId>
        <version>1.2.3</version>
    </dependency>

    <dependency>
        <groupId>org.springframework</groupId>
        <artifactId>spring-core</artifactId>
    </dependency>

    <dependency>
        <groupId>org.apache.commons</groupId>
        <artifactId>commons-lang3</artifactId>
        <version>3.4</version>
    </dependency>

</dependencies>
2、新增配置檔案application.yml
server:
  servlet:
   context-path: /mujiutian
spring:
  freemarker:
    allow-request-override: false
    cache: true
    check-template-location: true
    charset: UTF-8
    content-type: text/html
    expose-request-attributes: false
    expose-session-attributes: false
    expose-spring-macro-helpers: false
    suffix: .html
  profiles:
    active: dev
3、建立IM.html
<!DOCTYPE html>
<html>
<head>
    <meta charset="utf-8">
    <title>websocket通訊</title>
</head>
<script src="https://cdn.bootcss.com/jquery/3.3.1/jquery.js"></script>
<script>
    var socket;
    function openSocket() {
        if(typeof(WebSocket) == "undefined") {
            console.log("您的瀏覽器不支援WebSocket");
        }else{
            console.log("您的瀏覽器支援WebSocket");

            var socketUrl="http://localhost:8080/mujiutian/im/"+$("#userId").val();
            socketUrl=socketUrl.replace("https","ws").replace("http","ws");
            console.log(socketUrl)
            socket = new WebSocket(socketUrl);
            //開啟事件
            socket.onopen = function() {
                console.log("websocket已開啟");
                //socket.send("這是來自客戶端的訊息" + location.href + new Date());
            };
            //獲得訊息事件
            socket.onmessage = function(msg) {
                console.log(msg.data);
                //發現訊息進入    開始處理前端觸發邏輯
            };
            //關閉事件
            socket.onclose = function() {
                console.log("websocket已關閉");
            };
            //發生了錯誤事件
            socket.onerror = function() {
                console.log("websocket發生了錯誤");
            }
        }
    }
    function sendMessage() {
        if(typeof(WebSocket) == "undefined") {
            console.log("您的瀏覽器不支援WebSocket");
        }else {
            console.log("您的瀏覽器支援WebSocket");
            console.log('[{"toUserId":"'+$("#toUserId").val()+'","contentText":"'+$("#contentText").val()+'"}]');
            socket.send('[{"toUserId":"'+$("#toUserId").val()+'","contentText":"'+$("#contentText").val()+'"}]');
        }
    }
</script>
<body>
<p>【userId】:<input id="userId" name="userId" type="text">
<p>【toUserId】:<input id="toUserId" name="toUserId" type="text">
<p> [傳送內容]:<input id="contentText" name="contentText" type="text" maxlength="50">
<input type="button" onclick="openSocket()" value="開啟socket" style="background: cyan;background-color: red;width: auto;height: auto;"/>
<input type="button" onclick="sendMessage()" value="傳送訊息" style="background: cyan;background-color: lightgrey;width: auto;height: auto;" />
</body>

</html>
4、配置類
import org.springframework.context.annotation.Bean;
import org.springframework.context.annotation.Configuration;
import org.springframework.web.socket.server.standard.ServerEndpointExporter;

/**
 * @Author:Mujiutian
 * @Description:
 * @Date: Created in 上午11:15 2018/12/13
 */
@Configuration
public class WebSocketConfig {
    @Bean
    public ServerEndpointExporter serverEndpointExporter(){
        return new ServerEndpointExporter();
    }
}
5、Component類
import org.slf4j.Logger;
import org.slf4j.LoggerFactory;
import org.springframework.stereotype.Component;
import javax.websocket.*;
import javax.websocket.server.PathParam;
import javax.websocket.server.ServerEndpoint;
import java.io.IOException;
import java.util.concurrent.CopyOnWriteArraySet;

/**
 * @Author:Mujiutian
 * @Description:
 * @Date: Created in 上午11:16 2018/12/13
 */
@ServerEndpoint(value = "/websocket/{sid}")
@Component
public class WebSocketServer {

    private static Logger log = LoggerFactory.getLogger(WebSocketServer.class);

    //靜態變數,用來記錄當前線上連線數。應該把它設計成執行緒安全的。
    private static int onlineCount = 0;

    //concurrent包的執行緒安全Set,用來存放每個客戶端對應的MyWebSocket物件。
    private static CopyOnWriteArraySet<WebSocketServer> webSocketSet = new CopyOnWriteArraySet<>();

    //與某個客戶端的連線會話,需要通過它來給客戶端傳送資料
    private Session session;

    //接收sid
    private String sid = "";

    /**
     *
     * @Description:連線建立成功呼叫的方法
     * @Date:2018/12/13 下午3:16
     * @Author:Mujiutian
     * @UpdateRemark:
     * @Version:1.0
     *
     */
    @OnOpen
    public void onOpen(Session session,@PathParam("sid")String sid) {
        this.session = session;
        webSocketSet.add(this);     //加入set中
        addOnlineCount();           //線上數加1
        log.info("有新視窗開始監聽:"+sid+"有新連線加入!當前線上人數為" + getOnlineCount());
        this.sid = sid;

        try {
            sendMessage("連線成功");
        } catch (IOException e) {
            log.error("websocket IO異常");
        }
    }

    /**
     *
     * @Description:連線關閉呼叫的方法
     * @Date:2018/12/13 下午3:15
     * @Author:Mujiutian
     * @UpdateRemark:
     * @Version:1.0
     *
     */
    @OnClose
    public void onClose() {
        webSocketSet.remove(this);  //從set中刪除
        subOnlineCount();           //線上數減1
        log.info("有一連線關閉!當前線上人數為" + getOnlineCount());
    }

    /**
     *
     * @Description:收到客戶端訊息後呼叫的方法,message:客戶端傳送過來的訊息
     * @Date:2018/12/13 下午3:16
     * @Author:ChengJian
     * @UpdateRemark:
     * @Version:1.0
     *
     */
    @OnMessage
    public void onMessage(String message, Session session) {
        log.info("來自客戶端的訊息:" + message);

        //群發訊息
        for (WebSocketServer item : webSocketSet) {
            try {
                item.sendMessage(message);
            } catch (IOException e) {
                e.printStackTrace();
            }
        }
    }


    @OnError
    public void onError(Session session, Throwable error) {
        log.error("發生錯誤");
        error.printStackTrace();
    }


    /**
     *
     * @Description:實現伺服器主動推送
     * @Date:2018/12/13 下午3:17
     * @Author:ChengJian
     * @UpdateRemark:
     * @Version:1.0
     *
     */
    public void sendMessage(String message) throws IOException {
        this.session.getBasicRemote().sendText(message);
    }

    /**
     *
     * @Description:群發自定義訊息
     * @Date:2018/12/13 下午3:18
     * @Author:Mujiutian
     * @UpdateRemark:
     * @Version:1.0
     *
     */
    public static void sendInfo(String message, @PathParam("sid")String sid) throws IOException {
        log.info("推送訊息到視窗"+sid+",推送訊息內容:"+message);
        for (WebSocketServer item : webSocketSet) {
            try {
                //設定只能推送這個sid,為null則全部推送
                if (sid == null){
                    item.sendMessage(message);
                }else if (item.sid.equals(sid)){
                    item.sendMessage(message);
                }
            } catch (IOException e) {
                continue;
            }
        }
    }

    public static synchronized int getOnlineCount() {
        return onlineCount;
    }

    public static synchronized void addOnlineCount() {
        WebSocketServer.onlineCount++;
    }

    public static synchronized void subOnlineCount() {
        WebSocketServer.onlineCount--;
    }
}
6、Controller層
import com.mjt.websocket.component.WebSocketServer;
import org.springframework.stereotype.Controller;
import org.springframework.ui.ModelMap;
import org.springframework.web.bind.annotation.PathVariable;
import org.springframework.web.bind.annotation.RequestMapping;
import org.springframework.web.bind.annotation.ResponseBody;

import java.io.IOException;
import java.util.HashMap;
import java.util.Map;

/**
 * @Author:Mujiutian
 * @Description:
 * @Date: Created in 上午11:33 2018/12/13
 */
@Controller
public class HelloWorldController {

    @RequestMapping(value = "/IM.html/{userId}")
    public String IM(ModelMap modelMap,@PathVariable String userId){
        modelMap.put("userId",userId);
        return "IM";
    }

    @RequestMapping(value="/pushListToWeb")
    @ResponseBody
    public Map<String,Object> pushVideoListToWeb(String cid,String message) {
        Map<String,Object> result =new HashMap<>();

        try {
            WebSocketServer.sendInfo(message,cid);
            result.put("operationResult", true);
        }catch (IOException e) {
            result.put("operationResult", true);
        }
        return result;
    }
}
7、測試
7.1 呼叫現實頁面 http://localhost:8080/mujiutian/IM.html/20
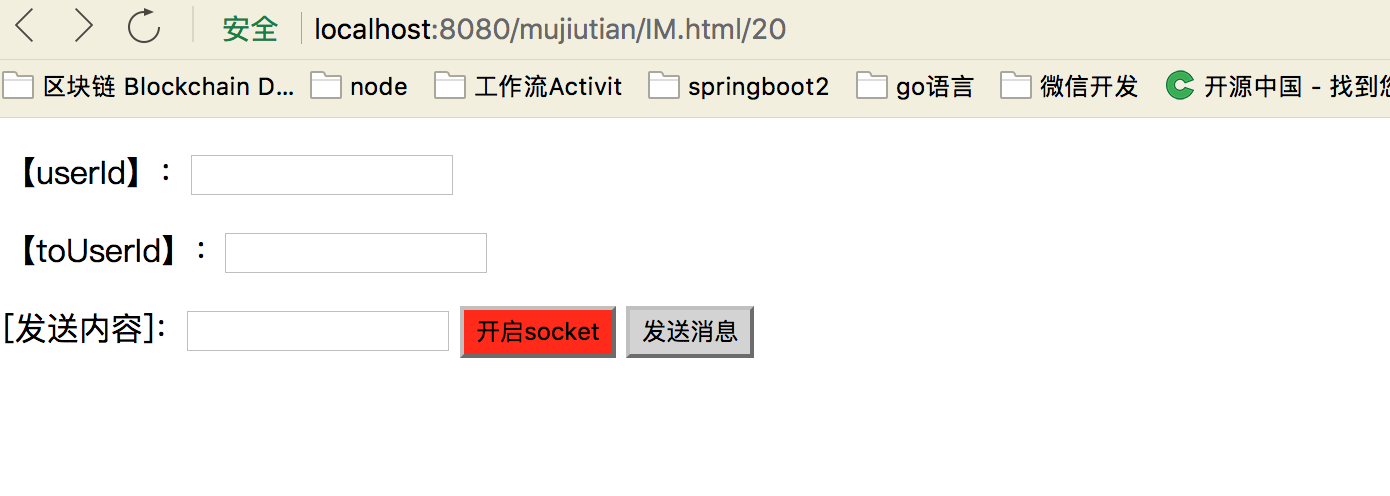
然後開啟socket,如下
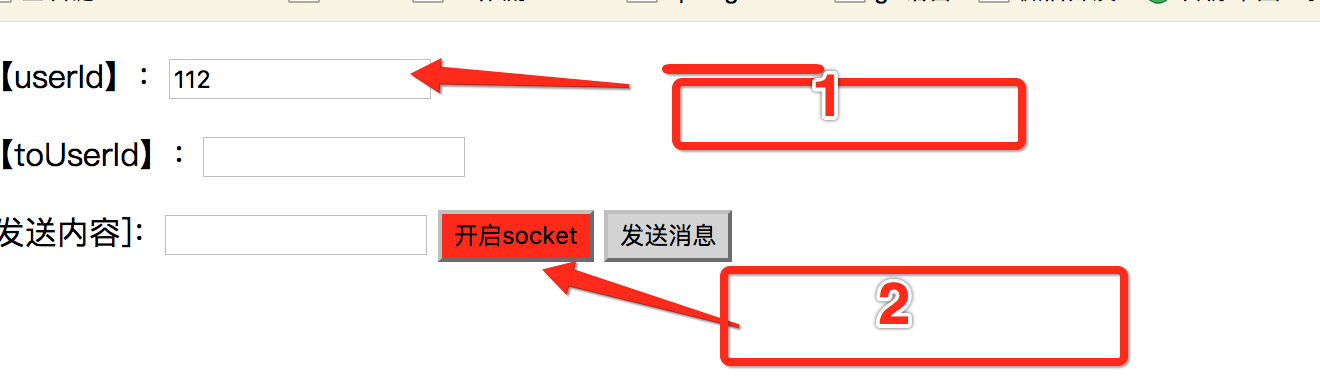
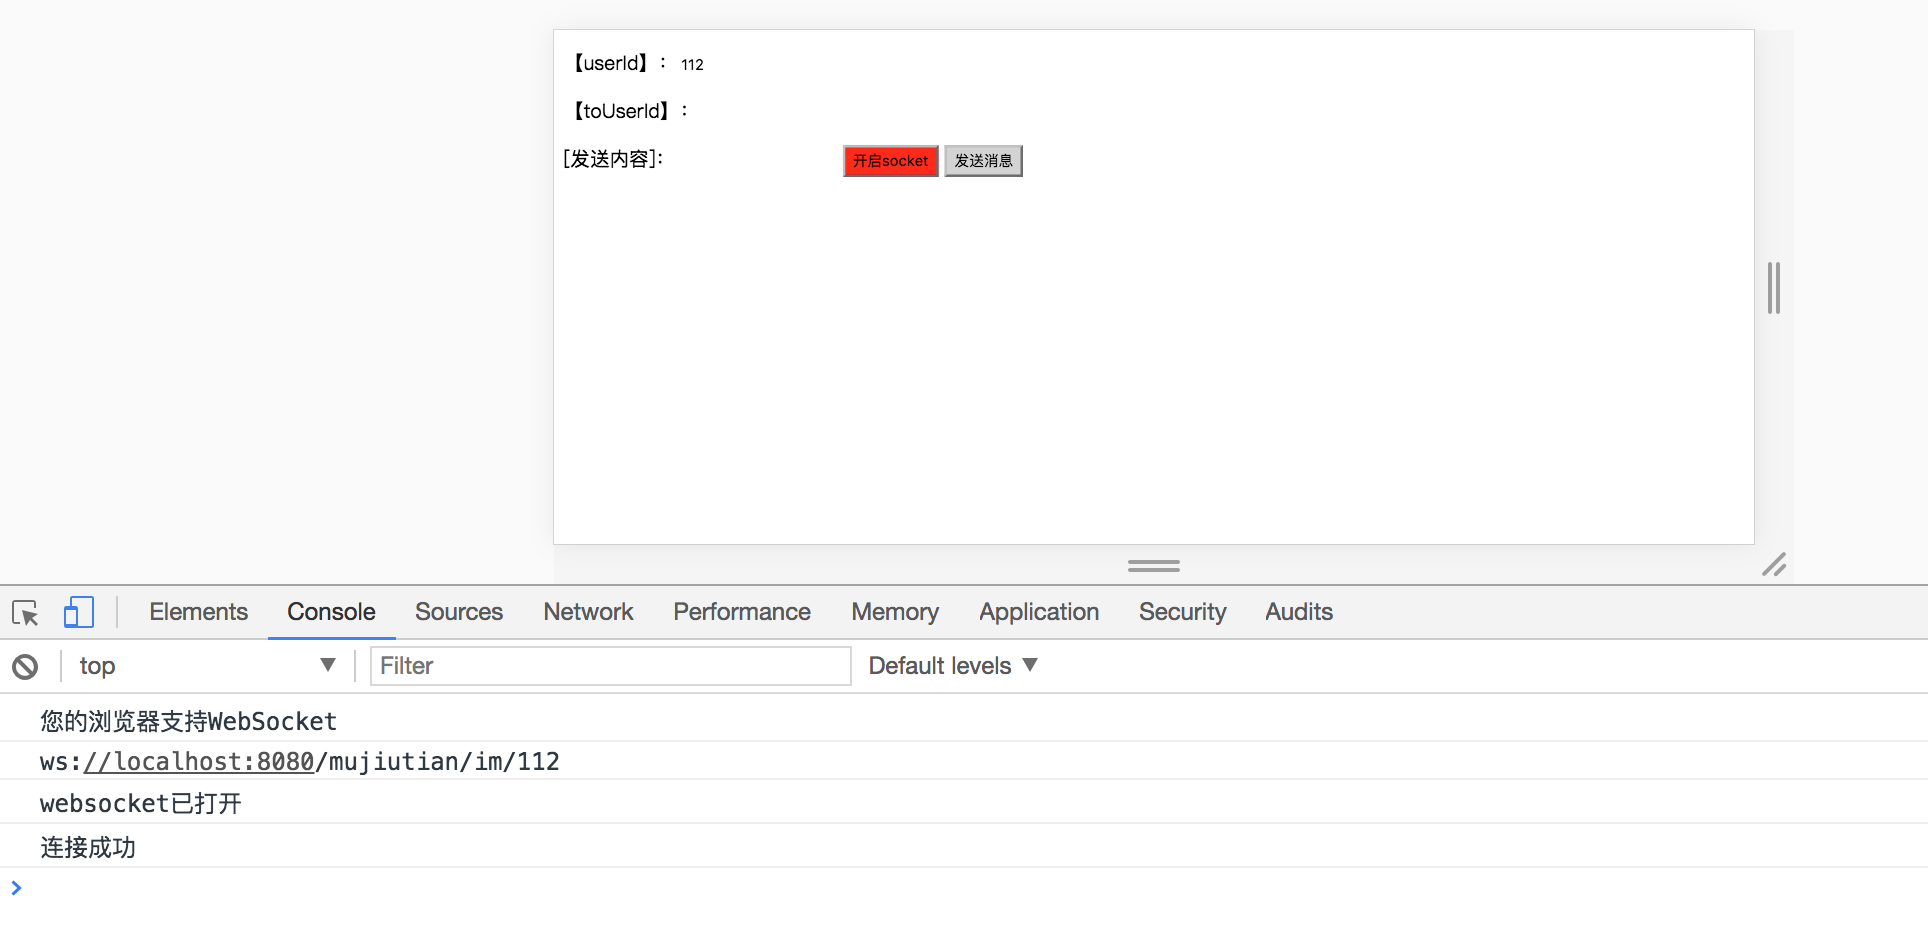
之後結果為:

然後同上操作換一個userId為114,結果為:

7.2 然後給傳送人傳送訊息,如下

結果為:
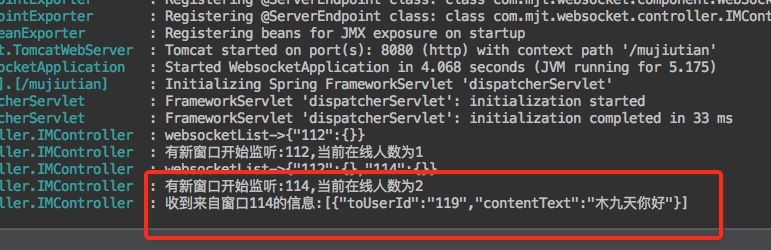
那麼我們通訊完成,具體邏輯業務在IMSocketServer中處理就好