使用elasticsearch建立搜尋引擎
使用elasticsearch建立搜尋引擎
elasticsearch官方網址:https://www.elastic.co/products/elasticsearch
1、選擇Elasticsearch的原因
(1)Elasticsearch是一個建立在全文搜尋引擎 Apache Lucene™ 基礎上的開源的實時分散式搜尋和分析引擎,功能強大:
- 支援全文搜尋;
- 分散式實時檔案儲存,並將每一個欄位都編入索引,使其可以被搜尋;
- 實時分析的分散式搜尋引擎;
- 可以擴充套件到上百臺伺服器,處理PB級別的結構化或非結構化資料。
所有的這些功能被整合到一個服務裡面,你的應用可以通過簡單的RESTful API、各種語言的客戶端甚至命令列與之互動。
(2)簡單易學,文件齊全
搜尋引擎選擇: Elasticsearch與Solr:http://www.cnblogs.com/chowmin/articles/4629220.html
2、安裝並配置Elasticsearch
因為我們要使用ansj分詞工具進行分詞,最新的ansj與elasticsearch結合的工具包對應的elastic search的版本是5.0.1,所以我們下載5.0.1版本的elasticsearch。
(1)下載並解壓
wget https://artifacts.elastic.co/downloads/elasticsearch/elasticsearch-5.0.1.tar.gz
sha1sum elasticsearch-5.0.1.tar.gz
tar -xzf elasticsearch-5.0.1.tar.gz
cd elasticsearch-5.0.1/
(2)啟動ES
./bin/elasticsearch
16-12-11T17:28:33,912][INFO ][o.e.n.Node ] [rpA7Jx3] started
看到類似這一句的,則說明啟動ES了
新開一個終端,檢視是否執行成功
curl -XGET 'localhost:9200/?pretty'
出現如上形式內容,則說明ES執行成功。
可以按Ctrl-C關閉ES
3、安裝並配置ansj分詞器
進入es目錄執行如下命令
./bin/elasticsearch-plugin install http://maven.nlpcn.org/org/ansj/elasticsearch-analysis-ansj/5.0.1.0/elasticsearch-analysis-ansj-5.0.1.0-release.zip
4、elasticsearch啟動出現的錯誤解決
(1)Java HotSpot™ 64-Bit Server VM warning: INFO:
os::commit_memory(0x0000000085330000, 2060255232, 0) failed; error=‘Cannot allocate memory’ (errno=12)
由於elasticsearch5.0預設分配jvm空間大小為2g,修改jvm空間分配
# vim config/jvm.options
-Xms2g
-Xmx2g
修改為
-Xms512m
-Xmx512m
(2)max number of threads [1024] for user [elasticsearch] is too low, increase to at least [2048]
修改 /etc/security/limits.d/90-nproc.conf
原: soft nproc 1024
改為: soft nproc 2048
(3)max virtual memory areas vm.max_map_count [65530] is too low, increase to at least [262144]
修改/etc/sysctl.conf配置檔案,
cat /etc/sysctl.conf | grep vm.max_map_count
vm.max_map_count=262144
如果不存在則新增
echo "vm.max_map_count=262144" >>/etc/sysctl.conf
(4)max file descriptors [65535] for elasticsearch process likely too low, increase to at least [65536]
ulimit -n 65536
(5)[[email protected] elasticsearch-5.0.1]# ./bin/elasticsearch
[WARN ][o.e.b.ElasticsearchUncaughtExceptionHandler] [] uncaught exception in thread [main]
org.elasticsearch.bootstrap.StartupException: java.lang.RuntimeException: can not run elasticsearch as root
注意:ES不能用root管理員身份啟動
5、配置elasticsearch Java API
在pom.xml新增如下依賴:
<!-- elasticsearch Java API -->
<dependency>
	<groupId>org.elasticsearch.client</groupId>
	<artifactId>transport</artifactId>
	<version>5.0.1</version>
</dependency>
<dependency>
	<groupId>org.apache.logging.log4j</groupId>
	<artifactId>log4j-api</artifactId>
	<version>2.8.0</version>
</dependency>
<dependency>
	<groupId>org.apache.logging.log4j</groupId>
	<artifactId>log4j-core</artifactId>
	<version>2.8.0</version>
</dependency>
6、elasticsearch教程
- 官方教程:https://www.elastic.co/guide/en/elasticsearch/reference/current/zip-targz.html
- Elasticsearch基礎教程:http://blog.csdn.net/cnweike/article/details/33736429
- Elasticsearch JAVA API教程:http://www.07net01.com/2016/07/1603264.html
1. Java API批量匯出
 Settings settings = ImmutableSettings.settingsBuilder().put("cluster.name", "elasticsearch-bigdata").build();
Client client = new TransportClient(settings)
        .addTransportAddress(new InetSocketTransportAddress("10.58.71.6", 9300));
SearchResponse response = client.prepareSearch("bigdata").setTypes("student")
       .setQuery(QueryBuilders.matchAllQuery()).setSize(10000).setScroll(new TimeValue(6000                  00))
        .setSearchType(SearchType.SCAN).execute().actionGet();//setSearchType(SearchType.Scan) 告訴ES不需要排序只要結果返回即可 setScroll(new TimeValue(600000)) 設定滾動的時間
String scrollid = response.getScrollId();
try {
//把匯出的結果以JSON的格式寫到檔案裡
    BufferedWriter out = new BufferedWriter(new FileWriter("es", true));

    //每次返回資料10000條。一直迴圈查詢直到所有的資料都查詢出來
    while (true) {
        SearchResponse response2 = client.prepareSearchScroll(scrollid).setScroll(new TimeValue(1000000))
                .execute().actionGet();
        SearchHits searchHit = response2.getHits();
        //再次查詢不到資料時跳出迴圈
        if (searchHit.getHits().length == 0) {
            break;
        }
        System.out.println("查詢數量 :" + searchHit.getHits().length);
        for (int i = 0; i < searchHit.getHits().length; i++) {
            String json = searchHit.getHits()[i].getSourceAsString();
            out.write(json);
            out.write("\r\n");
        }
    }
    System.out.println("查詢結束");
    out.close();
} catch (FileNotFoundException e) {
    // TODO Auto-generated catch block
    e.printStackTrace();
} catch (IOException e) {
    // TODO Auto-generated catch block
    e.printStackTrace();
}
2. Java API 批量匯入
Settings settings = ImmutableSettings.settingsBuilder().put("cluster.name", "elasticsearch-bigdata").build();
Client client = new TransportClient(settings)
        .addTransportAddress(new InetSocketTransportAddress("10.58.71.6", 9300));
try {
//讀取剛才匯出的ES資料
    BufferedReader br = new BufferedReader(new FileReader("es"));
    String json = null;
    int count = 0;
    //開啟批量插入
    BulkRequestBuilder bulkRequest = client.prepareBulk();
    while ((json = br.readLine()) != null) {
        bulkRequest.add(client.prepareIndex("bigdata", "student").setSource(json));
        //每一千條提交一次
        if (count% 1000==0) {
            bulkRequest.execute().actionGet();
            System.out.println("提交了:" + count);
        }
        count++;
    }
    bulkRequest.execute().actionGet();
    System.out.println("插入完畢");
    br.close();
} catch (FileNotFoundException e) {
    e.printStackTrace();
} catch (IOException e) {
    // TODO Auto-generated catch block
    e.printStackTrace();
}
elasticsearch匯入資料的兩種方法
第一種方法:手動匯入
1、cat test.json
{"index":{"_index":"stuff_orders","_type":"order_list","_id":903713}}
{"real_name":"劉備","user_id":48430,"address_province":"上海","address_city":"浦東新區","address_district":null,"address_street":"上海市浦東新區廣蘭路1弄2號345室","price":30.0,"carriage":6.0,"state":"canceled","created_at":"2013-10-24T09:09:28.000Z","payed_at":null,"goods":["營養早餐:火腿麥滿分"],"position":[121.53,31.22],"weight":70.0,"height":172.0,"sex_type":"female","birthday":"1988-01-01"}
2、匯入elasticsearch
[[email protected] opt]# curl -XPOST ‘localhost:9200/stuff_orders/_bulk?pretty‘ --data-binary @test.json
{
  "took" : 600,
  "errors" : false,
  "items" : [ {
    "index" : {
      "_index" : "stuff_orders",
      "_type" : "order_list",
      "_id" : "903713",
      "_version" : 1,
      "_shards" : {
        "total" : 2,
        "successful" : 1,
        "failed" : 0
      },
      "status" : 201
    }
  } ]
}
3、檢視elasticsearch是否存在資料
[[email protected] opt]# curl localhost:9200/stuff_orders/order_list/903713?pretty
{
  "_index" : "stuff_orders",
  "_type" : "order_list",
  "_id" : "903713",
  "_version" : 1,
  "found" : true,
  "_source" : {
    "real_name" : "劉備",
    "user_id" : 48430,
    "address_province" : "上海",
    "address_city" : "浦東新區",
    "address_district" : null,
    "address_street" : "上海市浦東新區廣蘭路1弄2號345室",
    "price" : 30.0,
    "carriage" : 6.0,
    "state" : "canceled",
    "created_at" : "2013-10-24T09:09:28.000Z",
    "payed_at" : null,
    "goods" : [ "營養早餐:火腿麥滿分" ],
    "position" : [ 121.53, 31.22 ],
    "weight" : 70.0,
    "height" : 172.0,
    "sex_type" : "female",
    "birthday" : "1988-01-01"
  }
}
第二種方法:從資料庫中匯入
1、下載安裝外掛elasticsearch-jdbc-2.3.4.0
wget http://xbib.org/repository/org/xbib/elasticsearch/importer/elasticsearch-jdbc/2.3.4.0/elasticsearch-jdbc-2.3.4.0-dist.zip
# elasticsearch-jdbc-2.3.4.0-dist.zip的版本要和你安裝的elasticsearch對應。
unzip elasticsearch-jdbc-2.3.4.0-dist.zip
mv elasticsearch-jdbc-2.3.4.0 /usr/local/
cd /usr/local/elasticsearch-jdbc-2.3.4.0/
2、配置指令碼
vim import.sh
#!/bin/sh
JDBC_IMPORTER_HOME=/usr/local/elasticsearch-jdbc-2.3.4.0
bin=$JDBC_IMPORTER_HOME/bin
lib=$JDBC_IMPORTER_HOME/lib
echo ‘{
"type" : "jdbc",
"jdbc": {
"elasticsearch.autodiscover":true,
"elasticsearch.cluster":"my-application", #簇名 詳見:/usr/local/elasticsearch/config/elasticsearch.yml
"url":"jdbc:mysql://localhost:3306/test",  #mysql資料庫地址
"user":"test",  #mysql使用者名稱
"password":"1234",  #mysql密碼
"sql":"select *,id as _id from workers_info",
"elasticsearch" : {
  "host" : "192.168.10.49",
  "port" : 9300
},
"index" : "myindex",  #新的index
"type" : "mytype"  #新的type
}
}‘| java   -cp "${lib}/*"   -Dlog4j.configurationFile=${bin}/log4j2.xml   org.xbib.tools.Runner   org.xbib.tools.JDBCImporter
chmod + import.sh
sh import.sh
3、檢視資料是否匯入elasticsearch
[[email protected] bin]# curl -XGET ‘http://localhost:9200/myindex/mytype/_search?pretty‘
{
  "took" : 15,
  "timed_out" : false,
  "_shards" : {
    "total" : 5,
    "successful" : 5,
    "failed" : 0
  },
  "hits" : {
    "total" : 1,
    "max_score" : 1.0,
    "hits" : [ {
      "_index" : "myindex",
      "_type" : "mytype",
      "_id" : "AVZyXCReGHjmX33dpJi3",
      "_score" : 1.0,
      "_source" : {
        "id" : 1,
        "workername" : "xing",
        "salary" : 10000,
        "tel" : "1598232123",
        "mailbox" : "[email protected]",
        "department" : "yanfa",
        "sex" : "F",
        "qq" : 736019646,
        "EmployedDates" : "2012-12-21T00:00:00.000+08:00"
      }
    } ]
  }
}
實戰程式碼
古詩文搜尋引擎實戰github地址:https://github.com/AngelaFighting/gushiwensearch
1、啟動ES
Windows系統,在ES目錄的bin目錄中開啟命令列視窗,輸入命令:·elasticsearch.bat·,回車,如果看到ES叢集顯示started並且狀態為Green,則說明啟動成功
2、使用瀏覽器開啟首頁
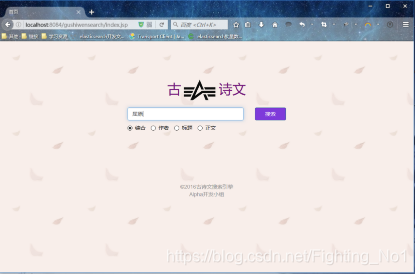
輸入要查詢的內容,並選擇搜尋範圍,點選搜尋按鈕
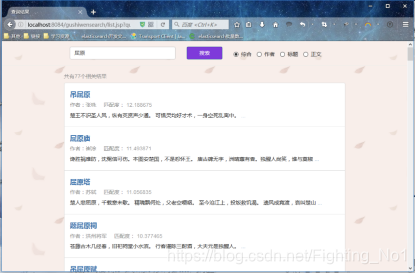
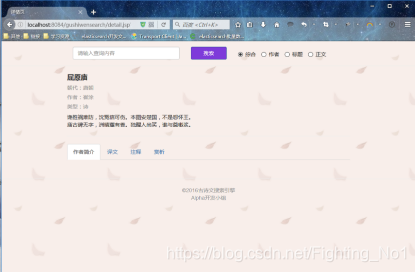
可看到匹配的結果數和各個結果的部分資訊。
點選某篇詩文的連結,就可以檢視詩文的詳細資訊了。