
rsync 資料備份+cron+mailx案例
大家都知道資料非常重要的,需要經常備份,如果備份了,但無法恢復還原,那就證明你備份的很失敗,所有當我們備份了資料需要檢查是否備份完整,是否可用可恢復。以下為一個企業案例:
某公司裡有一臺Web伺服器,裡面的資料很重要,但是如果硬碟壞了,資料就會丟失,現在領導要求你把資料在其他機器上做一個週期性定時備份。要求如下:
每天晚上00點整在web伺服器上打包備份系統配置檔案、網站主程式及訪問日誌,並通過rsync命令推送到伺服器上備份保留(備份思路可以是在本地按日期打包,然後再推送到備份伺服器上)
具體要求如下:
1、web伺服器和備份伺服器的備份目錄必須為/backup。
2、系統配置檔案包括:
a) 定時任務服務的配置檔案(/var/spool/cron/root)
b) 開機自啟動的配置檔案(/etc/rc.local)
c) 日常指令碼的目錄(/server/scripts)
d) 防火牆iptables的配置檔案(/etc/sysconfig/iptables)
3、web伺服器站點目錄假定位(var/www/html)。
4、web伺服器本地僅保留7天內的備份資料。
5、備份伺服器上/backup/下僅保留180天的資料,180天前的清除。
6、備份伺服器上檢查每天從web伺服器上備份的資料結果是否正常,並將每天的備份結果23點整發給管理員郵箱。
具體規劃配置如下:
web伺服器IP:192.168.43.119 備份(backup)伺服器IP:192.168.43.200
第一步:備份伺服器上部署rsync服務,並且在web伺服器上測試是否可以推送成功。
服務端配置:(backup)
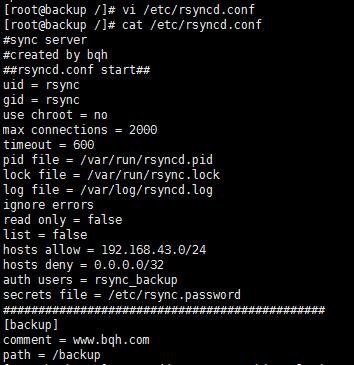
[[email protected] /]# vi /etc/rsyncd.conf
[[email protected] /]# cat /etc/rsyncd.conf
#sync server
#created by bqh
##rsyncd.conf start##
uid = rsync
gid = rsync
use chroot = no
max connections = 2000
timeout = 600
pid file = /var/run/rsyncd.pid
lock file = /var/run/rsync.lock
log file = /var/log/rsyncd.log
ignore errors
read only = false
list = false
hosts allow = 192.168.43.0/24
hosts deny = 0.0.0.0/32
auth users = rsync_backup
secrets file = /etc/rsync.password
##############################################
[backup]
comment = www.bqh.com
path = /backup
[[email protected] /]# useradd rsync -s /sbin/nologin -M
[[email protected] /]# id rsync
uid=501(rsync) gid=501(rsync) 組=501(rsync)
[[email protected] /]# mkdir -p /backup
[[email protected] /]# chown -R rsync /backup
[[email protected] /]# echo "rsync_backup:123" >/etc/rsync.password
[[email protected] /]# chmod 600 /etc/rsync.password
[[email protected] /]# rsync --daemon
[[email protected] /]# ps -ef|grep rsync|grep -v grep
root 1766 1 0 21:10 ? 00:00:00 rsync --daemon
[[email protected] /]# lsof -i :873
COMMAND PID USER FD TYPE DEVICE SIZE/OFF NODE NAME
rsync 1766 root 3u IPv4 17093 0t0 TCP *:rsync (LISTEN)
rsync 1766 root 5u IPv6 17094 0t0 TCP *:rsync (LISTEN)
[[email protected] /]#

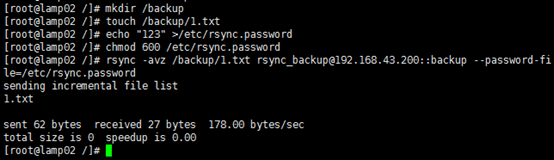
客戶端配置: ( web伺服器端)
[[email protected] /]# mkdir /backup
[[email protected] /]# touch /backup/1.txt
[[email protected] /]# echo "123" >/etc/rsync.password
[[email protected] /]# chmod 600 /etc/rsync.password
[[email protected] /]# rsync -avz /backup/1.txt [email protected]::backup --password-fi
le=/etc/rsync.password
sending incremental file list
1.txt
sent 62 bytes received 27 bytes 178.00 bytes/sec
total size is 0 speedup is 0.00
[[email protected] /]#
在備份伺服器上檢視是否推送成功:

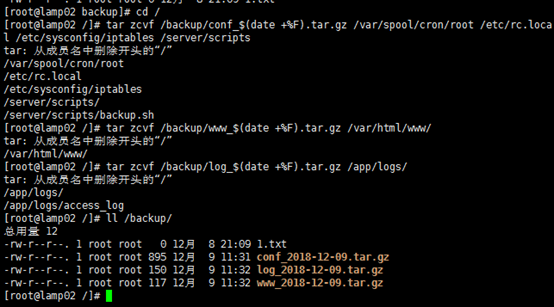
第二步:web伺服器本地實現打包:(配置檔案,程式,日誌分開打包)
tar zcvf /backup/conf_$(date +%F).tar.gz /var/spool/cron/root /etc/rc.local /etc/sysconfig/iptables /server/scripts
tar zcvf /backup/www_$(date +%F).tar.gz /var/html/www/
tar zcvf /backup/log_$(date +%F).tar.gz /app/logs/
我們可以寫一個備份推送指令碼backup.sh
#!/bin/sh
#defined variable
IP=$(ifconfig eth0|awk -F '[ :]+' 'NR==2 {print $4}')
Path="/backup/$IP"
[ ! -d $Path ] && mkdir $Path -p
#backup
tar zcf $Path/conf_$(date +%F).tar.gz /var/spool/cron/root /etc/rc.local /etc/sysconfig/ipt
ables /server/scriptstar zcf $Path/www_$(date +%F).tar.gz /var/html/www/
tar zcf $Path/log_$(date +%F).tar.gz /app/logs/
#to backup server
rsync -avz /backup/ [email protected]::backup --password-file=/etc/rsync.password
#local del
find /backup -type f -name "*.tar.gz" -mtime +7|xargs rm -f

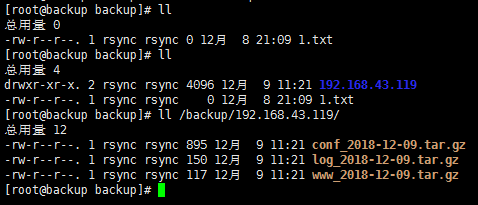
我們在備份(backup)伺服器上檢視執行指令碼是否成功推送:
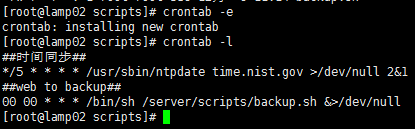
第三步:web伺服器和backup伺服器分別配置定時任務
web:
crontab –e
##web to backup##
00 00 * * * /bin/sh /server/scripts/backup.sh &>/dev/null
crontab -l
backup:
vi del.sh
find /backup -type f -name "*.tar.gz" -mtime +180|xargs rm -f
/bin/sh /server/scripts/del.sh
crontab –e
00 00 * * * /bin/sh /server/scripts/del.sh >/dev/null 2&1
crontab -l
第四步:檢查備份伺服器備份結果是否正常(採用flag+資料包md5sum指紋)
web伺服器指令碼修改如下:
#!/bin/sh
#defined variable
IP=$(ifconfig eth0|awk -F '[ :]+' 'NR==2 {print $4}')
Path="/backup/$IP"
[ ! -d $Path ] && mkdir $Path -p
#backup
tar zcf $Path/conf_$(date +%F).tar.gz /var/spool/cron/root /etc/rc.local /etc/sysconfig/ipt
ables /server/scripts &&\tar zcf $Path/www_$(date +%F).tar.gz /var/html/www/ &&\
tar zcf $Path/log_$(date +%F).tar.gz /app/logs/ &&\
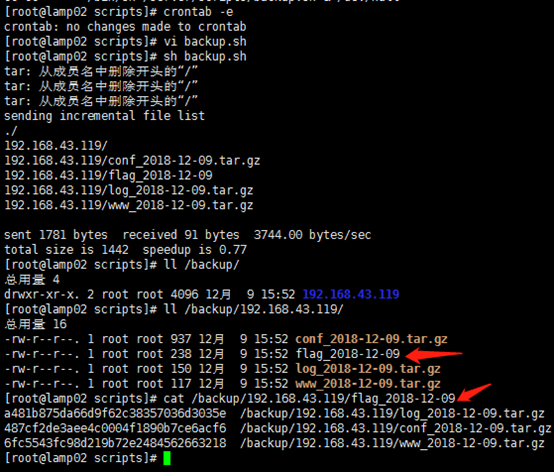
##flag+md5sum
find /backup/ -type f -name "*$(date +%F).tar.gz"|xargs md5sum >>$Path/flag_$(date +%F)
#to backup server
rsync -avz /backup/ [email protected]::backup --password-file=/etc/rsync.password
#local del
find /backup -type f -name "*.tar.gz" -mtime +7|xargs rm -f
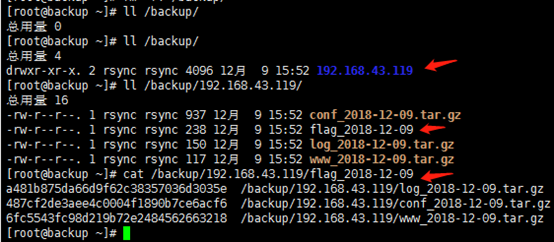
在backup伺服器上檢視是否推送過來:
md5sum –c 需要檢查的檔案,ok為成功,failed為失敗。
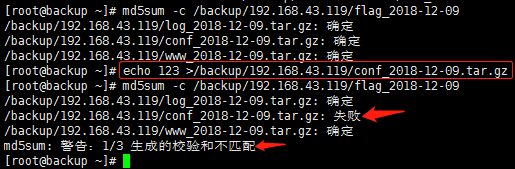
注意:如果備份伺服器接收的包裡沒有flagmd5檔案也會報錯。
所以我們在工作中,只需要過濾flag檔案是否有FAILED或者失敗字元就可以了。
md5sum –c 檢查檔案 |grep “失敗”
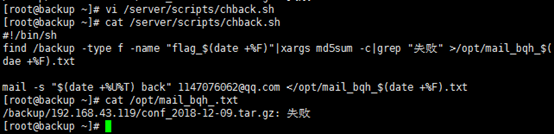
可以把檢查檔案是否備份成功(完整備份)命令寫入指令碼控制。
#!/bin/sh
find /backup -type f -name "flag_$(date +%F)"|xargs md5sum -c|grep "失敗" >/opt/mail_bqh_$(
dae +%F).txt
mail -s "$(date +%U%T) back" [email protected] </opt/mail_bqh_$(date +%F).txt
cat /opt/mail_bqh_.txt

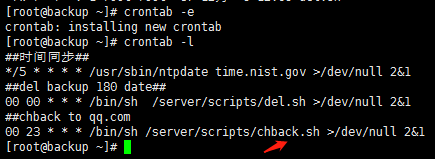
接下來我們寫定時任務檢查備份結果併發送至qq郵箱:
00 23 * * * /bin/sh /server/scripts/chback.sh >/dev/null 2&1
第五步:整體備份測試
詳細略….
用date –s 修改時間測試