
SSL在IOS中的應用
關於SSL的一些介紹,在上篇文章中《關於SSL的初步理解》有介紹過。下面主要介紹SSL在IOS下的應用.
首先,由於SSL提供了一套資料加密通訊的安全協議,其實現過程偏底層,且過程極其複雜。好在Github上為我們提供了一套開源的Socket框架CocoaAsyncSocket,基於TCP、UDP的功能封裝也是相當的完整。
一.目錄結構
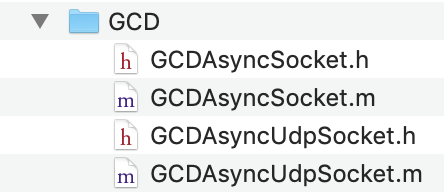
實現方式也是基於GCD完成,CocoaAsyncSocket中主要包含兩個類:
1.GCDAsyncSocket
用GCD搭建的基於TCP/IP協議的socket網路庫
GCDAsyncSocket is a TCP/IP socket networking library built atop Grand Central Dispatch. -- 引自CocoaAsyncSocket.
2.GCDAsyncUdpSocket
用GCD搭建的基於UDP/IP協議的socket網路庫.
GCDAsyncUdpSocket is a UDP/IP socket networking library built atop Grand Central Dispatch..-- 引自CocoaAsyncSocket.
二.客戶端的建立
1.繼承GCDAsyncSocketDelegate協議
2.宣告屬性
@property (nonatomic,strong)GCDAsyncSocket *clientSocket;//客戶端socket3.建立socket並制定代理物件為self
dispatch_queue_t delegateQueue = dispatch_queue_create("dispatch_queue_concrate", DISPATCH_QUEUE_CONCURRENT);
    //dispatch_get_global_queue(DISPATCH_QUEUE_PRIORITY_DEFAULT, 0);
self.clientSocket = [[GCDAsyncSocket alloc] initWithDelegate:self delegateQueue:delegateQueue];
4.連線指定主機對應埠,連線的主機為IP地址,並非DNS名稱.
NSError *error;
BOOL isConnect = [self.clientSocket connectToHost:@"127.0.0.1" onPort:5036 error:&error];
if (!isConnect) {
     NSLog(@"連線失敗,:%@",error);
}else{
     NSLog(@"連線成功");
}
5.實現GCDAsyncSocketDelegate代理方法
1.連線成功代理回撥
- (void)socket:(GCDAsyncSocket *)sock didConnectToHost:(NSString *)host port:(uint16_t)port
{
    NSLog(@"socket連線成功:%@,port:%hu",host,port);

    [self addSecurtyTransport];

    //開始讀取來自server端的資料
    [sock readDataWithTimeout:-1 tag:0];
}
2.開始手動簽名驗證回撥,需要實現startTLS方法才會被執行。
-(void)socket:(GCDAsyncSocket *)sock didReceiveTrust:(SecTrustRef)trust completionHandler:(void (^)(BOOL))completionHandler
{
    NSLog(@"thread:%@",[NSThread currentThread]);
    /*
     * This is only called if startTLS is invoked with options that include:
     * - GCDAsyncSocketManuallyEvaluateTrust == YES
      // 伺服器自簽名證書:
     //openssl req -new -x509 -nodes -days 365 -newkey rsa:1024  -out kohler_local_communicate.crt -keyout kohler_local_communicate.key

     //Mac平臺API(SecCertificateCreateWithData函式)需要der格式證書,分發到終端後需要轉換一下
     //openssl x509 -outform der -in kohler_local_communicate.crt -out kohler_local_communicate.der
     */

    //1.獲取根證書p12檔案 2.匯入鑰匙串 3.從鑰匙串匯出根證書cer檔案即可 root-decode64

    NSString *cerPath = [[NSBundle mainBundle] pathForResource:@"root-decode64" ofType:@"cer"];
    NSData *cerData = [NSData dataWithContentsOfFile:cerPath];

    OSStatus status = -1;
    SecTrustResultType result = kSecTrustResultDeny;
    if (cerData) {
        SecCertificateRef   cert1;
        // 將DER encoded X.509轉換成 SecCertificateRef
        cert1 = SecCertificateCreateWithData(NULL, (__bridge CFDataRef) cerData);


        NSArray *caArray = [NSArray arrayWithObjects:(__bridge id)(cert1), nil];

        // 設定證書用於驗證
        SecTrustSetAnchorCertificates(trust, (__bridge CFArrayRef)caArray);
        // 同步驗證伺服器證書和本地證書是否匹配,會一直阻塞驗證
        status = SecTrustEvaluate(trust, &result);

        CFRelease(cert1);

    }else{
        NSLog(@"local certificate could't be loaded!");
        completionHandler(NO);
    }

    if ((status == noErr &&
         (result == kSecTrustResultProceed || result == kSecTrustResultUnspecified))) {
        // 成功通過驗證,證書可信
        NSLog(@"成功通過驗證,證書可信");
        completionHandler(YES);
    }else{
        CFArrayRef arrayRefTrust = SecTrustCopyProperties(trust);
        NSLog(@"error in connection occured\n %@", arrayRefTrust);
        completionHandler(NO);
    }

}
3.SSL握手成功,建立安全通訊連結(也是需要實現startTLS才有回撥)
-(void)socketDidSecure:(GCDAsyncSocket *)sock
{
    NSLog(@"----SSL握手成功,建立安全通訊連結----");
}
4.讀取服務端資料
-(void)socket:(GCDAsyncSocket *)sock didReadData:(NSData *)data withTag:(long)tag
{
    NSLog(@"didReadData:%@,---tag:%li",data,tag);
    NSString *receivedStr = [[NSString alloc] initWithData:data encoding:NSUTF8StringEncoding];
    NSLog(@"收到了一條訊息:%@,---tag:%li",receivedStr,tag);

    //繼續讀取來自server端的資料
    [sock readDataWithTimeout:-1 tag:0];
}
5.傳送資料到服務端回撥,使用writeData方法觸發。
-(void)socket:(GCDAsyncSocket *)sock didWriteDataWithTag:(long)tag
{
    NSLog(@"傳送了一條訊息:%li",tag);
}
6.socket斷開連接回調
- (void)socketDidDisconnect:(GCDAsyncSocket *)sock withError:(nullable NSError *)err
{
    self.clientSocket = nil;
    self.clientSocket.delegate = nil;
    NSLog(@"socket連線中斷:%@,with error:%@",sock,err);
}
7.建立心跳連線。
 // 計時器
@property (nonatomic, strong) NSTimer *connectTimer;

// 新增定時器
- (void)addTimer
{
     // 長連線定時器
    self.connectTimer = [NSTimer scheduledTimerWithTimeInterval:5.0 target:self selector:@selector(longConnectToSocket) userInfo:nil repeats:YES];
     // 把定時器新增到當前執行迴圈,並且調為通用模式
    [[NSRunLoop currentRunLoop] addTimer:self.connectTimer forMode:NSRunLoopCommonModes];
}

// 心跳連線
- (void)longConnectToSocket
{
    // 傳送固定格式的資料,指令@"longConnect"
    float version = [[UIDevice currentDevice] systemVersion].floatValue;
    NSString *longConnect = [NSString stringWithFormat:@"123%f",version];

    NSData  *data = [longConnect dataUsingEncoding:NSUTF8StringEncoding];

    [self.clientSocket writeData:data withTimeout:- 1 tag:0];
}
注意:心跳連線中傳送給服務端的資料只是作為測試程式碼,根據你們公司需求,或者和後臺商定好心跳包的資料以及傳送心跳的時間間隔.因為這個專案的服務端socket也是我寫的,所以,我自定義心跳包協議.客戶端傳送心跳包,服務端也需要有對應的心跳檢測,以此檢測客戶端是否線上.
8.客戶端開始SSL/TLS傳輸
- (void)addSecurtyTransport
{
    NSMutableDictionary *settings = [[NSMutableDictionary alloc] init];

    //開始手動SSL證書驗證,必定要設定此key
    [settings setObject:[NSNumber numberWithBool:YES]
                 forKey:GCDAsyncSocketManuallyEvaluateTrust];


    NSString *cerPath = [[NSBundle mainBundle] pathForResource:@"client" ofType:@"p12"];
    NSData *p12Data = [NSData dataWithContentsOfFile:cerPath];
    if (p12Data) {
        //解密p12檔案
        CFDataRef inPKCS12Data = (CFDataRef)CFBridgingRetain(p12Data);
        CFStringRef password = CFSTR("123456");
        const void *keys[] = { kSecImportExportPassphrase };
        const void *values[] = { password };
        CFDictionaryRef options = CFDictionaryCreate(NULL, keys, values, 1, NULL, NULL);
        CFArrayRef items = CFArrayCreate(NULL, 0, 0, NULL);

        OSStatus securityError = SecPKCS12Import(inPKCS12Data, options, &items);
        CFRelease(options);
        CFRelease(password);

        if (securityError == errSecSuccess) {
            NSLog(@"Success opening p12 certificate.");

            CFDictionaryRef identityDict = CFArrayGetValueAtIndex(items, 0);
            SecIdentityRef myIdent = (SecIdentityRef)CFDictionaryGetValue(identityDict,
                                                                          kSecImportItemIdentity);

            SecIdentityRef  certArray[1] = { myIdent };
            CFArrayRef myCerts = CFArrayCreate(NULL, (void *)certArray, 1, NULL);

            [settings setObject:(id)CFBridgingRelease(myCerts) forKey:(NSString *)kCFStreamSSLCertificates];

        }else{
            NSLog(@"fail opening p12 certificate.");
        }
    }

    [self.clientSocket startTLS:settings];
}
三.服務端的建立
1.繼承GCDAsyncSocketDelegate
2.建立服務端,並指定代理為self.
dispatch_queue_t delegateQueue = dispatch_get_global_queue(DISPATCH_QUEUE_PRIORITY_DEFAULT, 0);
_serverSocket = [[GCDAsyncSocket alloc] initWithDelegate:self delegateQueue:delegateQueue];
3.開啟埠監聽,並啟動伺服器。
NSError *err;
BOOL isOpen = [_serverSocket acceptOnPort:5036 error:&err];
if (!isOpen) {
     NSLog(@"服務端開啟失敗:%@,",err);
}else{
     NSLog(@"服務端開啟成功,埠號:5036");
}
4.實現代理方法
1.服務端接收到來自客戶端連線
-(void)socket:(GCDAsyncSocket *)sock didAcceptNewSocket:(GCDAsyncSocket *)newSocket
{
    NSLog(@"收到一條新連結--->服務端的socket %@ ,客戶端的socket %@",sock,newSocket);
    //這裡需要儲存一下新建立的socket連線,不然server端會馬上斷開連線。
    [self->_clientSockets addObject:newSocket];

    //開始讀取來自客戶端的資料流
    [newSocket readDataWithTimeout:-1 tag:0];
}
2.接收客戶端資料
- (void)socket:(GCDAsyncSocket *)sock didReadData:(NSData *)data withTag:(long)tag
{
    NSString *text = [[NSString alloc]initWithData:data encoding:NSUTF8StringEncoding];
    [self showMessageWithStr:text];

    // 第一次讀取到的資料直接新增
    if (self.clientPhoneTimeDicts.count == 0)
    {
        [self.clientPhoneTimeDicts setObject:[self getCurrentTime] forKey:text];
    }
    else
    {
        // 鍵相同,直接覆蓋,值改變
        [self.clientPhoneTimeDicts enumerateKeysAndObjectsUsingBlock:^(id  _Nonnull key, id  _Nonnull obj, BOOL * _Nonnull stop) {
            [self.clientPhoneTimeDicts setObject:[self getCurrentTime] forKey:text];
        }];
    }

    [sock readDataWithTimeout:- 1 tag:0];
}
3.傳送回覆資料到客戶端,由writeData方法觸發
-(void)socket:(GCDAsyncSocket *)sock didWriteDataWithTag:(long)tag
{
    NSLog(@"%@,傳送了一條訊息:%li,",sock,tag);
}
4.建立檢測心跳連線
// 檢測心跳計時器
@property (nonatomic, strong) NSTimer *checkTimer;

// 新增計時器
- (void)addTimer
{
    // 長連線定時器
    self.checkTimer = [NSTimer scheduledTimerWithTimeInterval:10.0 target:self selector:@selector(checkLongConnect) userInfo:nil repeats:YES];
    // 把定時器新增到當前執行迴圈,並且調為通用模式
    [[NSRunLoop currentRunLoop] addTimer:self.checkTimer forMode:NSRunLoopCommonModes];
}

// 檢測心跳
- (void)checkLongConnect
{
    [self.clientPhoneTimeDicts enumerateKeysAndObjectsUsingBlock:^(id  _Nonnull key, id  _Nonnull obj, BOOL * _Nonnull stop) {
        // 獲取當前時間
        NSString *currentTimeStr = [self getCurrentTime];
        // 延遲超過10秒判斷斷開
        if (([currentTimeStr doubleValue] - [obj doubleValue]) > 10.0)
        {
            [self showMessageWithStr:[NSString stringWithFormat:@"%@已經斷開,連線時差%f",key,[currentTimeStr doubleValue] - [obj doubleValue]]];
            [self showMessageWithStr:[NSString stringWithFormat:@"移除%@",key]];
            [self.clientPhoneTimeDicts removeObjectForKey:key];
        }
        else
        {
            [self showMessageWithStr:[NSString stringWithFormat:@"%@處於連線狀態,連線時差%f",key,[currentTimeStr doubleValue] - [obj doubleValue]]];
        }
    }];
}
5.socket斷開連線
- (void)socketDidDisconnect:(GCDAsyncSocket *)sock withError:(nullable NSError *)err
{
    NSLog(@"socketDidDisconnect:%@,with error:%@",sock,err);
}
四.資料粘包處理
1.粘包現象
例如:包資料為:abcd

2.粘包解決思路
方法1:
傳送方將資料包加上包頭和包尾,包頭、包體以及包尾用字典形式包裝成json字串,接收方,通過解析獲取json字串中的包體,便可進行進一步處理.
方法2:
新增字首.和包內容拼接成同一個字串,使用componentsSeparatedByString:方法,以ab為分隔符,將每個包內容存入陣列中,再取對應陣列中的資料操作即可.
方法3:
如果最終要得到的資料的長度是個固定長度,用一個字串作為緩衝池,每次收到資料,都用字串拼接對應資料,每當字串的長度和固定長度相同時,便得到一個完整資料,處理完這個資料並清空字串,再進行下一輪的字元拼接。