
Spring Boot + Spring Cloud 構建微服務系統(九):配置中心(Spring Cloud Config)
技術背景
如今微服務架構盛行,在分散式系統中,專案日益龐大,子專案日益增多,每個專案都散落著各種配置檔案,且隨著服務的增加而不斷增多。此時,往往某一個基礎服務資訊變更,都會導致一系列服務的更新和重啟,運維也是苦不堪言,而且還很容易出錯。於是,配置中心便由此應運而生了。
目前市面上開源的配置中心有很多,像Spring家族的Spring Cloud Config, Apache的Apache Commons Configuration,淘寶的diamond, 百度的disconf, 360的QConf等等,都是為了解決這類問題。當下Spring體系大行其道,我們當然也優先選擇Spring Cloud Config了。
Spring Cloud Config
Spring Cloud Config 是一套為分散式系統中的基礎設施和微服務應用提供集中化配置的管理方案,它分為服務端與客戶端兩個部分。服務端也稱為分散式配置中心,它是一個獨立的微服務應用,用來連線配置倉庫併為客戶端提供獲取配置資訊。客戶端則是微服務架構中的各個微服務應用或基礎設施,它們通過指定的配置中心來管理服務相關的配置內容,並在啟動的時候從配置中心獲取和載入配置資訊。
Spring Cloud Config對服務端和客戶端中的環境變數和屬性配置 實現了抽象對映,所以它除了適用於 Spring 應用,也是可以在任何其他語言應用中使用的。Spring Cloud Config 實現的配置中心預設採用 Git 來儲存配置資訊,所以使用 Spring Cloud Config 構建的配置伺服器,天然就支援對微服務應用配置資訊的版本管理,並且可以通過 Git 客戶端工具非常方便的管理和訪問配置內容。當然它也提供了對其他儲存方式的支援,比如:SVN 倉庫、本地化檔案系統等。
實現案例
準備配置檔案
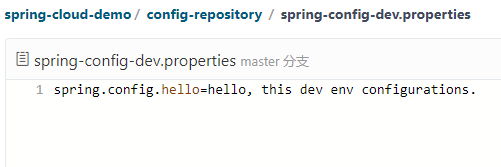
首先在GIT下,新建config-reposity目錄,用來存放配置檔案,如下圖所示,分別模擬了三個環境的配置檔案。

分別編輯三個檔案的,配置 spring.config.hello 屬性的值為 hello, this x env configurations.
服務端實現
新建工程
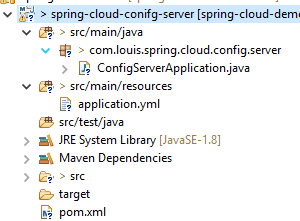
新建 spring-cloud-conifg-server 工程。
新增依賴
除了Spring Cloud依賴之外,新增配置中心依賴包。
pom.xml
    <dependencies>
        <dependency>
            <groupId>org.springframework.cloud</groupId>
            <artifactId>spring-cloud-config-server</artifactId>
        </dependency>
    </dependencies>
啟動類
啟動類添加註解 @EnableConfigServer,開啟配置服務支援。
ConfigServerApplication.java
package com.louis.spring.cloud.config.server;

import org.springframework.boot.SpringApplication;
import org.springframework.boot.autoconfigure.SpringBootApplication;
import org.springframework.cloud.config.server.EnableConfigServer;

@EnableConfigServer
@SpringBootApplication
public class ConfigServerApplication {

    public static void main(String[] args) {
        SpringApplication.run(ConfigServerApplication.class, args);
    }
}
新增配置
修改配置檔案,新增如下內容。使用者名稱和密碼須用自己的GIT賬號。
application.yml
server:
  port: 8551
spring:
  application:
    name: spring-cloud-config-server
  cloud:
    config:
      server:
        git:
          uri: https://gitee.com/liuge1988/spring-cloud-demo/         # 配置git倉庫的地址
          search-paths: config-repository                             # git倉庫地址下的相對地址,可以配置多個,用,分割。
          username: username                                          # git倉庫的賬號
          password: password                                          # git倉庫的密碼
Spring Cloud Config也提供本地儲存配置的方式,只需設定屬性spring.profiles.active=native,Config Server會預設從應用的src/main/resource目錄下檢索配置檔案。另外也可以通過spring.cloud.config.server.native.searchLocations=file:D:/properties/屬性來指定配置檔案的位置。雖然Spring Cloud Config提供了這樣的功能,但是為了更好的支援內容管理和版本控制,還是比較推薦使用GIT的方式。
測試效果


上述的返回的資訊包含了配置檔案的位置、版本、配置檔案的名稱以及配置檔案中的具體內容,說明server端已經成功獲取了git倉庫的配置資訊。

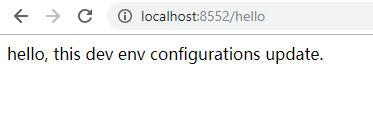
修改一下dev配置檔案內容如下(末尾加了一個 update):
spring.config.hello=hello, this dev env configurations update.

發現讀取的是修改後提交的資訊,說明服務端會自動讀取最新提交的資料。
倉庫中的配置檔案會被轉換成相應的WEB介面,訪問可以參照以下的規則:
- /{application}/{profile}[/{label}]
- /{application}-{profile}.yml
- /{label}/{application}-{profile}.yml
- /{application}-{profile}.properties
- /{label}/{application}-{profile}.properties
以spring-config-dev.properties為例子,它的application是spring-config,profile是dev。client會根據填寫的引數來選擇讀取對應的配置。
客戶端實現
新建工程
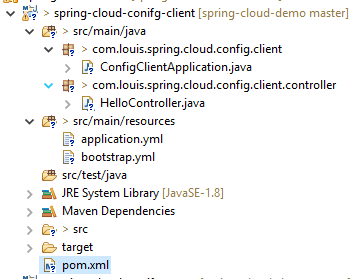
新建 spring-cloud-conifg-client 工程。
新增依賴
新增相關依賴,新增WEB是為了測試介面。
pom.xml
    <dependencies>
        <dependency>
             <groupId>org.springframework.cloud</groupId>
             <artifactId>spring-cloud-starter-config</artifactId>
        </dependency>
        <dependency>
            <groupId>org.springframework.boot</groupId>
            <artifactId>spring-boot-starter-web</artifactId>
        </dependency>
    </dependencies>
新增配置
新增兩個配置檔案如下。
application.yml
server:
  port: 8552
spring:
  application:
    name: spring-cloud-config-client
bootstrap.yml
spring:
  cloud:
    config:
      uri: http://localhost:8551/ # 配置中心的具體地址
      name: spring-config  # 對應{application}部分
      profile: dev  # 對應{profile}部分
      label: master  # 對應git的分支,如果配置中心使用的是本地儲存,則該引數無用
配置說明:
- spring.cloud.config.uri:配置中心的具體地址
- spring.cloud.config.name:對應{application}部分
- spring.cloud.config.profile:對應{profile}部分
- spring.cloud.config.label:對應git的分支。如果配置中心使用的是本地儲存,則該引數無用
- spring.cloud.config.discovery.service-id:指定配置中心的service-id,便於擴充套件為高可用配置叢集。
特別注意:
上面這些與spring cloud相關的屬性必須配置在bootstrap.yml中,這樣config部分內容才能被正確載入。
因為config的相關配置會先於application.yml,而bootstrap.yml的載入也是先於application.yml檔案的。
啟動類
啟動類無需新增額外註解。
ConfigClientApplication.java
package com.louis.spring.cloud.config.client;

import org.springframework.boot.SpringApplication;
import org.springframework.boot.autoconfigure.SpringBootApplication;

@SpringBootApplication
public class ConfigClientApplication {

    public static void main(String[] args) {
        SpringApplication.run(ConfigClientApplication.class, args);
    }
}
控制器
新增一個 HelloController 控制器, 添加註解 @Value("${spring.config.hello}"),宣告hello屬性從配置檔案讀取。
HelloController.java
package com.louis.spring.cloud.config.client.controller;

import org.springframework.beans.factory.annotation.Value;
import org.springframework.web.bind.annotation.RequestMapping;
import org.springframework.web.bind.annotation.RestController;

@RestController
class HelloController {

    @Value("${spring.config.hello}")
    private String hello;

    @RequestMapping("/hello")
    public String from() {
        return this.hello;
    }
}
測試效果
說明客戶端已經成功從服務端讀取了配置資訊。
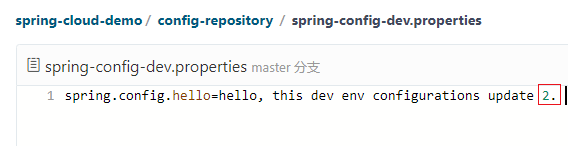
現在手動修改一下倉庫配置檔案的內容,末尾加個數字 2,修改完成並提交。
我們發現返回結果並沒有讀取最新提交的內容,這是因為Spring Boot專案只有在啟動的時候才會獲取配置檔案的內容,雖然GIT配置資訊被修改了,但是客戶端並沒有重新去獲取,所以導致讀取的資訊仍然是舊配置。那麼該如何去解決這個問題呢?這就是我們下一章要講的 Spring Cloud Bus。