Spring Boot 框架學習 (一)配置並執行Spring Boot 框架
阿新 • • 發佈:2018-12-18
下載開發工具:

下載完成開啟以後,第一步檢查環境
檢視jdk是否配置:
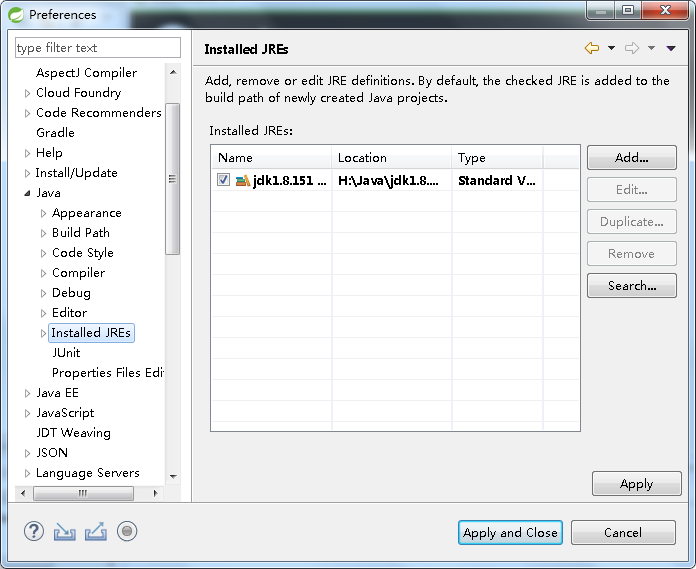
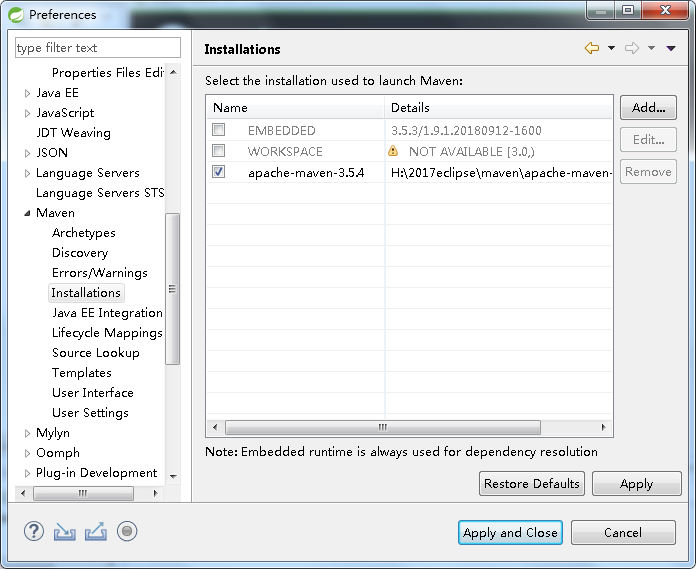
接著一定要注意,maven通常情況下它是沒有給你配置的,要自行配置:

右鍵新建:
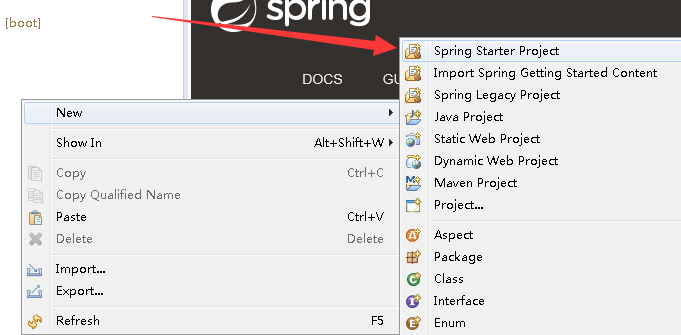
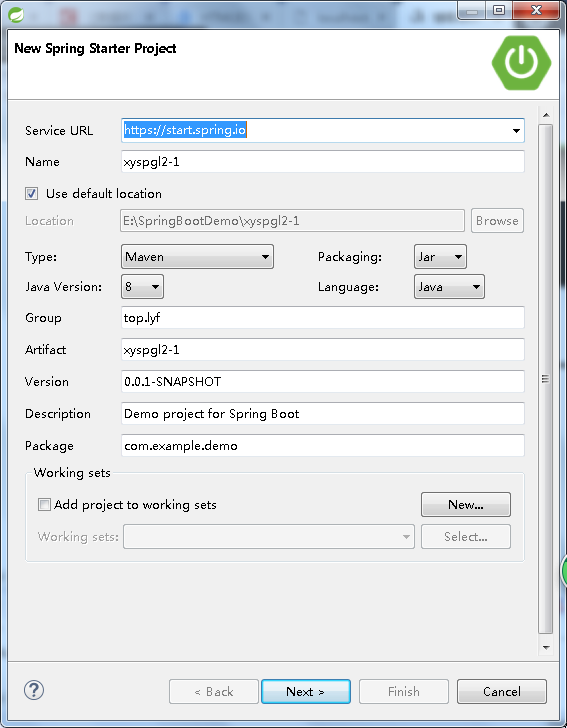
然後依賴選擇web、跟Mybatis就行了。
建立好專案後,會發現自帶了這個Application.java,這個檔案就是用來啟動整個專案的。

不同於SpringMVC,SpringBoot它預設自帶了一個內嵌的tomcat伺服器。
所以只需要右鍵,run-->java application,專案就啟動起來了。
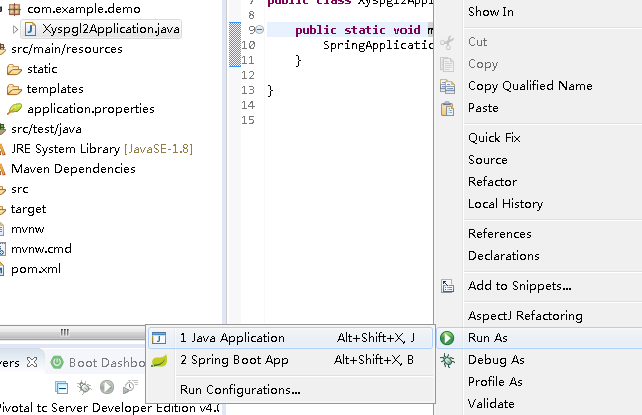
這裡就不需要再配置一個外接的server,然後在server裡面去跑我們的專案了。
而這裡applicarion.properties檔案,裡面就是用來配置資料庫連線資訊,還有Redis連線資訊等,都統一的放在這個配置檔案裡面。(包括程式裡用到的一些變數的資訊,也可以存放在這裡,方便我們去讀取)
接著看pom.xml檔案:
<?xml version="1.0" encoding="UTF-8"?> <project xmlns="http://maven.apache.org/POM/4.0.0" xmlns:xsi="http://www.w3.org/2001/XMLSchema-instance" xsi:schemaLocation="http://maven.apache.org/POM/4.0.0 http://maven.apache.org/xsd/maven-4.0.0.xsd"> <modelVersion>4.0.0</modelVersion> <parent> <groupId>org.springframework.boot</groupId> <!-- 主要是定義了java的編譯級別 --> <artifactId>spring-boot-starter-parent</artifactId> <version>1.5.18.RELEASE</version> <relativePath/> <!-- lookup parent from repository --> </parent> <groupId>top.lyf</groupId> <artifactId>xyspgl2</artifactId> <version>0.0.1-SNAPSHOT</version> <name>xyspgl2</name> <description>Demo project for Spring Boot</description> <properties> <!-- 定義了,使用UTF-8進行編碼,同時實現了通用的測試框架 ,智慧的資源過濾,還有智慧的外掛配置--> <project.build.sourceEncoding>UTF-8</project.build.sourceEncoding> <project.reporting.outputEncoding>UTF-8</project.reporting.outputEncoding> <java.version>1.8</java.version> </properties> <!-- 以上面的parent為基礎,定義相關依賴 --> <dependencies> <dependency> <!-- 定義支援web專案啟動 ,能右鍵run java application執行專案很大部分原因在這裡--> <groupId>org.springframework.boot</groupId> <artifactId>spring-boot-starter-web</artifactId> </dependency> <!-- 定義資料庫連結相關 --> <dependency> <groupId>org.mybatis.spring.boot</groupId> <artifactId>mybatis-spring-boot-starter</artifactId> <version>1.3.2</version> </dependency> <!-- 用來做ut的 --> <dependency> <groupId>org.springframework.boot</groupId> <artifactId>spring-boot-starter-test</artifactId> <scope>test</scope> </dependency> </dependencies> <build> <plugins> <plugin> <groupId>org.springframework.boot</groupId> <!-- 用來做打包的 --> <artifactId>spring-boot-maven-plugin</artifactId> </plugin> </plugins> </build> </project>
啟動 需要定義個controller類
@RestController
public class Hello {
    //@RestController 相當於結合了@Controller與@ResponseBody這兩個標籤
    //,這個類下所有方法返回的東西都是以json方式返回

    @RequestMapping(name="/hello",method=RequestMethod.GET)
    public String hello() {
        return "Hello SpringBoot!";
    }
}
然後回去右鍵執行,會發現,tomcat服務埠就是8080:

接著就可以在瀏覽器輸入並訪問到:

這是一種啟動方式,
還可以點選:
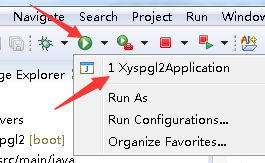
這種方式去啟動。
apllication中想要註釋的話,需要自己去修改編碼格式為UTF-8:
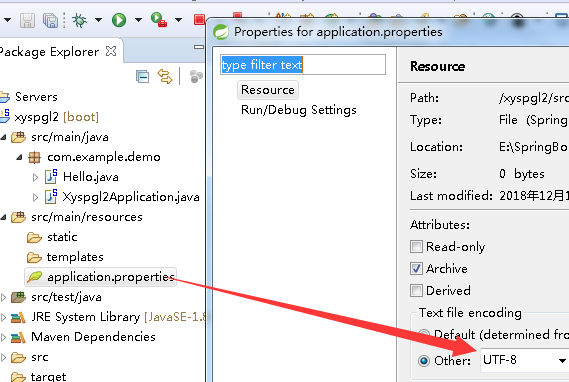
設定訪問路徑字首,在配置檔案中:
//埠
server.port=8080
//加入訪問字首
server.context-path=/xyspgl
之前的訪問路徑就變為了:

