
Spring框架整合Struts2框架的傳統方法
1. 匯入CRM專案的UI頁面,找到新增客戶的頁面,修改form表單,訪問Action
* 將menu.jsp中133行的新增客戶的跳轉地址改為:href="${pageContext.request.contextPath}/jsp/customer/add.jsp"
* 將jsp/customer下的add.jsp的提交頁面的地址改為:action="${pageContext.request.contextPath }/customer_save"。當點選儲存按鈕之後,訪問customer這個action中的save方法。
2. 建立包結構:
* ssh1
* com.huida.dao
* com.huida.domain
* com.huida.service
*com.huida.web
3. 在com.huida.web下建立action類CustomerAction。
在com.huida.service下建立介面:CustomerService,實現介面的類:CustomerServiceImpl。
CustomerService介面中的方法為:
package com.huida.service;

public interface CustomerService {

    public void save();
}
CustomerServiceImpl實現類的內容為:
package com.huida.service;

public class CustomerServiceImpl implements CustomerService {

    @Override
    public void save() {

        System.out.println("Service層中的save方法被執行了");

    }

}
4.編寫CustomerAction接收請求,在struts.xml中完成Action的配置
CustomerAction的接收請求為:
package com.huida.web;import com.huida.domain.Customer;
import com.huida.service.CustomerService;
import com.opensymphony.xwork2.ActionSupport;public class CustomerAction extends ActionSupport{

    /*
     * 儲存客戶的方法
     */
    public String save(){
        System.out.println("Action中執行了save方法");
        return NONE;
    }


}
在struts.xml中對Action的配置為:
<package name="crm" namespace="/" extends="struts-default">
        <action name="customer_*" class="com.huida.web.CustomerAction" method="{1}">
            <result name=""></result>
        </action>
</package>
5.在Action中獲取到service(開發不會使用,因為麻煩)
* 可以通過 WebApplicationContextUtils.getWebApplicationContext(ServletActionContext.getServletContext()); 來獲取,但是這種方式編寫程式碼太麻煩了!!
程式碼如下:
ackage com.huida.web;

import org.apache.struts2.ServletActionContext;
import org.springframework.context.ApplicationContext;
import org.springframework.context.support.ClassPathXmlApplicationContext;
import org.springframework.web.context.WebApplicationContext;
import org.springframework.web.context.support.WebApplicationContextUtils;

import com.huida.domain.Customer;
import com.huida.service.CustomerService;
import com.opensymphony.xwork2.ActionSupport;

public class CustomerAction extends ActionSupport {

    /*
     * 儲存客戶的方法
     */
    public String save(){
        System.out.println("Action中執行了save方法");
        //傳統的web工廠方法
        WebApplicationContext webApplicationContext=WebApplicationContextUtils.getRequiredWebApplicationContext(ServletActionContext.getServletContext());
        CustomerService customerService=(CustomerService) webApplicationContext.getBean("customerService");
        customerService.save();
        return NONE;
    }
}
* 還可以通過new ClassPathXmlApplicationContext("applicationContext.xml")來獲取。
程式碼如下:
package com.huida.web;

import org.apache.struts2.ServletActionContext;
import org.springframework.context.ApplicationContext;
import org.springframework.context.support.ClassPathXmlApplicationContext;
import org.springframework.web.context.WebApplicationContext;
import org.springframework.web.context.support.WebApplicationContextUtils;

import com.huida.domain.Customer;
import com.huida.service.CustomerService;
import com.opensymphony.xwork2.ActionSupport;
import com.opensymphony.xwork2.ModelDriven;

public class CustomerAction extends ActionSupport {

    /*
     * 儲存客戶的方法
     */
    public String save(){
        System.out.println("Action中執行了save方法");
        //使用spring的工廠
        ApplicationContext ac=new ClassPathXmlApplicationContext("applicationContext.xml");
        CustomerService customerService=(CustomerService) ac.getBean("customerService");

        customerService.save();
        return NONE;
    }

}
通過這兩種方法我們都可以實現從action中獲取service。
6. 我們可以驗證一下struts與spring整合是否成功。
啟動伺服器-->在瀏覽器中輸入http://localhost:8080/ssh1-->在頁面中點選客戶管理-->新增客戶-->點選儲存按鈕。在控制檯上輸出如下內容:
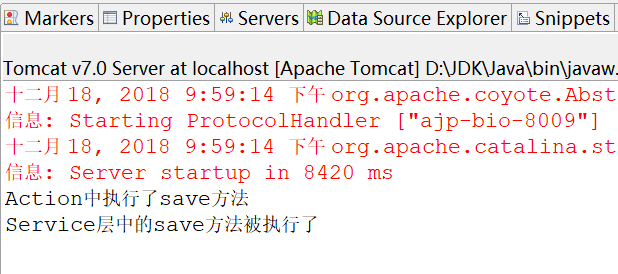
通過以上步驟我們便將struts與spring通過傳統的方法整合起來了。但是這種整合很麻煩,所以在下一篇博文中我就對整合的常用方法進行總結。