
Spring Data Solr One
Solr安裝與配置
1.1什麼是Solr
大多數搜尋引擎應用都必須具有某種搜尋功能,問題是搜尋功能往往是巨大的資源消耗並且它們由於沉重的資料庫載入而拖垮你的應用的效能。
這就是為什麼轉移負載到一個外部的搜尋伺服器是一個不錯的主意,Apache Solr是一個流行的開源搜尋伺服器,它通過使用類似REST的HTTP API,這就確保你能從幾乎任何程式語言來使用solr。
Solr是一個開源搜尋平臺,用於構建搜尋應用程式。 它建立在Lucene(全文搜尋引擎)之上。 Solr是企業級的,快速的和高度可擴充套件的。 使用Solr構建的應用程式非常複雜,可提供高效能。
為了在CNET網路的公司網站上新增搜尋功能,Yonik Seely於2004年建立了Solr。並在2006年1月,它成為Apache軟體基金會下的一個開源專案。並於2016年釋出最新版本Solr 6.0,支援並行SQL查詢的執行。
Solr可以和Hadoop一起使用。由於Hadoop處理大量資料,Solr幫助我們從這麼大的源中找到所需的資訊。不僅限於搜尋,Solr也可以用於儲存目的。像其他NoSQL資料庫一樣,它是一種非關係資料儲存和處理技術。
總之,Solr是一個可擴充套件的,可部署,搜尋/儲存引擎,優化搜尋大量以文字為中心的資料。
1.2 Solr安裝
- 1:安裝 Tomcat,解壓縮即可。
- 2:解壓 solr。
- 3:把 solr 下的dist目錄solr-4.10.3.war部署到 Tomcat\webapps下(去掉版本號)。
- 4:啟動 Tomcat解壓縮 war 包
- 5:把solr下example/lib/ext 目錄下的所有的 jar 包,新增到 solr 的工程中(\WEB-INF\lib目錄下)。
- 6:建立一個 solrhome 。solr 下的/example/solr 目錄就是一個 solrhome。複製此目錄到D盤改名為solrhome
- 7:關聯 solr 及 solrhome。需要修改 solr 工程的 web.xml 檔案。
    <env-entry>
       <env-entry-name>solr/home</env-entry-name>
       <env-entry-value>d:\solrhome</env-entry-value>
       <env-entry-type>java.lang.String</env-entry-type>
</env-entry>- 8:啟動 Tomcat
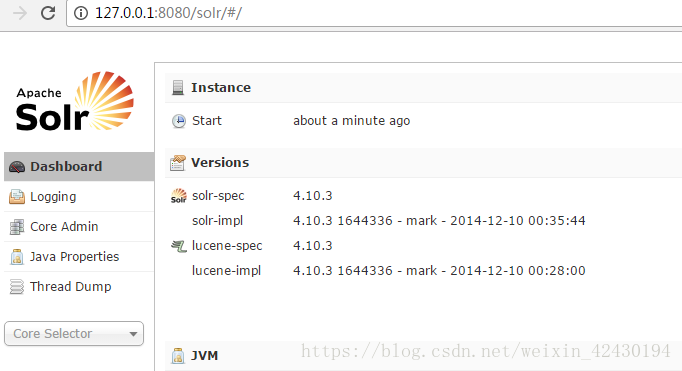
http://IP:8080/solr/
1.3中文分析器IK Analyzer
1.3.1 IK Analyzer簡介
IK Analyzer 是一個開源的,基亍 java 語言開發的輕量級的中文分詞工具包。從 2006年 12 月推出 1.0 版開始, IKAnalyzer 已經推出了 4 個大版本。最初,它是以開源專案Luence 為應用主體的,結合詞典分詞和文法分析演算法的中文分片語件。從 3.0 版本開始,IK 發展為面向 Java 的公用分片語件,獨立亍 Lucene 專案,同時提供了對 Lucene 的預設優化實現。在 2012 版本中,IK 實現了簡單的分詞歧義排除演算法,標誌著 IK 分詞器從單純的詞典分詞向模擬語義分詞衍化。
1.3.2 IK Analyzer配置
步驟:
- 1、把IKAnalyzer2012FF_u1.jar 新增到 solr 工程的 lib 目錄下
- 2、建立WEB-INF/classes資料夾 把擴充套件詞典、停用詞詞典、配置檔案放到 solr 工程的 WEB-INF/classes 目錄下。
- 3、修改 Solrhome 的solrhome\collection1\conf下的 schema.xml 檔案,配置一個 FieldType,使用 IKAnalyzer
fileType: 欄位型別
<fieldType name="text_ik" class="solr.TextField">
     <analyzer class="org.wltea.analyzer.lucene.IKAnalyzer"/>
</fieldType>
1.4配置域
域相當於資料庫的表字段,使用者存放資料,因此使用者根據業務需要去定義相關的Field(域),一般來說,每一種對應著一種資料,使用者對同一種資料進行相同的操作。
域的常用屬性:
• name:指定域的名稱
• type:指定域的型別
• indexed:是否索引 如果需要搜尋,則必須有索引.
• stored:是否儲存
• required:是否必須
• multiValued:是否多值
1.4.1域
修改solrhome的schema.xml 檔案 設定業務系統 Field
    <!--item_goodsid:  spu-->
    <field name="item_goodsid" type="long" indexed="true" stored="true"/>
    <field name="item_title" type="text_ik" indexed="true" stored="true"/>
    <field name="item_price" type="double" indexed="true" stored="true"/>
    <field name="item_image" type="string" indexed="false" stored="true" />
    <field name="item_category" type="string" indexed="true" stored="true" />
    <field name="item_seller" type="text_ik" indexed="true" stored="true" />
    <field name="item_brand" type="string" indexed="true" stored="true" />
1.4.2複製域
在solrhome的schema.xml 檔案中新增複製域:
複製域的作用在於將某一個Field中的資料複製到另一個域中
需要建立索引,不需要從儲存,需要多個值,複製域相當於其他幾個域的總和.
這樣就避免了使用多表查詢.
<field name="item_keywords" type="text_ik" indexed="true" stored="false" multiValued="true"/>
<copyField source="item_title" dest="item_keywords"/>
<copyField source="item_category" dest="item_keywords"/>
<copyField source="item_seller" dest="item_keywords"/>
<copyField source="item_brand" dest="item_keywords"/>
1.4.3動態域
當我們需要動態擴充欄位時,我們需要使用動態域。對於專案,規格的值是不確定的,所以我們需要使用動態域來實現。需要實現的效果如下:
配置:
<dynamicField name="item_spec_*" type="string" indexed="true" stored="true" />
2.Spring Data Solr入門
2.1 Spring Data Solr簡介
雖然支援任何程式語言的能力具有很大的市場價值,你可能感興趣的問題是:我如何將Solr的應用整合到Spring中?可以,Spring Data Solr就是為了方便Solr的開發所研製的一個框架,其底層是對SolrJ(官方API)的封裝。
2.2 Spring Data Solr入門小Demo
2.2.1 搭建工程
(1)建立maven工程, 選擇jar pom.xml中引入依賴
   <dependencies>
    <dependency>
        <groupId>org.springframework.data</groupId>
        <artifactId>spring-data-solr</artifactId>
        <version>1.5.5.RELEASE</version>
    </dependency>
    <dependency>
        <groupId>org.springframework</groupId>
        <artifactId>spring-test</artifactId>
        <version>4.2.4.RELEASE</version>
    </dependency>
    <dependency>
        <groupId>junit</groupId>
        <artifactId>junit</artifactId>
        <version>4.9</version>
    </dependency>
  </dependencies>
(2)在src/main/resources下建立 applicationContext-solr.xml
<?xml version="1.0" encoding="UTF-8"?>
<beans xmlns="http://www.springframework.org/schema/beans"
    xmlns:xsi="http://www.w3.org/2001/XMLSchema-instance" xmlns:p="http://www.springframework.org/schema/p"
    xmlns:context="http://www.springframework.org/schema/context"
    xmlns:solr="http://www.springframework.org/schema/data/solr"
    xsi:schemaLocation="http://www.springframework.org/schema/data/solr
        http://www.springframework.org/schema/data/solr/spring-solr-1.0.xsd
        http://www.springframework.org/schema/beans
        http://www.springframework.org/schema/beans/spring-beans.xsd
        http://www.springframework.org/schema/context
        http://www.springframework.org/schema/context/spring-context.xsd">
    <!-- solr伺服器地址 -->
    <solr:solr-server id="solrServer" url="http://127.0.0.1:8080/solr" />
    <!-- solr模板,使用solr模板可對索引庫進行CRUD的操作 -->
    <bean id="solrTemplate" class="org.springframework.data.solr.core.SolrTemplate">
        <constructor-arg ref="solrServer" />
    </bean>
</beans>
2.2.2 @Field 註解
建立TbItem實體類,屬性使用@Field註解標識 。 如果屬性與配置檔案定義的域名稱不一致,需要在註解中指定域名稱。
動態域有些特殊,這裡沒有註解
 public class TbItem implements Serializable{

    @Field
    private Long id;

    @Field("item_title")
    private String title;

    private String sellPoint;

    @Field("item_price")
    private BigDecimal price;

    private Integer stockCount;

    private Integer num;

    private String barcode;

    @Field("item_image")
    private String image;

    private Long categoryid;

    private String status;

    private Date createTime;

    private Date updateTime;

    private String itemSn;

    private BigDecimal costPirce;

    private BigDecimal marketPrice;

    private String isDefault;

    @Field("item_goodsId")
    private Long goodsId;

    private String sellerId;

    private String cartThumbnail;

    @Field("item_category")
    private String category;

    @Field("item_brand")
    private String brand;

    private String spec;

    @Field("item_seller")
    private String seller;
    //  get set方法省略
}
2.2.3 增加(修改)
- 建立測試類TestTemplate.java
如果id一樣,資料存在,則修改,資料不存在就增加
@RunWith(SpringJUnit4ClassRunner.class)
@ContextConfiguration(locations="classpath:applicationContext-solr.xml")
public class TestTemplate {

    @Autowired
    private SolrTemplate solrTemplate;

    @Test
    public void testAdd(){

        TbItem item = new TbItem();
        item.setId(1L);
        item.setTitle("華為METE10");
        item.setCategory("手機");
        item.setBrand("華為");
        item.setSeller("華為旗幟店");
        item.setGoodsId(2L);
        item.setPrice(new BigDecimal(999.99));

        solrTemplate.saveBean(item);
        solrTemplate.commit();//提交
    }
}
2.2.4 按主鍵查詢和刪除
    /**
     * 查詢
     */
    @Test
    public void findById(){
        TbItem item = solrTemplate.getById(1L, TbItem.class);
        System.out.println(item.getBrand());
    }

    /**
     * 刪除
     */
    @Test
    public void deleById(){
        solrTemplate.deleteById("1");
        solrTemplate.commit();
    }
2.2.6 分頁查詢和條件查詢
首先迴圈插入100條測試資料
分頁查詢測試程式碼:
@Test
    public void testPageQueryMutil(){

        Query query = new SimpleQuery("*:*");

        // contains : 包含,不分詞   is : 匹配,分詞
        Criteria criteria = new Criteria("item_category").is("手機");

        //增加一個條件
        criteria=criteria.and("item_title").contains("2");

        query.addCriteria(criteria);

        //從查詢的結果的第二條開始顯示
        query.setOffset(1);//開始索引 以查詢的結果建立索引
        query.setRows(50);//每頁記錄數

        ScoredPage<TbItem> page = solrTemplate.queryForPage(query, TbItem.class);

        for(TbItem item : page.getContent()){
            System.out.println(item.getTitle() + item.getBrand());
        }

        System.out.println("總記錄數"+page.getTotalElements());
        System.out.println("總頁數"+page.getTotalPages());
    }
2.2.7 刪除全部資料
    /**
     * 刪除
     */
    @Test
    public void deleAll(){
        //可以跟上條件
        Query query = new SimpleQuery("*:*");
        solrTemplate.delete(query);
        solrTemplate.commit();
    }