
小程式選項卡以及swiper套用(跨頁面)
阿新 • • 發佈:2018-12-20
選項卡tab和swpier之間的套用
其實我之前寫過一篇選項卡的切換demo,大家闊以參考一下 小程式多個選項卡切換 那今天寫這個demo呢,是因為專案需求,所以僅供參考。
我是拿到了home.wxml的陣列下標, 通過url傳參的方式去將這個id傳到下一個頁面, 下一個頁面接收以後再將id賦值給對應的tabI或者currentId(swiper 的下標) 實現上一個頁面進來以後直接進入對應的頁面。
首先看一下效果圖吧
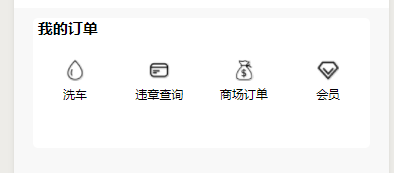 當我點選違章查詢
 跳轉到對應的頁面展示對應的內容
那麼上菜!!!
home.wxml
<view class='wrpg'>
  <view class='wrpg-bottom'>
    <view class='myOrder'>
      <view class='myTips'>
        <text>我的訂單</text>
      </view>
      <view class='allOrder' >
      <view class='item-Order' wx:for="{{allOrder}}" wx:key='' >
        <view class='washcar' bindtap='toOrder' data-index='{{index}}' data-id='{{item.id}}'>
          <image class='washcarImg' src="{{item.washcar}}" ></image>
          <text class='tips'>{{item.tips}}</text>
        </view>
      </view>
      </view>
    </view>
  </view>
</view>
home.wxss
.wrpg {
  width: 90%;
  height: 100%;
  margin: 0 auto;
}
.myOrder {
  margin: 20rpx auto;
  width: 100%;
  height: 260rpx;
  background: #fff;
  border-radius: 10rpx;
}

.myTips {
  font-size: 30rpx;
  font-weight: bold;
  margin: 10rpx;
}

.allOrder {
  width: 100%;
  height: 150rpx;
  display: flex;
  justify-content: center;
  align-items: center;
}

.item-Order {
  width: 100%;
  height: 100rpx;
  display: flex;
  justify-content: center;
  align-items: center;
}

.washcar {
  width: 100rpx;
  height: 100rpx;
  display: flex;
  justify-content: center;
  align-items: center;
/* 保持行級 */
  flex-flow: column nowrap;
  font-size: 25rpx;
}

.washcarImg {
  width: 45rpx;
  height: 45rpx;
}

.tips {
  margin-top: 10rpx;
}
home.js
陣列寫在data裡
allOrder: [{
      id:0,//這裡就是你需要的傳遞陣列的id
        washcar: "images/water.png",
        tips: "洗車"
      },
      {
        id:1,
        washcar: "images/bank.png",
        tips: "違章查詢"
      },
      {
        id: 2,
        washcar: "images/money.png",
        tips: "商場訂單"
      },
      {
        id: 3,
        washcar: "images/peo.png",
        tips: "會員"
      },
    ],
//事件處理函式,通過url傳參

  toOrder(e){

    var id = e.currentTarget.dataset.id;
    console.log(id);
    wx.navigateTo({
      url: 'order/order?id='+id,
    })
  },
OK!上一個頁面傳遞成功,那麼結下來就是接收了 order.wxml
<view class='wrpg'>
  <view class='wrpg-top'>
    <view class="content-titles">
      <view class='washcar {{index==indexNum?"active":""}}' wx:for="{{washcar}}" data-index='{{index}}' wx:key="" bindtap='tabChange'>
        <text>{{item.tips}}</text>
      </view>
    </view>
  </view>
  <view class='wrpg-content'>
    <swiper vertical="{{false}}" current='{{indexNum}}' bindchange='Change'>
      <!-- 第一屏 -->
      <swiper-item>
        <view class=''>washcar</view>
      </swiper-item>
      <!-- 第二屏 -->
      <swiper-item>
        <view class="select-content-titles">
          <view class='selectContent {{idx == index? "type-item-on" : ""}}' wx:for="{{selecttab}}" data-index='{{index}}' wx:key="" bindtap='checkviolation'>
            <text>{{item.tips}}</text>
          </view>
        </view>
        <view wx:if='{{idx == 0}}' class='tab1' data-id='0'>
          <image class='tab1Img' src="../images/order.png"></image>
          <text>你暫時還沒有違章查詢~</text>
        </view>
        <view wx:if='{{idx == 1}}' class='tab2' data-id='1'>222</view>
        <view wx:if='{{idx == 2}}' class='tab3' data-id='2'>333</view>
        <view wx:if='{{idx == 3}}' class='tab3' data-id='3'>444</view>
      </swiper-item>
      <!-- 第三屏 -->
      <swiper-item>
        <view class="select-content-titles">
          <view class='selectContent {{idx == index? "type-item-on" : ""}}' wx:for="{{ordertab}}" data-index='{{index}}' wx:key="" bindtap='checkviolation'>
            <text>{{item.tips}}</text>
          </view>
        </view>
        <view wx:if='{{idx == 0}}' class='tab1' data-id='0'>
        000
        </view>
        <view wx:if='{{idx == 1}}' class='tab2' data-id='1'>
        <image class='tab1Img' src="../images/order.png"></image>
          <text>你暫時還沒有商品~</text>
          <text class='buyMore'>去逛逛~</text>
        </view>
        <view wx:if='{{idx == 2}}' class='tab3' data-id='2'>

         <image class='orderDetailImg' src="../images/orderDetail.png"></image>
        </view>
        <view wx:if='{{idx == 3}}' class='tab3' data-id='3'>444</view>
      </swiper-item>
      <!-- 第四屏 -->
      <swiper-item>
        <view class=''>vip</view>
      </swiper-item>
    </swiper>

  </view>
</view>
order.wxss
/* pages/home/order/order.wxss */

page {
  width: 100%;
  height: 100%;
  background: rgb(244, 246, 250);
}

.wrpg-top {
  width: 100%;
  height: 80rpx;
  background: #fff;
}

.content-titles {
  display: flex;
  justify-content: center;
  align-items: center;
}

.washcar {
  width: 200rpx;
  height: 100rpx;

  display: flex;
  justify-content: center;
  align-items: center;
  margin-left: 10rpx;
  font-size: 30rpx;

}

.active {
  font-size: 40rpx;
  font-weight: bold;
}

swiper{
    width:100%;
  height: 1100rpx;


}
.select-content-titles{
width: 100%;
height: 80rpx;
background: #fff;
  display: flex;
  justify-content: center;
  align-items: center;
}
.selectContent{
    width: 200rpx;
  height: 100rpx;
  display: flex;
  justify-content: center;
  align-items: center;
  margin-left: 10rpx;
  font-size: 25rpx;
}
.type-item-on {
border-bottom: 4rpx solid rgb(95, 162, 238);
color: rgb(95, 162, 238);
}
.tab1,.tab2{
width: 100%;
height: 100%;

  display: flex;
  justify-content: center;
  align-items: center;
  flex-flow: column;
  font-size: 30rpx;
}
.tab1Img{
   width: 100rpx;
  height: 100rpx;
}
.buyMore{
  color: rgb(95, 162, 238);
}
.orderDetailImg{
width: 100%;
height: 600rpx;
margin: 10rpx;
}
1.接下來就是接收上一個頁面home的id和在order.js的onload事件裡重新整理order.wxml的選項卡陣列下標index, 這樣就是從上一個頁面子元素進入本頁面的對應子元素。
但是
我的這裡拿到這個homeid以後沒有直接賦值給我的washcar陣列的id。 我是賦值給了我的swiper的下標indexNum。 因為我的swiper 和導航的選項卡陣列下標做了聯動,我只需要改其中之一就能實現。所以我就取巧了。
2.在swiper裡,利用swiper元件的屬性 current拿到對應的滑塊的下標, 將滑塊的下標賦值給我的order.wxml的選項卡陣列下標,就可以實現滑動的同時,重新整理tab對應的選項樣式。
// pages/home/order/order.js

Page({

  /**
   * 頁面的初始資料
   */
  data: {
    idx: 0, //預設選中第一項
    indexNum: 0,
    washcar: [{
        tips: "洗車"
      },
      {
        tips: "違章查詢"
      },
      {
        tips: "商城訂單"
      },
      {
        tips: "會員"
      },
    ],
    selecttab: [{
        id: 0,
        tips: "處理中"
      },
      {
        id: 1,
        tips: "已成功"
      },
      {
        id: 2,
        tips: "已撤銷"
      },
      {
        id: 3,
        tips: "全部"
      },

    ],
    ordertab: [{
        id: 0,
        tips: "全部"
      },
      {
        id: 1,
        tips: "待付款"
      },
      {
        id: 2,
        tips: "待收貨"
      },
      {
        id: 3,
        tips: "待評價"
      },
    ],
  },
//導航欄點選事件
  tabChange: function(e) {
    var navigitionIndex = e.currentTarget.dataset.index;
    this.setData({
      indexNum: navigitionIndex
    })

  },
  //選項卡滑動
  Change(e) {
    var cur = e.detail.current;
    this.setData({
      indexNum: cur
    })
  },
  //查詢違章選項卡
  checkviolation(e) {
    let that = this;
    let index = e.currentTarget.dataset.index;
    that.setData({
      idx: index,
    })

  },
  /**
   * 生命週期函式--監聽頁面載入
   */
  onLoad: function(options) {
    var id = options.id;
    this.setData({
      indexNum:id
    })
  },
一開始我想點選事件和滑動事件都共用一個滑動事件,通過判斷來控制下標,但bindtap和滑動裡的bindchange事件,根本就是兩個事件,無法再一個事件裡實現,我一直糾結在使用一個事件來實現,導致一直卡殼。想複雜了 其實我是一個前端小白,從後臺轉過了也才沒有多久,希望有不對可以指正。廣泛交友。共同成長