
第 23 講 SpringBoot上傳檔案
阿新 • • 發佈:2018-12-20
第二十三講 SpringBoot上傳檔案
1. 引入依賴:pom.xml
<dependency>
<groupId>org.springframework.boot</groupId>
<artifactId>spring-boot-starter-web</artifactId>
</dependency>
<dependency>
<groupId>org.springframework.boot</groupId>
<artifactId> 2. 引入前端檔案:
2.1 下載前端檔案:
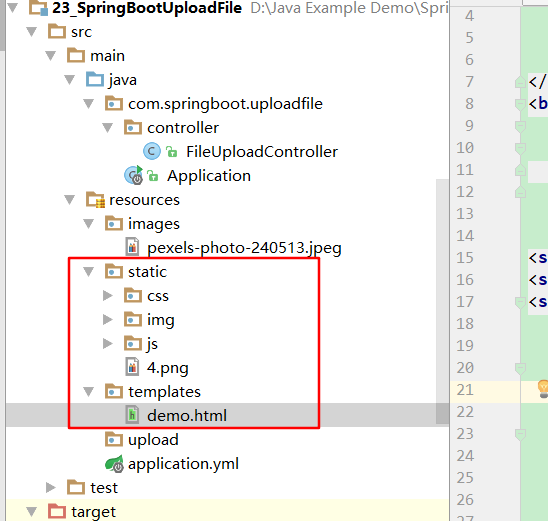
前端檔案如圖所示放置:html檔案放置在templates目錄下,css,js,img目錄存放在static目錄下
2.2 修改demo.html
<!doctype html>
<html lang="en">
<head>
	<meta charset="UTF-8"/>
	<title>上傳按鈕 的樣式優化外掛</title>
	<link rel="stylesheet" href="css/fileUpload.css"/>
    <script type="text/javascript" src='js/jquery.js'></script>
    <script type="text/javascript" src='js/jquery.fileupload.js'></script>
</head>
<body>
	<div class="wrap">
        <input id="uploadFile" title='支援jpg、jpeg、gif、png格式,檔案小於5M' tabIndex='3'
			   type='file' size='3' name='file' hidefocus="true" class="fnOpt"/>
    </div>
    <button id="uploadFileBtn" onclick="uploadFile()" type="submit">上傳檔案</button>

<script type="text/javascript">
	$(".fnOpt").optFileUpload();

    function  uploadFile() {
        var formData = new FormData();
        formData.append("file", $("#uploadFile")[0].files[0]);
        $.ajax({
            url:'/fileUpload',
            type:'POST',
            data: formData,
            async: false,
            cache: false,
            contentType: false, //不設定內容型別
            processData: false, //不處理資料
            success:function(data){
                console.log(data);
                alert(data);
            },
            error:function(){
                alert("上傳失敗!");
            }
        })
    }
</script>
</body>
</html>
3. 上傳檔案邏輯:FileUploadController
package com.springboot.uploadfile.controller;

import org.apache.catalina.servlet4preview.http.HttpServletRequest;
import org.slf4j.Logger;
import org.slf4j.LoggerFactory;
import org.springframework.stereotype.Controller;
import org.springframework.util.ResourceUtils;
import org.springframework.web.bind.annotation.RequestMapping;
import org.springframework.web.bind.annotation.RequestParam;
import org.springframework.web.bind.annotation.ResponseBody;
import org.springframework.web.multipart.MultipartFile;

import java.io.*;
import java.net.URL;

/**
 * @Description:
 * @Author: zrblog
 * @CreateTime: 2018-10-20 20:49
 * @Version:v1.0
 */
@Controller
public class FileUploadController {

    private final static Logger logger = LoggerFactory.getLogger(FileUploadController.class);


    /**
     * @param
     * @Description: 跳轉到上傳檔案頁面
     * @Return
     * @Author: zrblog
     * @Date: 2018/10/20 21:59
     */
    @RequestMapping("/")
    public String toUploadFile() {
        return "demo";
    }


    /**
     * @Description: 上傳檔案
     * @Param [file, request]
     * @Return java.lang.String
     * @Author: zrblog
     * @Date: 2018/10/20 22:02
     */
    @RequestMapping("fileUpload")
    @ResponseBody
    public String uploadFile(@RequestParam("file") MultipartFile file, HttpServletRequest request) {

        String contentType = file.getContentType();
        logger.info("ContentType:" + contentType);

        String originalFilename = file.getOriginalFilename();
        logger.info("OriginalFilename:" + originalFilename);

        try {
            //獲取跟目錄
            File path = new File(ResourceUtils.getURL("classpath:").getPath());
            if(!path.exists()) {
                path = new File("");
                System.out.println("專案根目錄:"+path.getAbsolutePath());
            }

            //如果上傳目錄為/static/images,則可以如下獲取:
            File uploadDirPath = new File(path.getAbsolutePath(),"23_SpringBootUploadFile/src/main/resources/images");
            if(!uploadDirPath.exists()){
                uploadDirPath.mkdirs();
            }
            System.out.println("檔案存放目錄:"+uploadDirPath.getAbsolutePath());

            String imgFilePath = uploadDirPath + File.separator + originalFilename;

            System.out.println("檔案完整路徑:" + imgFilePath);

            InputStream is = null;
            FileOutputStream fos = null;
            try {

                is = file.getInputStream();

                fos = new FileOutputStream(imgFilePath);

                byte[] bytes = new byte[1024];

                int len = 0;

                while ((len = is.read(bytes)) != -1) {
                    fos.write(bytes, 0, len);
                }

                fos.flush();

            } catch (Exception e) {
                e.printStackTrace();
            } finally {
                if (fos != null) {
                    try {
                        fos.close();
                    } catch (IOException e) {
                        e.printStackTrace();
                    }
                }

                if (is != null) {
                    try {
                        is.close();
                    } catch (IOException e) {
                        e.printStackTrace();
                    }
                }
            }
        } catch (FileNotFoundException e) {
            e.printStackTrace();
        }


        return "{\"data\":\"上傳成功\"}";
    }

}
4.測試:執行Appliaction.java檔案中的main方法,啟動專案
顯示下圖介面:
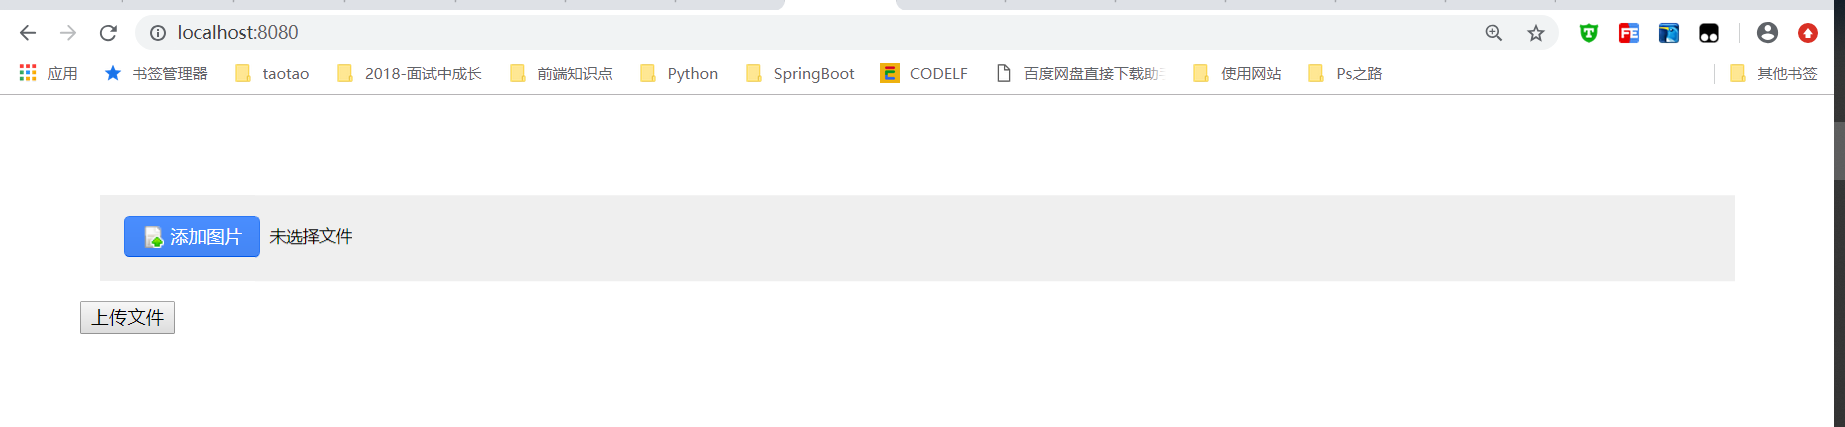
- 選擇圖片,點選上傳檔案按鈕
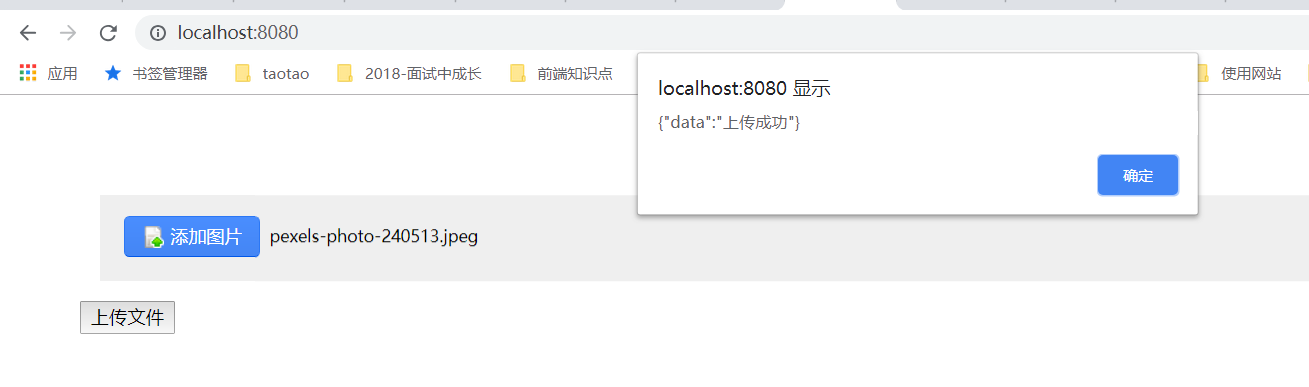
- 控制檯輸出:
