Okhttp之RetryAndFollowUpInterceptor攔截器原理解析
如果研究過okhttp原始碼,應該知道okhttp的核心是攔截器,而攔截器所採用的設計模式是責任鏈設計,即每個攔截器只處理與自己相關的業務邏輯。
今天徹底分析Okhttp的核心攔截器RetryAndFollowUpInterceptor的原理解析:
這裡先貼出RetryAndFollowUpInterceptor的核心虛擬碼,可以大體的看一遍,待下文一步一步帶你解析。
攔截器的核心程式碼都在intercept(Chain chain )方法中,所以有必要徹底研究該方法是如何處理即可理解RetryAndFollowUpInterceptor的奧妙。
  @Override
  public Response intercept(Chain chain) throws IOException {
    Request request = chain.request();
    //...省略部分程式碼
    StreamAllocation streamAllocation = new StreamAllocation(client.connectionPool(),
    createAddress(request.url()), call, eventListener, callStackTrace);
      //...省略部分程式碼
    while (true) {

      Response response;
      boolean releaseConnection = true;
      try {
        response = realChain.proceed(request, streamAllocation, null, null);
        releaseConnection = false;
      } catch (RouteException e) {
        // The attempt to connect via a route failed. The request will not have been sent.
        if (!recover(e.getLastConnectException(), streamAllocation, false, request)) {
          throw e.getFirstConnectException();
        }
        releaseConnection = false;
        continue;
      } catch (IOException e) {
        // An attempt to communicate with a server failed. The request may have been sent.
        boolean requestSendStarted = !(e instanceof ConnectionShutdownException);
        if (!recover(e, streamAllocation, requestSendStarted, request)) throw e;
        releaseConnection = false;
        continue;
      } finally {
        // We're throwing an unchecked exception. Release any resources.
        if (releaseConnection) {
          streamAllocation.streamFailed(null);
          streamAllocation.release();
        }
      }

      // Attach the prior response if it exists. Such responses never have a body.
      if (priorResponse != null) {
        response = response.newBuilder()
            .priorResponse(priorResponse.newBuilder()
                    .body(null)
                    .build())
            .build();
      }


      Request followUp;
      try {
       //判斷是否進行重新請求
        followUp = followUpRequest(response, streamAllocation.route());
      } catch (IOException e) {
        streamAllocation.release();
        throw e;
      }

      if (followUp == null) {
      //如果為空,則釋放資源,不空則繼續下一次請求
        streamAllocation.release();
        return response;
      }

      request = followUp;
      priorResponse = response;
    }
  }
1、先分析正常的一次網路請求的業務邏輯
1.1 例項化StreamAllocation,初始化一個Socket連線物件,獲取到輸入/輸出流,從執行緒池中獲取執行緒及拼接請求地址得到StreamAllocation物件
    StreamAllocation streamAllocation = new StreamAllocation(client.connectionPool(),
    createAddress(request.url()), call, eventListener, callStackTrace);
2、通過建立好的request和streamAllocation物件,去網路獲取到response並傳遞給下一級攔截器
response = realChain.proceed(request, streamAllocation, null, null);
如果是正常的網路請求,RetryAndFollowUpInterceptor起作用的程式碼就這些。
2、回到最初的起點,看它的"真正"的作用
RetryAndFollowUpInterceptor的定義為:This interceptor recovers from failures and follows redirects as necessary 即網路請求失敗後,在一些必要的條件下,會重新進行網路請求。
接下來,看看到底是如何重新進行網路請求?
2.1 首先可以看見它本身維護這一個死迴圈
  while (true) {
      try {
        response = realChain.proceed(request, streamAllocation, null, null);
        releaseConnection = false;
      } catch (RouteException e) {
         throw e;
     }catch(IOException e){
      //.....省略部分程式碼
         continue;
     }
}
會進行try…catch 如果出現了異常資訊,可以看到,它本身會進行處理 RouteException、IOException 它會重新根據recover(…)方法,然後continue掉本次迴圈,然後繼續下一次請求,即:
response = realChain.proceed(request, streamAllocation, null, null);
那麼問題來了,假如說出現了異常,它豈不是一直重新進行請求網路,它什麼時候跳出迴圈?
2.2 這裡有兩種情況進行跳出死迴圈
第一種:當發生RouteException時候,並且 recover為false的時候,這時候會跳出迴圈,然後丟擲去異常,並回調callback.onFailure(Exception e),返回給UI層進行處理 ,假如說沒有開資料流量的情況下,去請求網路,則會丟擲該異常。
第二種:當發生IOException時候,recover為false的時候,則throw exception,中斷死迴圈的操作,
3、以網路重定向進行分析,看它是如何進行重新請求網路
如果你對網路知識瞭解的話,正常一次請求會返回一個響應,但是重定向比較特殊,其實是客戶端請求了2次網路,伺服器返回了2次資料。
3.1 以訪問百度為例,重定向例項,請求兩次網路
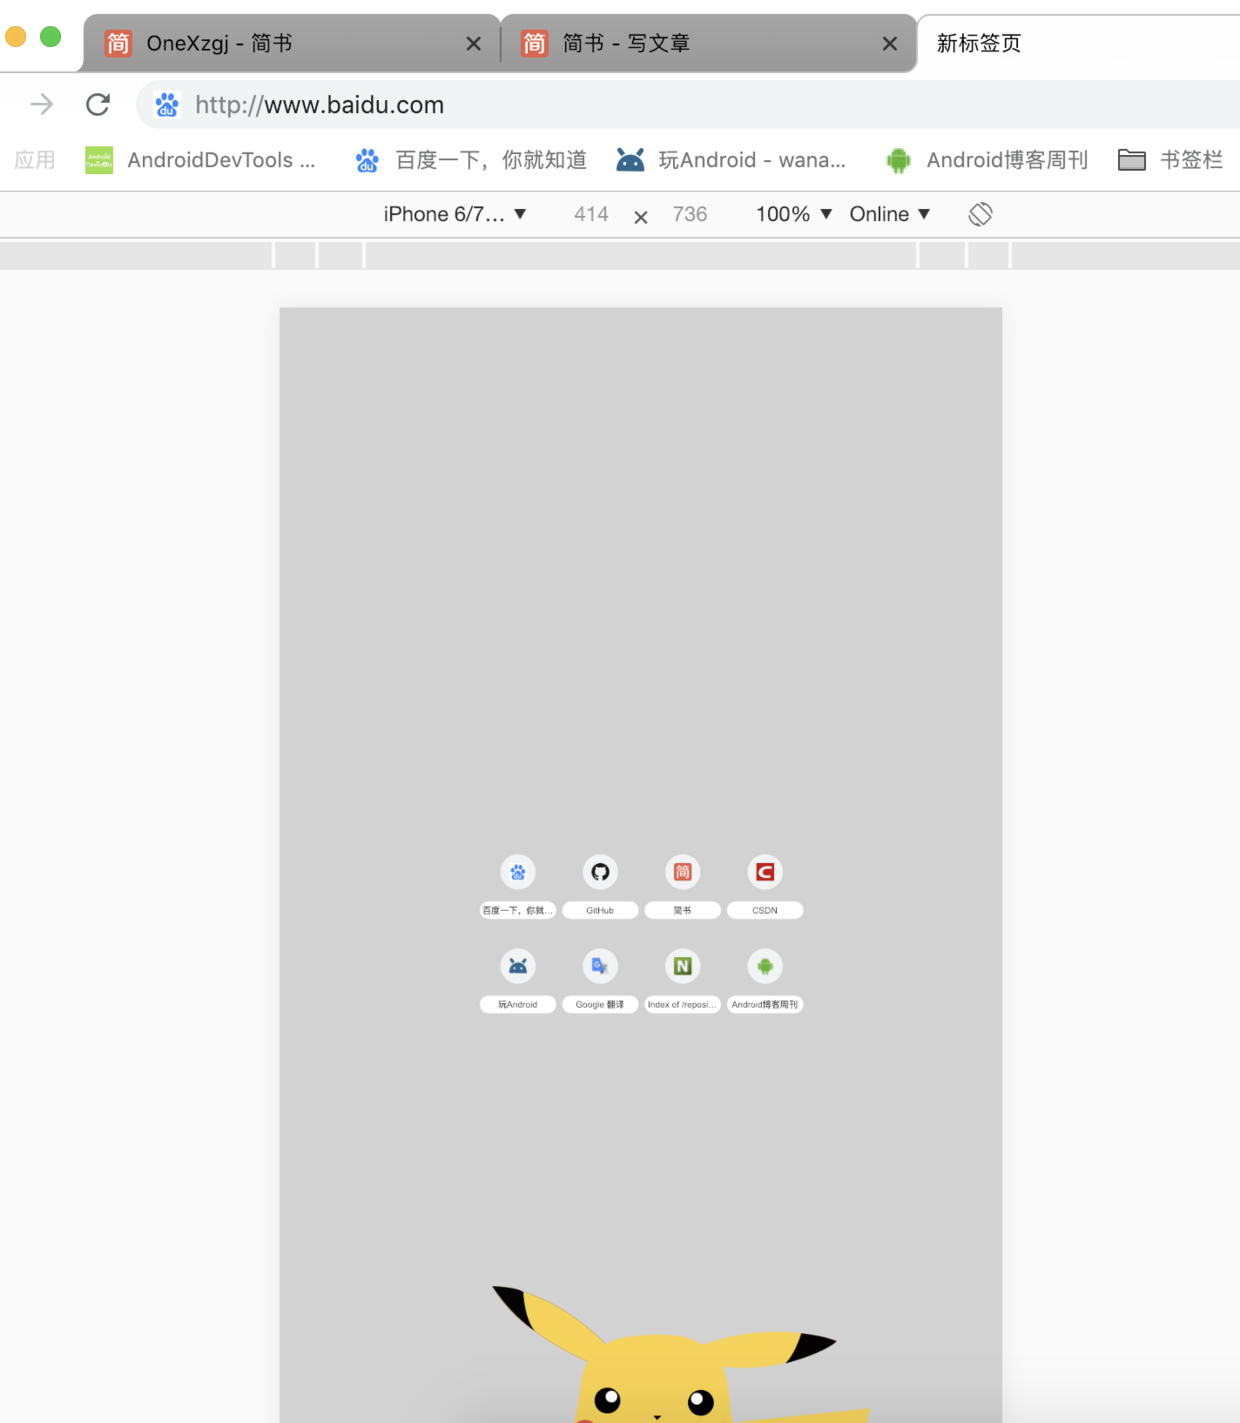
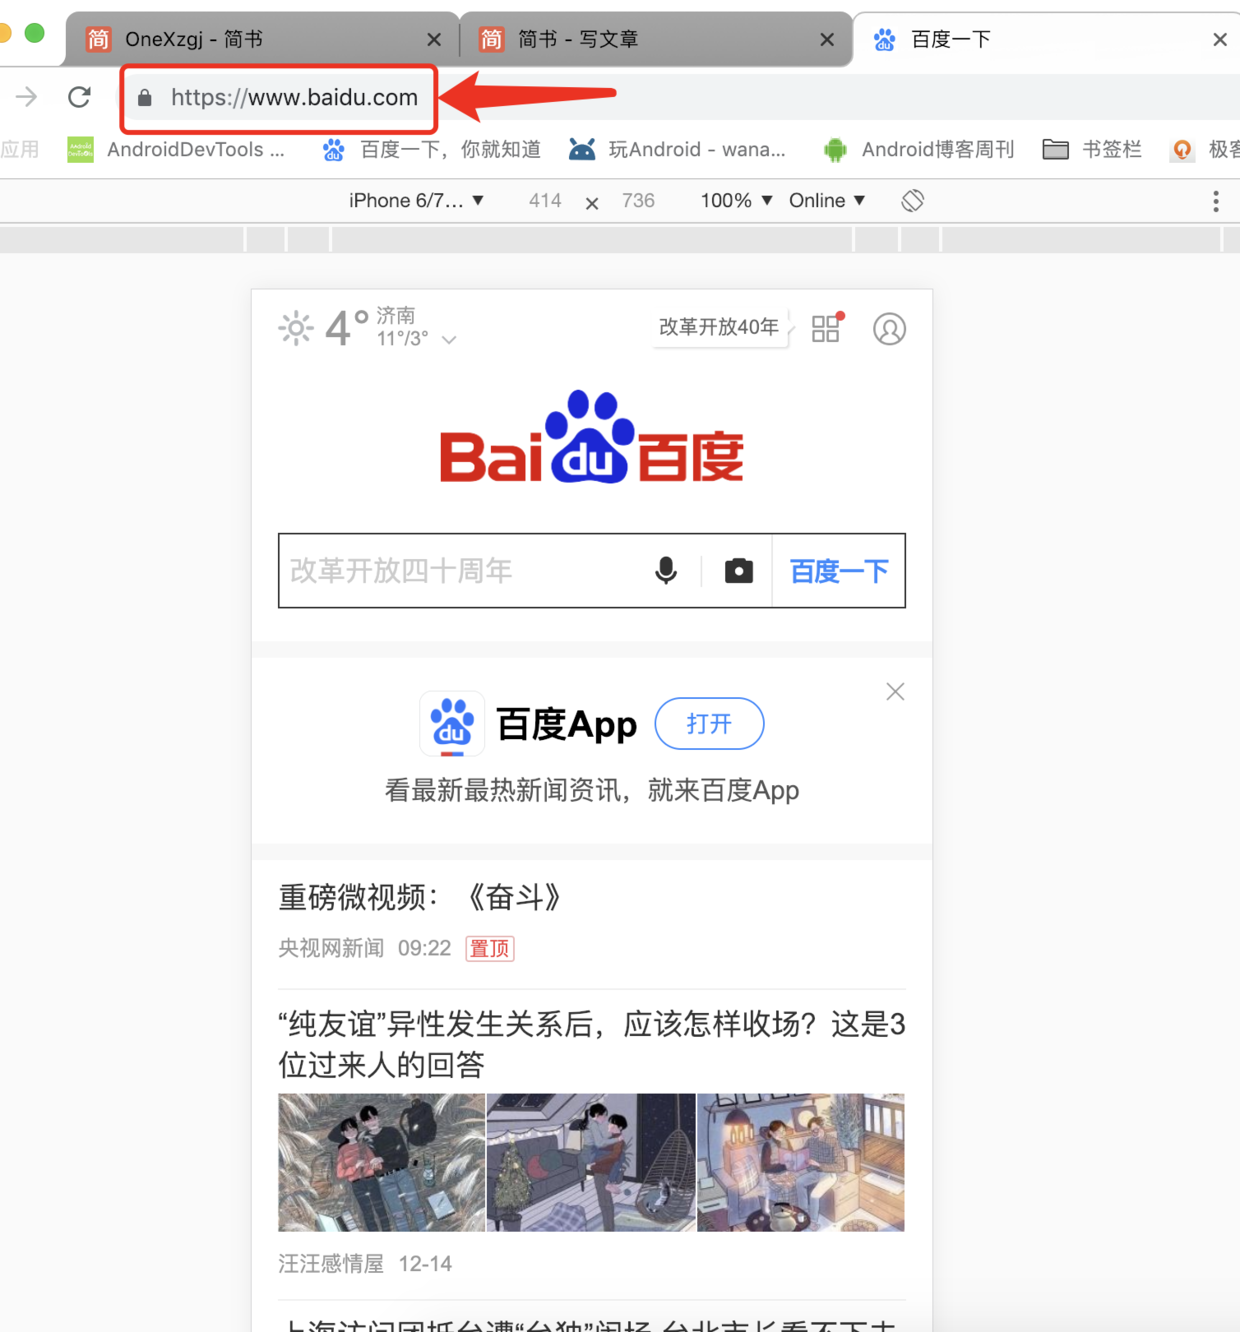
百度的真正的地址為:https://www.baidu.com ,但是在位址列中輸入 http://www.baidu.com 也可以看到百度主頁,但是隻要看到百度主頁,說明瀏覽器裡面請求了https://www.baidu.com,這裡就說明發生了重定向,通過開啟開發者模式可以看見。如下圖所示:
當按下回車的時候,位址列變為自動變為https://www.baidu.com
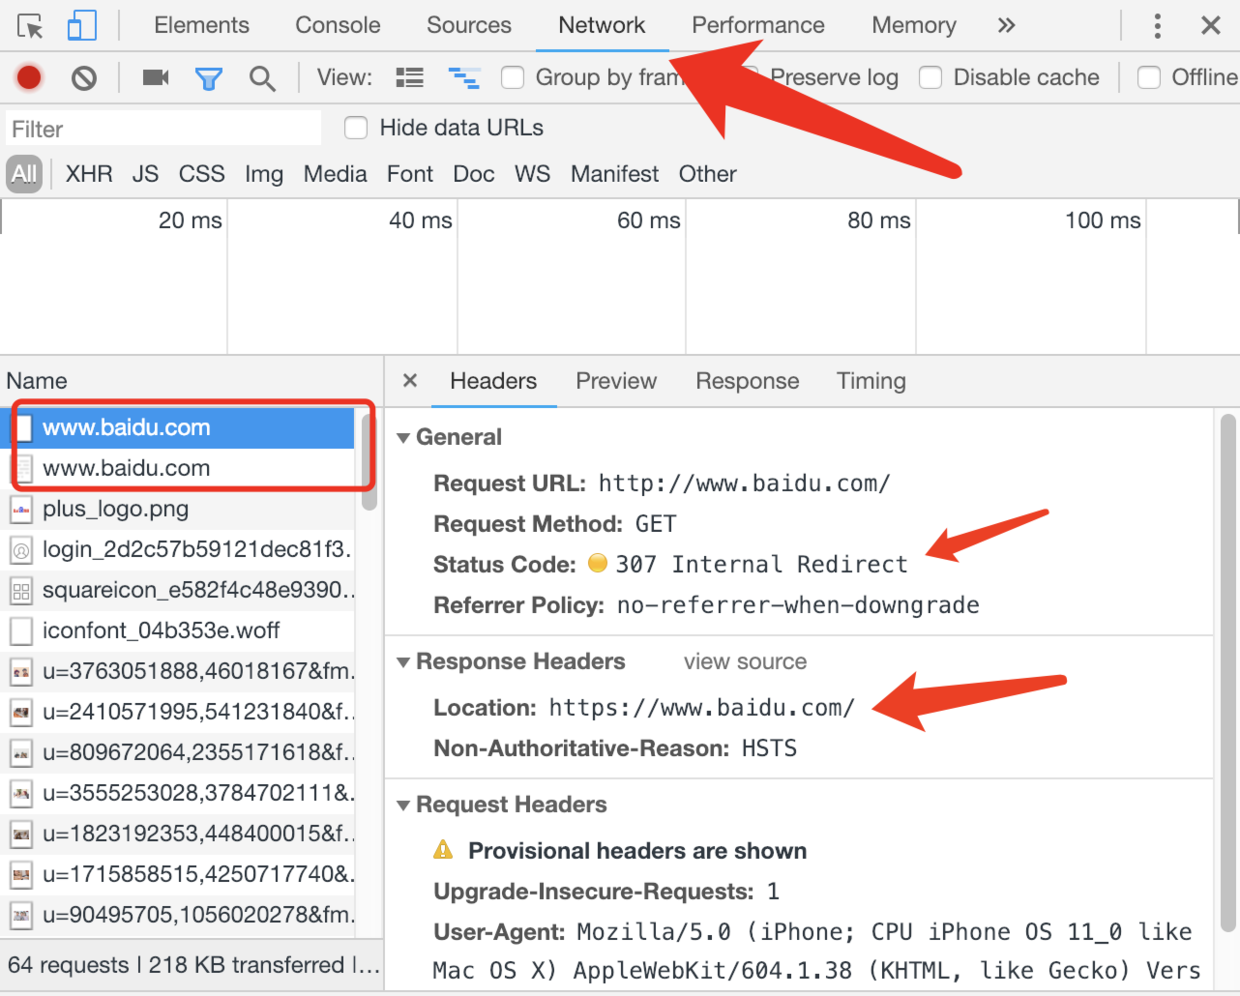
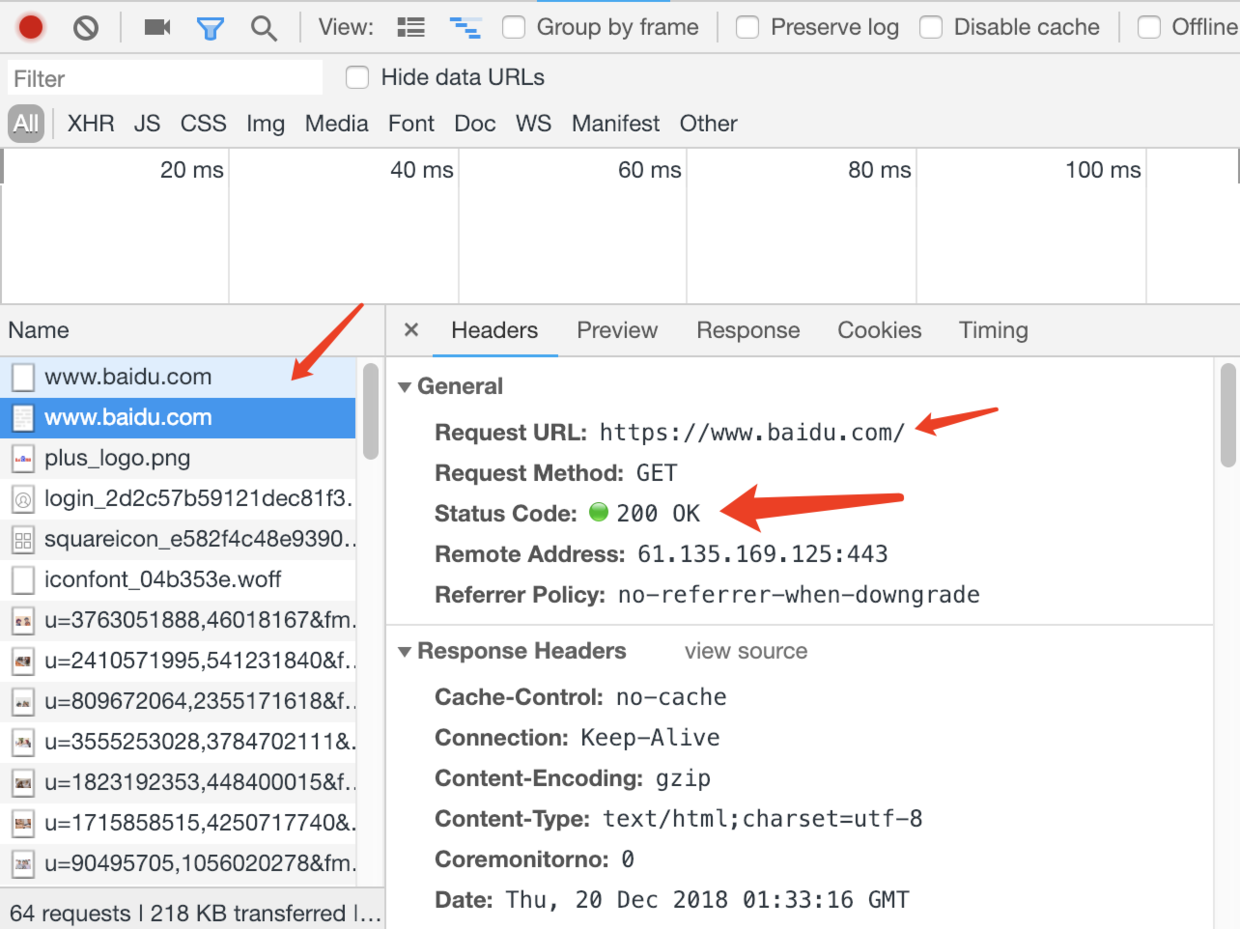
3.2 在開發者模式中看到訪問了兩次www.baidu.com
第一次 則status code 為307 即表示是重定向,而且在返回的response Headers中Location欄位中是重定向的地址,即真正的百度的地址。
第二次 則status code 為200 ,真正的網路請求,如下圖所示:
看到上面重定向以後,再來看看okhttp是如何進行處理這種重定向的請求
4、okhttp是如何實現重定向功能
知道了重定向返回的status code 為307,來研究okhttp是怎麼實現,注意重定向並不會發生異常,而是執行如下方法 followUpRequest()判斷是否要重新進行網路請求。
  try {
        followUp = followUpRequest(response, streamAllocation.route());
  } catch (IOException e) {
        streamAllocation.release();
        throw e;
  }
既然這裡執行了followUpRequest(),那看看followUpRequest中的具體實現吧(偽核心程式碼)
  private Request followUpRequest(Response userResponse, Route route) throws IOException {
    if (userResponse == null) throw new IllegalStateException();
    int responseCode = userResponse.code();

    final String method = userResponse.request().method();
    switch (responseCode) {
     //... 省略部分程式碼...
      case HTTP_PERM_REDIRECT:
      case HTTP_TEMP_REDIRECT:
        if (!method.equals("GET") && !method.equals("HEAD")) {
          return null;
        }
      case HTTP_MULT_CHOICE:
      case HTTP_MOVED_PERM:
      case HTTP_MOVED_TEMP:
      case HTTP_SEE_OTHER:
        if (!client.followRedirects()) return null;

        String location = userResponse.header("Location");
        if (location == null) return null;
        HttpUrl url = userResponse.request().url().resolve(location);

        boolean sameScheme = url.scheme().equals(userResponse.request().url().scheme());
        Request.Builder requestBuilder = userResponse.request().newBuilder();
        if (HttpMethod.permitsRequestBody(method)) {
          final boolean maintainBody = HttpMethod.redirectsWithBody(method);
          if (HttpMethod.redirectsToGet(method)) {
            requestBuilder.method("GET", null);
          } else {
            RequestBody requestBody = maintainBody ? userResponse.request().body() : null;
            requestBuilder.method(method, requestBody);
          }
          if (!maintainBody) {
            requestBuilder.removeHeader("Transfer-Encoding");
            requestBuilder.removeHeader("Content-Length");
            requestBuilder.removeHeader("Content-Type");
          }

        return requestBuilder.url(url).build();

      default:
        return null;
    }
  }
該方法會取到狀態碼,然後進行switch判斷,當status code為307即HTTP_TEMP_REDIRECT時,okhttp會從相應體中,獲取Location值(重定向地址)從原始碼中可以看出,還有好多種狀態碼的判斷。這裡只介紹重定向307的情況:
String location = userResponse.header("Location");
然後重新建立和拼接請求新的Request, 即:
HttpUrl url = userResponse.request().url().resolve(location);
然後將原請求的相關Header資訊進行拼裝,最後建立一個新的Request返回回去,即:
 HttpUrl url = userResponse.request().url().resolve(location);
 Request.Builder requestBuilder = userResponse.request().newBuilder();
 requestBuilder.url(url).build();
重新將拼接好的request物件,重新進行網路請求。即:
while(true) {
 response = realChain.proceed(request, streamAllocation, null, null);
}
知道請求網路正常或者有特殊的異常的時候,結束掉本次網路請求。
到這裡,RetryAndFollowUpInterceptor的核心程式碼就分析完了,相信你也有一定的收穫吧!期待你的喜歡哦 _


