springboot 整合redis 以及redis的簡單使用
阿新 • • 發佈:2018-12-21
redis是一種支援Key-Value等多種資料結構的儲存系統,用於快取還是很方便的, springboot整合redis 也很簡單。
首先 在 pom檔案裡面 加入redis的相關依賴 :
<!-- Redis客戶端 -->
<dependency>
<groupId>redis.clients</groupId>
<artifactId>jedis</artifactId>
<version>2.9.0</version>
</dependency>
<dependency>
<groupId>org.springframework.boot</groupId>
<artifactId>spring-boot-starter-redis</artifactId>
</dependency>
<dependency>
<groupId>org.springframework.data</groupId>
<artifactId>spring-data-redis</artifactId>
<version>1.8.4.RELEASE</version>
</dependency>
第二步:在application.properties裡面 加入redis相關配置
# REDIS (RedisProperties)
# Redis資料庫索引(預設為0)
spring.redis.database=0
# Redis伺服器地址
spring.redis.host=127.0.0.1
# Redis伺服器連線埠
spring.redis.port=6379
# Redis伺服器連線密碼(預設為空)
spring.redis.password=
# 連線池最大連線數(使用負值表示沒有限制)spring.redis.pool.max-active=8
# 連線池最大阻塞等待時間(使用負值表示沒有限制)
spring.redis.pool.max-wait=-1
# 連線池中的最大空閒連線
spring.redis.pool.max-idle=8
# 連線池中的最小空閒連線
spring.redis.pool.min-idle=0
# 連線超時時間(毫秒)
spring.redis.timeout=0
這樣redis的配置就弄好了
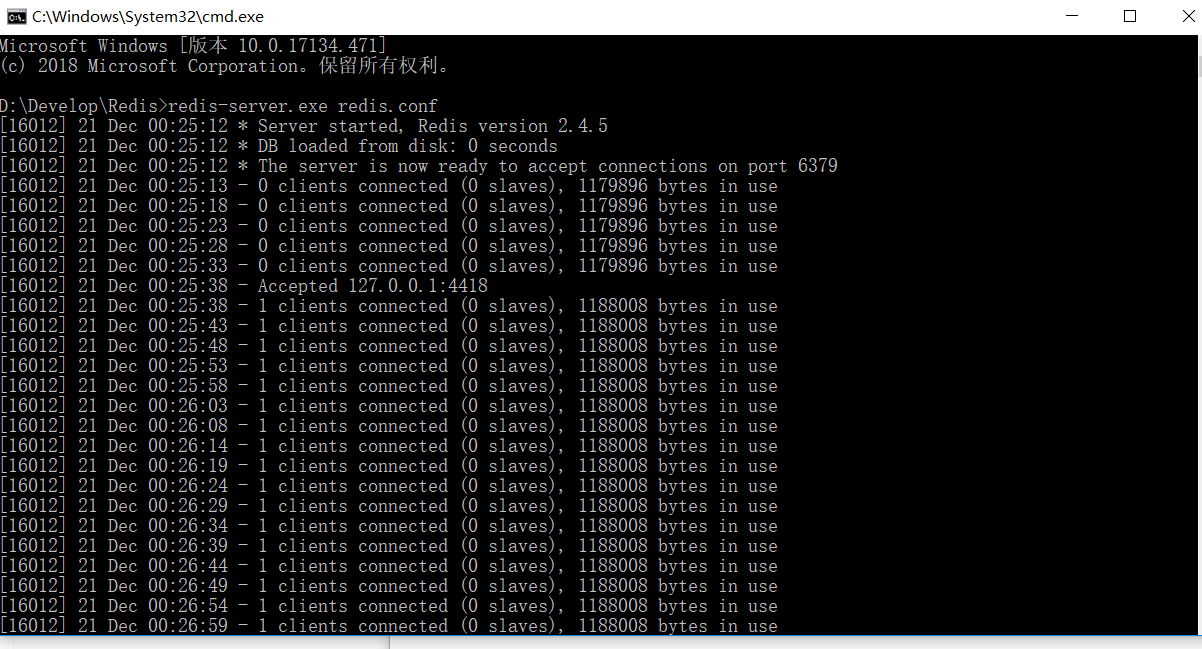
在本地安裝好redis, 在redis安裝目錄路徑下 cmd 視窗 執行命令 redis-server.exe redis.conf 啟動redis 監聽服務

再一次 cmd 執行命令 redis-cli.exe -h 127.0.0.1 -p 6379 啟動本機redis

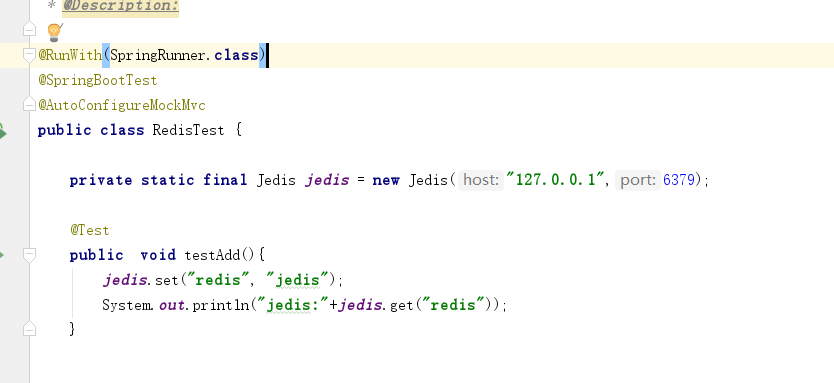
這樣redis就啟動好了,下面寫些簡單程式碼來對redis進行測試
在idea 新增測試類

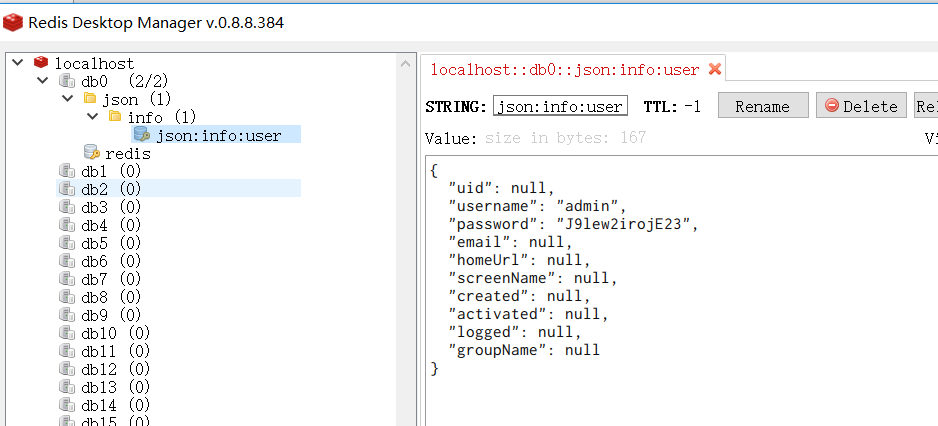
執行結果 可以直接在 Redis Desktop Manager上 直觀的檢視

這樣key 為redis ,值為jedis的 鍵值對 就成功的 儲存在了redis中。
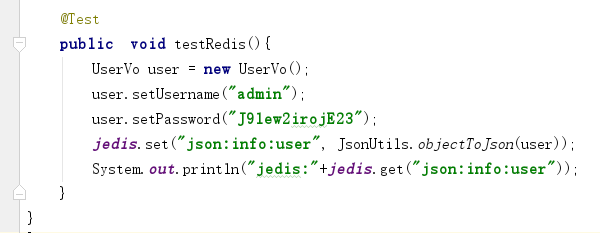
再寫一個儲存物件的測試

將物件轉換成json儲存在redis更加方便

以上就是對redis的簡單使用了,具體還要多寫程式碼 ,多學習使用
