
部署MFS檔案系統
MFS
MooseFS是一個具有容錯性的網路分散式檔案系統。它把資料分散存放在多個物理伺服器上,而呈現給使用者的則是一個統一的資源。
MFS的讀資料過程:
client當需要一個數據時,首先向master server發起查詢請求;
管理伺服器檢索自己的資料,獲取到資料所在的可用資料伺服器位置ip|port|chunkid;
管理伺服器將資料伺服器的地址傳送給客戶端;
客戶端向具體的資料伺服器發起資料獲取請求;
資料伺服器將資料傳送給客戶端;
MFS的寫資料過程:
MFS的寫資料過程:
當客戶端有資料寫需求時,首先向管理伺服器提供檔案元資料資訊請求儲存地址(元資料資訊如:檔名|大小|份數等);
管理伺服器根據寫檔案的元資料資訊,到資料伺服器建立新的資料塊;
資料伺服器返回建立成功的訊息;
管理伺服器將資料伺服器的地址返回給客戶端(chunkIP|port|chunkid);
客戶端向資料伺服器寫資料;
資料伺服器返回給客戶端寫成功的訊息;
客戶端將此次寫完成結束訊號和一些資訊傳送到管理伺服器來更新檔案的長度和最後修改時間
MFS的刪除檔案過程:
客戶端有刪除操作時,首先向Master傳送刪除資訊;
Master定位到相應元資料資訊進行刪除,並將chunk server上塊的刪除操作加入佇列非同步清理;
響應客戶端刪除成功的訊號
MFS修改檔案內容的過程:
客戶端有修改檔案內容時,首先向Master傳送操作資訊;
Master申請新的塊給.swp檔案,
客戶端關閉檔案後,會向Master傳送關閉資訊;
Master會檢測內容是否有更新,若有,則申請新的塊存放更改後的檔案,刪除原有塊和.swp檔案塊;
若無,則直接刪除.swp檔案塊。
MFS重新命名檔案的過程:
客戶端重新命名檔案時,會向Master傳送操作資訊;
Master直接修改元資料資訊中的檔名;返回重新命名完成資訊;
實驗環境:
| 主機 | ip |
|---|---|
| server1 | 172.25.254.1 |
| server2 | 172.25.254.2 |
| server3 | 172.25.254.3 |
配置MFS檔案系統:
server1:
[1].在server1安裝master和web圖形介面
[[email protected] ~]# yum install -y moosefs-cgi-3.0.97-1.rhsysv.x86_64.rpm
moosefs-cgiserv-3.0.97-1.rhsysv.x86_64.rpm moosefs-master-3.0.97-1.rhsysv.x86_64.rpm
[2].主節點解析
[[email protected] ~]# vim /etc/hosts
172.25.254.1     server1     mfsmaster    # 表明server1是master的身份 master上是儲存的元資料
172.25.254.2     server2
172.25.254.3     server3
[3].開啟服務
[[email protected] ~]# /etc/init.d/moosefs-master start
[[email protected] ~# netstat -antlp    ##9419 9420 9421埠

[4].開啟圖形處理工具
[[email protected] ~]# /etc/init.d/moosefs-cgiserv start ## 9425埠開啟

server2和server3:
[1].安裝MFS的客戶端軟體:
[[email protected] ~]# yum install -y moosefs-chunkserver-3.0.97-1.rhsysv.x86_64.rpm
[[email protected] ~]# yum install -y moosefs-chunkserver-3.0.97-1.rhsysv.x86_64.rpm
[2].加server1解析
[[email protected] ~]# vim /etc/hosts
  172.25.254.1      server1 mfsmaster
[[email protected] ~]# vim /etc/hosts
  172.25.254.1      server1 mfsmaster
[3].掛載並開啟服務
[[email protected] mfs]# mkdir /mnt/chunk1
[[email protected] mfs]# cd /mnt
[[email protected] mnt]# chown mfs.mfs chunk1/
[[email protected] mnt]# cd /etc/mfs/
[[email protected] mfs]# vim mfshdd.cfg
  /mnt/chunk1    ##最後一行寫入掛載點
[[email protected] mfs]# /etc/init.d/moosefs-chunkserver start
[[email protected] ~]# mkdir /mnt/chunk2
[[email protected] ~]# cd /mnt
[[email protected] ~]# chown mfs.mfs /mnt/chunk2    修改該掛載目錄的所有人和所有組,這樣才可以在目錄中進行讀寫操作
[[email protected] ~]# vim /etc/mfs/mfshdd.cfg
  /mnt/chunk2    ##最後一行寫入掛載點
[[email protected] ~]# /etc/init.d/moosefs-chunkserver start
物理主機:
[1].安裝客戶端軟體:
[[email protected] ~]# yum install moosefs-client-3.0.97-1.rhsystemd.x86_64.rpm
[[email protected] ~]# rpm -qa | grep moosefs
moosefs-client-3.0.97-1.rhsystemd.x86_64    ## 顯示已經安裝
[2].加入server1的解析
作用:是確定server1的master位置,而且客戶端在訪問其中的資料時候,是先來master端取得儲存資料得元資料,再去server2或server3上取資料
[[email protected] ~]# vim /etc/hosts
172.25.245.1 server1 mfsmaster
[3].建立在真機掛載資料的目錄並編輯配置檔案
[[email protected] mfs]# mkdir /mnt/mfs
[[email protected] mfs]# cd /etc/mfs
[[email protected] mfs]# vim mfsmount.cfg
       /mnt/mfs
[4].客戶端掛載檔案系統
[[email protected] mfs]# mfsmount 掛載
[[email protected] mfs]# df 檢視是否掛載上
[[email protected] mfs]# cd /mnt/mfs/
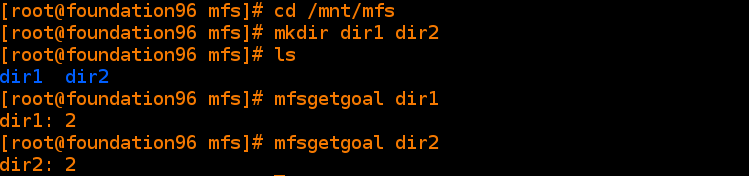
[[email protected] mfs]# mkdir dir1 dir2 在該目錄下建立目錄
[[email protected] mfs]# mfsgetgoal dir1/ 檢視該目錄中的檔案儲存的份數
[[email protected] mfs]# mfsgetgoal dir2/

[5]. 修改dir1的檔案備份份數為1
[[email protected] mfs]#  mfssetgoal -r 1 dir1    修改dir1的檔案備份份數為1
dir1:
 inodes with goal changed:                       1
[[email protected] mfs]#  mfsgetgoal dir1
dir1: 1
[[email protected] mfs]#  mfsgetgoal dir2
dir2: 2
[[email protected] mfs]# cd dir1
[[email protected] dir1]# cp /etc/passwd .    ## passwd 移動到dir1
[[email protected] dir1]# mfsfileinfo passwd
passwd:
	chunk 0: 0000000000000001_00000001 / (id:1 ver:1)
		copy 1: 172.25.254.3:9422 (status:VALID)
[[email protected] dir1]# cd ..
[[email protected] mfs]# cd dir2
[[email protected] dir2]# cp /etc/fstab .       ## fstab 移動到dir2
[[email protected] dir2]# mfsfileinfo fstab
fstab:
	chunk 0: 0000000000000002_00000001 / (id:2 ver:1)
		copy 1: 172.25.254.2:9422 (status:VALID)
		copy 2: 172.25.254.3:9422 (status:VALID)

在瀏覽器中檢視:172.25.245.1:9425


[6]. 刪除dir1中的檔案passwd,之後恢復passwd
[[email protected] ~]# cd /mnt/mfs/dir1
[[email protected] dir1]# dd if=/dev/zero of=bigfile bs=1M count=100
記錄了100+0 的讀入
記錄了100+0 的寫出
104857600位元組(105 MB)已複製,0.171047 秒,613 MB/秒
[[email protected] dir1]# mfsfileinfo bigfile
bigfile:
	chunk 0: 0000000000000003_00000001 / (id:3 ver:1)
		copy 1: 172.25.254.2:9422 (status:VALID)
	chunk 1: 0000000000000004_00000001 / (id:4 ver:1)
		copy 1: 172.25.254.3:9422 (status:VALID)
[[email protected] dir1]# mfsgettrashtime passwd
passwd: 86400
[[email protected] dir1]# rm -f passwd

恢復:
[[email protected] dir1]# cd /mnt
[[email protected] mnt]# mkdir mfsmeta   在/mnt下建立目錄mfsmeta
[[email protected] mnt]# mfsmount -m /mnt/mfsmeta
mfsmaster accepted connection with parameters: read-write,restricted_ip
[[email protected] mnt]# mount
sysfs on /sys type sysfs (rw,nosuid,nodev,noexec,relatime,seclabel)
proc on /proc type proc (rw,nosuid,nodev,noexec,relatime)

[[email protected] mnt]# cd mfsmeta/
[[email protected] mfsmeta]# ls
sustained  trash
[[email protected] mfsmeta]# cd trash/
[[email protected] trash]# find -name *passwd*
./004/00000004|dir1|passwd
[[email protected] trash]# cd ./004/
[[email protected] 004]# ls
00000004|dir1|passwd  undel
[[email protected] 004]# mv 00000004\|dir1\|passwd  undel
[[email protected] 004]# cd /mnt/mfs/dir1/
[[email protected] dir1]# ls
bigfile  passwd


自動恢復moosefs-master異常
在不正常情況下關閉moosefs-master
[[email protected] ~]# ps ax
[[email protected] ~]# kill -9  1154    #結束程序
[[email protected] ~]# /etc/init.d/moosefs-master start
[[email protected] ~]# vim /etc/init.d/moosefs-master
31 $prog start >/dev/null 2>&1 || $prog -a >/dev/null 2>&1 && success
 #異常關閉moosefs-master時,指令碼會自動恢復正常並且開啟master
 [[email protected] ~]# /etc/init.d/moosefs-master start
Starting mfsmaster:

