
ActiveMQ介紹和整合Spring使用
ActiveMQ介紹和整合Spring使用
一、什麼是ActiveMQ
ActiveMQ 是Apache出品,最流行的,能力強勁的開源訊息匯流排。ActiveMQ 是一個完全支援JMS1.1和J2EE 1.4規範的 JMS Provider實現,儘管JMS規範出臺已經是很久的事情了,但是JMS在當今的J2EE應用中間仍然扮演著特殊的地位。
主要特點:
- 多種語言和協議編寫客戶端。語言: Java, C, C++, C#, Ruby, Perl, Python, PHP。應用協議: OpenWire,Stomp REST,WS Notification,XMPP,AMQP
- 完全支援JMS1.1和J2EE 1.4規範 (持久化,XA訊息,事務)
- 對Spring的支援,ActiveMQ可以很容易內嵌到使用Spring的系統裡面去,而且也支援Spring2.0的特性
- 通過了常見J2EE伺服器(如 Geronimo,JBoss 4, GlassFish,WebLogic)的測試,其中通過JCA 1.5 resource adaptors的配置,可以讓ActiveMQ可以自動的部署到任何相容J2EE 1.4 商業伺服器上
- 支援多種傳送協議:in-VM,TCP,SSL,NIO,UDP,JGroups,JXTA
- 支援通過JDBC和journal提供高速的訊息持久化
- 從設計上保證了高效能的叢集,客戶端-伺服器,點對點
- 支援Ajax
- 支援與Axis的整合
- 可以很容易得呼叫內嵌JMS provider,進行測試
二、ActiveMQ的訊息形式
對於訊息的傳遞有兩種型別:
一種是點對點的,即一個生產者和一個消費者一一對應;
另一種是釋出/訂閱模式,即一個生產者產生訊息並進行傳送後,可以由多個消費者進行接收。
JMS定義了五種不同的訊息正文格式,以及呼叫的訊息型別,允許你傳送並接收以一些不同形式的資料,提供現有訊息格式的一些級別的相容性。
• StreamMessage – Java原始值的資料流
• MapMessage–一套名稱-值對
• TextMessage–一個字串物件
• ObjectMessage–一個序列化的 Java物件
• BytesMessage–一個位元組的資料流
三、ActiveMQ的安裝

安裝環境:
1、需要jdk
2、安裝Linux系統。生產環境都是Linux系統。
安裝步驟
第一步: 把ActiveMQ 的壓縮包上傳到Linux系統。
第二步:解壓縮。
第三步:啟動。
使用bin目錄下的activemq命令啟動:
[[email protected] bin]# ./activemq start
關閉:
[[email protected] bin]# ./activemq stop
檢視狀態:
[[email protected] bin]# ./activemq status
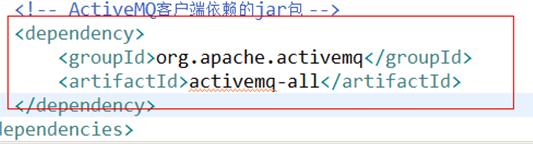
注意:如果ActiveMQ整合spring使用不要使用activemq-all-5.12.0.jar包。建議使用5.11.2
進入管理後臺:
http://192.168.25.168:8161/admin
使用者名稱:admin
密碼:admin

四、ActiveMQ的使用方法

五、Queue
(1)Producer
生產者:生產訊息,傳送端。
把jar包新增到工程中。使用5.11.2版本的jar包。
第一步:建立ConnectionFactory物件,需要指定服務端ip及埠號。
第二步:使用ConnectionFactory物件建立一個Connection物件。
第三步:開啟連線,呼叫Connection物件的start方法。
第四步:使用Connection物件建立一個Session物件。
第五步:使用Session物件建立一個Destination物件(topic、queue),此處建立一個Queue物件。
第六步:使用Session物件建立一個Producer物件。
第七步:建立一個Message物件,建立一個TextMessage物件。
第八步:使用Producer物件傳送訊息。
第九步:關閉資源。
@Test
	public void testQueueProducer() throws Exception {
		// 第一步:建立ConnectionFactory物件,需要指定服務端ip及埠號。
		//brokerURL伺服器的ip及埠號
		ConnectionFactory connectionFactory = new ActiveMQConnectionFactory("tcp://192.168.25.168:61616");
		// 第二步:使用ConnectionFactory物件建立一個Connection物件。
		Connection connection = connectionFactory.createConnection();
		// 第三步:開啟連線,呼叫Connection物件的start方法。
		connection.start();
		// 第四步:使用Connection物件建立一個Session物件。
		//第一個引數:是否開啟事務。true:開啟事務,第二個引數忽略。
		//第二個引數:當第一個引數為false時,才有意義。訊息的應答模式。1、自動應答2、手動應答。一般是自動應答。
		Session session = connection.createSession(false, Session.AUTO_ACKNOWLEDGE);
		// 第五步:使用Session物件建立一個Destination物件(topic、queue),此處建立一個Queue物件。
		//引數:佇列的名稱。
		Queue queue = session.createQueue("test-queue");
		// 第六步:使用Session物件建立一個Producer物件。
		MessageProducer producer = session.createProducer(queue);
		// 第七步:建立一個Message物件,建立一個TextMessage物件。
		/*TextMessage message = new ActiveMQTextMessage();
		message.setText("hello activeMq,this is my first test.");*/
		TextMessage textMessage = session.createTextMessage("hello activeMq,this is my first test.");
		// 第八步:使用Producer物件傳送訊息。
		producer.send(textMessage);
		// 第九步:關閉資源。
		producer.close();
		session.close();
		connection.close();
	}
(2)Consumer
消費者:接收訊息。
第一步:建立一個ConnectionFactory物件。
第二步:從ConnectionFactory物件中獲得一個Connection物件。
第三步:開啟連線。呼叫Connection物件的start方法。
第四步:使用Connection物件建立一個Session物件。
第五步:使用Session物件建立一個Destination物件。和傳送端保持一致queue,並且佇列的名稱一致。
第六步:使用Session物件建立一個Consumer物件。
第七步:接收訊息。
第八步:列印訊息。
第九步:關閉資源
@Test
	public void testQueueConsumer() throws Exception {
		// 第一步:建立一個ConnectionFactory物件。
		ConnectionFactory connectionFactory = new ActiveMQConnectionFactory("tcp://192.168.25.168:61616");
		// 第二步:從ConnectionFactory物件中獲得一個Connection物件。
		Connection connection = connectionFactory.createConnection();
		// 第三步:開啟連線。呼叫Connection物件的start方法。
		connection.start();
		// 第四步:使用Connection物件建立一個Session物件。
		Session session = connection.createSession(false, Session.AUTO_ACKNOWLEDGE);
		// 第五步:使用Session物件建立一個Destination物件。和傳送端保持一致queue,並且佇列的名稱一致。
		Queue queue = session.createQueue("test-queue");
		// 第六步:使用Session物件建立一個Consumer物件。
		MessageConsumer consumer = session.createConsumer(queue);
		// 第七步:接收訊息。
		consumer.setMessageListener(new MessageListener() {

			@Override
			public void onMessage(Message message) {
				try {
					TextMessage textMessage = (TextMessage) message;
					String text = null;
					//取訊息的內容
					text = textMessage.getText();
					// 第八步:列印訊息。
					System.out.println(text);
				} catch (JMSException e) {
					e.printStackTrace();
				}
			}
		});
		//等待鍵盤輸入
		System.in.read();
		// 第九步:關閉資源
		consumer.close();
		session.close();
		connection.close();
	}
五、Topic
(1)Producer
使用步驟:
第一步:建立ConnectionFactory物件,需要指定服務端ip及埠號。
第二步:使用ConnectionFactory物件建立一個Connection物件。
第三步:開啟連線,呼叫Connection物件的start方法。
第四步:使用Connection物件建立一個Session物件。
第五步:使用Session物件建立一個Destination物件(topic、queue),此處建立一個Topic物件。
第六步:使用Session物件建立一個Producer物件。
第七步:建立一個Message物件,建立一個TextMessage物件。
第八步:使用Producer物件傳送訊息。
第九步:關閉資源。
@Test
	public void testTopicProducer() throws Exception {
		// 第一步:建立ConnectionFactory物件,需要指定服務端ip及埠號。
		// brokerURL伺服器的ip及埠號
		ConnectionFactory connectionFactory = new ActiveMQConnectionFactory("tcp://192.168.25.168:61616");
		// 第二步:使用ConnectionFactory物件建立一個Connection物件。
		Connection connection = connectionFactory.createConnection();
		// 第三步:開啟連線,呼叫Connection物件的start方法。
		connection.start();
		// 第四步:使用Connection物件建立一個Session物件。
		// 第一個引數:是否開啟事務。true:開啟事務,第二個引數忽略。
		// 第二個引數:當第一個引數為false時,才有意義。訊息的應答模式。1、自動應答2、手動應答。一般是自動應答。
		Session session = connection.createSession(false, Session.AUTO_ACKNOWLEDGE);
		// 第五步:使用Session物件建立一個Destination物件(topic、queue),此處建立一個topic物件。
		// 引數:話題的名稱。
		Topic topic = session.createTopic("test-topic");
		// 第六步:使用Session物件建立一個Producer物件。
		MessageProducer producer = session.createProducer(topic);
		// 第七步:建立一個Message物件,建立一個TextMessage物件。
		/*
		 * TextMessage message = new ActiveMQTextMessage(); message.setText(
		 * "hello activeMq,this is my first test.");
		 */
		TextMessage textMessage = session.createTextMessage("hello activeMq,this is my topic test");
		// 第八步:使用Producer物件傳送訊息。
		producer.send(textMessage);
		// 第九步:關閉資源。
		producer.close();
		session.close();
		connection.close();
	}
(2)Consumer
消費者:接收訊息。
第一步:建立一個ConnectionFactory物件。
第二步:從ConnectionFactory物件中獲得一個Connection物件。
第三步:開啟連線。呼叫Connection物件的start方法。
第四步:使用Connection物件建立一個Session物件。
第五步:使用Session物件建立一個Destination物件。和傳送端保持一致topic,並且話題的名稱一致。
第六步:使用Session物件建立一個Consumer物件。
第七步:接收訊息。
第八步:列印訊息。
第九步:關閉資源
@Test
	public void testTopicConsumer() throws Exception {
		// 第一步:建立一個ConnectionFactory物件。
		ConnectionFactory connectionFactory = new ActiveMQConnectionFactory("tcp://192.168.25.168:61616");
		// 第二步:從ConnectionFactory物件中獲得一個Connection物件。
		Connection connection = connectionFactory.createConnection();
		// 第三步:開啟連線。呼叫Connection物件的start方法。
		connection.start();
		// 第四步:使用Connection物件建立一個Session物件。
		Session session = connection.createSession(false, Session.AUTO_ACKNOWLEDGE);
		// 第五步:使用Session物件建立一個Destination物件。和傳送端保持一致topic,並且話題的名稱一致。
		Topic topic = session.createTopic("test-topic");
		// 第六步:使用Session物件建立一個Consumer物件。
		MessageConsumer consumer = session.createConsumer(topic);
		// 第七步:接收訊息。
		consumer.setMessageListener(new MessageListener() {

			@Override
			public void onMessage(Message message) {
				try {
					TextMessage textMessage = (TextMessage) message;
					String text = null;
					// 取訊息的內容
					text = textMessage.getText();
					// 第八步:列印訊息。
					System.out.println(text);
				} catch (JMSException e) {
					e.printStackTrace();
				}
			}
		});
		System.out.println("topic的消費端03。。。。。");
		// 等待鍵盤輸入
		System.in.read();
		// 第九步:關閉資源
		consumer.close();
		session.close();
		connection.close();
	}
六、Activemq整合spring
使用方法
第一步:引用相關的jar包。
<dependency>
			<groupId>org.springframework</groupId>
			<artifactId>spring-jms</artifactId>
		</dependency>
		<dependency>
			<groupId>org.springframework</groupId>
			<artifactId>spring-context-support</artifactId>
		</dependency>
第二步:配置Activemq整合spring。配置ConnectionFactory
<?xml version="1.0" encoding="UTF-8"?>
<beans xmlns="http://www.springframework.org/schema/beans"
	xmlns:context="http://www.springframework.org/schema/context" xmlns:p="http://www.springframework.org/schema/p"
	xmlns:aop="http://www.springframework.org/schema/aop" xmlns:tx="http://www.springframework.org/schema/tx"
xmlns:xsi="http://www.w3.org/2001/XMLSchema-instance"
	xsi:schemaLocation="http://www.springframework.org/schema/beans http://www.springframework.org/schema/beans/spring-beans-4.2.xsd
	http://www.springframework.org/schema/context http://www.springframework.org/schema/context/spring-context-4.2.xsd
	http://www.springframework.org/schema/aop http://www.springframework.org/schema/aop/spring-aop-4.2.xsd
	http://www.springframework.org/schema/tx http://www.springframework.org/schema/tx/spring-tx-4.2.xsd
	http://www.springframework.org/schema/util http://www.springframework.org/schema/util/spring-util-4.2.xsd">


	<!-- 真正可以產生Connection的ConnectionFactory,由對應的 JMS服務廠商提供 -->
	<bean id="targetConnectionFactory" class="org.apache.activemq.ActiveMQConnectionFactory">
		<property name="brokerURL" value="tcp://192.168.25.168:61616" />
	</bean>
	<!-- Spring用於管理真正的ConnectionFactory的ConnectionFactory -->
	<bean id="connectionFactory"
		class="org.springframework.jms.connection.SingleConnectionFactory">
		<!-- 目標ConnectionFactory對應真實的可以產生JMS Connection的ConnectionFactory -->
		<property name="targetConnectionFactory" ref="targetConnectionFactory" />
	</bean>
</beans>
第三步:配置生產者。
使用JMSTemplate物件。傳送訊息。
第四步:在spring容器中配置Destination。
<?xml version="1.0" encoding="UTF-8"?>
<beans xmlns="http://www.springframework.org/schema/beans"
	xmlns:context="http://www.springframework.org/schema/context" xmlns:p="http://www.springframework.org/schema/p"
	xmlns:aop="http://www.springframework.org/schema/aop" xmlns:tx="http://www.springframework.org/schema/tx"
	xmlns:xsi="http://www.w3.org/2001/XMLSchema-instance"
	xsi:schemaLocation="http://www.springframework.org/schema/beans http://www.springframework.org/schema/beans/spring-beans-4.2.xsd
	http://www.springframework.org/schema/context http://www.springframework.org/schema/context/spring-context-4.2.xsd
	http://www.springframework.org/schema/aop http://www.springframework.org/schema/aop/spring-aop-4.2.xsd http://www.springframework.org/schema/tx http://www.springframework.org/schema/tx/spring-tx-4.2.xsd
	http://www.springframework.org/schema/util http://www.springframework.org/schema/util/spring-util-4.2.xsd">

	<!-- 真正可以產生Connection的ConnectionFactory,由對應的 JMS服務廠商提供 -->
	<bean id="targetConnectionFactory" class="org.apache.activemq.ActiveMQConnectionFactory">
		<property name="brokerURL" value="tcp://192.168.25.168:61616" />
	</bean>
	<!-- Spring用於管理真正的ConnectionFactory的ConnectionFactory -->
	<bean id="connectionFactory"
		class="org.springframework.jms.connection.SingleConnectionFactory">
		<!-- 目標ConnectionFactory對應真實的可以產生JMS Connection的ConnectionFactory -->
		<property name="targetConnectionFactory" ref="targetConnectionFactory" />
	</bean>
	<!-- 配置生產者 -->
	<!-- Spring提供的JMS工具類,它可以進行訊息傳送、接收等 -->
	<bean id="jmsTemplate" class="org.springframework.jms.core.JmsTemplate">
		<!-- 這個connectionFactory對應的是我們定義的Spring提供的那個ConnectionFactory物件 -->
		<property name="connectionFactory" ref="connectionFactory" />
	</bean>
	<!--這個是佇列目的地,點對點的 -->
	<bean id="queueDestination" class="org.apache.activemq.command.ActiveMQQueue">
		<constructor-arg>
			<value>spring-queue</value>
		</constructor-arg>
	</bean>
	<!--這個是主題目的地,一對多的 -->
	<bean id="topicDestination" class="org.apache.activemq.command.ActiveMQTopic">
		<constructor-arg value="topic" />
	</bean>
</beans>
第五步:程式碼測試
@Test
	public void testSpringActiveMq() throws Exception {
		//初始化spring容器
		ApplicationContext applicationContext = new ClassPathXmlApplicationContext("classpath:spring/applicationContext-activemq.xml");
		//從spring容器中獲得JmsTemplate物件
		JmsTemplate jmsTemplate = applicationContext.getBean(JmsTemplate.class);
		//從spring容器中取Destination物件
		Destination destination = (Destination) applicationContext.getBean("queueDestination");
		//使用JmsTemplate物件傳送訊息。
		jmsTemplate.send(destination, new MessageCreator() {

			@Override
			public Message createMessage(Session session) throws JMSException {
				//建立一個訊息物件並返回
				TextMessage textMessage = session.createTextMessage("spring activemq queue message");
				return textMessage;
			}
		});
	}
第六步:程式碼測試
傳送訊息
第一步:初始化一個spring容器
第二步:從容器中獲得JMSTemplate物件。
第三步:從容器中獲得一個Destination物件
第四步:使用JMSTemplate物件傳送訊息,需要知道Destination
@Test
	public void testQueueProducer() throws Exception {
		// 第一步:初始化一個spring容器
		ApplicationContext applicationContext = new ClassPathXmlApplicationContext("classpath:spring/applicationContext-activemq.xml");
		// 第二步:從容器中獲得JMSTemplate物件。
		JmsTemplate jmsTemplate = applicationContext.getBean(JmsTemplate.class);
		// 第三步:從容器中獲得一個Destination物件
		Queue queue = (Queue) applicationContext.getBean("queueDestination");
		// 第四步:使用JMSTemplate物件傳送訊息,需要知道Destination
		jmsTemplate.send(queue, new MessageCreator() {

			@Override
			public Message createMessage(Session session) throws JMSException {
				TextMessage textMessage = session.createTextMessage("spring activemq test");
				return textMessage;
			}
		});
	}
接收訊息
e3-search-Service中接收訊息。
第一步:把Activemq相關的jar包新增到工程中
第二步:建立一個MessageListener的實現類。
public class MyMessageListener implements MessageListener {

	@Override
	public void onMessage(Message message) {

		try {
			TextMessage textMessage = (TextMessage) message;
			//取訊息內容
			String text = textMessage.getText();
			System.out.println(text);
		} catch (JMSException e) {
			e.printStackTrace();
		}
	}

}
第三步:配置spring和Activemq整合。
<?xml version="1.0" encoding="UTF-8"?>
<beans xmlns="http://www.springframework.org/schema/beans"
	xmlns:context="http://www.springframework.org/schema/context" xmlns:p="http://www.springframework.org/schema/p"
	xmlns:aop="http://www.springframework.org/schema/aop" xmlns:tx="http://www.springframework.org/schema/tx"
	xmlns:xsi="http://www.w3.org/2001/XMLSchema-instance"
	xsi:schemaLocation="http://www.springframework.org/schema/beans http://www.springframework.org/schema/beans/spring-beans-4.2.xsd
	http://www.springframework.org/schema/context http://www.springframework.org/schema/context/spring-context-4.2.xsd
	http://www.springframework.org/schema/aop http://www.springframework.org/schema/aop/spring-aop-4.2.xsd http://www.springframework.org/schema/tx http://www.springframework.org/schema/tx/spring-tx-4.2.xsd
	http://www.springframework.org/schema/util http://www.springframework.org/schema/util/spring-util-4.2.xsd">

	<!-- 真正可以產生Connection的ConnectionFactory,由對應的 JMS服務廠商提供 -->
	<bean id="targetConnectionFactory" class="org.apache.activemq.ActiveMQConnectionFactory">
		<property name="brokerURL" value="tcp://192.168.25.168:61616" />
	</bean>
	<!-- Spring用於管理真正的ConnectionFactory的ConnectionFactory -->
	<bean id="connectionFactory"
		class="org.springframework.jms.connection.SingleConnectionFactory">
		<!-- 目標ConnectionFactory對應真實的可以產生JMS Connection的ConnectionFactory -->
		<property name="targetConnectionFactory" ref="targetConnectionFactory" />
	</bean>
	<!--這個是佇列目的地,點對點的 -->
	<bean id="queueDestination" class="org.apache.activemq.command.ActiveMQQueue">
		<constructor-arg>
			<value>spring-queue</value>
		</constructor-arg>
	</bean>
	<!--這個是主題目的地,一對多的 -->
	<bean id="topicDestination" class="org.apache.activemq.command.ActiveMQTopic">
		<constructor-arg value="topic" />
	</bean>
	<!-- 接收訊息 -->
	<!-- 配置監聽器 -->
	<bean id="myMessageListener" class="cn.e3mall.search.listener.MyMessageListener" />
	<!-- 訊息監聽容器 -->
	<bean class="org.springframework.jms.listener.DefaultMessageListenerContainer">
		<property name="connectionFactory" ref="connectionFactory" />
		<property name="destination" ref="queueDestination" />
		<property name="messageListener" ref="myMessageListener" />
	</bean>
</beans>
第四步:測試程式碼。
@Test
	public void testQueueConsumer() throws Exception {
		//初始化spring容器
		ApplicationContext applicationContext = new ClassPathXmlApplicationContext("classpath:spring/applicationContext-activemq.xml");
		//等待
		System.in.read();
	}