【XCode - OC】之UI基礎2
阿新 • • 發佈:2018-12-25
UILable
#在Mystoryboard中

預設只放文字 ,另一個attributed 可以放文字圖片等

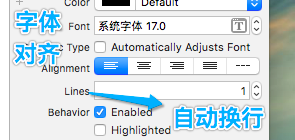
Lines=0 預設自動換行
Lines=1 只排成一行
Lines=2 排成兩行
。。。

clip 就不顯示後面的東西了,除非拖大label

shadow是字的陰影,目的是使字有立體效果
width是左右移陰影,height是上下移動陰影,有正有負
#純程式碼實現
//1.1 建立UILabel
UILabel *label = [[UILabel alloc] init];
//1.2 給Label設定位置和尺寸
label.frame = CGRectMake(100, 200, 120, 360);
//1.3 給Label加文字 背景顏色
label.text = @"我超級無敵聰明,IQ爆表。當然這是不可能的";
label.textColor = [UIColor whiteColor];
label.backgroundColor = [UIColor blueColor];
//1.4 給Label設定陰影
label.shadowColor = [UIColor blackColor];
label.shadowOffset = CGSizeMake(-6.18, 6.18);
//1.5 自動換行
label.numberOfLines = 0;
//1.6 對齊方式
label.textAlignment = NSTextAlignmentCenter;
//1.7 設定字型大小 (有預設system預設格式 加粗 和斜體三種字型模式)
label.font = [UIFont boldSystemFontOfSize:20.f];
//2.0 把Label顯示到view上
[self.view addSubview:label];
myboard中

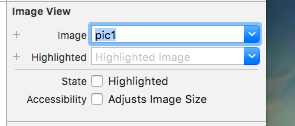
先插入圖片,在這邊寫插入的圖名字,按回車,圖片自己就進UIImageView中去了。
###常用的Content Mode
- 預設的Scale To Fill
壓縮比例填充,圖片會壓縮 扭曲

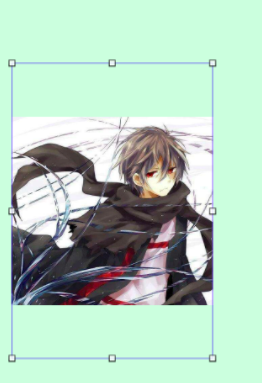
- Aspect Fit
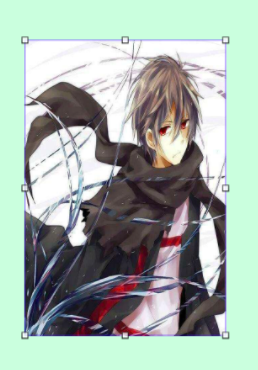
在框中保持縱橫比,不會扭曲圖,但是圖片大小會適應框子

- Aspect Fill
可以跳出框子,把原圖顯示出來

- 其他mode
不常用,且理解簡單,暫不歸納
純程式碼
升級版
    //1.0 建立UIImageView
UIImageView *imageView = [[UIImageView alloc] init];
//1.1 設定image尺寸和大小
//imageView.frame = CGRectMake(0, 0, self.view.frame.size.width, self.view.frame.size.height);
imageView.frame = self.view.bounds;
//1.2 插入圖片和背景色 (png格式圖片不需要字尾)
imageView.image = [UIImage imageNamed:@"pic1"];
//imageView.backgroundColor =[UIColor yellowColor];
//1.3 設定圖片的內容模式
//    UIViewContentModeRedraw,重新繪製

//    UIViewContentModeScaleToFill,帶scale的影象有可能被壓縮拉伸
//    UIViewContentModeScaleAspectFit,
//    UIViewContentModeScaleAspectFill,

//    UIViewContentModeCenter,不帶scale的影象不可能被壓縮拉伸
//    UIViewContentModeTop,
//    UIViewContentModeBottom,
//    UIViewContentModeLeft,
//    UIViewContentModeRight,
//    UIViewContentModeTopLeft,
//    UIViewContentModeTopRight,
//    UIViewContentModeBottomLeft,
//    UIViewContentModeBottomRight,
imageView.contentMode = UIViewContentModeScaleAspectFill;
//裁剪多餘的image
imageView.clipsToBounds =YES;
//2.0 設定毛玻璃效果
UIToolbar *toolbar = [[UIToolbar alloc] init];
//2.1 把toolbar罩在整幅圖上面
toolbar.frame = imageView.bounds;
//2.2 設定toolbar的顏色  就兩種,預設白色 還有黑色
//toolbar.barStyle =UIBarStyleBlack;
//2.3 設定toolbar的透明度
toolbar.alpha =0.618;
//2.4 把toolbar放在imageView上面
[imageView addSubview:toolbar];
//3.0 把UIImageView列印到view中
[self.view addSubview:imageView];
其他建立ImgView的方法
//建立ImgView的方法2
//UIImageView *imgView_2 = [[UIImageView alloc] initWithImage:[UIImage imageNamed:@"pic2"]];
//建立ImgView的方法3
UIImage *img2 = [UIImage imageNamed:@"pic2"];
UIImageView *imgView_3 = [[UIImageView alloc]initWithFrame:CGRectMake(0, 0, img2.size.width, img2.size.height)];
imgView_3.image =img2; //⭐️:沒有這個,就顯示不出來
imgView_3.center = CGPointMake(toolbar.frame.size.width*0.5, toolbar.frame.size.height*0.5);
imgView_3.contentMode = UIViewContentModeScaleAspectFill;
[toolbar addSubview:imgView_3];
載入圖片的兩種方式
- 通過imageNamed 來載入
- 通過imageWithContentsOfFile
1. 載入Assets.xcassets裡面的圖片
  1) 打包後變成Assets.car
  2)拿不到路徑
  3)自能通過ImagedNamed:載入圖片
  4)不能通過imageWithContentsOfFile來載入
  ---
2. 放到專案中的圖片
  1)可以拿到路徑
  2)能通過imageNamed:載入圖片
  3) 也能通過imageWithContentsOfFile來載入
//方式一 必須放在Assets.xcassets裡面
//imageView.image = [UIImage imageNamed:@"測試圖片2"];
//方式二
NSString *path = [[NSBundle mainBundle] pathForResource:@"測試圖片2" ofType:@"jpg"];
imageView.image =[UIImage imageWithContentsOfFile:path];

