
jQuery操作HTML元素
上一篇寫了jQuery的選擇器和過濾器,已經能夠選中元素了。接下來要做的是,操作元素,為了便於記憶,我按照查詢、增加、刪除、修改四種操作來寫,下面進入正題。
本節知識腦圖:

一、查詢元素操作
解釋一下:其實jQuery的選擇器就屬於查詢操作,這裡的查詢操作指的是遍歷。我們獲取到的 jQuery 物件是個集合,裡面可能包含很多個dom物件,往往需要將它們遍歷,進而再操作。
1.each(回撥函式)
<html>
<head>
  <script src="jquery.js"></script>
</head>
<body>
   <div>北京</div>
   <div>上海</div>
   <div>天津</div>
<script>
 $(document).ready(function(){
    $(document.body).click(function () {
      $("div").each(function (i) {
        if (this.style.color != "blue") {
          this.style.color = "blue";
        } else {
          this.style.color = "";
        }
      });
     });
    });
</script>
</body>
</html>
執行結果:(點一下變藍,再點一下變預設黑)
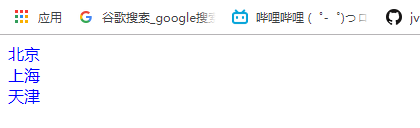
注意的是:$(“div”)集合中有三個元素,所以它呼叫each()函式執行裡面的回撥函式,呼叫三次回撥函式,每次傳入的 i 值會加1。而且 this 代表的是依次而來的 dom物件
2.find(選擇器)
<!DOCTYPE html>
<html>
<head>
  <script src="jquery.js"></script>
<script>
 $(document).ready(function(){
      var trs=$('#employees').find('tr');
     for(var i=0;i<trs.length;i++){
          var td=$(trs[i]).find('td:nth-child(3)');
          if(td.html()=='男') {
              td.html('<img src="male.png" width="20" height="20"/>');
          }
          else if($(td).html()=='女')  {
              $(td).html('<img src="female.png" width="20" height="20"/>');
          }
     }
  });
	</script>
</head>
<body>
<table id="employees" width="200" border="1">
<tr><th>ID</th><th>姓名</th><th>性別</th><th>年齡</th><th>學歷</th></tr>
<tr>
				<td>001</td>
				<td>張三</td>
				<td>女</td>
				<td>29</td>
				<td>大專</td>
		</tr>
		<tr>
				<td>002</td>
				<td>李四</td>
				<td>男</td>
				<td>30</td>
				<td>中專</td>
		</tr>
		<tr>
				<td>003</td>
				<td>王五</td>
				<td>女</td>
				<td>25</td>
				<td>本科</td>
		</tr>
		</table>
</body>
</html>
執行結果就不在這裡貼了,簡單解釋一下這段程式碼。入口函式裡面,id選擇器呼叫的jQuery對應的find()方法,它裡面的引數是標籤名,所以最終匹配到的結果集trs就是所有的tr。然後執行for迴圈,迴圈中的第一句話很有意思。它首先把trs結果集通過[i]的方式拿出單個的dom物件,再加$()轉換成jQuery物件才能夠呼叫find()方法,而這次傳遞的引數中有過濾器,過濾器的作用就是選擇更加明確的元素,td有很多,但是加上子元素過濾器,找到了某一列,加上之前找到的某一行,實現定位到單元格的效果。之後的判斷分支就很簡單了,這裡不做分析。
二、增加元素操作
1.append()追加內容
<!DOCTYPE html>
<html>
<head>
<script src="jquery.js"></script>
<script>
$(document).ready(function(){
$("button").click(function () {
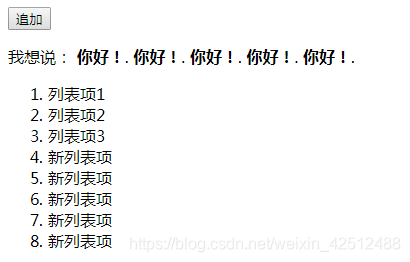
$("p").append(" <b>你好!</b>.");
$("ol").append("<li>新列表項</li>");
});
});
</script>
</head>
<body>
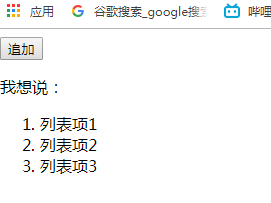
<button>追加</button>
<p>我想說:</p>
<ol>
<li>列表項1</li>
<li>列表項2</li>
<li>列表項3</li>
</ol>
</body>
</html>
執行結果:
2.prepend()追加內容
<!DOCTYPE html>
<html>
<head>
  <script src="http://code.jquery.com/jquery-1.9.1.js"></script>
</head>
<body>

  <b>Hello</b><p>, how are you?</p>

<script>
  $("b").clone().prependTo("p");
</script>

</body>
</html>
執行結果:

注意:prepend根據單詞的意思就知道它是在前面追加的意思。它通過標籤選擇器複製了一個節點追加到,在段落內容的前面進行追加。
3.after()、before()插入內容
<!DOCTYPE html>
<html>
<head>
  <script src="jquery.js"></script>
<script>
 $(document).ready(function(){
    $("button").click(function () {
       $("p").after(" <b>你好!</b>");
       $("ol").before("<li>新列表項</li>");
    });
  });
	</script>
</head>
<body>
   <button>追加</button>
  <p>我想說:</p>
  <ol>
  <li>列表項1</li>
  <li>列表項2</li>
  <li>列表項3</li>
  </ol>
</body>
</html>
執行結果:
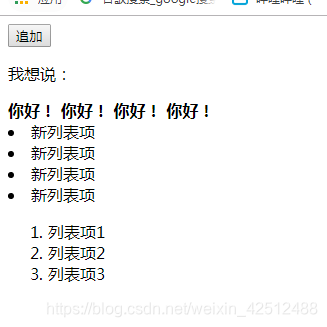
注意:說一下兩者的異同點:不難發現,它們都能追加內容,而且引數中都可以帶標籤,可以一直追加,內容會一直重複。但是,append追加的內容是在呼叫它的物件之內追加的,比如第一個追加之後,產生第四個列表項。但是after可不一樣,它的本質是插入,看第二個程式碼的截圖就會發現,他會追加到緊接著p標籤之後和ol標籤之前。
4.insertafter(選擇器)
<!DOCTYPE html>
<html>
<head>
  <script src="jquery.js"></script>
<script>
$(document).ready(function(){
$("button").click(function () {
    $('<p>jQuery</p>').insertAfter('.inner');
  });
 });
</script>
</head>
<body>
<div class="container">
  <div class="inner">Hello</div>
  <div class="inner">Goodbye</div>
</div>
<button>插入</button>
</body>
</html>
執行結果:
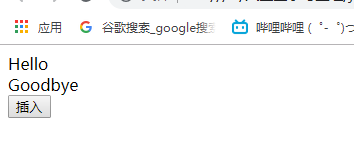

注意:從程式碼中可以看到,insertafter()方法,是你要增加的dom節點(必須轉換成jQuery物件)呼叫該方法,引數是選擇器,選擇要插到哪個元素的後面。該元素只能是某個dom節點,不能是純文字內容。其實,除了這個區別之外,我認為它的本質和after沒有區別,只是形式不同。
三、刪除元素操作
1.removeAttr()刪除屬性
<!DOCTYPE html>
<html>
<head>
  <script src="jquery.js"></script>
<script>
 $(document).ready(function(){
    $("button").click(function () {
      $(this).next().removeAttr("disabled")
             .focus()
             .val("現在可以編輯了。");
    });
  });
	</script>
</head>
<body>
   <button>啟用</button>
  <input type="text" disabled="disabled" value="現在還不可以編輯" />
</body>
</html>
執行結果:
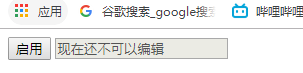
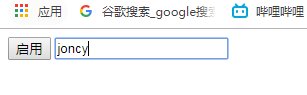
注意:這個next()方法很重要,他選擇的是button按鈕的下一個jQ元素。之後再呼叫removeAttr()刪掉對應的方法。有些時候可能會出現這樣的方法呼叫方法這種形式,其實仔細分析之後,最終的n-1個元素一定是jQ物件。
2.remove(選擇器)刪除HTML元素
<!DOCTYPE html>
<html>
<head>
<script src="jquery.js"></script>
<script>
$(document).ready(function(){
$("button").click(function () {
$("p").remove();
$("p").text("ppp");
$("a").text("aaa");
});
});
</script>
</head>
<body>
<p>
歡迎訪問 <a href="http://jquery.com/">jQuery官網</a>
</p>
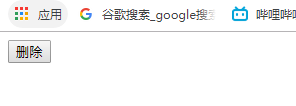
<button>刪除</button>
</body>
</html>
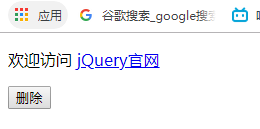
執行結果:
3.empty()方法刪除HTML元素的內容和所有子元素
<!DOCTYPE html>
<html>
<head>
  <script src="jquery.js"></script>
<script>
$(document).ready(function(){
$("button").click(function () {
    $("p").empty();
	$("p").text("ppp");
	$("a").text("aaa");
  });
  });
</script>
</head>
<body>
<p>
  歡迎訪問 <a href="http://jquery.com/">jQuery官網</a>
</p>
<button>刪除</button>
</body>
</html>
執行結果:

注意:說一下2和3的區別,remove是把這個節點,包括它的位元組點連根刪掉。empty是清空呼叫它的元素得內容,如果說包含子元素,也將子元素節點連根刪掉。
四、修改元素操作
1.修改內容
a. html()
<html>
<head>
<script type="text/javascript" src="jquery.js"></script>
<script type="text/javascript">
$(document).ready(function(){
$("button").click(function(){
var a = $("p").html();
alert(a);
//alert($("p").html());
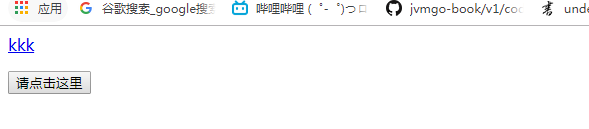
$("p").html("<a href='#'>kkk</a>");
});
});
</script>
</head>
<body>
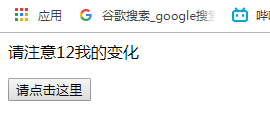
<p>請注意<a>12</a>我的變化</p>
<button type="button">請點選這裡</button>
</body>
</html>
執行結果:

b. text()方法
<html>
<head>
<script type="text/javascript" src="jquery.js"></script>
<script type="text/javascript">
$(document).ready(function(){
$("button").click(function(){
var a = $("p").text();
alert(a);
//alert($("p").html());
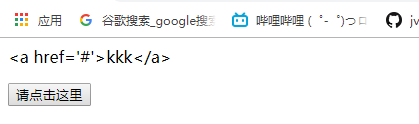
$("p").text("<a href='#'>kkk</a>");
});
});
</script>
</head>
<body>
<p>請注意<a>12</a>我的變化</p>
<button type="button">請點選這裡</button>
</body>
</html>
執行結果:


c. val()
<html>
<head>
<script type="text/javascript" src="jquery.js"></script>
<script type="text/javascript">
$(document).ready(function(){
  $("button").click(function(){

  var a = $("p").val();
  alert(a);
  //alert($("p").html());
  $("p").val("<a href='#'>kkk</a>");
  });
});
</script>
</head>
<body>
<p>請注意<a>12</a>我的變化</p>
<button type="button">請點選這裡</button>
</body>
</html>
執行結果:


<html>
<head>
<script type="text/javascript" src="jquery.js"></script>
<script type="text/javascript">
$(document).ready(function(){
  $("button").click(function(){
    $("input:text").val(function(index,oldvalue){
		alert(index);
		alert($("#button").val());
      return oldvalue.toUpperCase();;
    });
  });
});
</script>
</head>

<body>
<p>Name: <input type="text" name="user" value="abcd" /></p>
<p>Name1: <input type="text" name="user" value="avcd" /></p>
<p>Name2: <input type="text" name="user" value="avcf" /></p>
<button value="11">轉換為大寫</button>
</body>
</html>
執行結果:

注意:三者的區別通過程式碼已經很顯而易見了,這裡再強調一下,html()獲取到的內容是文字+子元素標籤+子元素內容。text()獲取到的是文字+子元素文字,不會獲得子元素的標籤。但是他設定的內容也只能是文字型別,如果帶有標籤標籤按照文字輸出。val()獲得的是input標籤中value屬性的值,設定的也是value的值,像button這種標籤,不存在value值,於是輸出了undefined。
2.修改HTML元素屬性
a. attr[屬性名,屬性值]
<!DOCTYPE html>
<html>
<head>
<script src="jquery.js"></script>
</head>
<body>
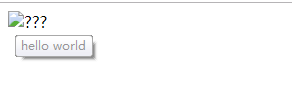
<img id="div_img" src="01.jpg">
<script>
$(document).ready(function(){
$("#div_img").click(function() {
//$("#div_img").attr("src", "02.jpg");
$("#div_img").attr({
src:"/02.jpg",
title:"hello world",
alt:"???"
});
});
});
</script>
</body>
</html>
執行結果:
attr[屬性名]
<!DOCTYPE html>
<html>
<head>
  <script src="jquery.js"></script>
<script>
 $(document).ready(function(){
         var a = $("a").attr("href");
			alert(a);
  });
	</script>
</head>
<body>
   <a href="http://www.sina.com.cn">新浪</a>
   <a href="http://www.sohu.com">搜狐</a>
</body>
</html>

注意:這裡的要是引數是一個就是獲取屬性值,兩個就是修改屬性值。
3.替換HTML元素
a. replaceWith(內容)
<!DOCTYPE html>
<html>
<head>

  <script src="jquery.js"></script>
</head>
<body>

<button>First</button>
<button>Second</button>
<button>Third</button>

<script>
$("button").click(function () {
  $(this).replaceWith( "<div>" + $(this).text() + "</div>" );
});
</script>

</body>
</html>
執行結果:
滑鼠點選一個按鈕這個按鈕就變成了文字。注意這裡的內容既然能是標籤,就一定能使純文字。
b.replaceAll()
<!DOCTYPE html>
<html>
<head>

  <script src="jquery.js"></script>
</head>
<body>
  <p>Hello</p>
  <p>World</p>
<script>$("<div>jQuery</div>").replaceAll("p");</script>
</body>
</body>
</html>
執行結果:
注意:這裡要替換的內容在前,被替換的內容在後。