OCiOS開發:UIKit 力學(UIDynamics)(二)
一、前言
在上篇文章中,我們已經瞭解到了UIDynamic的一些基本概念,本篇部落格,我們主要了解一些力學行為特性即物理行為。
UIKit力學行為包含重力(UIGravityBehavior)、碰撞(UICollisionBehavior)、吸附(UIAttachmentBehavior)、推送(UIPushBehavior)、捕捉(UISnapBehavior)和行為限制(UIDynamicItemBehavior)。除了行為限制(UIDynamicItemBehavior)外,其中的5種力學行為使用起來都大同小異。
下面將分別介紹幾種物理行為的配置方法。
二、重力行為 UIGravityBehavior
1、簡介
給定重力方向、加速度,讓物體朝著重力方向掉落
2、UIGravityBehavior 初始化
// 1、items引數 :裡面存放著物理模擬元素
public init(items: [UIDynamicItem])
3、UIGravityBehavior 常見方法
// 1、新增1個物理模擬元素
public func addItem(item: UIDynamicItem)

// 2、移除1個物理模擬元素
public func removeItem(item: UIDynamicItem)
4、UIGravityBehavior 常見屬性
items:新增到重力行為中的所有物理模擬元素
gravityDirection:重力方向(是一個二維向量)
angle:重力方向(是一個角度,以x軸正方向為0°,順時針正數,逆時針負數)
magnitude:量級(用來控制加速度,1.0代表加速度是1000 points /second²)
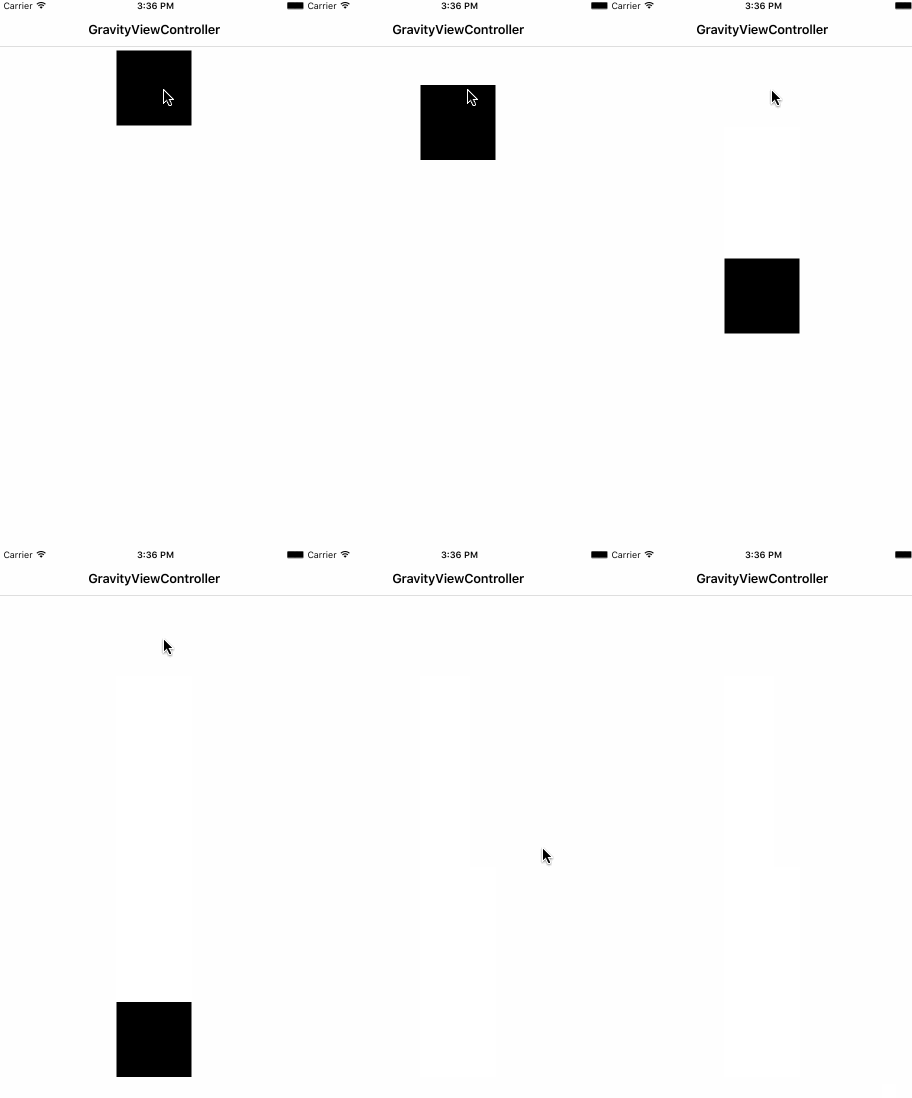
5、效果展示
6、程式碼示例
import UIKit
class ViewController: UIViewController {
var square: UIButton! /**< 物理模擬元素 */
var animator: UIDynamicAnimator! /**< 物理模擬器 */
var gravity : UIGravityBehavior! /**< 重力行為 */ 三、碰撞行為 UICollisionBehavior
1、簡介
可以讓物體之間實現碰撞效果
可以通過新增邊界(boundary),讓物理碰撞侷限在某個空間中
2、UICollisionBehavior 邊界相關的方法
1)檢測是否與ReferenceView邊界發生碰撞的方法如下:
self.collision.translatesReferenceBoundsIntoBoundary = true2)檢測是否與其他的物體(檢視物件)邊界發生碰撞的方法如下:
// 1、設定一個碰撞的貝塞爾曲線,第一個引數是定義一個標識,第二個引數forPath是設定貝塞爾曲線。
public func addBoundaryWithIdentifier(identifier: NSCopying, forPath bezierPath: UIBezierPath)

// 2、設定一個碰撞的線段,第一個引數是定義一個標識,第二個引數fromPoint是設定線段開始點,第三個引數toPoint是設定線段結束點。
public func addBoundaryWithIdentifier(identifier: NSCopying, fromPoint p1: CGPoint, toPoint p2: CGPoint)
3)其他方法
// 1、根據碰撞標識獲取貝塞爾曲線
public func boundaryWithIdentifier(identifier: NSCopying) -> UIBezierPath?

// 2、根據標識移除碰撞邊界
public func removeBoundaryWithIdentifier(identifier: NSCopying)

// 3、移除所有碰撞邊界
public func removeAllBoundaries()
3、常見用法
translatesReferenceBoundsIntoBoundary:是否以參照檢視的bounds為邊界
setTranslatesReferenceBoundsIntoBoundaryWithInsets:設定參照檢視的bounds為邊界,並且設定內邊距
collisionMode:碰撞模式(分為3種,元素碰撞、邊界碰撞、全體碰撞)
collisionDelegate:代理物件(可以監聽元素的碰撞過程)
4、collisionDelegate 代理方法
// 1、開始碰撞
optional public func collisionBehavior(behavior: UICollisionBehavior, beganContactForItem item1: UIDynamicItem, withItem item2: UIDynamicItem, atPoint p: CGPoint)

// 2、結束碰撞
optional public func collisionBehavior(behavior: UICollisionBehavior, endedContactForItem item1: UIDynamicItem, withItem item2: UIDynamicItem)
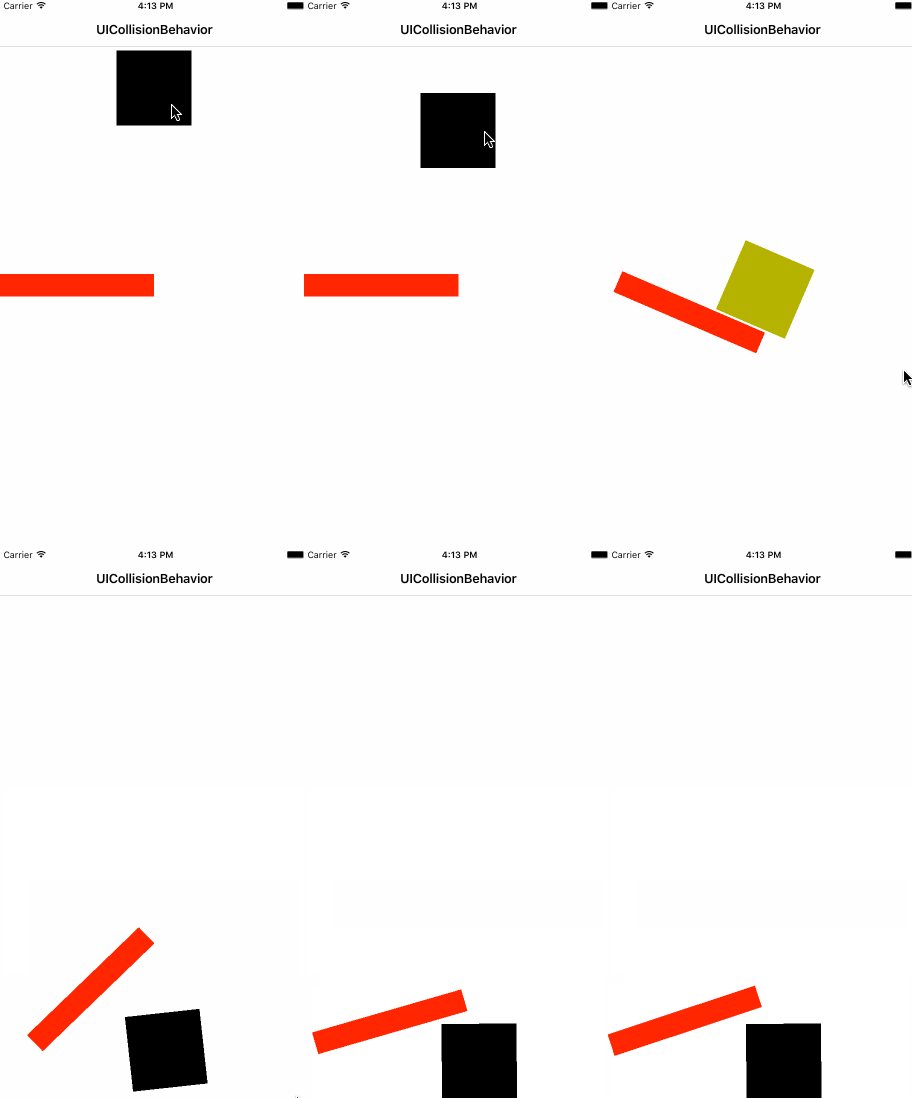
5、重力 + 碰撞 效果展示
6、程式碼示例
import UIKit

class ViewController: UIViewController, UICollisionBehaviorDelegate {

    var square: UIButton!
    var obstacles: UIView!

    var animator : UIDynamicAnimator!    /**< 物理引擎 */
    var gravity  : UIGravityBehavior!    /**< 重力行為 */
    var collision: UICollisionBehavior!  /**< 碰撞行為 */

    override func viewDidLoad() {
        super.viewDidLoad()
        self.initializeUserInterface()
    }

    // MARK:- Initialize -
    func initializeUserInterface() {
        self.view.backgroundColor = UIColor.whiteColor()

        // 1、設定檢視背景顏色
        self.view.backgroundColor = UIColor.whiteColor()

        // 2、初始化物理模擬元素
        self.square = UIButton(frame: CGRect(x: 0.0, y: 0.0, width: 100.0, height: 100.0))
        self.square.center = CGPoint(x: CGRectGetMidX(self.view.bounds), y: 120)
        self.square.backgroundColor = UIColor.blackColor()
        self.square.addTarget(self, action: "respondsToSquareTaped:", forControlEvents: UIControlEvents.TouchUpInside)
        self.view.addSubview(self.square)

        // 2、初始化障礙物
        self.obstacles = UIView(frame: CGRect(x: 0.0, y: CGRectGetMidY(self.view.bounds), width: CGRectGetWidth(self.view.bounds) * 0.5, height: 30))
        self.obstacles.backgroundColor = UIColor.redColor()
        self.view.addSubview(self.obstacles)

    }

    // MARK:- Events -
    func respondsToSquareTaped(sender: UIButton) {

        // 1、初始化物理模擬器,指定模擬範圍為整個螢幕檢視
        self.animator = UIDynamicAnimator(referenceView: self.view)

        // 2、初始化重力行為,並新增物理模擬元素
        self.gravity = UIGravityBehavior(items: [self.square])
        // 2.1、設定重力行為的方向(垂直向下)
        self.gravity.gravityDirection = CGVector(dx: 0.0, dy: 1.0)
        // 2.2、設定重力的加速度,重力的加速度越大,碰撞就越厲害
        self.gravity.magnitude = 1.0
        // 2.3、將重力行為新增到物理模擬器中
        self.animator.addBehavior(self.gravity)

        // 3、初始化碰撞行為,並設定碰撞元素
        self.collision = UICollisionBehavior(items: [self.square, self.obstacles])
        // 3.1、讓參照檢視的邊框成為碰撞檢測的邊界
        self.collision.translatesReferenceBoundsIntoBoundary = true
        // 3.2、設定碰撞代理
        self.collision.collisionDelegate = self
        // 3.3、將碰撞行為新增到物理模擬器中
        self.animator.addBehavior(self.collision)


    }

    // MARK:- UICollisionBehaviorDelegate -
    // 碰撞開始,改變模擬元素背景色
    func collisionBehavior(behavior: UICollisionBehavior, beganContactForItem item1: UIDynamicItem, withItem item2: UIDynamicItem, atPoint p: CGPoint) {
        UIView.animateWithDuration(0.2, animations: { () -> Void in
            self.square.backgroundColor = UIColor.yellowColor()
            }) { (finsh) -> Void in
                self.square.backgroundColor = UIColor.blackColor()
        }
    }
}
四、吸附行為 UIAttachmentBehavior
1、簡介
吸附行為可以實現兩個物體彼此牽制,就好像是用一根棍子將兩個物體連線在一起,注意這裡用棍子而不是繩子描述,這是因為兩個物體之間的距離是剛性的。其描述一個view和一個錨相連線的情況,也可以描述view與view之間的連線。attachment描述的是兩個點之間的連線情況,可以通過設定來模擬無形變或者彈性形變的情況。
2、UIAttachmentBehavior 初始化
1)初始化連線動力item的中心和錨點的吸附行為
public convenience init(item: UIDynamicItem,
attachedToAnchor point: CGPoint)
1.1)引數:item是你要應用吸附行為的動力項,point是吸附行為的錨點,與跟行為相關的動態動畫所在在系統座標有關。
1.2)返回:初始化的attachment behavior,如果初始化過程出錯將會返回nil。
1.3)該初始化方法的吸附行為的型別是 UIAttachmentBehaviorType.Anchor
2)初始化連線兩個動力項中心的吸附行為
public convenience init(item item1: UIDynamicItem, attachedToItem item2: UIDynamicItem)2.1)引數:item1第一個被吸附行為連線的動力項,item2第二個被吸附行為連線的動力項
2.2)返回:初始化的attachment behavior,如果初始化過程出錯將會返回nil。
2.3)該初始化方法的吸附行為的型別是UIAttachmentBehaviorType.Items
3)初始化連線動力項中某一點和錨點的 吸附行為
public init(item: UIDynamicItem, offsetFromCenter offset: UIOffset, attachedToAnchor point: CGPoint)3.1)引數:item要應用吸附行為的動力項,p1相對於item中心的偏移,point 是吸附行為的錨點,與跟行為相關的動力動畫所在在系統座標有關。
3.2)返回: 初始化的 attachment behavior,如果初始化過程出錯將會返回nil。
3.3)該初始化方法的吸附行為的型別是UIAttachmentBehaviorType.Anchor
4)初始化連線一個動力item中某一點和另一個動力item中某一點的吸附行為
public init(item item1: UIDynamicItem, offsetFromCenter offset1: UIOffset, attachedToItem item2: UIDynamicItem, offsetFromCenter offset2: UIOffset)4.1)引數:item1第一個被吸附行為連線的動力項,p1相對於item1中心的偏移,item2第二個被吸附行為連線的動力項,p2相對於item2中心的偏移
4.2)返回:返回:初始化的attachment behavior,如果初始化過程出錯將會返回nil。
4.3)這是為UIAttachmentBehavior類指定的初始化程式。
3、UIAttachmentBehavior 常用屬性
items:獲取所有添加了吸附行為的模擬元素
damping:描述吸附行為減弱的阻力大小
frictionTorque:摩擦力
anchorPoint:錨點
frequency:吸附行為震盪的頻率
length:吸附行為中的兩個吸附點之間的距離,通常用這個屬性來調整吸附的長度,可以建立吸附行為之後呼叫。系統基於你建立吸附行為的方法來自動初始化這個長度。
attachedBehaviorType:吸附行為的型別,說明吸附到的是什麼樣子的動力項。
public enum UIAttachmentBehaviorType : Int {

    case Items  // 表示連線兩個item的吸附行為
    case Anchor // 表示連線一個item與錨點的吸附行為
}
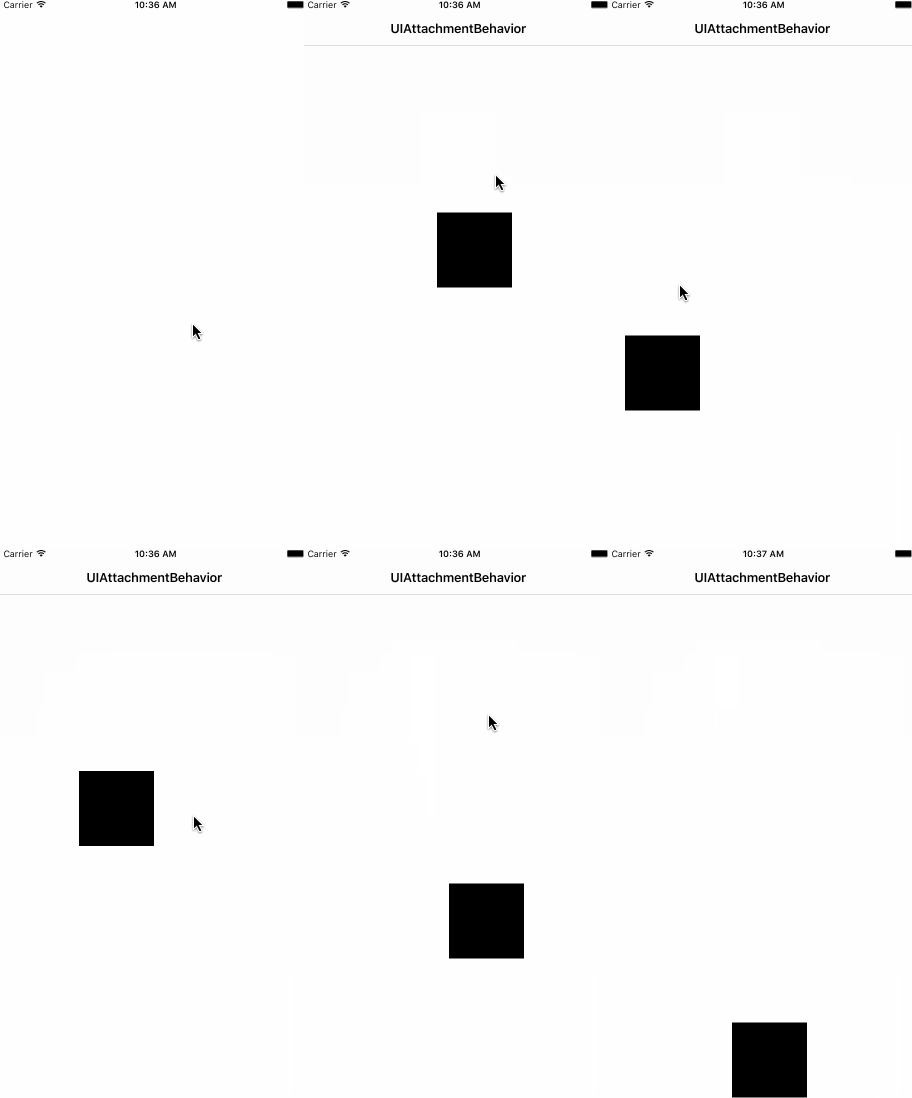
4、效果展示
5、程式碼示例
import UIKit

class ViewController: UIViewController, UICollisionBehaviorDelegate {

    var square: UIView!

    var animator : UIDynamicAnimator!     /**< 物理模擬器 */
    var attach   : UIAttachmentBehavior!  /**< 吸附行為 */
    var gravity  : UIGravityBehavior!     /**< 重力行為 */
    var collision: UICollisionBehavior!   /**< 碰撞行為 */


    override func viewDidLoad() {
        super.viewDidLoad()
        // 1、設定背景顏色
        self.view.backgroundColor = UIColor.whiteColor()

        // 2、初始化物理模擬元素
        self.square = UIButton(frame: CGRect(x: 0.0, y: 0.0, width: 100.0, height: 100.0))
        self.square.center = CGPoint(x: CGRectGetMidX(self.view.bounds), y: 120)
        self.square.backgroundColor = UIColor.blackColor()
        self.view.addSubview(self.square)

        // 3、初始化物理模擬器
        self.animator = UIDynamicAnimator(referenceView: self.view)

        // 4、碰撞
        self.collision = UICollisionBehavior(items: [self.square])
        self.collision.translatesReferenceBoundsIntoBoundary = true
        self.animator.addBehavior(self.collision)

        // 5、重力
        self.gravity = UIGravityBehavior(items: [self.square])
        self.animator.addBehavior(self.gravity)

        // 5、手勢
        let pan = UIPanGestureRecognizer(target: self, action: "handleAttachmentGesture:")
        self.view.addGestureRecognizer(pan)

    }

    // MARK:- Gesture -
    func handleAttachmentGesture(gesture: UIPanGestureRecognizer) {
        if gesture.state == UIGestureRecognizerState.Began {
            let square_center = CGPoint(x: self.square.center.x, y: self.square.center.y - 100.0)
            // 吸附
            self.attach = UIAttachmentBehavior(item: self.square, attachedToAnchor: square_center)
            self.animator.addBehavior(self.attach)
        }else if gesture.state == UIGestureRecognizerState.Changed {
            self.attach.anchorPoint = gesture.locationInView(self.view)
        }else if gesture.state == UIGestureRecognizerState.Ended {
            self.animator.removeBehavior(self.attach)
        }
    }
}
五、推力行為 UIPushBehavior
1、簡介
推行為可以使檢視物件朝某個方向運動,這個推力有瞬間(UIPushBehaviorModelInstantaneous)和持續(UIPushModelContinuous)兩種方式。持續的推力會產生一個恆定的加速度,所以物體的速度會越來越快。瞬時推力只是一瞬間的推力,物體會由於摩擦力越來越慢。
2、UIPushBehavior 初始化
public init(items: [UIDynamicItem], mode: UIPushBehaviorMode)3、UIPushBehavior 常用屬性
mode:推送方式
active:是否處於推送狀態
angle:推送角度
magnitude:速度 每1個magnigude將會引起100/平方秒的加速度
pushDirection:推送方向
六、捕捉行為 UISnapBehavior
1、簡介
可以讓物體迅速衝到某個位置(捕捉位置),捕捉到位置之後會帶有一定的震動
2、UISnapBehavior 初始化
public init(item: UIDynamicItem, snapToPoint point: CGPoint)3、UISnapBehavior 常用屬性
damping:用於減幅、減震(取值範圍是0.0 ~ 1.0,值越大,震動幅度越小)
snapPoint:迅速移動效果 只能一次 新增到一個元素上 snapToPoint 讓他移動到哪一個點
4、UISnapBehavior使用注意
如果要進行連續的捕捉行為,需要先把前面的捕捉行為從物理模擬器中移除


