
IDEA的安裝、註冊碼、建立專案、配置環境、配置Struts2模組、Debug使用、十大特徵,Eclipse及IntelliJ IDEA的xml檔案的建立
阿新 • • 發佈:2018-12-26
最近同學,很多都在使用IntelliJ IDEA編輯器,我也跟著換個工具來,但將IDEA安裝(在最後部分,有相關連結,可以直接點選藍色,直接跳轉)後,我還是繼續使用JDK1.7,雖然聽他們說自己都改用JDK1.8,可是我百度,也見有人使用JDK1.7加上Tomcat7.0或者8.0,還有的是我安裝了Tomcat8.0,但是使用Tomcat7.0,(IDEA很卡,但是很方便)
所以我的環境配置:JDK1.7+Tomcat7.0
學完Spring、MyBatis之後,學SpringMVC;因此我在IDEA中新建專案,該配的環境都去配,該引入的jar包都引入,接著在src下加包,


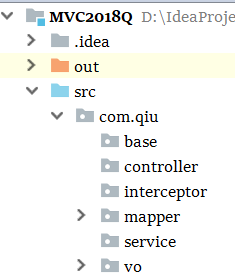
接著想去New個XML檔案到"mapper"包下或者"src"下,發現沒有"New 基本模板的XML",不像Eclipse中建立Xml檔案,
①以下為Eclipse建立XML檔案(是除了直接拷貝黏貼XML檔案的另一種方法):


---------------------以下若有錯誤,請及時告訴我,我好糾正,謝謝~.~-------------------------


【在Eclipse中匯入或新增DTD檔案】


---------------------使用第三種方式Create Xml File From an Xml Template的結果--------------

② 以下為IDEA中建立XML檔案:

開啟路徑主要有兩條
⑴ 一:

⑵ 二:


——⑴接下來我主要以第一種路徑方式來講,因為第二種路徑進去新增也是差不多的


_________*******MyBatis-config.xml******___________
[自定義的MyBatis配置檔案模板]

<?xml version="1.0" encoding="UTF-8" ?>
<!DOCTYPE configuration
        PUBLIC "-//mybatis.org//DTD Config 3.0//EN"
        "http://mybatis.org/dtd/mybatis-3-config.dtd">
<configuration>

</configuration>

_____________*******XxxDAO.xml*******_____________
[自定義的Mapper配置檔案模板]

<?xml version="1.0" encoding="UTF-8" ?>
<!-- mybatis的dtd檔案 -->
<!DOCTYPE mapper
        PUBLIC "-//mybatis.org//DTD Mapper 3.0//EN"
        "http://mybatis.org/dtd/mybatis-3-mapper.dtd">
<!--namespace屬性: 用於指定指向那個介面 -->
<mapper namespace="com.ht.mapper.AxxDAO">

</mapper>

___________*******Spring-config.xml*******_____________
[IDEA有預設New該Spring配置檔案的模板]

<?xml version="1.0" encoding="UTF-8"?>
<beans xmlns="http://www.springframework.org/schema/beans"
       xmlns:xsi="http://www.w3.org/2001/XMLSchema-instance"
       xsi:schemaLocation="http://www.springframework.org/schema/beans
       http://www.springframework.org/schema/beans/spring-beans.xsd">

</beans>

            ——————————spring-service.xml(或者spring-dao.xml)

<?xml version="1.0" encoding="UTF-8"?>
<beans xmlns="http://www.springframework.org/schema/beans"
       xmlns:xsi="http://www.w3.org/2001/XMLSchema-instance"
       xmlns:context="http://www.springframework.org/schema/context"
       xmlns:tx="http://www.springframework.org/schema/tx"
       xsi:schemaLocation="http://www.springframework.org/schema/beans
       http://www.springframework.org/schema/beans/spring-beans.xsd
       http://www.springframework.org/schema/context http://www.springframework.org/schema/context/spring-context.xsd
       http://www.springframework.org/schema/tx http://www.springframework.org/schema/tx/spring-tx.xsd">

</beans>

            ——————————spring-web.xml
[相對多了xmlns:mvc]

<?xml version="1.0" encoding="UTF-8"?>
<beans xmlns="http://www.springframework.org/schema/beans"
       xmlns:xsi="http://www.w3.org/2001/XMLSchema-instance"
       xmlns:mvc="http://www.springframework.org/schema/mvc"
       xmlns:context="http://www.springframework.org/schema/context"
       xsi:schemaLocation="http://www.springframework.org/schema/beans
       http://www.springframework.org/schema/beans/spring-beans.xsd http://www.springframework.org/schema/mvc http://www.springframework.org/schema/mvc/spring-mvc.xsd http://www.springframework.org/schema/context http://www.springframework.org/schema/context/spring-context.xsd">

</beans>

            ——————————application.xml
[其實就是spring配置的Xml檔案嘛!!!相對多了xmlns:aop,而xmlns:tx的值可能有多餘,無用時可刪除,多餘刪除後,有時可用為:import-hbm.xml、datasource-context.xml、applicationContext.xml]

<?xml version="1.0" encoding="UTF-8"?>
<beans xmlns="http://www.springframework.org/schema/beans"
    xmlns:xsi="http://www.w3.org/2001/XMLSchema-instance"
    xmlns:context="http://www.springframework.org/schema/context"
    xmlns:aop="http://www.springframework.org/schema/aop"
    xmlns:tx="http://www.springframework.org/schema/tx"
    xsi:schemaLocation="http://www.springframework.org/schema/beans
    http://www.springframework.org/schema/beans/spring-beans.xsd
    http://www.springframework.org/schema/context
    http://www.springframework.org/schema/context/spring-context.xsd
    http://www.springframework.org/schema/aop
    http://www.springframework.org/schema/aop/spring-aop.xsd
    http://www.springframework.org/schema/tx
    http://www.springframework.org/schema/tx/spring-tx.xsd">

</beans>

            ——————————service-config.xml

<?xml version="1.0" encoding="UTF-8"?>
<service-config>

</service-config>


______________******struts.xml********________________
[一般拷貝進去,但應該也可以自己配置 或者 建立新專案時除了勾選Web Application也勾選Struts??!!?!(不過我的沒有Struts模組或元件,可以去配置,在 最後部分 哦!!!)]

<?xml version="1.0" encoding="UTF-8"?>
<!DOCTYPE struts PUBLIC
        "-//Apache Software Foundation//DTD Struts Configuration 2.0//EN"
        "http://struts.apache.org/dtds/struts-2.0.dtd">
<struts>

</struts>

_____________*********hibernate.cfg.xml*******__________________
[一般拷貝黏貼]

<?xml version='1.0' encoding='UTF-8'?>
<!DOCTYPE hibernate-configuration PUBLIC
          "-//Hibernate/Hibernate Configuration DTD 3.0//EN"
          "http://hibernate.sourceforge.net/hibernate-configuration-3.0.dtd">
<hibernate-configuration>

</hibernate-configuration>
③最後
⒈安裝時找到的“講解詳細的文章【IntelliJ IDEA安裝及破解】”
⒉安裝之後,開啟軟體,要註冊碼(使用正版更好些嘛)的話看這篇文章【IDEA2018.1.1版本破解】(如果在第一步的“修改C:\Windows\System32\drivers\etc\hosts 檔案”中,修改之後儲存不了,可以試著下載NotePad++軟體,用該軟體開啟檔案並修改儲存,一定成功,我就是遇到這樣的情況了哈哈~)
⒊或者這篇文章的註冊碼【IntelliJ IDEA2018.3 最新破解方法 親測可用】
⒋註冊之後,匯入Tomcat的Jar包、建立WebProject、引入Tomcat、簡單的Servlet實現【IDEA新建javaWeb以及Servlet簡單實現】
⒌ 若你不想看1、2 或3、4,可以看這個: 這1 、2或3、4的大概,即,總體上主要的都有了【Windows7下安裝與破解IntelliJ IDEA2017】
(這裡有個關於IDEA的PDF檔案(我也是找別人的),有"詳細講解Setting、Maven安裝與使用、快捷鍵、引入GitHub或Git等")
⒍Maven簡單使用(主要看這個才去點吧,後面那個我已經說過了)和建立Spring配置檔案的路徑【IDEA中配置 和建立spring.xml】
⒎就是看了這篇文章,解決我的問題,並且我寫出這篇文章(我覺得,我的更全面!!!)【IntelliJ IDEA中建立xml檔案】
⒏除錯debug詳細講解,個人認為比原創更詳細【IDEA:Debug使用詳解(含2018版特性)】
⒐看到這裡,想要詳細看圖而且用中文講解 “ 建立專案、Tomcat服務配置、setting中修改字型或風格或拼寫檢查、常用快捷鍵 ” 的,可以看這篇【IDEA快捷鍵以及初次使用配置】
⒑瞭解——1【IntelliJ IDEA 2017 的十大特性(1)】、瞭解——2【IntelliJ IDEA 2017 的十大特性(2)】、瞭解——3【IntelliJ IDEA 2017 的十大特性(3)】
⒒若使用Struts2框架,當建立專案時,Java Enterprise選項卡沒有Struts模組,這可以看這篇檔案【如何在Intellij IDEA中建立struts2模組】
⒓或者【從零開始用Intellij idea14建立struts2專案】