[iOS] Adding UITableView to ViewController
阿新 • • 發佈:2018-12-27
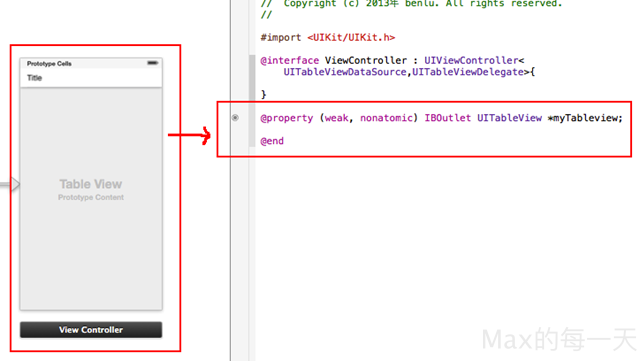
- Put tableView to view controller and link it to viewcontroller.
- link delegate and datasource of tableview to viewcontroller.
- in
viewcontroller.h@interface ViewController: UIViewController <UITableViewDelegate, UITableViewDataSource> - in viewDidLoad put
tblService.delegate=self; tblService.dataSource=self;
而在.m檔中,必須要實作下列三個方法。第一個方法是設定Tableview裡面有多少區段。
- (NSInteger)numberOfSectionsInTableView:(UITableView *)tableView{
    // Return the number of sections.
    return 1;
}
這個方法是設定在這個UITableView裡面有幾個區段,區段我們看到下圖。在iPhone設定畫面上,會看到相似的功能被歸相同的群組裡面。這部分就是區段。所以要設定有多少區段,必須從這個方法來設定。
這裡是設定每一個區段有多少筆資料。
- (NSInteger)tableView:(UITableView *)tableView
numberOfRowsInSection:(NSInteger)section{
    return [array count];
}
這個方法是用來Rander畫面上Cell欄位資料。
在這個方法中,在程式中static NSString *CellIdentifier = @”Cell”;
對UITable Cell的命名和Storyboard 裡的設定值,如果兩邊名稱不一樣,會導致你的UITable Cell資料會顯示不出來。
設定 Cell 的 identifier:
 - (UITableViewCell *)tableView:(UITableView *)tableView cellForRowAtIndexPath:(NSIndexPath *)indexPath
{
static
 相關文章:

