Android-Service 服務詳解
一、Service的簡介
首先,相信很多Android開發者都知道Service是android 系統中的四大元件之一,它跟Activity的級別差不多,但是它只能後臺執行,並且可以和其他元件進行互動。service可以在很多場合的應用中使用,比如播放音樂的時候使用者啟動了其他Activity這個時候程式要在後臺繼續播放,比如後臺下載某些資料時,再或者在後臺記錄你地理資訊位置的改變等等,總之服務總是藏在後臺的。
二、 Service啟動流程
Service總共有2種啟動方式,分別是context.startService() 和 context.bindService()
其中context.startService() 的生命週期也就是啟動流程為:
context.startService() -> onCreate() -> onStartCommand() -> Service running -> context.stopService() -> onDestroy() -> Service stop
在這裡需要注意的是如果你的這個服務已經開啟過一次。但是在你第二次起startService()前你並沒有去登出這個服務,那麼你這次以及在你登出前去啟動這個服務都只會執行 onStartCommand()而不會onCreate()。
而context.bindService()的啟動生命週期為:
context.bindService() -> onCreate() -> onBind() -> Service running -> onUnbind() -> onDestroy() -> Service stop
這種啟動方式也就是常說的Activity與Service通訊的啟動方式了,通過這種註冊的方式我們服務中的onBind()機會返回一個IBinder可過活動來操作服務了。實現他們之間的通訊。**這裡需要注意的是當Activity關閉時,這裡的Service也會跟著關閉。執行onDestroy() **
在Service每一次的開啟關閉過程中,只有onStart可被多次呼叫(通過多次startService呼叫),其他onCreate,onBind,onUnbind,onDestory在一個生命週期中只能被呼叫一次。
三、程式碼示例
這裡我先將所有程式碼貼出然後進行拆分
Activity
public class MainActivity extends AppCompatActivity implements View.OnClickListener{
    Button startBtn,stopBtn,bindBtn,unbindBtn,intentService,toActivity2;
    MyService.MyBinder myBinder;

    @Override
    protected void onCreate(Bundle savedInstanceState) {
        super.onCreate(savedInstanceState);
        setContentView(R.layout.activity_main);
        init();
    }
    private ServiceConnection connection=new ServiceConnection() {
        @Override
        public void onServiceConnected(ComponentName componentName, IBinder iBinder) {
            myBinder=(MyService.MyBinder)iBinder;
            myBinder.startOne();
            myBinder.stopOne();
        }

        @Override
        public void onServiceDisconnected(ComponentName componentName) {

        }
    };
    public void init(){
        startBtn=findViewById(R.id.startService);
        stopBtn=findViewById(R.id.stopService);
        bindBtn=findViewById(R.id.bindService);
        unbindBtn=findViewById(R.id.unbindService);
        intentService=findViewById(R.id.intentService);
        toActivity2=findViewById(R.id.to_activity2);
        bindBtn.setOnClickListener(this);
        unbindBtn.setOnClickListener(this);
        startBtn.setOnClickListener(this);
        stopBtn.setOnClickListener(this);
        intentService.setOnClickListener(this);
        toActivity2.setOnClickListener(this);
    }

    @Override
    public void onClick(View view) {
        switch (view.getId()){
            case R.id.startService:
                Intent startIntent=new Intent(this,MyService.class);
                startService(startIntent);
                break;
            case R.id.stopService:
                Intent stopIntent=new Intent(this,MyService.class);
                stopService(stopIntent);
                break;
            case R.id.bindService:
                Intent bindIntent=new Intent(this,MyService.class);
                bindService(bindIntent,connection,BIND_AUTO_CREATE);

                break;
            case R.id.unbindService:
                unbindService(connection);
                break;
            case R.id.intentService:
                Intent intent=new Intent(this,MyIntentService.class);
                startService(intent);
                break;
            case R.id.to_activity2:
                Intent intent1=new Intent(MainActivity.this,Main2Activity.class);
                startActivity(intent1);
                MainActivity.this.finish();
                break;
        }
    }
}
Service
public class MyService extends Service {
    private static final String TAG = "MyService";

    MyBinder myBinder=new MyBinder();
    class MyBinder extends Binder{
        public void startOne(){
            Log.d(TAG, "startOne: ");
        }
        public void stopOne(){
            Log.d(TAG, "stopOne: ");
        }
    }
    public MyService() {
    }

    @Override
    public IBinder onBind(Intent intent) {
        Log.d(TAG, "onBind: ");
        return myBinder;

    }

    @Override
    public boolean onUnbind(Intent intent) {
        Log.d(TAG, "onUnbind: ");
        return super.onUnbind(intent);
    }

    @Override
    public void onCreate() {
        super.onCreate();
        Log.d(TAG, "onCreate: ");
        Intent intent=new Intent(this,MainActivity.class);
        PendingIntent pi=PendingIntent.getActivity(this,0,intent,0);
        Notification notification=new NotificationCompat.Builder(this)
                .setContentTitle("前臺服務")
                .setContentText("這是一條前臺服務")
                .setWhen(System.currentTimeMillis())
                .setSmallIcon(R.drawable.ic_launcher_background)
                .setContentIntent(pi)
                .build();
        startForeground(1,notification);

    }

    @Override
    public int onStartCommand(Intent intent, int flags, int startId) {
        Log.d(TAG, "onStartCommand: ");
        return super.onStartCommand(intent, flags, startId);

    }

    @Override
    public void onDestroy() {
        Log.d(TAG, "onDestroy: ");
        super.onDestroy();
    }
}
AndroidManifest.xml
        <activity android:name=".MainActivity">
            <intent-filter>
                <action android:name="android.intent.action.MAIN" />

                <category android:name="android.intent.category.LAUNCHER" />
            </intent-filter>
        </activity>


        <service
            android:name=".MyService"
            android:enabled="true"
            android:exported="true" />

        <activity android:name=".Main2Activity"></activity>
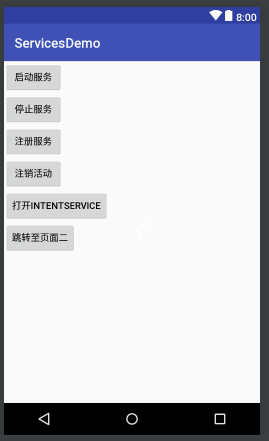
然後我們的介面程式碼就不放上來了就是幾個按鈕

程式碼中可以看到我們在Service中的關鍵生命週期中都log了
我們先來看一下context.startService()的啟動模式這裡是通過Intent來對其進行操作
            case R.id.startService:
                Intent startIntent=new Intent(this,MyService.class);
                startService(startIntent);
                break;
            case R.id.stopService:
                Intent stopIntent=new Intent(this,MyService.class);
                stopService(stopIntent);
                break;
我們先點選開啟服務然後點選停止服務看下log資訊如下 正如我們所料

在上面我們還說過一個注意事項就是onCreate()方法在服務停止前只會執行一次。我們來驗證一下。同時點選2下開啟服務如下:

這裡很容易可以看出onCreate()確實只運行了一次。
接下來我們繼續看context.bindService()的啟動方式我們依然是按照上面的測試方法如下:

中間的第2、3條是我在ServiceConnection中寫的呼叫返回的IBinder中的方法實現與服務的通訊
private ServiceConnection connection=new ServiceConnection() {
        @Override
        public void onServiceConnected(ComponentName componentName, IBinder iBinder) {
            myBinder=(MyService.MyBinder)iBinder;
            myBinder.startOne();
            myBinder.stopOne();
        }

        @Override
        public void onServiceDisconnected(ComponentName componentName) {

        }
    };
好了我們服務的生命週期就將到這裡了大家可以利用服務的生命週期在後臺為所欲為了
原始碼地址gitHub
