Linux之mysql伺服器基本使用(Linux帶著小弟shell去打怪)
阿新 • • 發佈:2018-12-27
說明:此博文為,mysql伺服器複習筆記。此博文分享在複習過程中,實戰遇到的問題,具體的細節和術語準確度別糾結。
@author:拈花為何不一笑
MySQL伺服器管理(解除安裝,安裝,執行等)
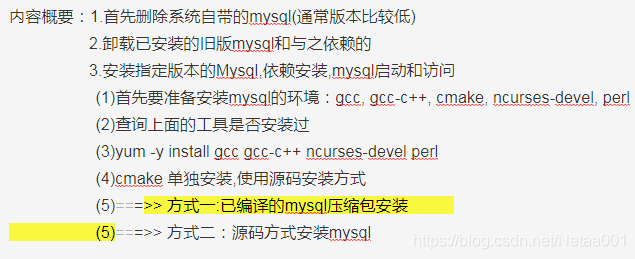
1.首先刪除系統自帶的mysql(通常版本比較低)
(1).先查詢當前linux系統是否已安裝了mysql
使用命令: rpm -qa | grep -i mysql 或者 rpm -q mysql
例如:
[[email protected] ~]# rpm -qa | grep -i mysql
MySQL-python-1.2.3-0.3.c1.1.el6.i686
mysql-server-5.1.47-4.el6.i686
mysql-5.1.47-4.el6.i686
mysql-devel-5.1.47-4.el6.i686
qt-mysql-4.6.2-16.el6.i686
mysql-libs-5.1.47-4.el6.i686
perl-DBD-MySQL-4.013-3.el6.i686
mysql-connector-odbc-5.1.5r1144-7.el6.i686
[ [email protected] ~]#
2.解除安裝已安裝的舊版mysql和與之依賴的
使用命令: rpm -ev mysql-server-5.1.47-4.el6.i686 --nodeps 其中--nodeps選項表示忽略依賴解除安裝
例如:
[[email protected] ~]# rpm -ev MySQL-python-1.2.3-0.3.c1.1.el6.i686 #使用解除安裝命令
[[email protected] ~]# rpm -qa | grep -i mysql #再查詢,發現MySQL-python-1.2.3-0.3.c1.1.el6.i686沒有了
mysql-server-5.1.47-4.el6.i686
mysql-5.1.47-4.el6.i686
mysql-devel-5.1.47-4.el6.i686
qt-mysql-4.6.2-16.el6.i686
mysql-libs-5.1.47-4.el6.i686
perl-DBD-MySQL-4.013-3.el6.i686
mysql-connector-odbc-5.1.5r1144-7.el6.i686
[ [email protected] ~]#
按照上面步驟把查詢出來與mysql相關的程式全部解除安裝掉(
大家注意到沒,本人是先解除安裝依賴再刪除mysql本身的解除安裝順序,當然咯這裡使用了--nodeps已經忽略了依賴)
mysql-connector-odbc-5.1.5r1144-7.el6.i686
[[email protected] ~]# rpm -ev qt-mysql-4.6.2-16.el6.i686 --nodeps
[[email protected] ~]# rpm -ev perl-DBD-MySQL-4.013-3.el6.i686 --nodeps
[ [email protected] ~]# rpm -ev mysql-connector-odbc-5.1.5r1144-7.el6.i686 --nodeps
[[email protected] ~]# rpm -ev mysql-server-5.1.47-4.el6.i686 --nodeps
[[email protected] ~]# rpm -ev mysql-5.1.47-4.el6.i686 --nodeps
[[email protected] ~]# rpm -ev mysql-devel-5.1.47-4.el6.i686 --nodeps
[[email protected] ~]# rpm -ev mysql-libs-5.1.47-4.el6.i686 --nodeps
[[email protected] ~]# rpm -qa | grep -i mysql #解除安裝完後,再查詢沒有了,說明解除安裝成功
[[email protected] ~]#
[[email protected] ~]# whereis mysql
mysql:
[[email protected] ~]# which mysql
/usr/bin/which: no mysql in (/usr/lib/qt-3.3/bin:/usr/local/sbin:/usr/local/bin:/sbin:/bin:/usr/sbin:/usr/bin:/root/bin)
[[email protected] /]# find / -name mysql
[[email protected] /]#
3.安裝指定版本的Mysql,依賴安裝,mysql啟動和訪問
(1)首先要準備安裝mysql的環境:比如gcc, gcc-c++, cmake, ncurses-devel, perl
(2)查詢上面的工具是否安裝過:
[[email protected] ~]# yum list installed | grep gcc.*
compat-libgcc-296.i686 2.96-144.el6 @anaconda-centos-201106051823.i386/6.0
gcc.i686 4.4.4-13.el6 @anaconda-centos-201106051823.i386/6.0
gcc-c++.i686 4.4.4-13.el6 @anaconda-centos-201106051823.i386/6.0
gcc-gfortran.i686 4.4.4-13.el6 @anaconda-centos-201106051823.i386/6.0
libgcc.i686 4.4.4-13.el6 @anaconda-centos-201106051823.i386/6.0
[[email protected] ~]#
同樣的方式進行查詢:
[[email protected] ~]# yum list installed | grep -i cmake #發現沒有輸出結果,表示沒有安裝cmake
[[email protected] ~]# yum list installed | grep -i ncurses-devel #查詢出來了ncurses-devel,說明已經安裝了
ncurses-devel.i686 5.7-3.20090208.el6
[[email protected] ~]# yum list installed | grep -i perl
mod_perl.i686 2.0.4-10.el6 @anaconda-centos-201106051823.i386/6.0
perl.i686 4:5.10.1-115.el6
(3)yum -y install gcc gcc-c++ ncurses-devel perl #一次把這幾個沒有安裝的程式都安裝,哪個安裝了的就從這條命令中去掉哪個
發現只有cmake沒有安裝,那安裝cmake
(4)cmake 單獨安裝,使用原始碼安裝方式
cd /usr/local/src #進入一個目錄(目錄可以自己指定),用來安裝cmake
下載cmake-3.12.0.tar.gz
tar -zvxf cmake-3.12.0.tar.gz #當前目錄下,解壓cmake-3.12.0.tar.gz包
cd cmake-3.12.0/ #進入解壓後的檔案目錄cmake-3.12.0下
./configure #執行configure檔案對安裝環境進行檢驗並在當前目錄下生成編譯時所需檔案(如CMakefile.txt)
#採用gcc4.4.4版本編譯時遇到提示譯器gcc不支援c++11 , 解決方案:更新至gcc/g++ 4.8版本或以上即可。
./bootstrap #執行bootstrap檔案
make #編譯, Linux系統環境下的make就是GNU Make(gmake),是為了區別在Solaris系統或其他非GNU/linux系統中的make的編譯器而起的名字
make install #安裝
[[email protected] cmake-3.12.0]# cmake --version #檢視是否成功安裝,如果有下面資訊說明安裝成功了
cmake version 3.12.0
CMake suite maintained and supported by Kitware (kitware.com/cmake).
(5) ===>> 方式一:已編譯的mysql壓縮包安裝
cd /usr/local/src #進入一個目錄(目錄可以自己指定),用來安裝mysql
(5.1)下載,解壓
https://dev.mysql.com/downloads/mysql/#downloads #下載地址,這裡下載mysql-5.5.61-linux-glibc2.12-i686.tar.gz這個版本
#如果想下載其它版本,請點選右邊的Looking for previous GA versions?
下載成功後,mysql-5.5.61-linux-glibc2.12-i686.tar.gz上傳到linux系統 /usr/local/src目錄下
tar -zxvf mysql-5.5.61-linux-glibc2.12-i686.tar.gz #解壓
(5.2)建立mysql所需要的環境
cd /usr/local #進入linux系統預設安裝總目錄
mkdir mysql #建立mysql目錄作為mysql的安裝目錄
cd /usr/local/src/mysql-5.5.61-linux-glibc2.12-i686/ #進入mysql解壓後的目錄
[[email protected] mysql-5.5.61-linux-glibc2.12-i686]# cp ./ -r /usr/local/mysql #把當前目錄下所有資料拷貝至/usr/local/mysql目錄中
cat /etc/passwd | grep mysql #檢視mysql使用者是否存在linx系統中,如果存在則不需要建立了
cat /etc/groups | grep mysql #檢視mysql使用者組是否存在linx系統中,如果存在則不需要建立了
###建立這兩個東西的目的是為了更好的管理mysql資料庫軟體###
groupadd mysql #建立使用者組
useradd -r -g mysql mysql #建立使用者並指定所屬使用者組
(5.3)安裝mysql資料庫和屬主設定
cd /usr/local/mysql #進入mysql安裝目錄
chown -R mysql:mysql ./ #設定當mysql安裝目錄的屬主和所屬於使用者組
./scripts/mysql_install_db --user=mysql #安裝mysql資料庫
chown -R root:root ./ #修改當前目錄歸屬為root:root
chown -R mysql:mysql data #修改data目錄歸屬為mysql:mysql
(5.4)新增開機啟動
[[email protected] mysql]# cp ./support-files/mysql.server /etc/init.d/mysqld #把mysql加入系統啟動,拷貝mysql.server並重命名為mysqld
[[email protected] mysql]# cp ./support-files/mysql.server /etc/rc.d/init.d/mysqld #把mysql加入系統啟動,拷貝mysql.server並重命名為mysqld
chkconfig --list #查詢出所有的服務(相當於window下的服務管理中的服務),發現並沒有mysqld服務
chkconfig mysqld on #把mysqld加入到服務中開機啟動mysql伺服器。mysql.server執行時其實呼叫mysqld
[[email protected] ~]# netstat -tupln | grep mysql #重啟linux系統,查詢發現mysql伺服器開機啟動成功
tcp 0 0 0.0.0.0:3306 0.0.0.0:* LISTEN 2147/mysqld
[[email protected] ~]#
(5.5)mysql啟動,關閉,重閉和設定mysql資料庫的root密碼(預設為空)
[[email protected] local]# service mysqld start #啟動mysql
Starting MySQL..
[[email protected] local]# netstat -tupln | grep -i mysql #檢視是否成功啟動mysql
tcp 0 0 0.0.0.0:3306 0.0.0.0:* LISTEN 24003/mysqld
[[email protected] local]# ./mysql/bin/mysql -h localhost -P 3306 -u root -p #登陸mysql伺服器
Enter password: #直接回車,新安裝的mysql資料的root使用者密碼預設為空
Welcome to the MySQL monitor. Commands end with ; or \g.
Your MySQL connection id is 1
Server version: 5.5.61 MySQL Community Server (GPL)
Copyright (c) 2000, 2018, Oracle and/or its affiliates. All rights reserved.
Oracle is a registered trademark of Oracle Corporation and/or its
affiliates. Other names may be trademarks of their respective
owners.
Type 'help;' or '\h' for help. Type '\c' to clear the current input statement.
mysql> quit #退出mysql伺服器
[[email protected] local]# mysql/bin/mysqladmin -u root password root #設定mysql資料庫root使用者的密碼
[[email protected] local]# ./mysql/bin/mysql -h localhost -P 3306 -u root -p
Enter password: #不輸入密碼回車,報錯了。
ERROR 1045 (28000): Access denied for user 'root'@'localhost' (using password: NO)
[[email protected] local]# ./mysql/bin/mysql -h localhost -P 3306 -u root -p
Enter password:
Welcome to the MySQL monitor. Commands end with ; or \g.
Your MySQL connection id is 4
Server version: 5.5.61 MySQL Community Server (GPL)
Copyright (c) 2000, 2018, Oracle and/or its affiliates. All rights reserved.
Oracle is a registered trademark of Oracle Corporation and/or its
affiliates. Other names may be trademarks of their respective
owners.
Type 'help;' or '\h' for help. Type '\c' to clear the current input statement.
mysql> show databases; #使用mysql資料中提供的命令,操作mysql中的資料庫...
-----------------------------------------------------
service mysqld start #啟動mysql
service mysqld restart #重啟mysql
service mysqld stop #啟動mysql
-----------------------------------------------------
說明:遇到一些問題
[[email protected] mysql]# service mysql start
Starting MySQL.Logging to '/usr/local/mysql/data/jtxdsh-129.err'.
cp support-files/mysql.server /etc/init.d/mysqld #新增mysqld 開機時啟動
[[email protected] mysql-5.5.61-linux-glibc2.12-i686]# service mysqld start --->問題1
/etc/init.d/mysql: line 244: my_print_defaults: command not found
/etc/init.d/mysql: line 264: cd: /usr/local/mysql: No such file or directory
Starting MySQLCouldn't find MySQL server (/usr/local/mysql/[失敗]sqld_safe)
[[email protected] mysql-5.5.61-linux-glibc2.12-i686]# cd /usr/local
上面提示非常清楚的告訴了你,在執行mysql.server時需要在目錄 /usr/local/mysql中進行相關操作
cd /usr/local && ls #發現並沒有/usr/local/mysql這個目錄(linux中/usr/local目錄下預設為軟體安裝目錄)
mkdir mysql #在/usr/local目錄下建立目錄mysql(這個目錄是用來存放安裝程式的,將mysql包被解壓後的資料拷貝至/usr/local/mysql目錄中)
[[email protected] mysql]# cd /usr/local/src/mysql-5.5.61-linux-glibc2.12-i686/ #進入mysql安裝目錄,
[[email protected] mysql-5.5.61-linux-glibc2.12-i686]# cp ./ -r /usr/local/mysql #並把當前目錄下所有資料拷貝至/usr/local/mysql目錄中
設定好許可權或歸屬後
[[email protected] mysql]# service mysqld start --->問題2
Starting MySQL.Logging to '/usr/local/mysql/data/jtxdsh-129.err'.
[[email protected] mysql]# cat /usr/local/mysql/data/jtxdsh-129.err #發現磁碟空間不夠,Database寫失敗
...
InnoDB: a new database to be created!
181222 14:19:16 InnoDB: Setting file ./ibdata1 size to 10 MB
InnoDB: Database physically writes the file full: wait... #發現磁碟空間不夠,Database寫失敗(df -h,刪除一些無用的資料即可解決)
181222 14:19:16 InnoDB: Log file ./ib_logfile0 did not exist: new to be created
InnoDB: Setting log file ./ib_logfile0 size to 5 MB
....
[[email protected] local]# service mysqld start -->成功啟動mysql
Starting MySQL.. [確定]
[[email protected] local]# netstat -tupln | grep -i mysql
tcp 0 0 0.0.0.0:3306 0.0.0.0:* LISTEN 24003/mysqld
[[email protected] local]# mysql -h localhost -P 3306 -u root -p #問題3,重啟linux系統後,直接登陸mysql伺服器,報錯.(應該先開mysql服務即啟動mysql伺服器)
Enter password:
ERROR 2002 (HY000): Can't connect to local MySQL server through socket '/tmp/mysql.sock' (2)
本地不能登陸,而遠端可以登陸mysql伺服器--->問題4
是因為有一個空使用者:''@locahost (''表示使用者名稱,@是一個符號,localhost表示主機host)
遠端客戶端(這裡指windows系統)登陸mysql伺服器(linux中安裝的mysql伺服器),來刪除空使用者,即可解決此問題。
這個空使用者導致本地不能登陸linux,或使用者不需要輸入密碼就直接可以登陸,mysql -h localhost -u root即可登陸,但是資料不一樣。
mysql> select user,host,password from mysql.user; (遠端windows系統,相對於linux是遠端,參照物:安裝了mysql的linux系統)
+------+------------+-------------------------------------------+
| user | host | password |
+------+------------+-------------------------------------------+
| root | % | *81F5E21E35407D884A6CD4A731AEBFB6AF209E1B |
| root | jtxdsh-129 | |
| root | 127.0.0.1 | |
| root | ::1 | |
| | localhost | |
| | jtxdsh-129 | |
+------+------------+-------------------------------------------+
6 rows in set (0.02 sec)
mysql> drop user ''@localhost; #在windows系統下刪除空使用者
Query OK, 0 rows affected (0.00 sec)
mysql> select user,host,password from mysql.user;
+------+------------+-------------------------------------------+
| user | host | password |
+------+------------+-------------------------------------------+
| root | % | *81F5E21E35407D884A6CD4A731AEBFB6AF209E1B |
| root | jtxdsh-129 | |
| root | 127.0.0.1 | |
| root | ::1 | |
| | jtxdsh-129 | |
+------+------------+-------------------------------------------+
5 rows in set (0.00 sec)
mysql>
(5.6)設定mysql客戶端軟連結(設定軟連結,使其在任意目錄下直接使用mysql的客戶端命令mysql -h localhost ...命令登陸,否則會報錯找不到mysql command)
(a)未設定軟連結前,直接使用mysql命令,報錯。(如果想使用得到mysql所在目錄下/usr/local/mysql/bin/mysql才能使用,這個跟windows上的原理是一樣的)
[[email protected] local]# mysql -h localhost -u root -P3306 -p
-bash: mysql: command not found
===>>>> 設定軟連結
[[email protected] local]# ln -s /usr/local/mysql/bin/mysql /usr/local/bin/mysql #建立mysql客戶端/usr/local/mysql/bin/mysql的軟連結/usr/local/bin/mysql
(b)設定軟連結後,直接使用mysql命令登陸mysql伺服器,成功。
[[email protected] local]# mysql -h localhost -u root -P3306 -p
Enter password:
。。。。
[[email protected] local]# ll /usr/local/bin
總用量 62156
-rwxr-xr-x. 1 root root 14498661 12月 22 11:49 ccmake
-rwxr-xr-x. 1 root root 16003711 12月 22 11:49 cmake
-rwxr-xr-x. 1 root root 15701488 12月 22 11:49 cpack
-rwxr-xr-x. 1 root root 17215421 12月 22 11:49 ctest
lrwxrwxrwx. 1 root root 26 12月 22 14:53 mysql -> /usr/local/mysql/bin/mysql
-rwxr-xr-x. 1 root root 2363 10月 24 16:55 pcre-config
-rwxr-xr-x. 1 root root 69899 10月 24 16:55 pcregrep
-rwxr-xr-x. 1 root root 143323 10月 24 16:55 pcretest
[[email protected] local]#
說明:mysql與mysqld的區別
-->>>位於 mysql安裝目錄/bin/{mysql,mysqld} 的兩個命令工具
mysql #就是通常用來登陸的命令,mysql is a command-line client for executing SQL statements interactively or in batch mode.
mysqld #mysqld服務(啟動它就啟動了mysql),mysqld is the MySQL server.
-->>>位於 mysql安裝目錄/support-files/mysql.server
mysql.server #用於服務註冊和啟動服務(啟動mysql)
(5.7)開牆mysql對外提供服務(開放mysql監聽的埠3306),遠端機器可以連線到本機的mysql伺服器(網路是可達的,ping 安裝mysql的機器的ip看看是否連通)
[[email protected] local]# /sbin/iptables -L -n | grep 3306 #發現沒有開牆
[[email protected] local]#
[[email protected] local]# vim /etc/sysconfig/iptables
-A INPUT -m state --state NEW -m tcp -p tcp --dport 80 -j ACCEPT #新增這句,在-I FORWARD -m....前面新增此句
service iptables restart #重啟防火牆服務iptables
[[email protected]txdsh-129 local]# mysql -h 192.168.179.129 -P 3306 -u root -p #模擬遠端登陸mysql伺服器,要求'root'@'jtxdsh-129'
Enter password:
ERROR 1045 (28000): Access denied for user 'root'@'jtxdsh-129' (using password: YES)
需要更新mysql使用者表中的一個host欄位為%,這樣才能夠遠端訪問mysql伺服器
update user set host = '%' where user = 'root';
commit; #手動提交事務(防止關閉事務,進行修改時不能自動提交)
flush privileges; #重新整理下許可權(這個不能少,否則還是不能遠端登陸)
在本地使用mysql客戶端命令mysql遠端連線mysql伺服器
(安裝了mysql伺服器的bin目錄下都有這個客戶端mysql命令,也可以通常客戶端工具:比如SQLyog/EMS for MySQL/MySQLQueryBrowser)
比如在本地windows系統中連線遠端的mysql伺服器
進入本地windows的cmd環境中,Win+r -->輸入cmd 回車
C:\Users\Administrator.PCNH>cd d:\mysql\bin #進入本地window中安裝的mysql的bin目錄下,目的是使用客戶端命令mysl來連線遠端mysl
C:\Users\Administrator.PCNH>d:
d:\mysql\bin>mysql -h 192.168.179.129 -P 3306 -u root -p #使用mysql命令連線192.168.179.129機器上的mysql伺服器
Enter password: ****
Welcome to the MySQL monitor. Commands end with ; or \g.
Your MySQL connection id is 9
Server version: 5.5.61 MySQL Community Server (GPL)
Copyright (c) 2000, 2018, Oracle and/or its affiliates. All rights reserved.
Oracle is a registered trademark of Oracle Corporation and/or its
affiliates. Other names may be trademarks of their respective
owners.
Type 'help;' or '\h' for help. Type '\c' to clear the current input statement.
mysql> show databases;
(5.8)mysql配置檔案常用屬性/引數/選項
mysql安裝目錄/support-files 目錄下存放著mysql的配置檔案,如下:
-rw-r--r--. 1 root root 19759 12月 22 13:58 my-innodb-heavy-4G.cnf
-rw-r--r--. 1 root root 4665 12月 22 13:58 my-large.cnf
-rw-r--r--. 1 root root 4676 12月 22 13:58 my-medium.cnf
-rw-r--r--. 1 root root 2840 12月 22 13:58 my-small.cnf
[email protected] support-files]# cat my-small.cnf |less #檢視一下配置檔案
touch my.cnf #建立一個自定義的配置檔案
mysql配置檔案中的內容通常分四大類:
client、mysqld、 mysqldump和 mysqlhotcopy
(5)===>> 方式二:原始碼方式安裝mysql( 如果使用的是未編譯的mysql軟體包,則需要cmake進行編譯和安裝。)
(5.1)建立Mysql所需要的環境(建立mysql的安裝目錄,mysql資料庫檔案儲存目錄,mysql使用者和組)
###建立這兩個東西的目的是為了更好的管理mysql資料庫軟體###
cat /etc/passwd | grep mysql #檢視mysql使用者是否存在linx系統中,如果存在則不需要建立了
cat /etc/groups | grep mysql #檢視mysql使用者組是否存在linx系統中,如果存在則不需要建立了
groupadd mysql #建立使用者組
useradd -r -g mysql mysql #建立使用者並指定所屬使用者組
### 建立安裝mysql時所需要的兩個目錄,如果不指定則使用預設的目錄###
mkdir mysql #建立mysql安裝目錄
mkdir mysql/data #建立mysql儲存資料的目錄
(5.2)安裝mysql資料庫
#進入mysql安裝目錄
cd /usr/local/src/mysql
#修改當前目錄的屬主為mysql,使用者組為mysql
chown -R mysql:mysql ./ #語法:chown -R 使用者名稱:組名 ./ ,表示把當前目錄下的所有資源的歸屬更改為(或設定成)當前mysql使用者和mysql使用者組
#安裝mysql資料庫
./scripts/mysql_install_db --user=mysql --basedir=/home/usr/local/src/mysql --datadir=/home/usr/local/src/mysql/data
#修改當前目錄歸屬為root:root
chown -R root:root ./
#修改data目錄歸屬為mysql:mysql
chown -R mysql:mysql data
(5.3)新增mysql啟動服務和啟動mysql
cp support-files/mysql.server /etc/init.d/mysql #新增mysql 開機時啟動
service mysql start #開啟mysql服務,即啟動mysql
(5.4)修改mysql的root使用者密碼(安裝成功後,root使用者預設密碼為空)
[[email protected] local]# mysql/bin/mysqladmin -u root password root #進入mysql安裝目錄的bin目錄下,設定mysql資料庫root使用者的密碼
(5.5 )設定Mysql配置檔案常用選項或屬性
mysql安裝目錄/support-files 目錄下存放著mysql的配置檔案,如下:
-rw-r--r--. 1 root root 19759 12月 22 13:58 my-innodb-heavy-4G.cnf
-rw-r--r--. 1 root root 4665 12月 22 13:58 my-large.cnf
-rw-r--r--. 1 root root 4676 12月 22 13:58 my-medium.cnf
-rw-r--r--. 1 root root 2840 12月 22 13:58 my-small.cnf
[email protected] support-files]# cat my-small.cnf |less #檢視一下配置檔案
touch my.cnf #建立一個自定義的配置檔案
Mysql伺服器基本使用,希望能夠幫助到大家。