
How to become a Git expert
Scenario 1
Let’s say that you have committed a bunch of files and realised that the commit message you entered is actually not clear. Now you want to change the commit message. In order to do this you can use git commit --amend
git commit --amend -m “New commit message”
Scenario 2
Let’s say that you wanted to commit six files but, by mistake, you end up committing only five files. You may think that you can create a new commit and add the 6th file to that commit.
There is nothing wrong with this approach. But, to maintain a neat commit history, wouldn’t it be nicer if you could actually somehow add this file to your previous commit itself? This can be done through git commit --amend as well:
git add file6git commit --amend --no-edit
--no-edit means that the commit message does not change.
Scenario 3
Whenever you do a commit in Git, the commit has an author name and author email tied to it. Generally, when you set up Git for the first time, you set up the author name and email. You don’t need to worry about the author details for every commit.
That said, it’s possible that for a particular project you want to use a different email ID. You need to configure the email id for that project with the command:
git config user.email “your email id”
Let’s say that you forgot to configure the email and already did your first commit. Amend can be used to change the author of your previous commit as well. The author of the commit can be changed using the following command:
git commit --amend --author "Author Name <Author Email>"
Point to note
Use the amend command only in your local repository. Using amend for the remote repository can create a lot of confusion.
My Commit history is a mess. How do I handle it?
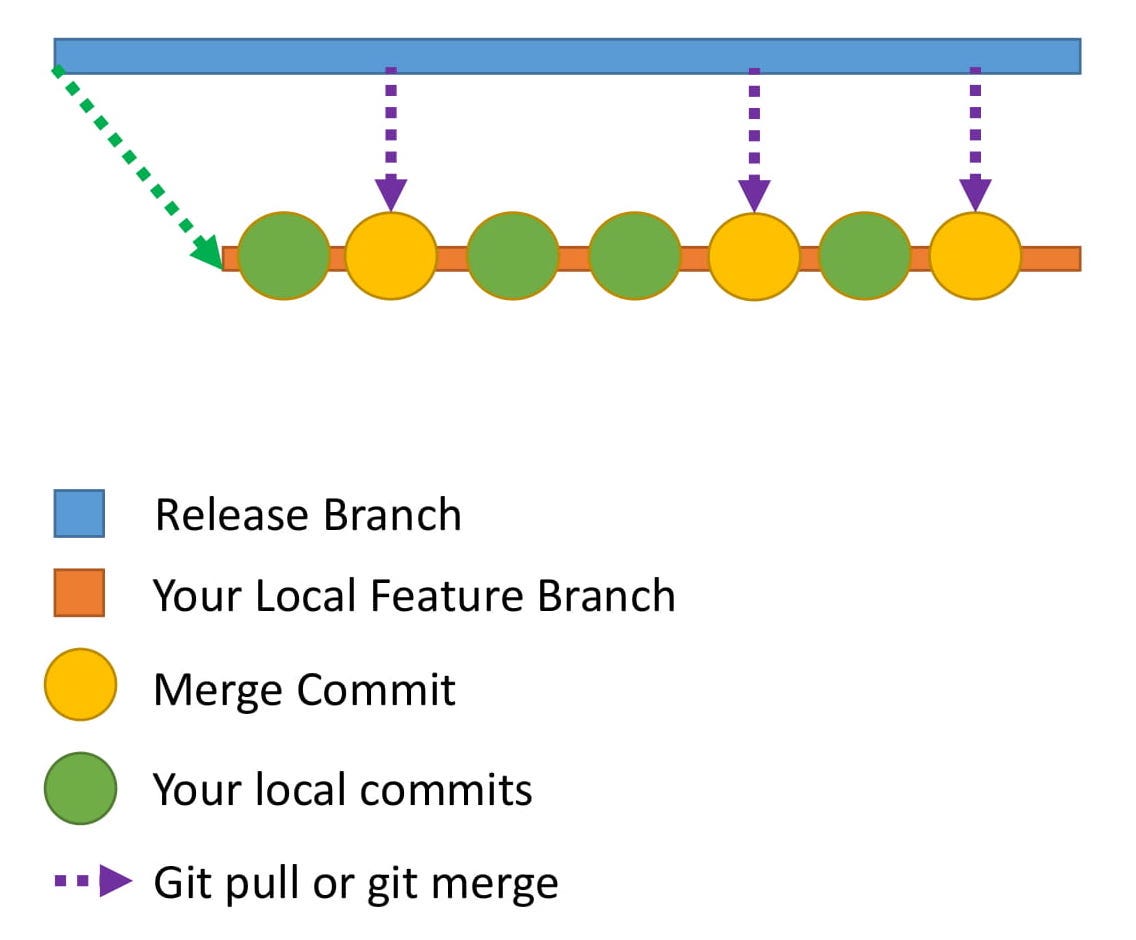
Let’s say that you are working on a piece of code. You know that the code is going to take approximately ten days to complete. Within those ten days, the other developers will also be committing code to the remote repository.
It is a good practise to keep your local repository code up-to-date with the code in the remote repository. This avoids a lot of merge conflicts later when you raise a pull request. So you decide that you will pull the changes from the remote repository once every two days.
Every time you pull the code from the remote repository to the local repository a new merge commit is created in your local repository. This means that your local commit history is going to have a lot of merge commits which can make things look confusing to the reviewer.

How do you make the commit history look neater?
This is where rebase comes to the rescue.
What is rebasing?
Let me explain this through an example.

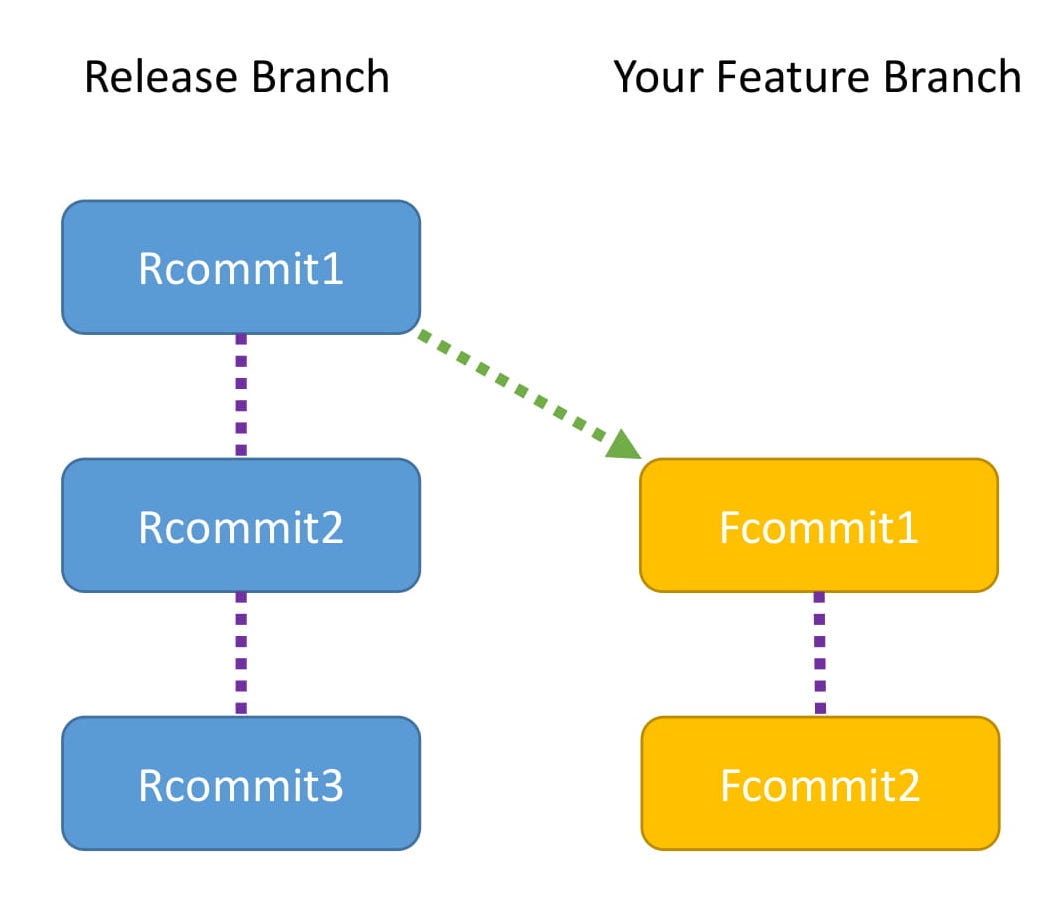
- The Release branch has three commits: Rcommit1, Rcommit2, and Rcommit3.
- You created your Feature branch from the Release branch when it had only one commit, which is Rcommit1.
- You have added two commits to the Feature branch. They are Fcommit1 and Fcommit2.
- Your goal is to get the commits from the Release branch into your Feature branch.
- You are going to use rebase to do this.
- Let the name of the Release branch be release and the name of the Feature branch be feature.
- Rebasing can be done using the following commands:
git checkout featuregit rebase release
Rebasing
While rebasing, your goal is to ensure the Feature branch gets the latest code from the Release branch.
Rebasing tries to add each commit, one by one, and checks for conflicts. Does that sound confusing?
Let me explain with the help of a diagram.
This shows what rebasing actually does internally:

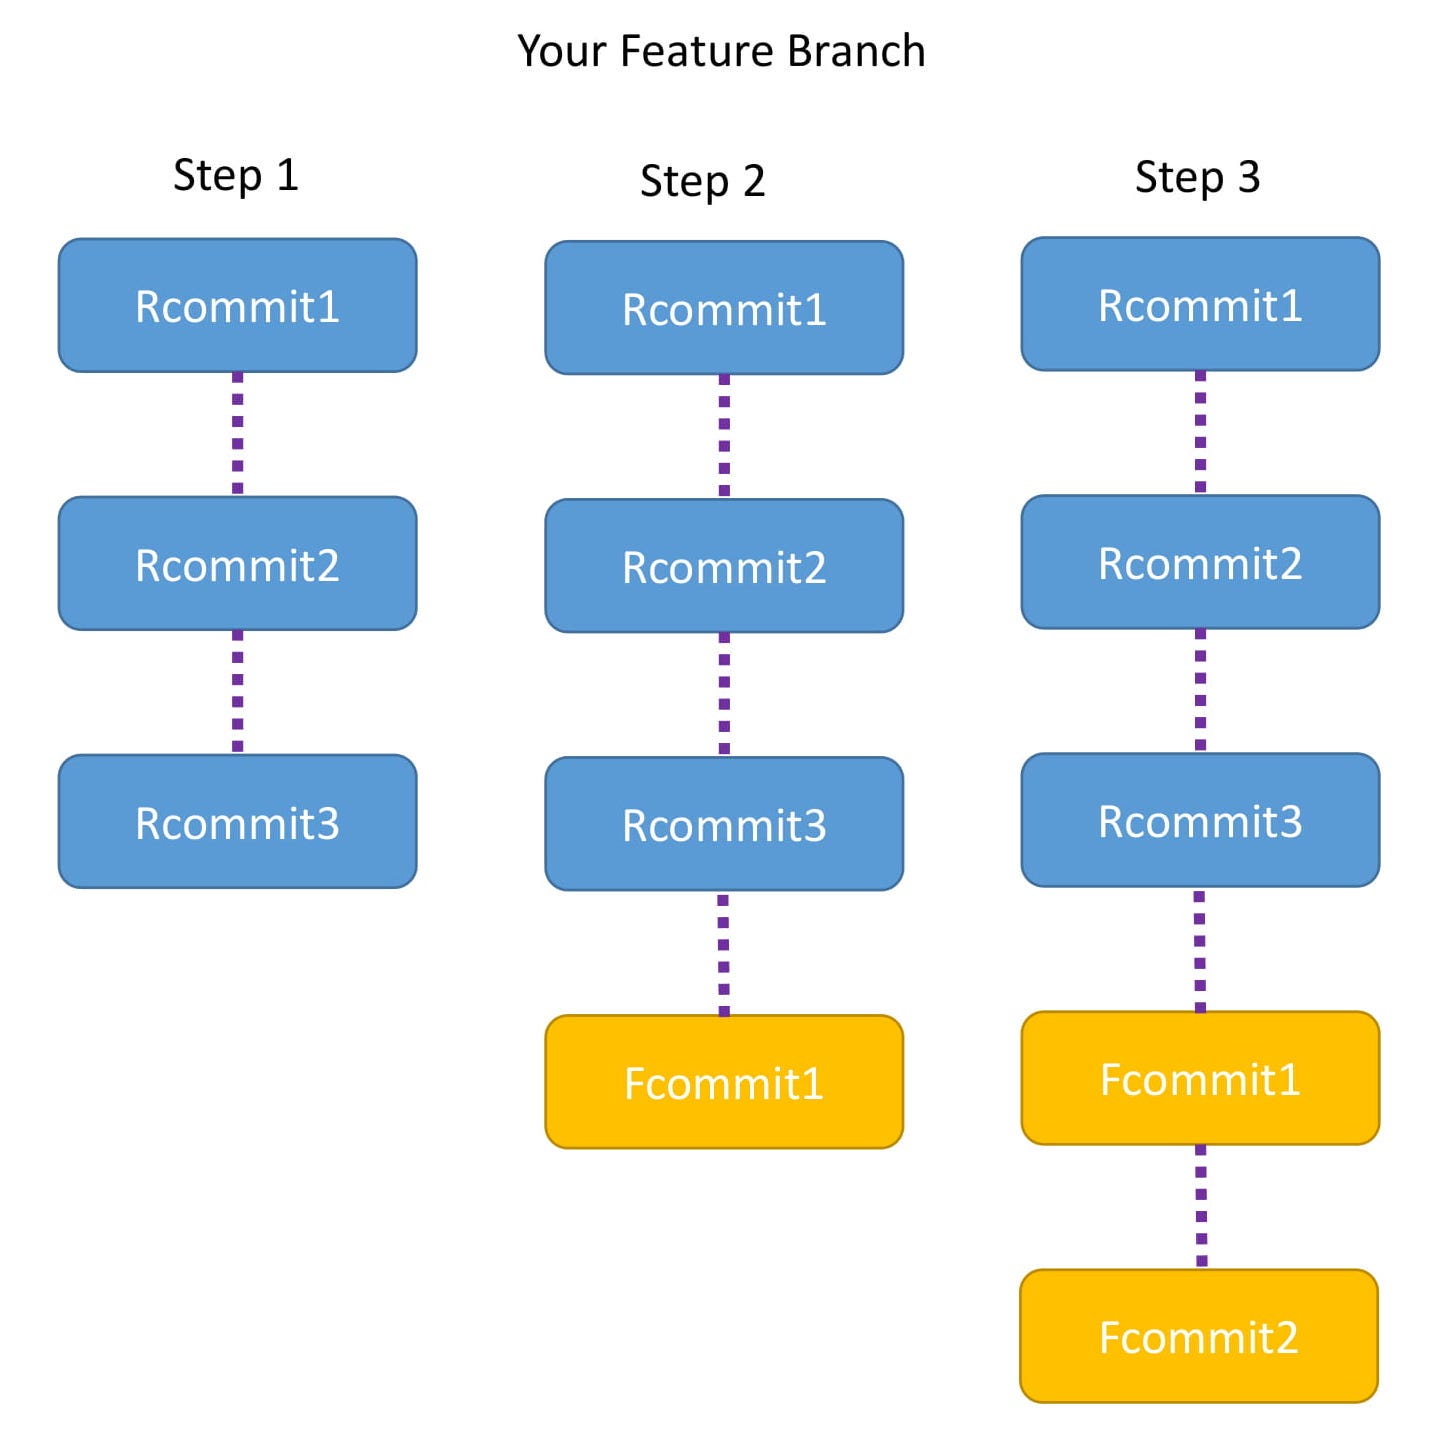
Step 1
- The moment you run the command, the Feature branch is pointed to the head of Release branch.
- Now the Feature branch has three commits: Rcommit1, Rcommit2, and Rcommit3.
- You may be wondering what happened to Fcommit1 and Fcommit2.
- The commits are still there and will be used in the steps below.
Step 2
- Now Git tries to add Fcommit1 to the Feature branch.
- If there is no conflict Fcommit1 is added after Rcommit3
- If there is a conflict, Git will notify you, and you will have to resolve the conflict manually.
Step 3
- Once Fcommit1 is added, Git will try to add Fcommit2.
- Again, if there is no conflict Fcommit2 is added after Fcommit1 and the rebase is successful.
- If there is a conflict, Git will notify you, and you will have to resolve it manually.
- After the entire rebase is done, you will notice that the Feature branch has Rcommit1, Rcommit2, Rcommit3 , Fcommit1, and Fcommit2.
Points to note
- Both Rebase and Merge are useful in Git. One is not better than the other.
- In the case of a merge you will have a merge commit. In the case of a rebase there is no extra commit like a merge commit.
- One best practise is to use the commands at different points. Use rebase when you are updating your local code repository with the latest code from the remote repository. Use merge when you are dealing with pull requests to merge the Feature branch back with the Release or Master branch.
Congrats
You are now a Git expert ?
In this post you have learnt about:
- amending commits
- rebase
Both of these are very useful concepts. Go explore the world of Git to learn even more.
About the author
I love technology and follow the advancements in the field. I also like helping others with my technology knowledge.