Using Google Colab for MNIST with fastai v1
Using Google Colab for MNIST with fastai v1
Now that fastai version 1 is out, I decided to get my hands dirty. On Google Colab, you can use GPU for free for your notebook project. So I picked Colab to try out all new fastai version 1 (1.0.5 to be exact).
You can create an ipynb on your Gdrive by `new>more>Colaboratory`.

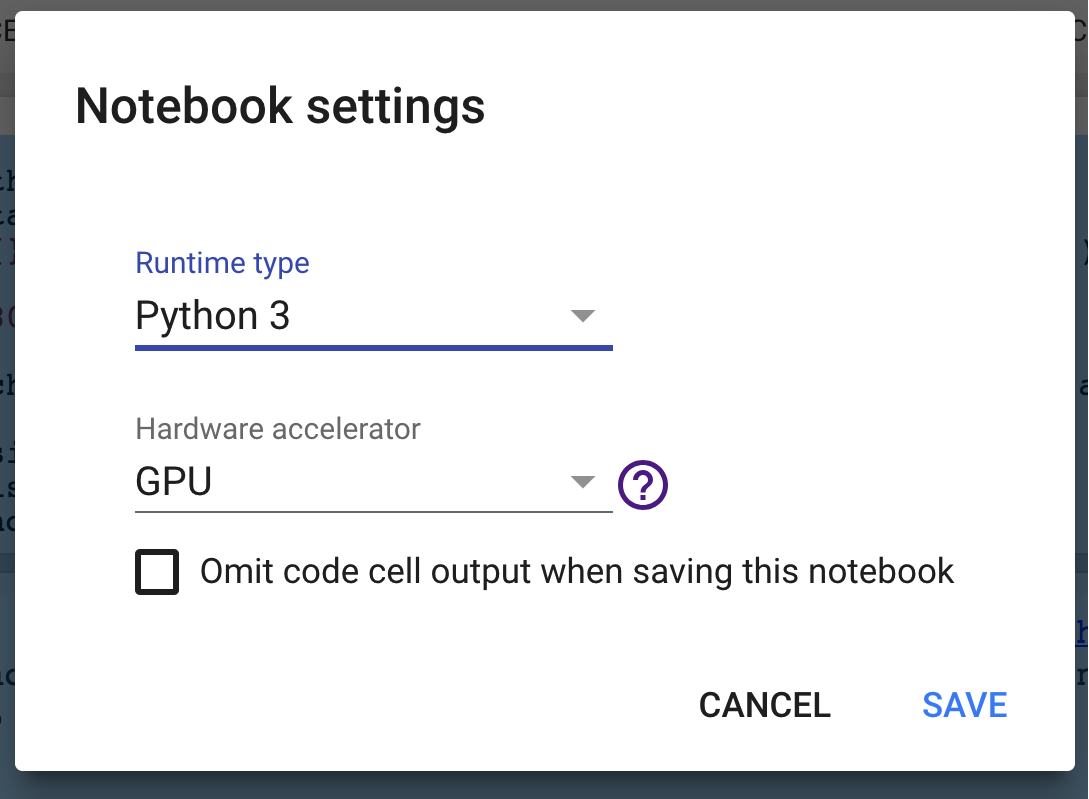
Once you open the new ipynb file, you can change your runtime to use GPU by going to `Runtime > Change runtime type`. Select Python3 and GPU.

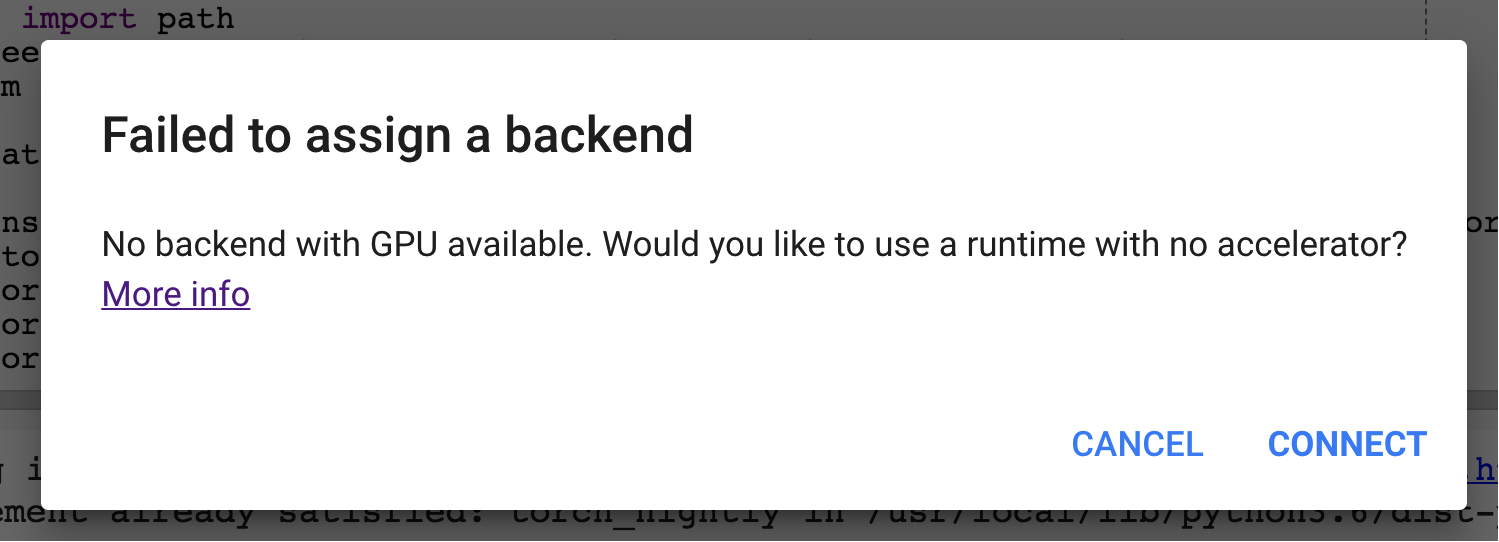
By the way, I think Colab is ok to try out machine learning with small data but it’s not enough for serious machine learning. (Probably because it is free,) many times you will encounter GPU not available error. Then you would have to try later or use CPU environment.


I found handy code from a [Github page](https://github.com/chungbrain/Google-Colab-with-GPU) that I adapted. What it does is, it installs PyTorch preview (nightly) build which fastai v1 depends on. It checks if hardware has Nvidia GPU installed and installs CPU only build if GPU is not available. If everything goes as expected, you should see nightly build version printed (something similar to `1.0.0.dev20181005`) and True
torch.cuda.is_available() and torch.backends.cudnn.enabled .

And then you install fastai. The library is in active development, so I specified a version to be “1.0.5” in case there maybe a breaking change in API in the future.


These are all imports you need to follow this short tutorial. Library author Jeremy promotes importing by * for faster iterations and better interactivity. I think using * is good for fast prototyping and experiments also. But importing specifically one by one should clarify where everything is coming from so it should help readers of this post and me to better learn about this library. Also, I am not experimenting with this notebook anymore now that I am writing about it so there is no reason for me to use * import. If I continue using this style of importing in the future posts, now you know why I do so (also I come from Software engineering background where specific import s are much appreciated). But feel free to use * import.


`MNIST_PATH` is path to MNIST data which is provided by fastai.docs . And we untar(decompress) the data.

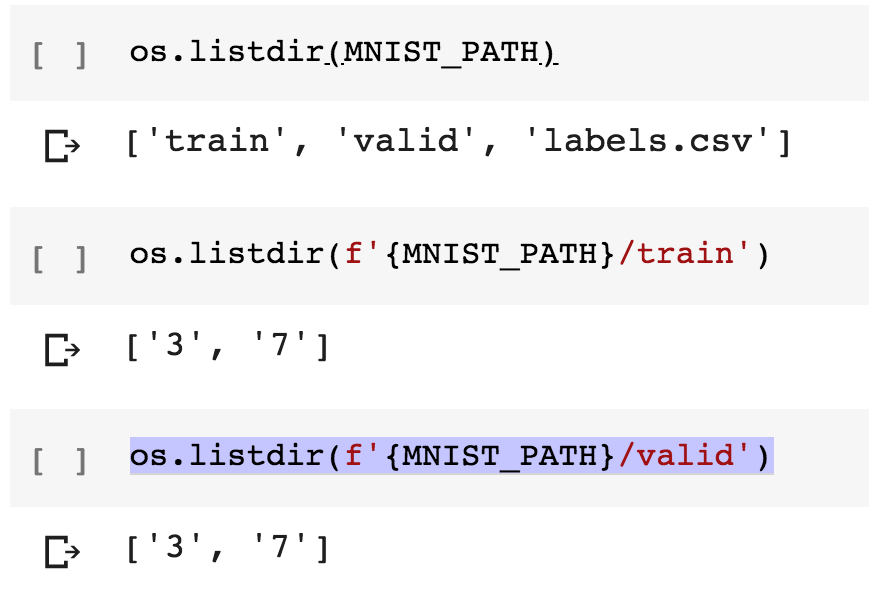
We can MNIST_PATH contains train, valid(ation) directories and a label csv file. And each of the directories has subdirectory 3 and 7 . Fully-fledged MNIST would have all 10 digits but I guess this is enough for just demonstrating image classification example.

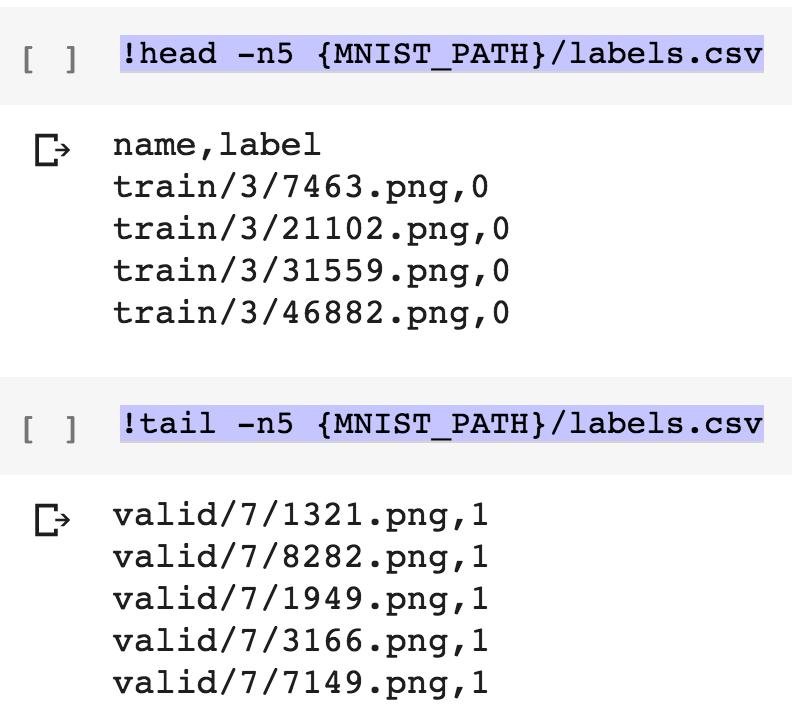
Examination of contents inside of the csv file shows that there are name column and then label column. Name has path to the individual examples and label seems to have value 0 and 1. From what we can see so far we can guess 0 label means the image file has number 3 and 1 means the image file has number 7.


Now we load the data by passing the path to data and data set transformation function and we get the data object. Here we only apply some random paddings for data augmentation purpose. If we index to the 0th item in the train data set, we get image and label. And the image has number 3 in it.


Now we pass data, architecture (resnet18 in this case) and metrics to ConvLearner (Conv as in Convolutional, we will use convolutional neural network because this is computer vision problem) and we get back the learn object. We then train 1 epoch by calling fit on the object. Measuring accuracy gives me that it is 98.6% accurate in distinguishing 3 from 7. Well, for many many good reasons you would probably want to use [log loss](http://wiki.fast.ai/index.php/Log_Loss) as your metrics but let’s just leave it this way for this post.

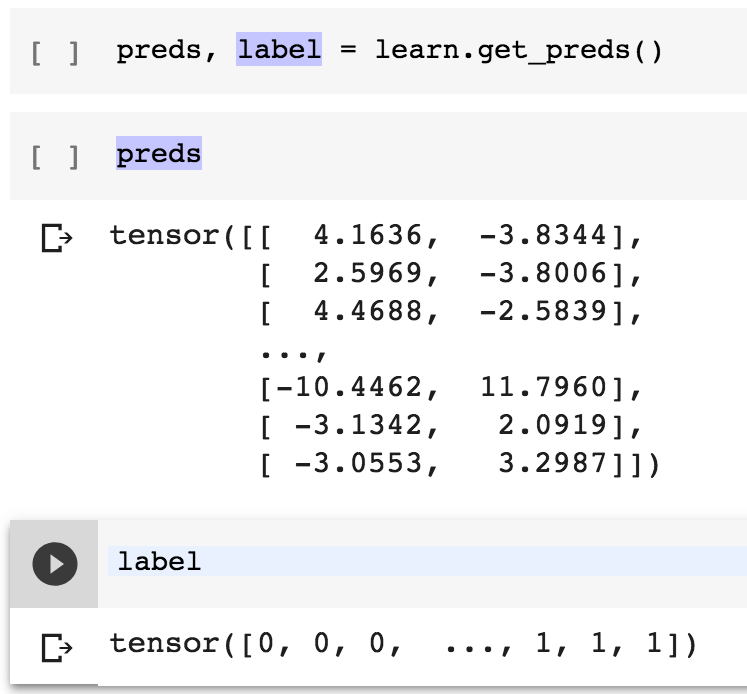
Lastly, what do we actually get by calling get_preds method? It turns out that it returns a) predictions as probabilities of an example being a certain class and b) actual labels that we can use predictions against to measure the loss.
Well that was it for this post. Please give me feed back so that I can improve my post. I don’t think I will use Colab that much for machine learning purpose , but it seems like it’s good deal for the bucks (which is 0) and great way to collaborate online using notebook like environment. The fact that it needs almost no setup (installing Anacoda or such for the notebook) is also very good. I will continue writing about machine learning but I will move on to Google Cloud Platform Compute engine the next time. It gives 300$ worth of free credits for trial so I think it is a great option to practice machine learning with arbitrarily powerful machine for free (well at least in the beginning). Hope this helped.
