
Access Control Management with Swift
The Plan
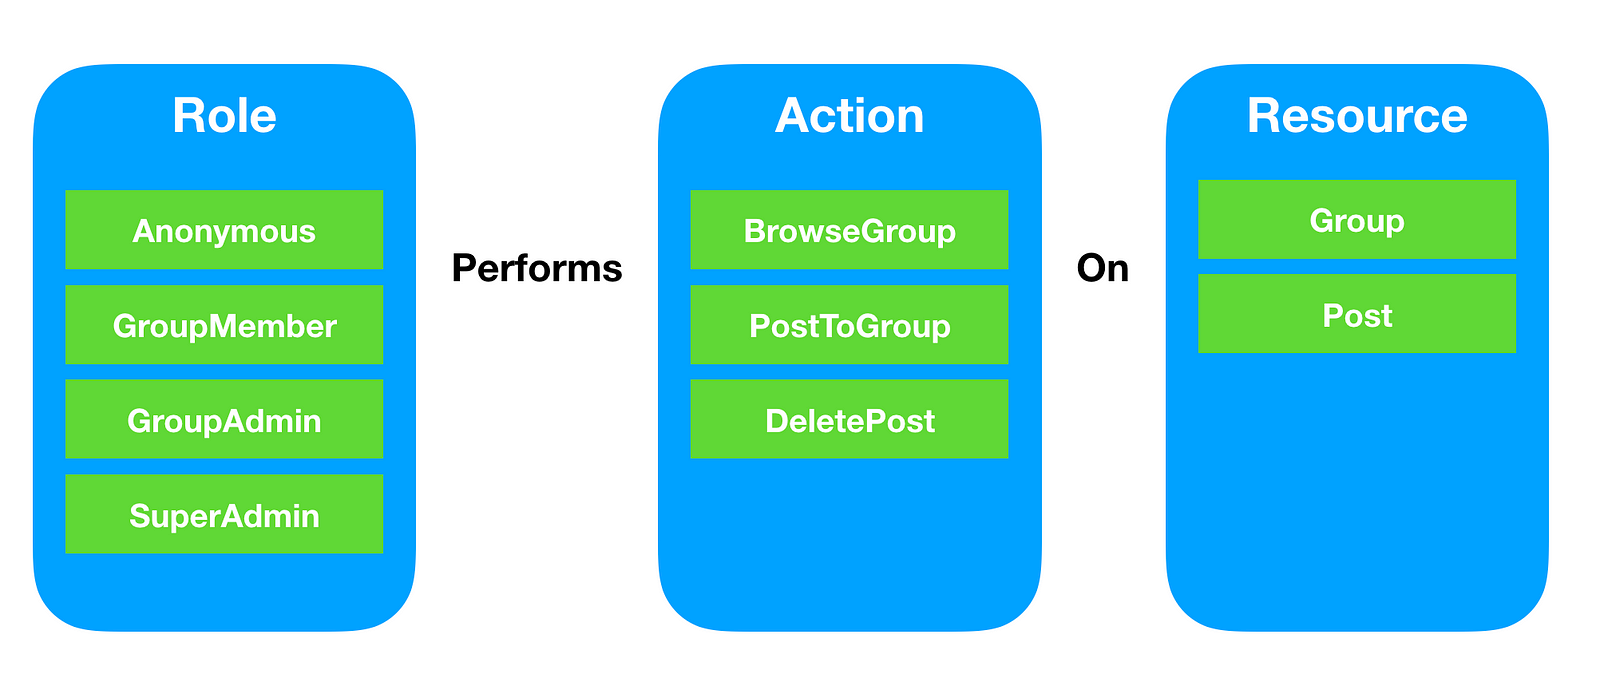
Let’s start by dividing the requirements into three main domains:
- Actors who perform actions (Roles): anonymous users, group members, group admins, super admins
- (Actions) performed by actors: browse group, post to group, delete post
- The (Resources) that actors perform actions on them: groups, posts

Next, we need to form a declarative way (think of it like an equation) to describe the relationship between these three domains in terms of which role should be able to perform action on a resource. For example, group member should be able to browse a group when he is a member of this group.

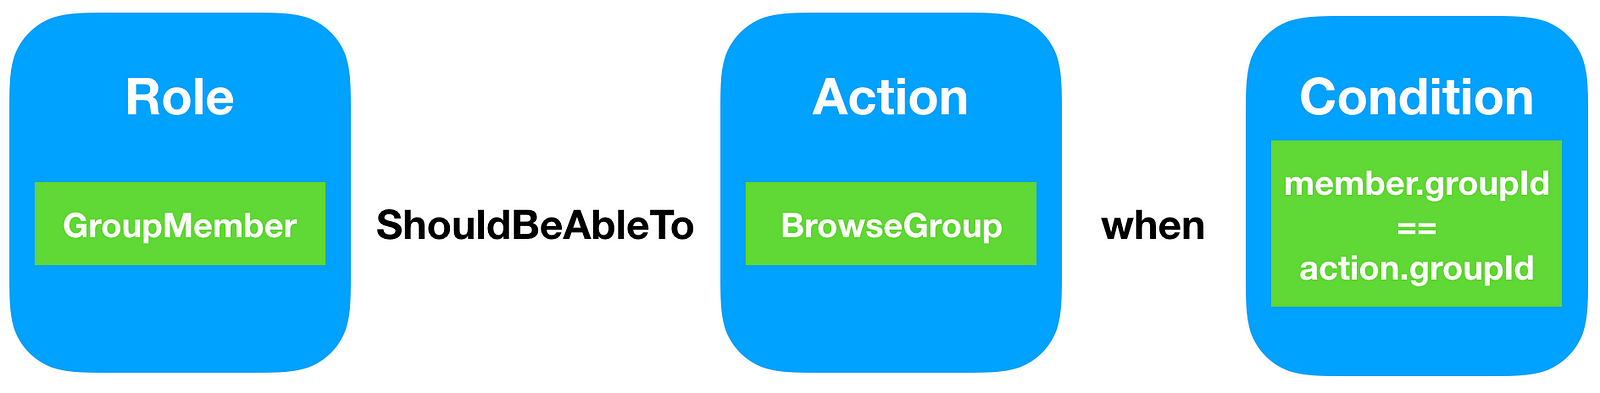
Let’s call this equation a policy, so now we can convert any requirement we have regarding access control into a policy. Some policies doesn’t even need a condition, for example a super admin can browse any group without any limitation; in that case we need to omit the condition as it will always return true.


In the next section will leverage the power of Swift to implement a framework that can:
- Describe and maintain our requirements in form of a set of policies.
- Provide a clean API for other system components to inquiry if a specific user is allowed to do a specific action or not (complying to the policies).
The Execution
Let’s start by writing our solution in pseudo code to give us a clue about what do we want to achieve in Swift:
// The Group member policy
GroupMember.shouldBeAbleTo(BrowseGroup)
    .when(member.groupId == action.groupId)
// create users
user1 = GroupMember(name = "Adam Smith", age = 18, groupId = 1)
user2 = GroupMember(name = "Adam Smith", age = 18, groupId = 2)
// create action
browseGroup2 = BrowseGroup(groupId = 2)
// check if user is allowed
user1.can(browseGroup2)  // false
user2.can(browseGroup2)  // true
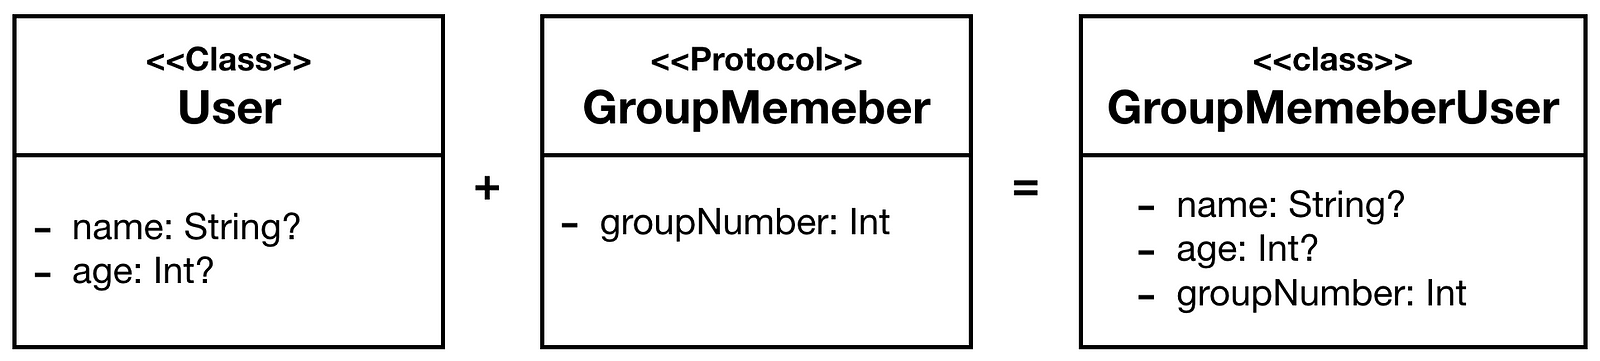
In our news app, assume that we have a class User that contains basic user information like name and age and a class Group containing basic group information like groupNumber and a flag indicating if group is public or not:
Because Swift Is a Protocol-Oriented Programming Language, we will use the power of Protocols and Protocol extensions to build our solution. We will compose roles to users by mapping our roles to protocols and mix these protocols with User class to generate different types of users based on their roles. For example a User class conforming to GroupMember protocol is a GroupMemberUser and must have property groupNumber .

Now taking role hierarchy into consideration we will model all roles as protocols. For example GroupAdmin extended GroupMember because every GroupAdmin is-a GroupMember, this means that a group admin have all the privileges group member had plus more.
Next step is modeling actions, mapping different actions to simple types (in our case I choose struct) that conforms to protocol Action
Next piece in the puzzle is the one that manages the relationship between actions and roles, the Policies.Remember from the previous section that Policy = Role + Action + Condition. Policy has two important methods, apply which executes condition on an action and a role instances and when which accepts a condition because condition is optional and not included in the policy initializer.
Connecting the dots
In order for our solution to be more like the pseudo code we started with, we will change Role and Action protocols to be like this:
Here we added shouldBeAbleTo function to Role protocol, this function acts as a factory method that creates a policy connecting an Action to the caller Role, we can then assign additional condition to this policy using the when function we added before in Policy class. We also added the function can which validates if the role can perform an action by evaluating this action over all rules and return true if anyone of them returned true. Note that we also added a required empty initializer to both protocols.
Everything is in place now, we can now feed our framework with all the policies we had in the requirements and build our app
This implementation allows us to add new policies with the minimum cost of change as we discussed before. If we received a new requirement that we want to allow users to browse a group if it is created for news within 30 km from the place the user lives in we can implement it as the following:
Conclusion
In this article we implemented a simple attributed role based access control framework in Swift. Our solution used the power of swift protocols to allow us to model the requirements we had in form of a set of policies. The full source code of this article can be found in the Example project.