Using TimescaleDB with Hasura GraphQL
Using TimescaleDB with Hasura GraphQL
TimescaleDB is the first open-source time-series database that natively supports full SQL and is deployed in production across industries all around the world for powering applications in DevOps, IoT, SaaS, and Machine Learning. It is packaged as a Postgres extension. As the
For example, you can use create powerful views using TimescaleDB functions and instantly build real-time dashboards using GraphQL live-queries that Hasura will automatically provide. You can leverage TimescaleDB’s fast ingestion and use GraphQL mutations from your app to insert data quickly and easily.
For this post, we are going to set this up on a Digital Ocean VM.
TL;DR
These are the topics we’ll cover in this guide:
- Create a Digital Ocean droplet and install docker and docker-compose
- Run Hasura with TimescaleDB using docker-compose
- Learn what hypertables are
- Run GraphQL queries on hypertables
- Run GraphQL subscriptions and get real-time data
Create a Digital Ocean droplet
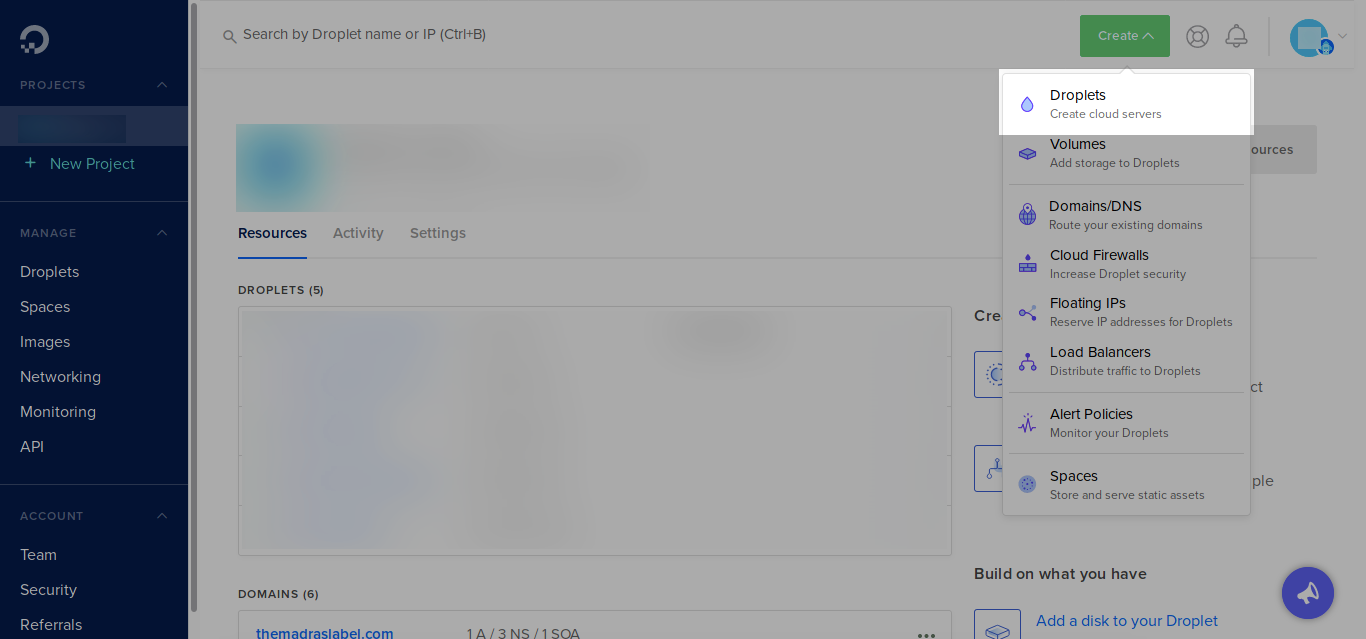
Open Digital Ocean console, and click on the “Create” button, and select “Droplet” from the menu:

In the next screen, choose the image to be “Ubuntu 16.04”:

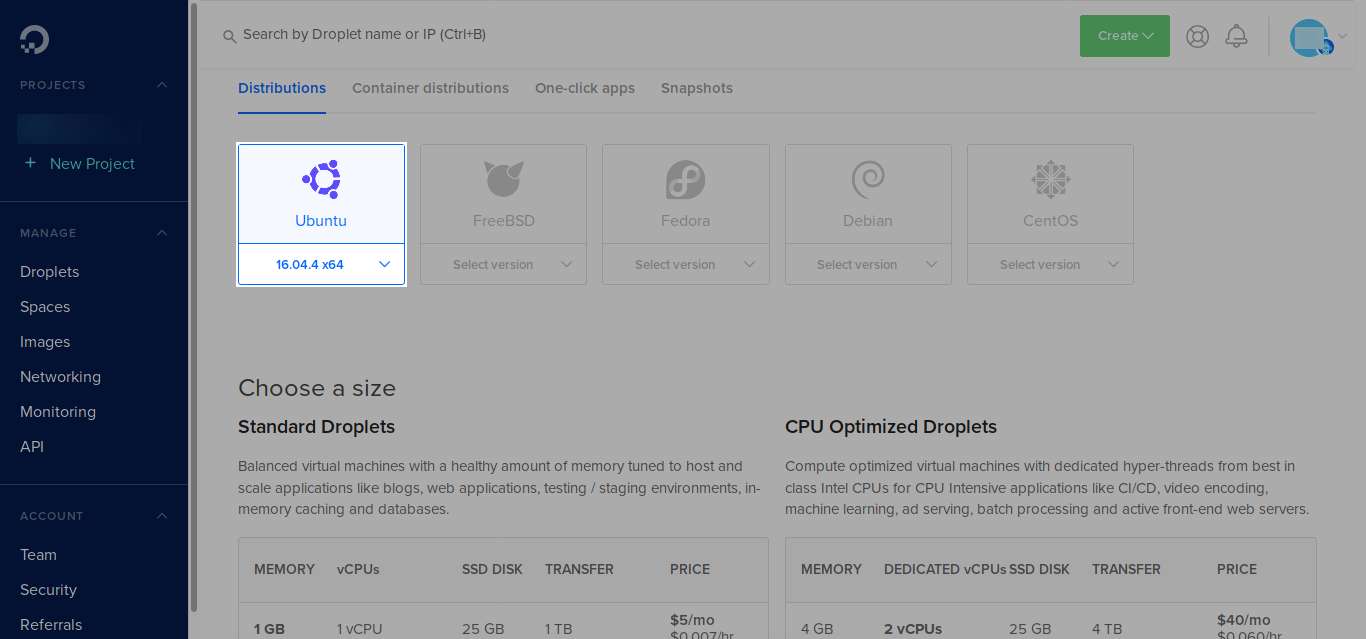
Then choose a machine size and choose a region of your preference.
Next, make sure to add a SSH key (you can add your existing SSH key on your computer), so that we can login to our server. Finally, click on the “Create” button.
Installing Docker
Get the public IP of your droplet, and then SSH to the server:
$ ssh -i <path-to-the-private-key> [email protected]<public-ip-of-droplet>
Once we are logged in, install Docker and Docker compose:
$ apt-get update$ apt-get install docker.io docker-compose# verify docker is working$ docker info
Run TimescaleDB with Hasura
To run TimescaleDB stand-alone, we can just run their docker image:
$ docker run -d -p 5432:5432 timescale/timescaledb:latest-pg10
This will pull the timescale/timescaledb docker image and run it, binding the host’s port 5432 to the container’s port 5432.
But instead of this let’s use docker compose to run TimescaleDB and Hasura GraphQL together.
Copy and paste the following in a file, name it docker-compose.yaml :
Change the HASURA_GRAPHQL_ACCESS_KEY and POSTGRES_PASSWORD to your preference.
Then run:
$ docker-compose up -d
Check if everything is running, by:
$ docker ps
CONTAINER ID IMAGE ... CREATED STATUS PORTS ...097f58433a2b hasura/graphql-engine ... 1m ago Up 1m 8080->8080/tcp ...bccb3af615fd timescale/timescaledb ... 1m ago Up 1m 5432/tcp ......
This starts both TimescaleDB and Hasura.
Now in your browser open: http://your-droplet-public-ip:8080 , and you should see the Hasura console. It will prompt for the access key you have entered before.
Setup the TimescaleDB extension
We have to setup the timescaledb extension on our database:
We need to use psql to create the extension. To do that, we need to exec into out container.
Find out the container id from:
$ docker ps
Then exec into the container with psql , and create the extension:
# exec into the container, with psql$ docker exec -it <container-id> psql -U postgres
# once we are connected to the db, we get a psql promptpostgres-#
# create the timescale extensionpostgres-# CREATE EXTENSION IF NOT EXISTS timescaledb CASCADE;Now, we are all set to use TimescaleDB.
First steps with TimescaleDB
SQL tables in Timescale are called hypertables. They are an abstraction over standard SQL tables for efficient managing and querying of timescale data. For the end user, they can use hypertables as normally they would with standard SQL statements.
Note: hypertables are created by first creating a normal SQL table, then converting it into a hypertable via the function
Let’s create our first hypertable via the Hasura console:
-- We start by creating a regular SQL table
CREATE TABLE conditions ( time TIMESTAMPTZ NOT NULL, location TEXT NOT NULL, temperature DOUBLE PRECISION NULL, -- in celsius humidity DOUBLE PRECISION NULL -- in percentage);

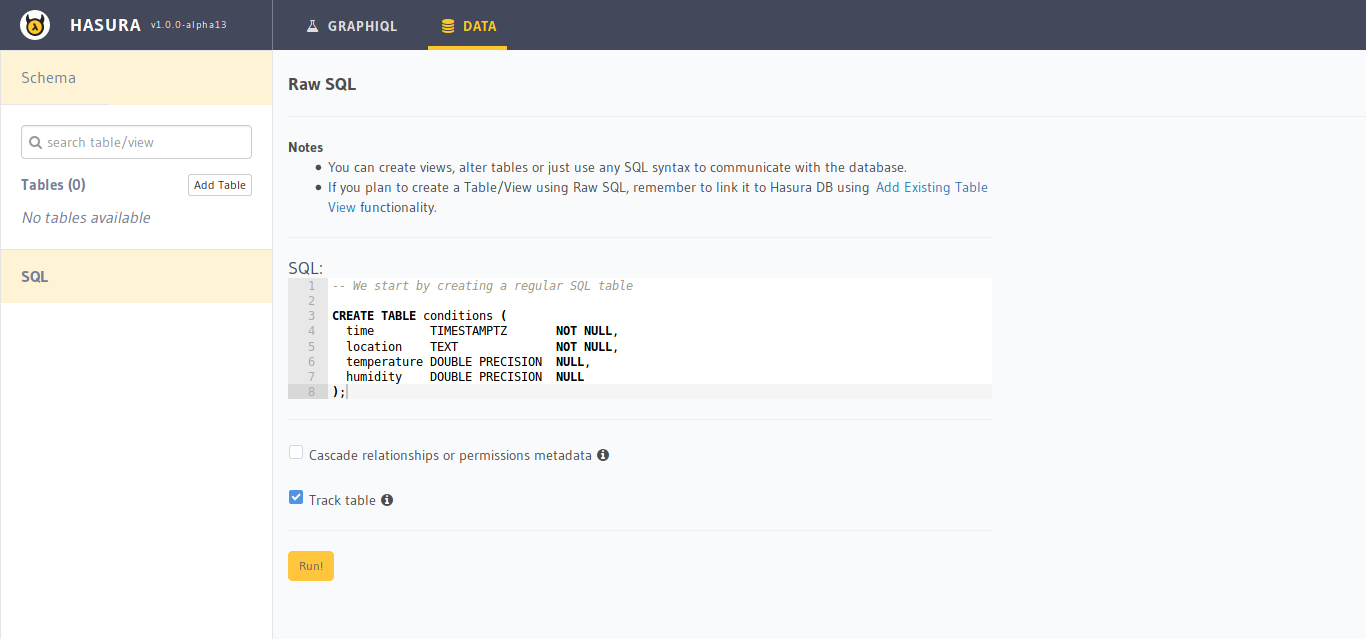
We are using raw SQL to create the table because we have data types that are not available in the console directly. We will also track the table, so that we can perform GraphQL queries on it.
Next, convert it into a hypertable:
-- This creates a hypertable that is partitioned by time-- using the values in the `time` column.SELECT create_hypertable('conditions', 'time');
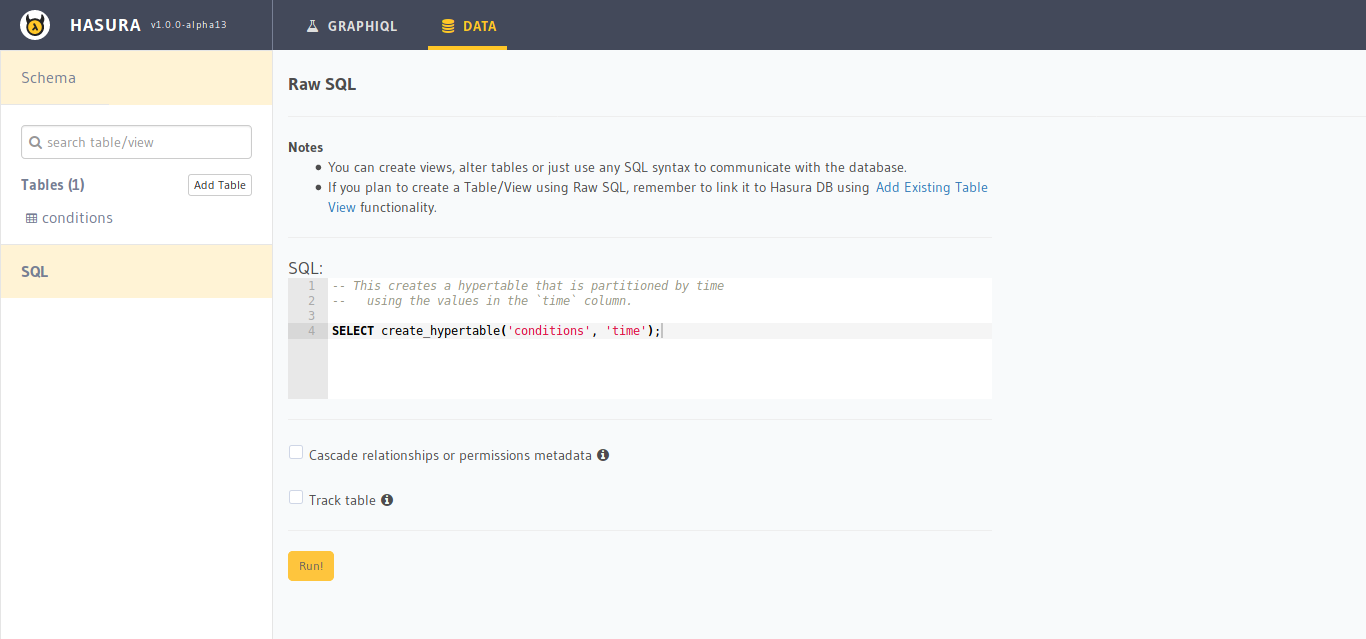
-- This creates a hypertable that is partitioned by time-- using the values in the `time` column.SELECT create_hypertable('conditions', 'time');Let’s insert some sample data:
INSERT INTO conditions(time, location, temperature, humidity) VALUES (NOW(), 'office', 27.24, 48.15);INSERT INTO conditions(time, location, temperature, humidity) VALUES (NOW(), 'home', 32.21, 77.23);
The following query will fetch last three hours data, grouped in 15 minute windows with their max temperature and humidity, and grouped by each location:
SELECT time_bucket('15 minutes', time) AS fifteen_min, location, COUNT(*), MAX(temperature) AS max_temp, MAX(humidity) AS max_hum FROM conditions WHERE time > NOW() - interval '3 hours' GROUP BY fifteen_min, location ORDER BY fifteen_min DESC, max_temp DESC;Hasura GraphQL with TimescaleDB
To query our hypertables with TimescaleDB-specific functions like time_bucket , we can just create a view, track the view and make GraphQL queries on the view.
We can create this view:
CREATE VIEW last_fifteen_mins_stats AS ( SELECT time_bucket('15 minutes', time) AS fifteen_min, location, COUNT(*), MAX(temperature) AS max_temp, MAX(humidity) AS max_hum FROM conditions WHERE time > NOW() - interval '3 hours' GROUP BY fifteen_min, location ORDER BY fifteen_min DESC, max_temp DESC);
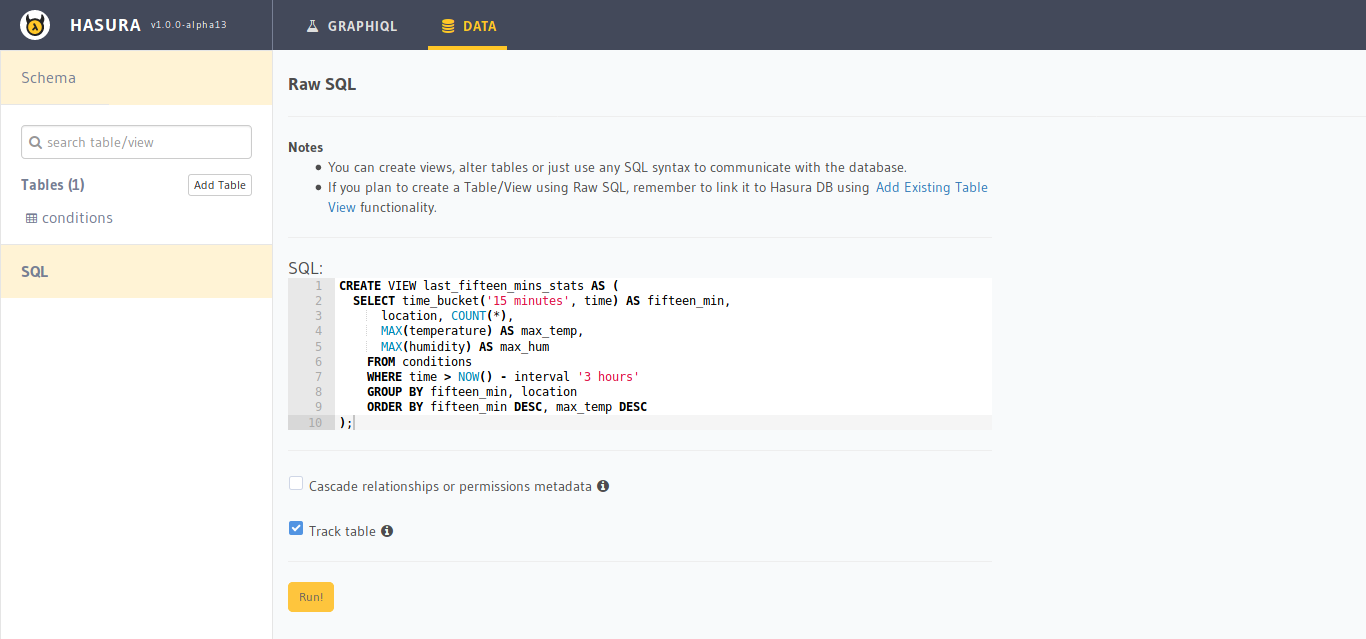
Now we can make GraphQL queries on our view:
query { last_fifteen_mins_stats { location, fifteen_min, max_temp, max_hum }}Which will result in:
{ "data": { "last_fifteen_mins_stats": [ { "max_temp": 32.21, "location": "home", "max_hum": 77.23, "fifteen_min": "2018-08-22T11:15:00+00:00" }, { "max_temp": 27.24, "location": "office", "max_hum": 77.23, "fifteen_min": "2018-08-22T11:15:00+00:00" } }}Real-time data with TimescaleDB & Hasura GraphQL
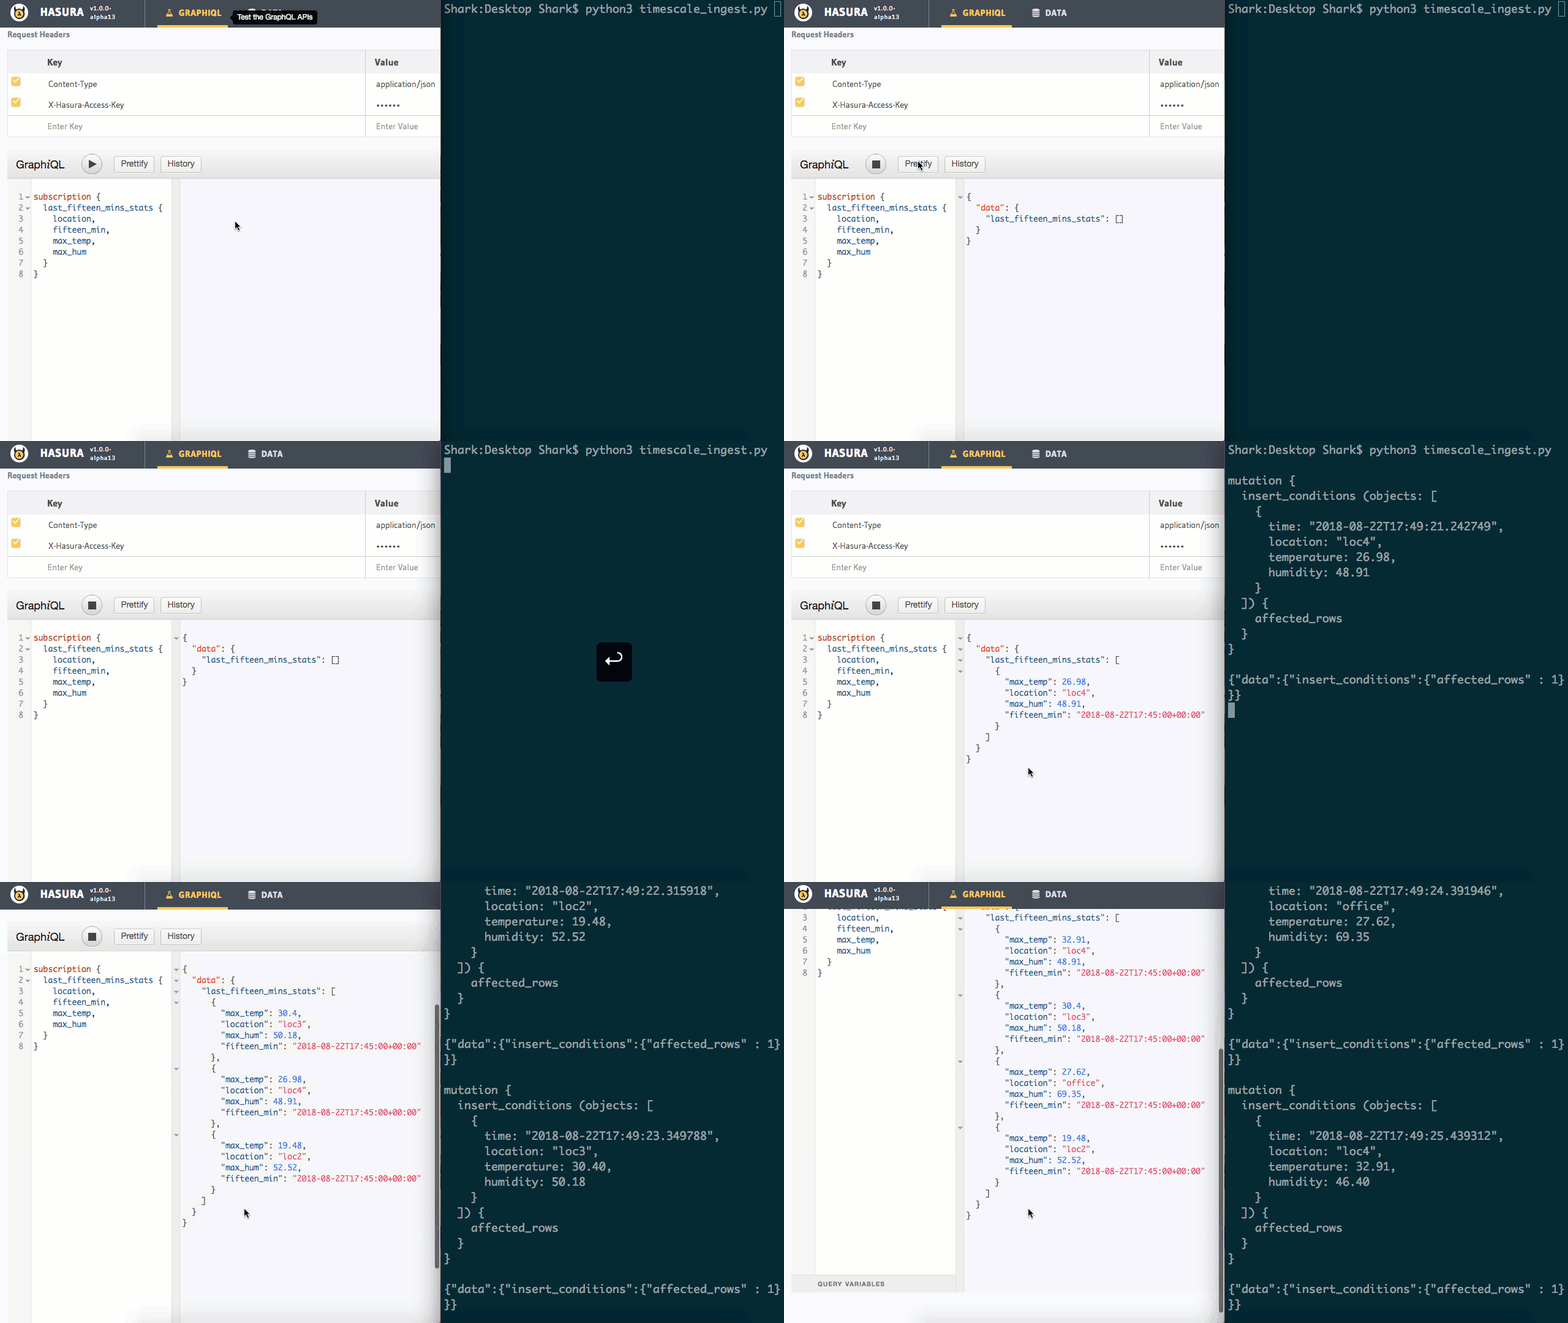
We can make a simple Python script which ingests data into TimescaleDB. We can run a subscription query to fetch our data in real-time.
As our conditions table is also tracked in Hasura GraphQL, we can make insert mutations !
Our script looks like this:
If we save this script in a file timescale_ingest.py , we can run this script by:
$ python3 timescale_ingest.py
This will run in an infinite loop and ingest random data into our TimescaleDB instance via Hasura GraphQL mutations.
We can run subscribe to this query by using Hasura GraphQL subscription:
subscription { last_fifteen_mins_stats { location, fifteen_min, max_temp, max_hum }}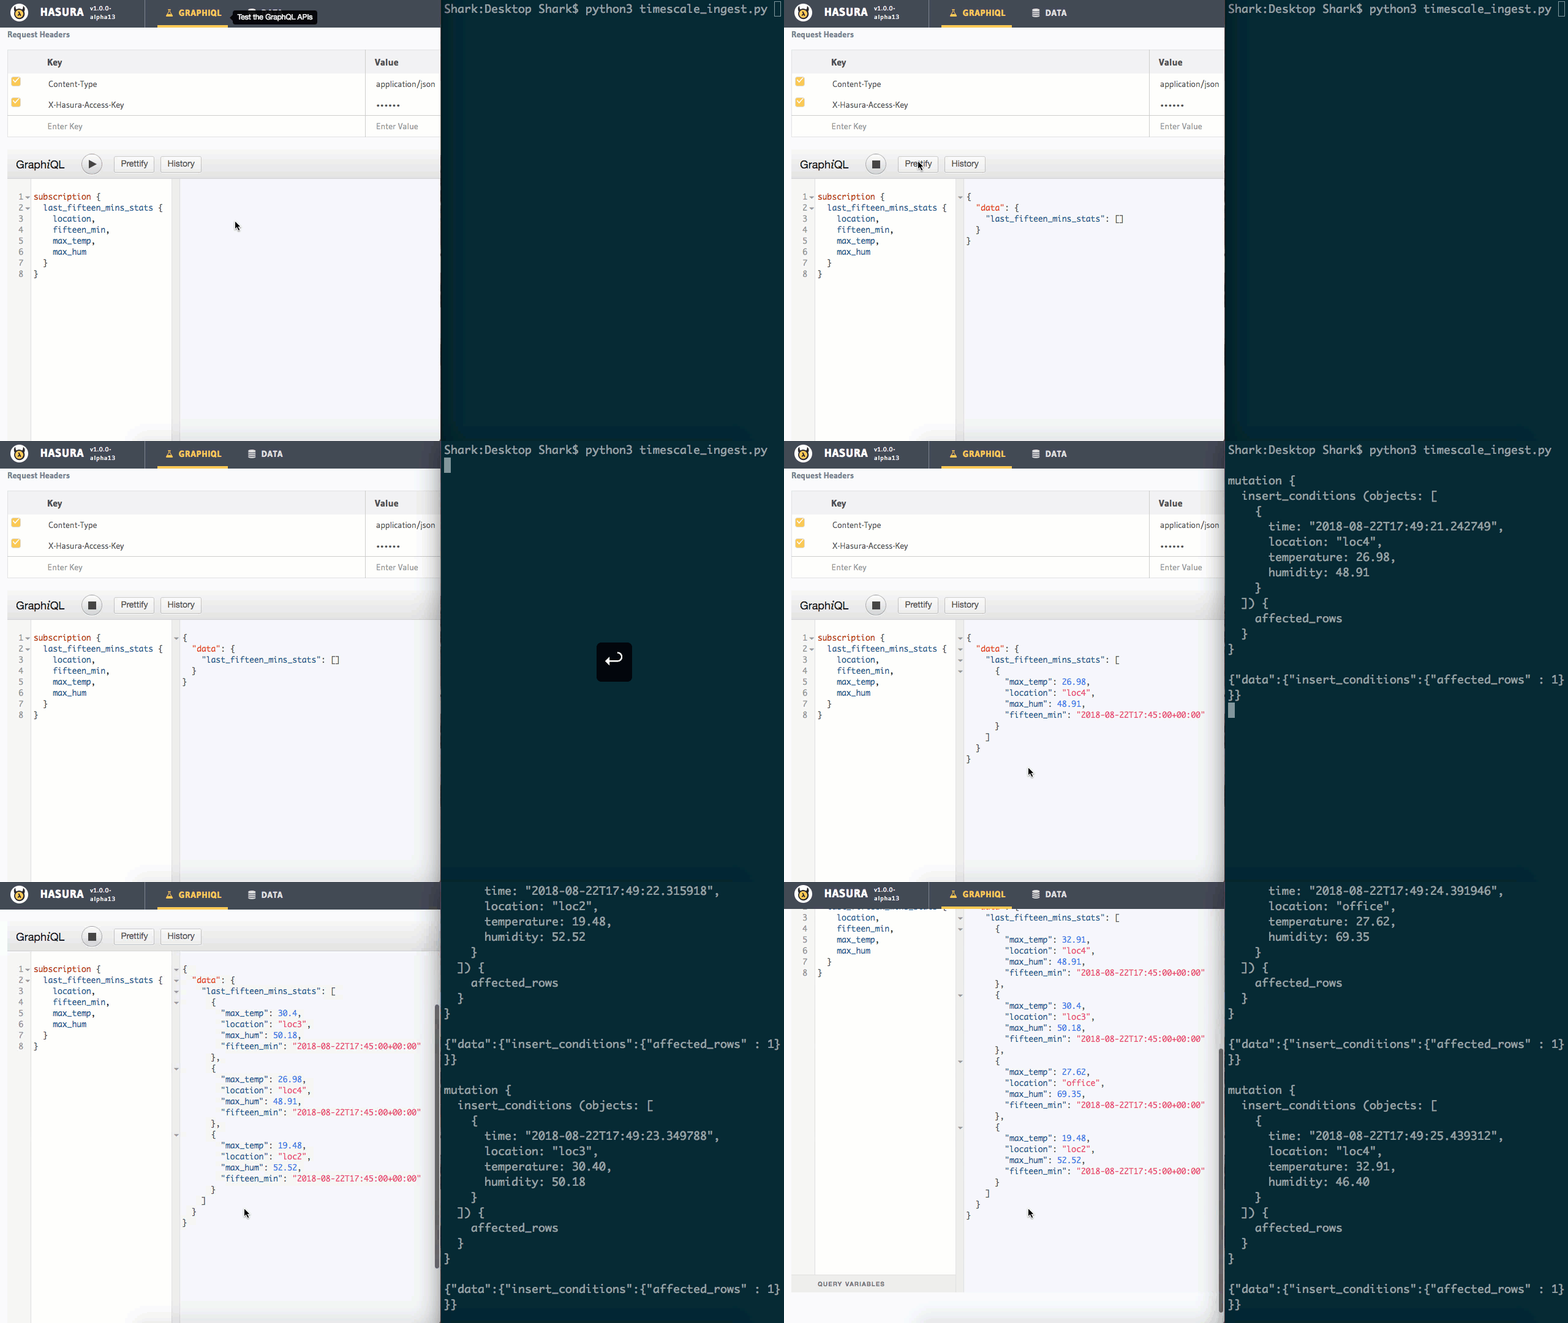
Summary
Using TimescaleDB and Hasura GraphQL engine, we could query our Postgres database for real-time data using GraphQL APIs in under 10 minutes. This makes building powerful, real-time dashboards extremely simple.
To get started with TimescaleDB, check out their GitHub and feel free to join their Slack community.
You can get started with Hasura here. We’re very active on our community chat on Discord. You can also DM me on Discord @rayanon if you are trying this out and have any questions!
